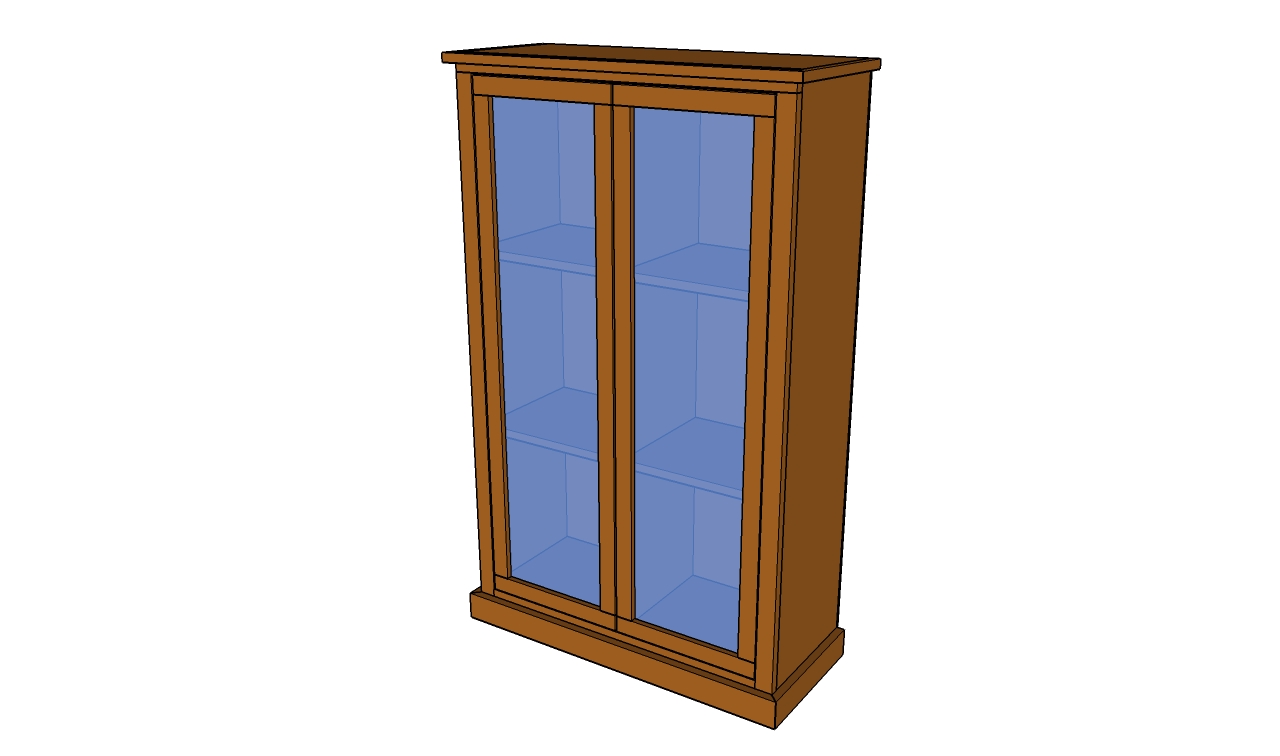
This step by step diy article is about how to build a cupboard. Building wooden cupboards will create lots of storage space for crockery, food or textiles. In addition, this project features cabinet doors with glass, so make sure you choose the design that fits your needs. Work with great attention and plan everything with attention, if you want to build a professional storage cabinet.
There are a few things you should take into account, before starting the woodworking project. First of all, you need to select the quality lumber, such as pine. Select the wooden components with great care, making sure they are in a good condition and properly straight. In addition, you need to drill pocket holes and insert 1 1/4” screws to lock the components together.
It is essential to order the glass sheets 1/8″ smaller than the recess in the frame. In addition, make sure you order thick glass (3/16″) and secure it into place with glass clips. Place the clips to the door frames, every 12″. On the other hand, the doors should fit into place easily, so make sure there is a clearance space of about 1/8″ around all edges. This aspect is essential, otherwise you won’t be able to install the hinges. See all my Premium Plans in the Shop.
Made from this plan
In order to build a bookshelf, you need to use the following:
Materials
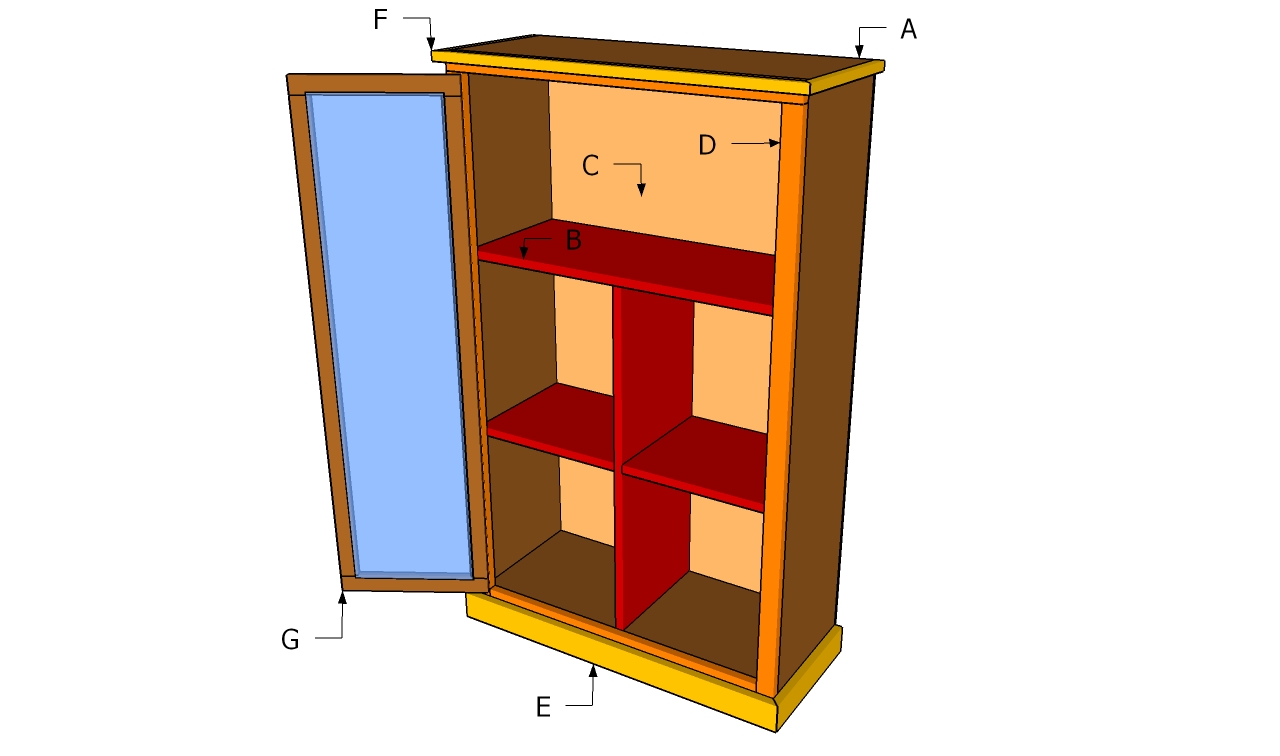
- A – 2 pieces of 1×12 lumber – 50″, 1 pieces of 1×12 – 30″, 1 piece of 1×12 – 28 1/2″ SIDES
- B – 1 pieces of 1×12 – 31”, 2 pieces of 1×12 – 14”, 1 piece of 1×12 – 28 1/2″ SHELVES
- C – 1 piece of 1/4″ plywood – 30″x48 1/2″ BACK
- D – 2 pieces of 1×2 – 49 1/4”, 1 piece of 1×2 – 30″, 1 piece of 1×2 – 27″ TRIMS
- E – 2 pieces of 1×3 – 13”, 1 piece of 1×3 – 31 1/2” BOTTOM TRIMS
- F – 2 pieces of 1×1 – 13”, 1 piece of 1×1 – 31 1/2” TOP TRIMS
- G – 4 pieces of 1×2 – 42 3/4″, 4 pieces of 1×2 – 13 1/4″, 2 pieces of glass – 3/16″ thick glass 10 5/8 x 43 1/8″ DOORS
- 1 piece of 1×1 lumber – 6 ft
- 3 pieces of 1×12 lumber – 8 ft
- 1 piece of 1/4″ plywood – 3’x4′
- 5 pieces of 1×2 lumber – 8 ft
- 1 piece of 1×3 lumber – 6 ft
- 1 piece of 1×1 lumber – 6 ft
- 2 pieces of glass – 3/16″ thick glass 10 5/8 x 43 1/8″
- 2 1/2″ screws
- 1 1/4″ screws
- glue, stain
- wood filler
Tools
- Safety gloves, glasses
- Miter saw, jigsaw
- Chalk line, tape measure, spirit level, carpentry pencil
- Drill machinery and drill bits
Tips
- Apply several coats of wood stain to the wooden components
- Adjust the size of the shelves, according to your needs and tastes
Time
- One Day
Related
Building a cupboard

Building a cupboard
How to build a cupboard

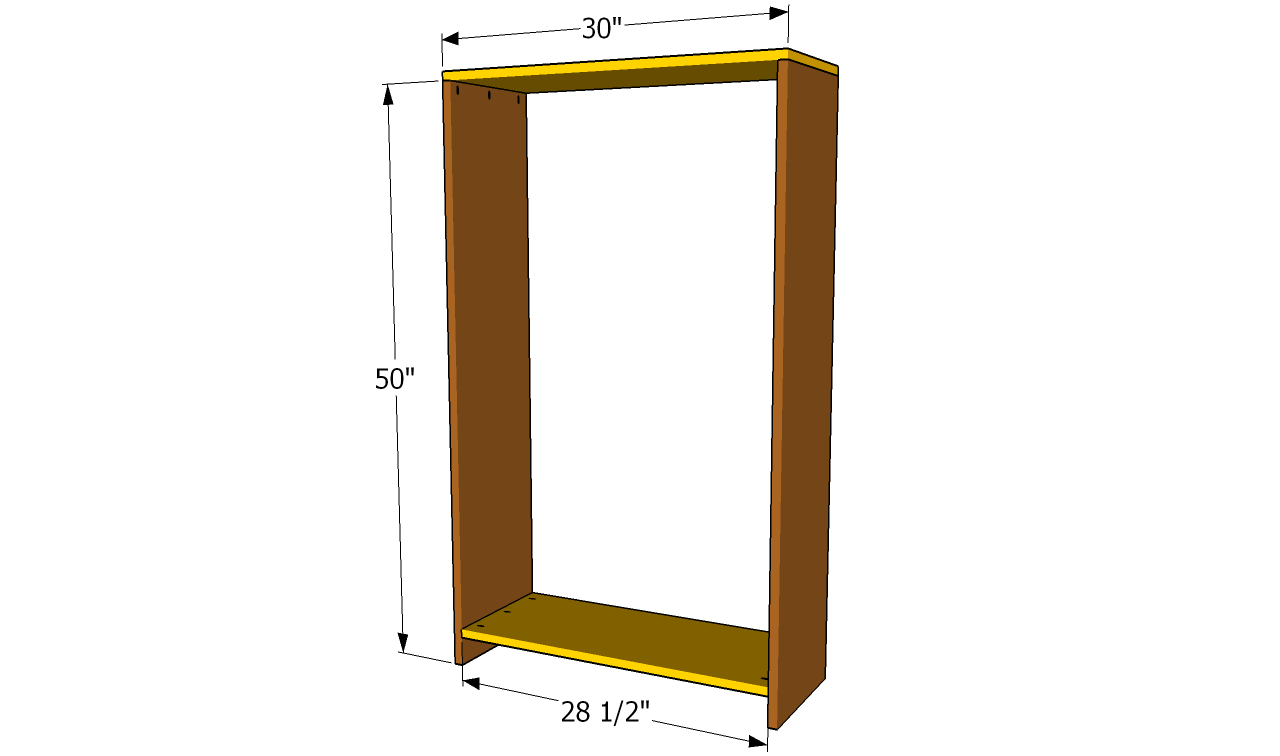
Assembling the frame
The first step of the project is to build the frame of the cup board. In order to get the job done as a professional, you could use either 1×10 or 1×12 boards. After making sure the components are in a good condition, you should join them together with pocket hole screws.
Use a jig to drill pocket holes at both ends of the components and inset 1 1/4” screws. Add glue to the joint, to enhance their rigidity.

Installing the back of the cupboard
Continue the woodworking project by installing the back of the cupboard. Use 1/4 – 3/4″ plywood, making sure you cut the sheet at the right size. After marking the cut lines, adjust the size of the sheet using a circular saw with a sharp blade.

Installing the shelves
If you want to make use of the cupboard’s interior efficiently, you should install several shelves, as in the plans or according to your own needs and tastes. Use boards of the same size as the frame and lock them into place with pocket holes.
It is essential to level and plumb the components with a spirit level before locking them to the frame with screws. Place the boards with the pilot holes downward-oriented, in order to get a neat appearance.

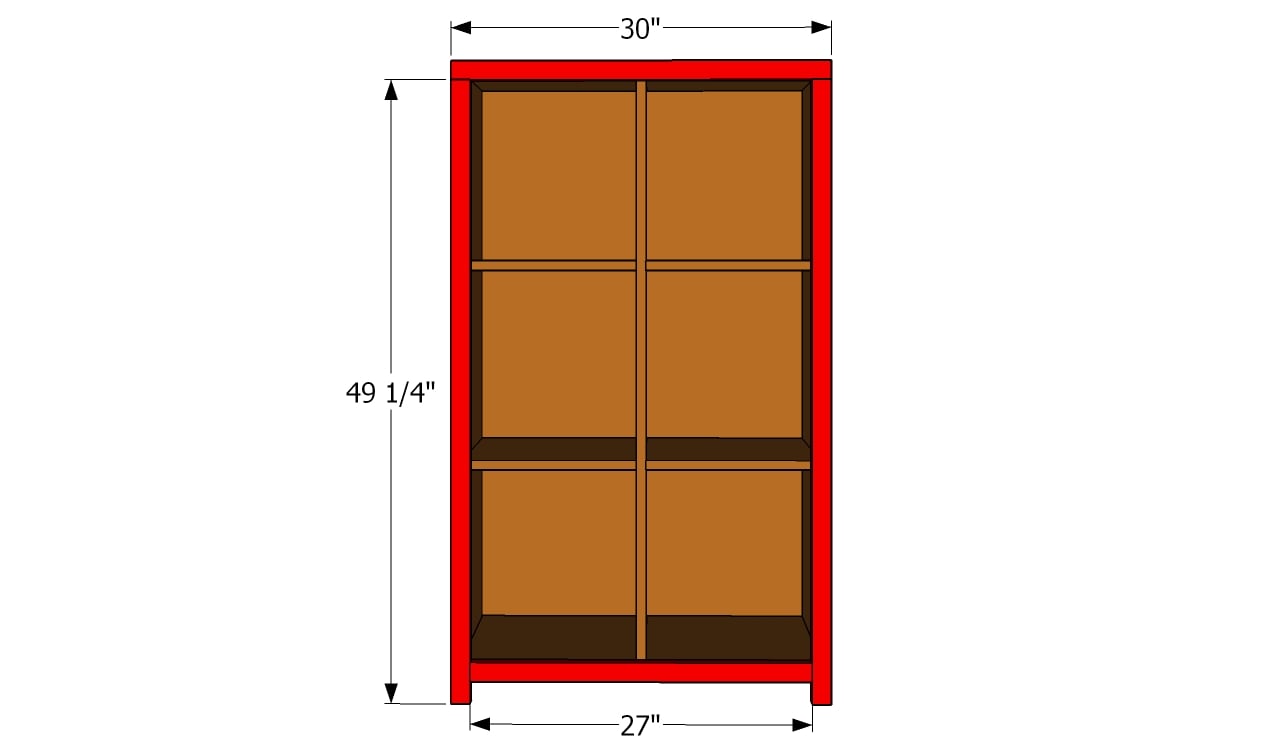
Installing the trims
Add 1×2 trims around the front face frame, in order to enhance the look of the cupboard. In addition, the trims will hold the doors into place, as well as the trims. Cut the 1×2 boars at the right size and lock them together with pocket screws.
Afterwards, center the trims to the frame, making sure the exterior edges are flush with the frame. Add glue and insert 1 1/4″ finishing nails to lock the trims into place.

Fitting the bottom trims
Although this step is not compulsory, adding trims to the bottom of the cupboard will most certainly add value to your woodworking project. Use 1×3 lumber to build the trims, making sure you cut the ends of the components at 45º.
In this manner, the trims would fit together easily and create strong joints. Add glue to the back edges of the trims and drive 1 1/4” nails into the frame of the cupboard.

Building the doors
Building the doors of the cupboard is a straight forward process. Therefore, we recommend you to build the frame out of 1×2 trims. Lock the components together with pocket screws, after checking if the corners are right angled.
In order to attach the glass to the back of the doors, we recommend you to make 1/4″ channels inside the frame. Fit the glass inside the frames and lock them into place with glass clips (every 12″).

How to build a cupboard
Last but not least, we recommend you to take care of the final touches. In order to get a professional result, fill the holes and the gaps with wood filler and let it dry out for a few hours. Afterwards, smooth the surface along the wood grain, using 120-grit sandpaper.
Thank you for reading our project about how to build a cupboard and we recommend you to check out the rest of the projects. Don’t forget to share our projects with your friends, by using the social media widgets.
