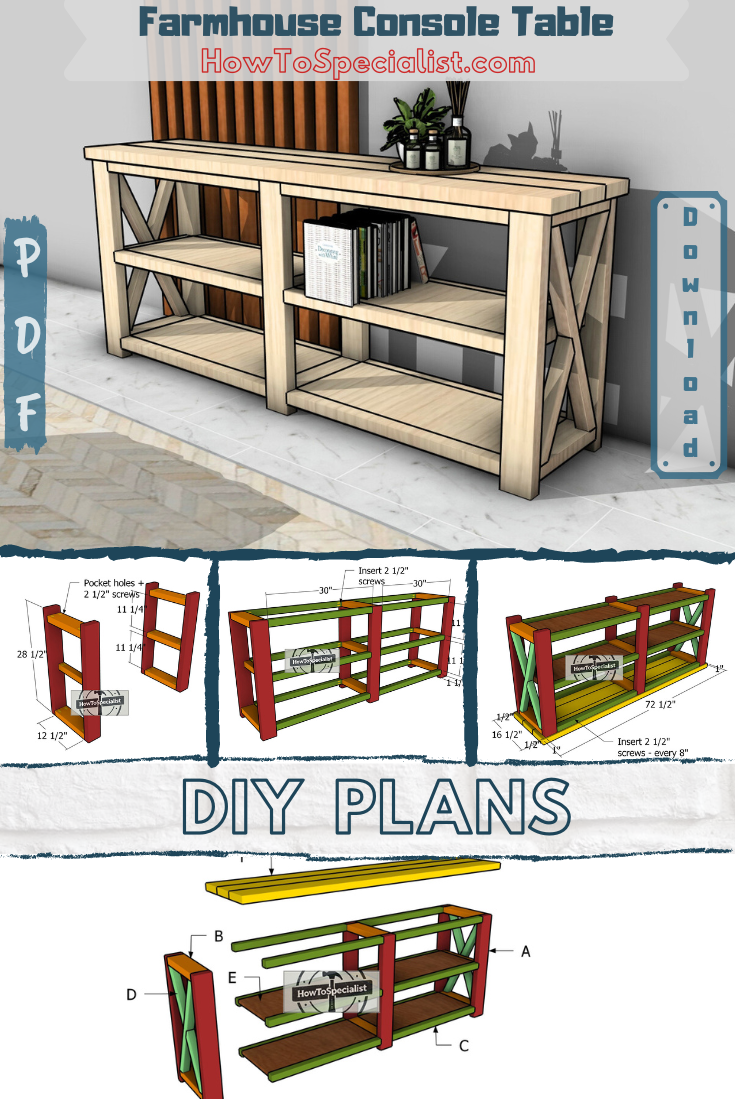
If you’re looking to add a touch of rustic charm to your home, these farmhouse console table plans are just what you need. This project combines classic design elements with sturdy construction, resulting in a beautiful piece that’s as functional as it is stylish. Whether you’re a seasoned DIYer or just starting out, these plans will guide you step-by-step in creating a console table that’s perfect for your entryway, living room, or hallway. Let’s dive in and bring some farmhouse warmth into your space!
We recommend you to invest in the best materials you could afford. Therefore, you should buy weather-resistant lumber, such as pine or cedar. Always take accurate measurements before adjusting the size of the components at the proper size. Drill pilot holes trough the components before inserting the wood screws, to prevent the wood from splitting. My plans come with a full cut / shopping list and they are PDF Download and Print friendly. See all my Premium Plans HERE.
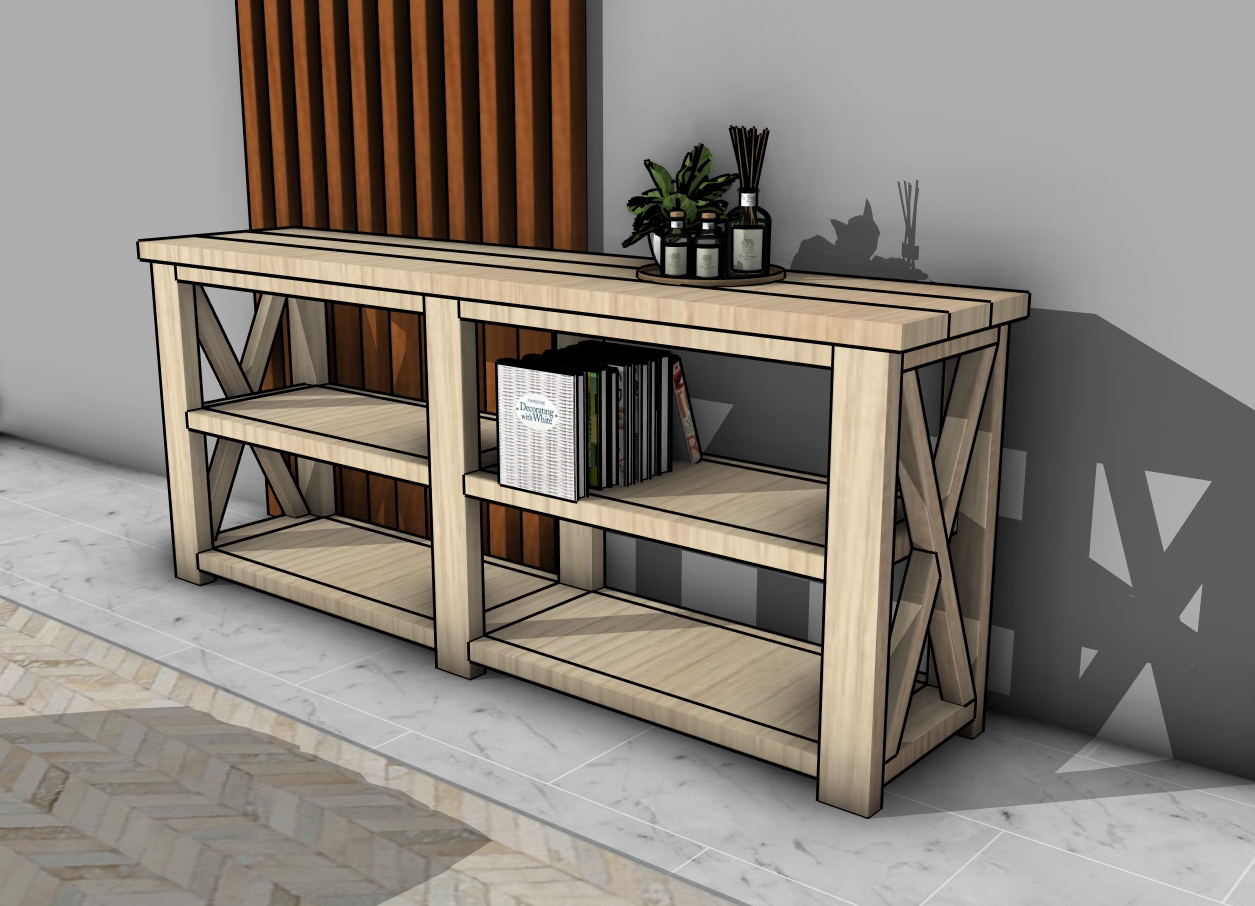
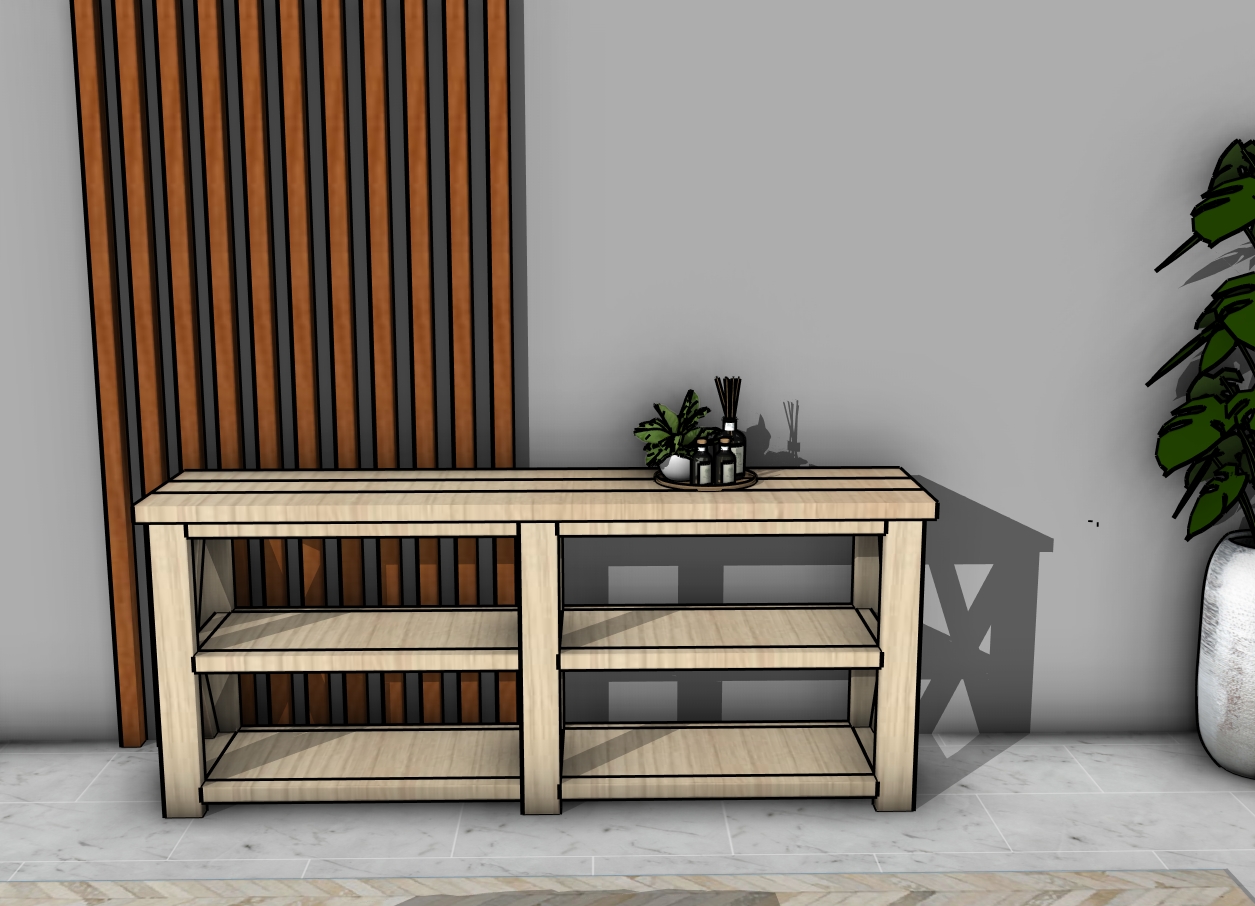
Made from this plan
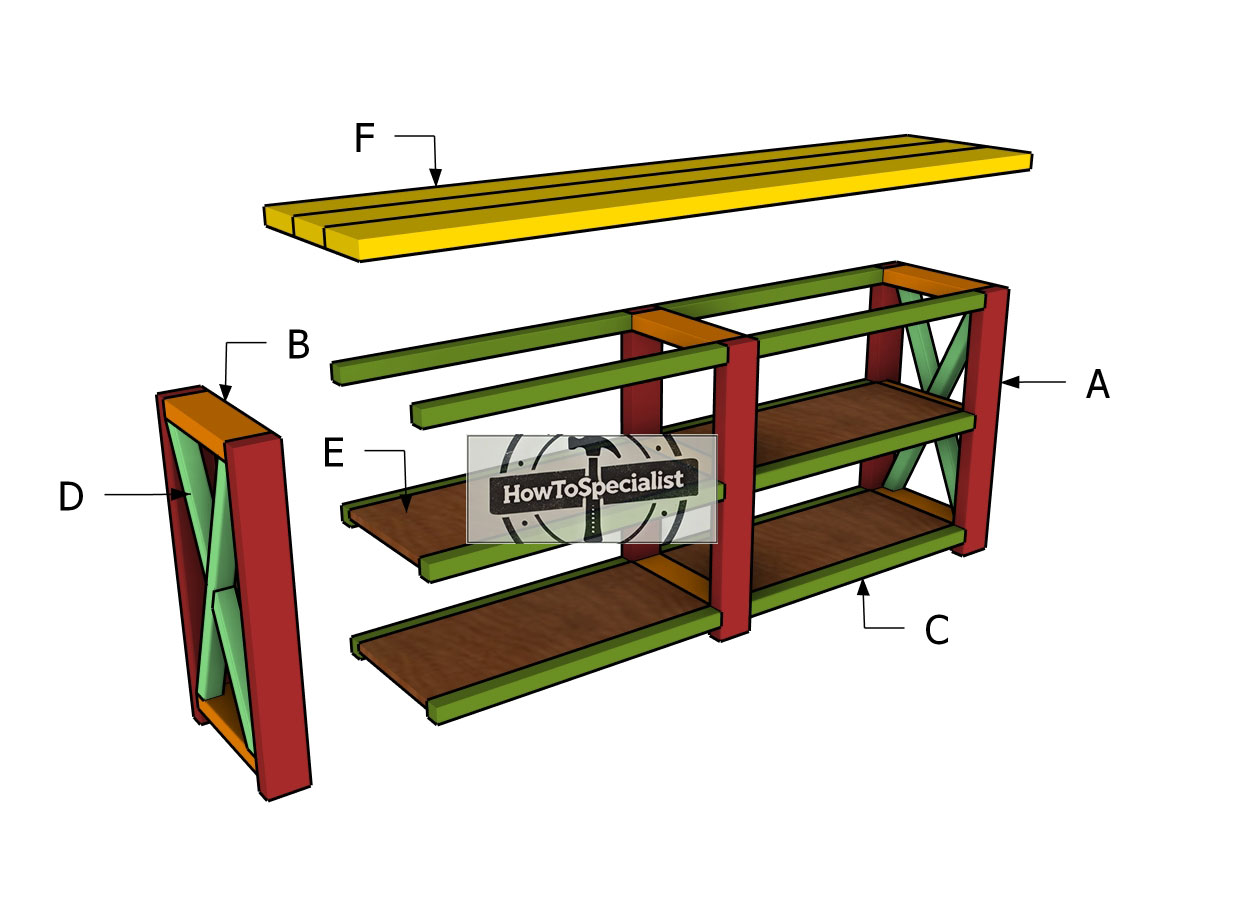
Farmhouse Console Table – Free Plans
Building-a-farmhouse-console-table
Materials
A – LEGS – 2×4 lumber 28 1/2″ – 6 pieces
B – FRAMES – 2×4 lumber 12 1/2″ – 7 pieces
B – FRAMES – 2×2 lumber 12 1/2″ – 2 pieces
C – SUPPORTS – 2×2 lumber 30″ – 12 pieces
D – X TRIMS – 2×2 lumber 27″ – 4 pieces
E – SHELVES – 3/4″ plywood 12 1/2″x30″ – 4 pieces
F – TABLETOP – 2×6 lumber 72 1/2″ – 3 pieces
- 3 pieces of 2×6 lumber – 8 ft
- 3 pieces of 2×4 lumber – 8 ft
- 6 pieces of 2×2 lumber – 8 ft
- 2 1/2″ screws – 100 pieces
- 1 1/4″ screws – 100 pieces
- glue, stain
Tools
- Circular saw
- Drill machinery, drill bits
- Safety gloves, glasses
- Chalk line, tape measure, spirit level, carpentry pencil
Time
- One weekend
Related
Pin for later!
Farmhouse console table plans
Rustic Console Table – Building the frames
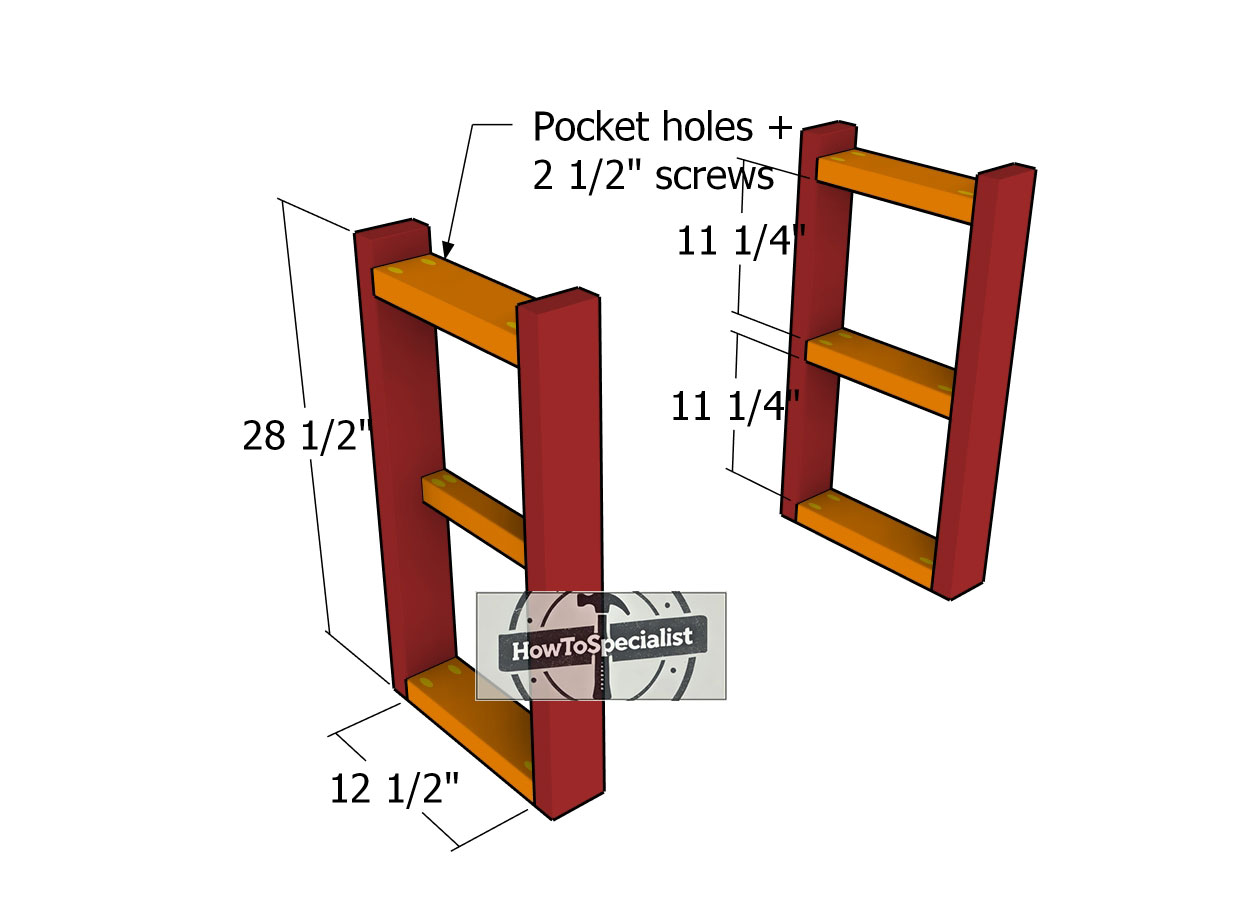
Assembling-the-vertical-frames
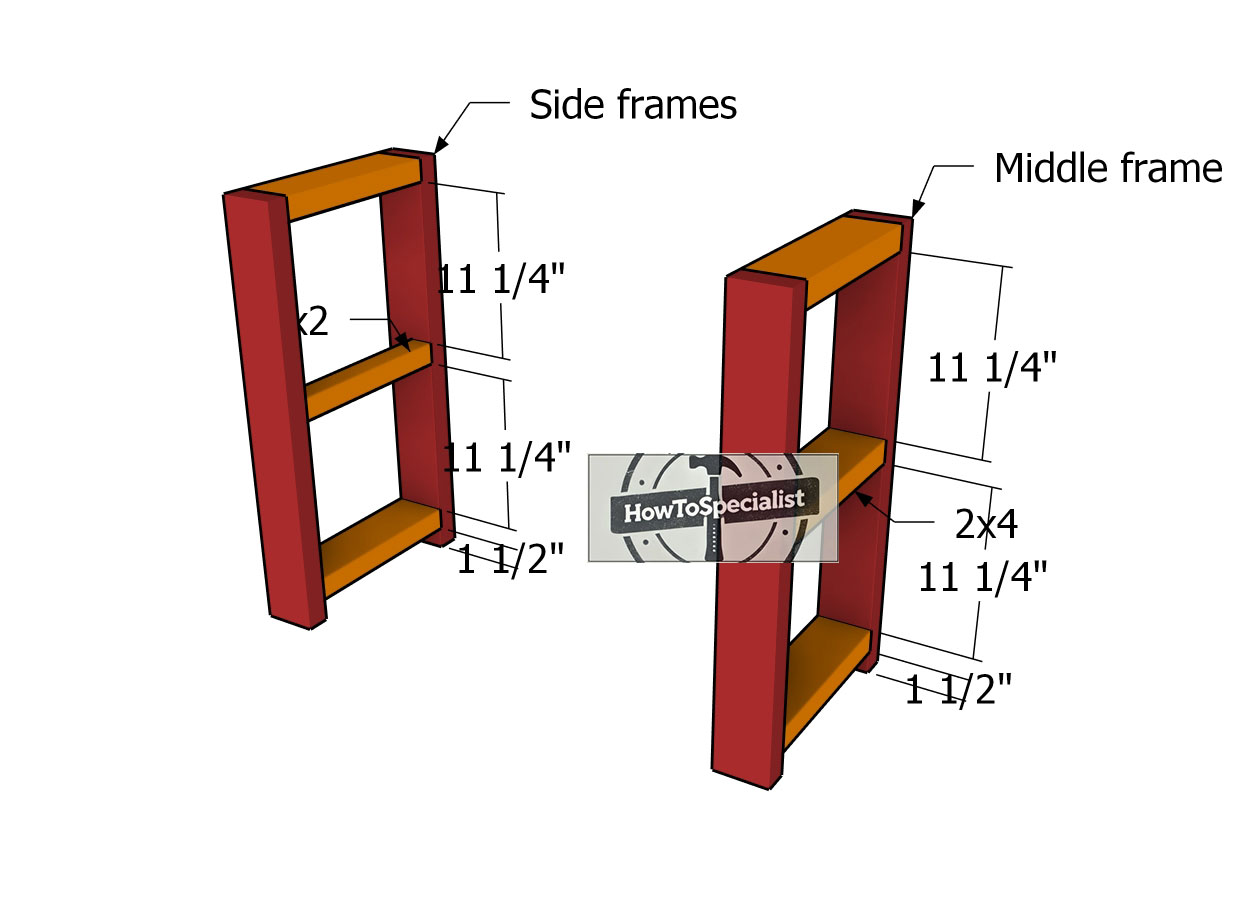
The first step in this project is to build the three essential frames for your console table. You’ll need two side frames and one middle frame, all crafted from sturdy 2×4 lumber—except for the side frames, which will also incorporate some 2x2s. Start by drilling pocket holes at both ends of the horizontal pieces; this will ensure everything fits together snugly and securely.
Frames
Align the edges of your frames so they’re perfectly flush, and take a moment to ensure the corners are square. Once everything is lined up, secure the frames by inserting 2 1/2″ screws. This will lock everything in place, giving you strong, sturdy frames to build on.
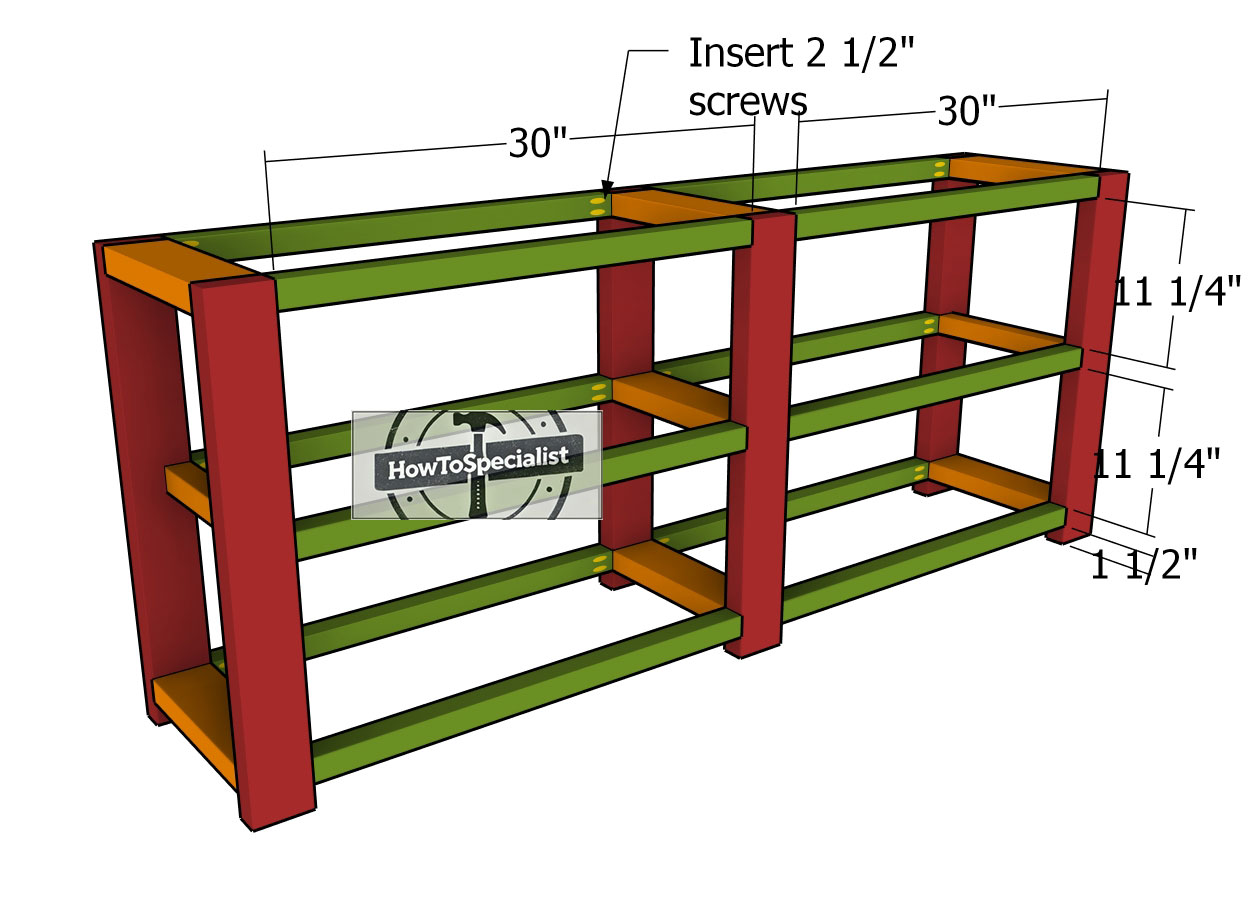
Assembling-the-frame-of-the-console-table
The next step in this project is to bring your console table to life by fitting the horizontal supports. Cut these supports from 2×2 lumber and drill pocket holes at both ends. As you assemble the table, ensure the pocket holes are facing inward for a clean, polished look. Use a spirit level to plumb the frames, and carefully attach the supports, making sure they’re perfectly horizontal. This attention to detail will ensure your table is both sturdy and well-aligned.
Trims and Shelves
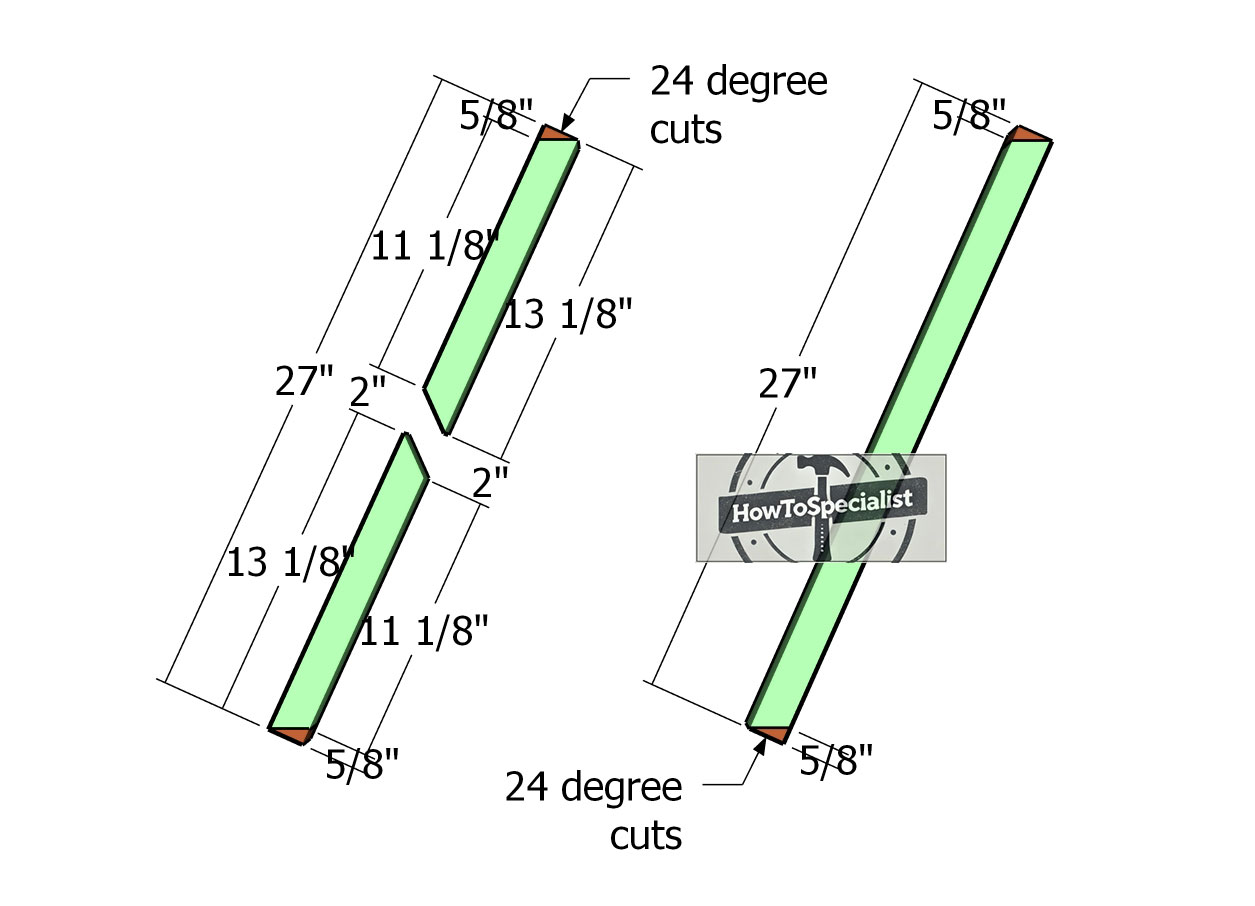
Cutting-the-X-trims
Next up, it’s time to cut the X trims that will give your console table its distinctive farmhouse style. Grab your miter saw and set it to a 24-degree angle, then carefully make the cuts at both ends of each trim piece. This precise cutting will ensure that the X shapes fit perfectly into the frames, adding both strength and visual appeal to your table.
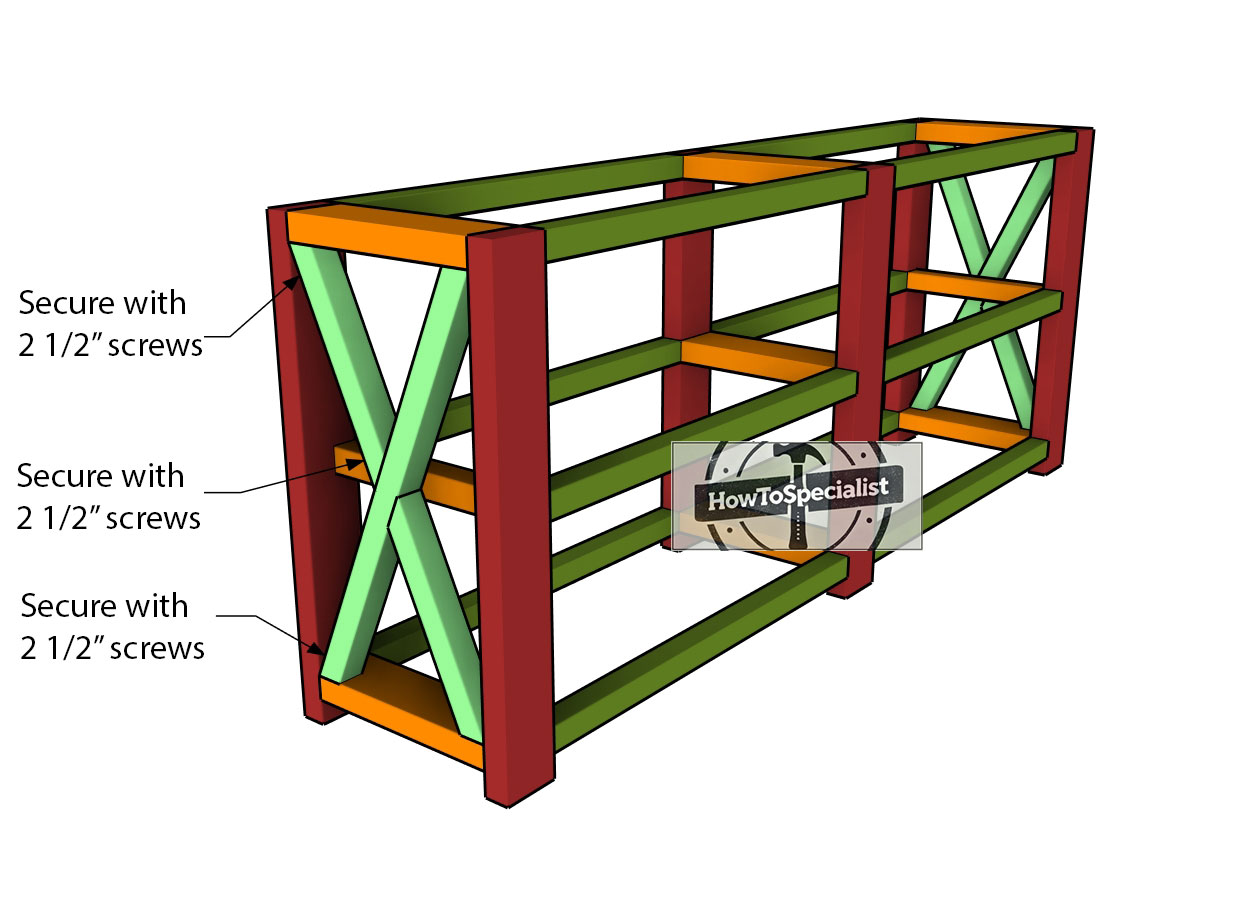
Fitting-the-X-trims
Assemble the X trims and position them within the side frames, ensuring a snug fit. Drill pilot holes through the trims and secure them to the vertical legs using 2 1/2″ screws. Don’t forget to lock the center of the X shape with additional screws for added stability. Make sure to countersink the screw heads so that they’re flush with the surface—this way, you can easily fill them with putty later for a smooth, finished look.
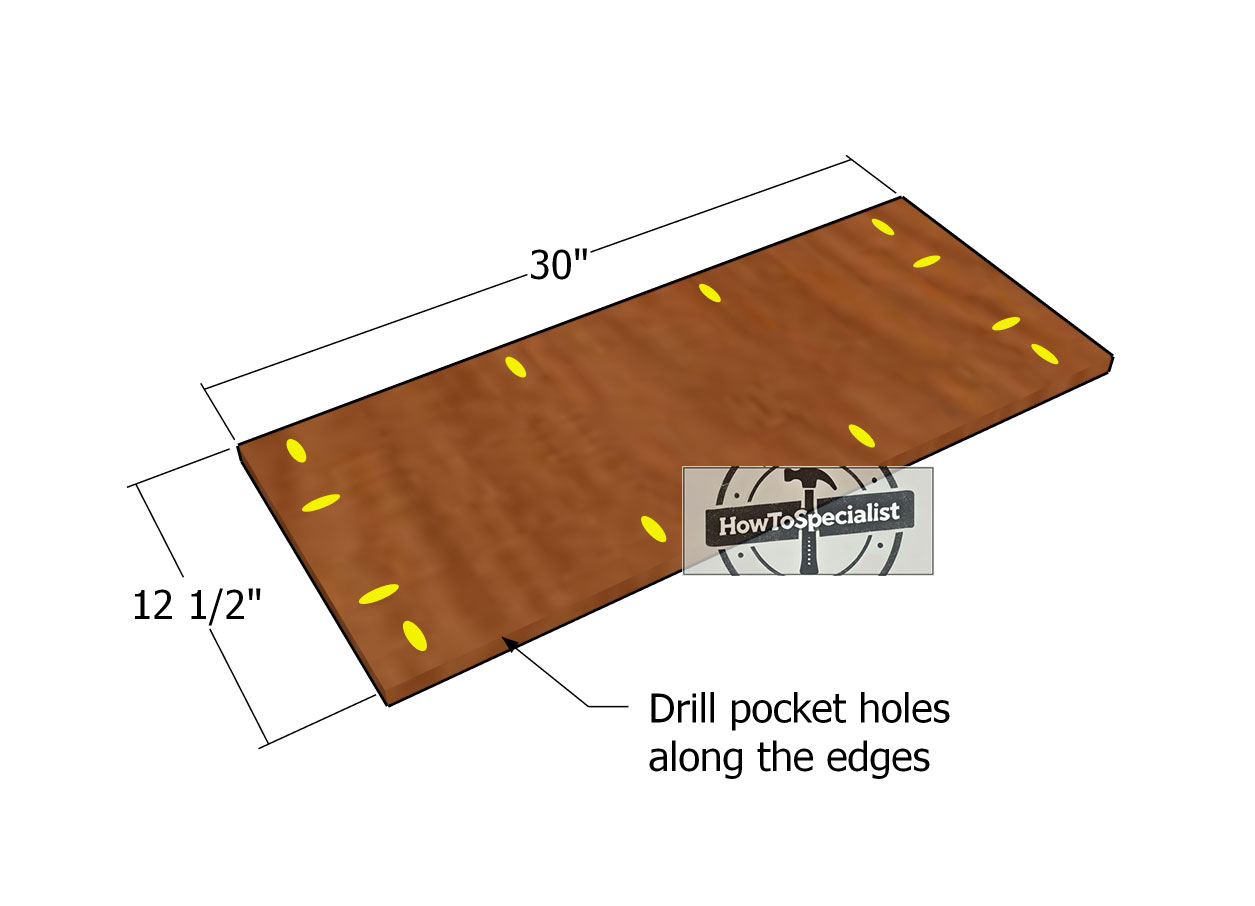
Shelves—pocket-holes
Cut the shelves from 3/4″ plywood, sizing them to 12 1/2″x30″ rectangles. Once your shelves are cut, drill pocket holes along the edges, following the layout shown in the diagram. These pocket holes will allow for a strong, seamless connection when you attach the shelves to the rest of the console table, ensuring everything fits together neatly and securely.
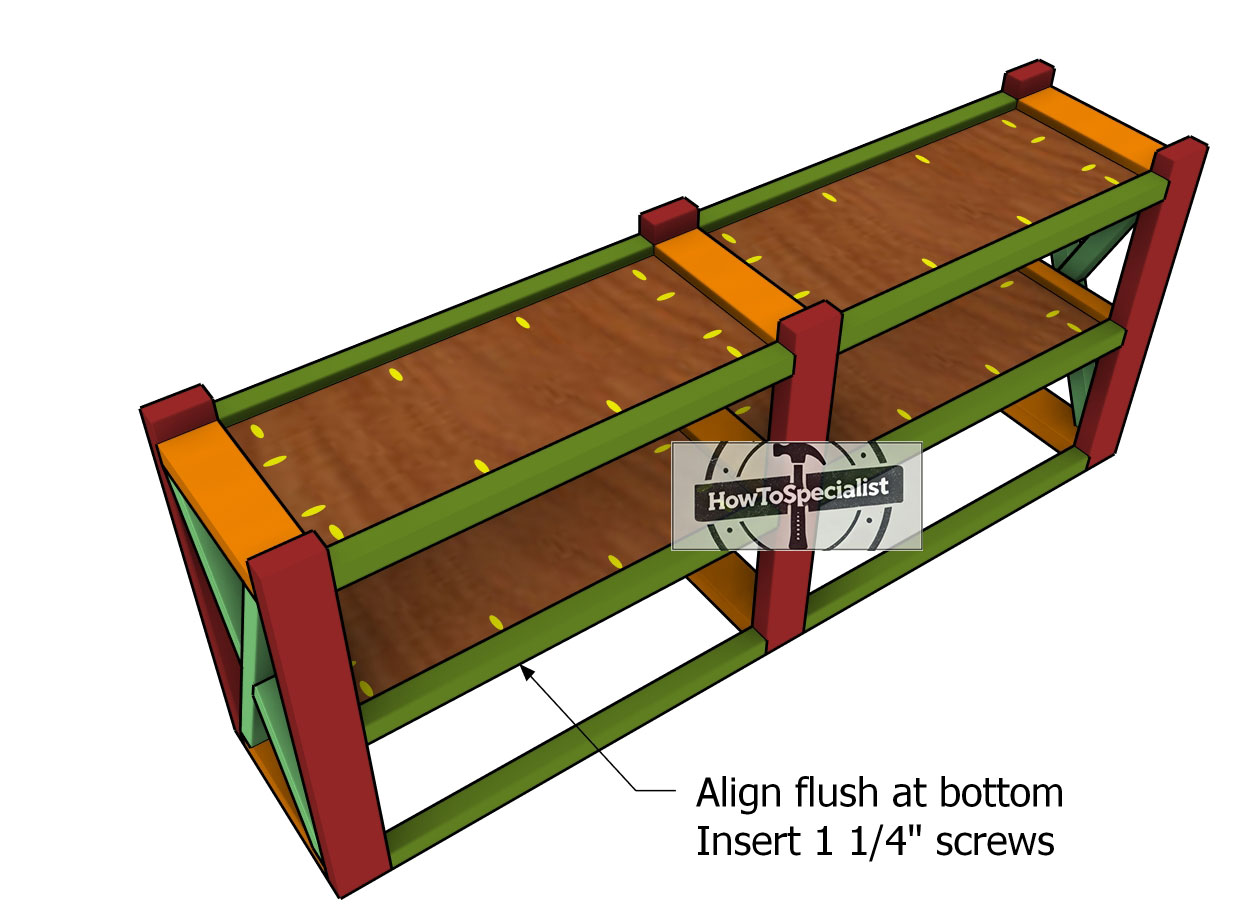
Fitting-the-shelves
Fit the plywood rectangles into the console table as shown in the image, making sure the edges are perfectly aligned. Secure them in place by inserting 1 1/4″ screws, ensuring everything is locked down tightly. Be careful to leave no gaps between the components, so your table has a clean, seamless finish.
Attaching-the-tabletop
To build the tabletop, start by laying the 2×6 boards on a level surface, making sure the edges are perfectly aligned. Apply wood glue between each board, then clamp them together for a few hours. This process not only enhances the rigidity of the tabletop but also ensures there are no gaps between the boards, giving you a solid, seamless surface.
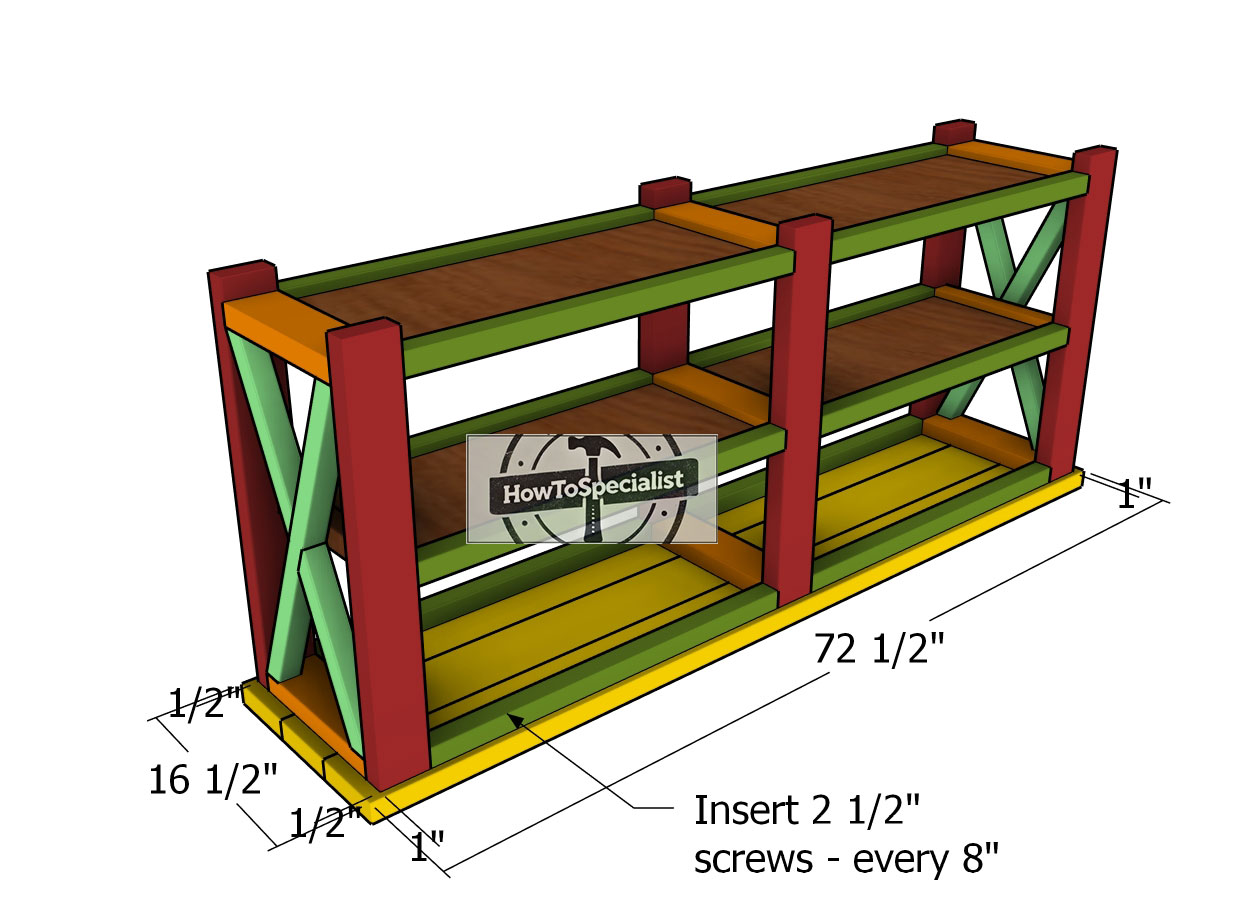
Once the tabletop is assembled and the glue has set, center the frame of the table on top of it. Drill pilot holes through the frame and into the tabletop, spacing the holes about every 8 inches. Secure the tabletop by inserting 2 1/2″ screws into each pilot hole, ensuring the frame is firmly attached and the table is rock solid.
Finishing touches
Farmhouse Console Table Plans
With the main construction complete, it’s time to add those finishing touches that really bring your console table to life. Start by filling any screw holes or gaps with wood putty, ensuring a smooth, seamless surface. Once the putty is dry, give the entire table a light sanding, focusing on the edges and corners to ensure everything is smooth to the touch.
After sanding, wipe down the table to remove any dust, then apply your choice of stain or paint to match your style. If you’re staining, consider applying a wood conditioner first to help the stain absorb evenly. After staining or painting, add a coat of clear sealer or polyurethane to protect the surface and give it a durable finish. Finally, let everything dry completely before placing the table in your home.

Rustic-console-table—dimensions
Building a farmhouse console table with X-shaped sides will likely cost you between $100 and $200, depending on the wood and finishes you choose. This table combines rustic charm with sturdy construction, making it a standout piece that’s both functional and stylish. The X-shaped sides not only add visual interest but also provide additional stability, making this a worthwhile investment for a piece of furniture that will last.
Free console table plans
You can expect to spend about 1 to 2 weekends building your farmhouse console table with X-shaped sides. The project is relatively straightforward, with the X details adding a bit of extra craftsmanship. With careful cutting and assembly, you’ll soon have a beautifully crafted table ready to enhance your living space.
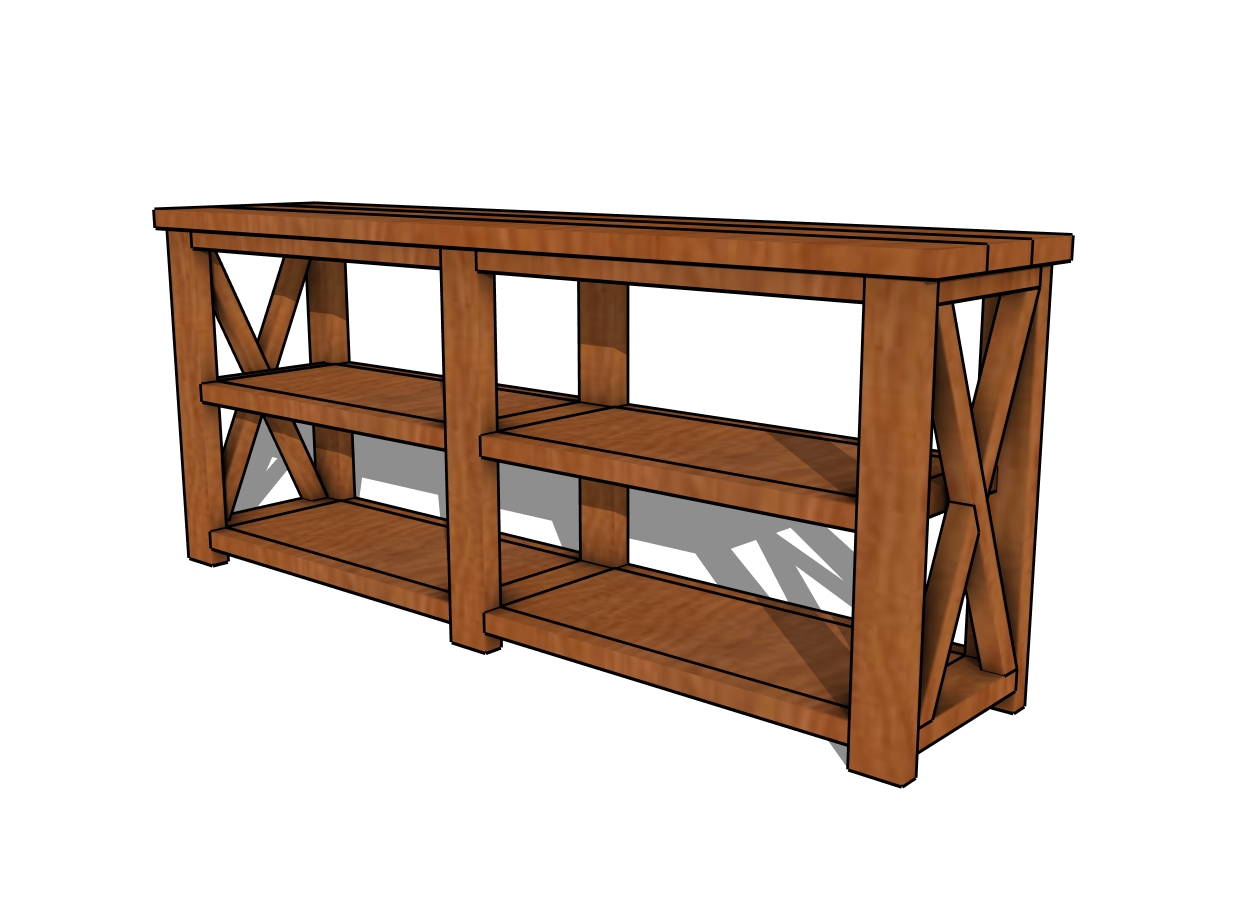
Farmhouse console table – free plans
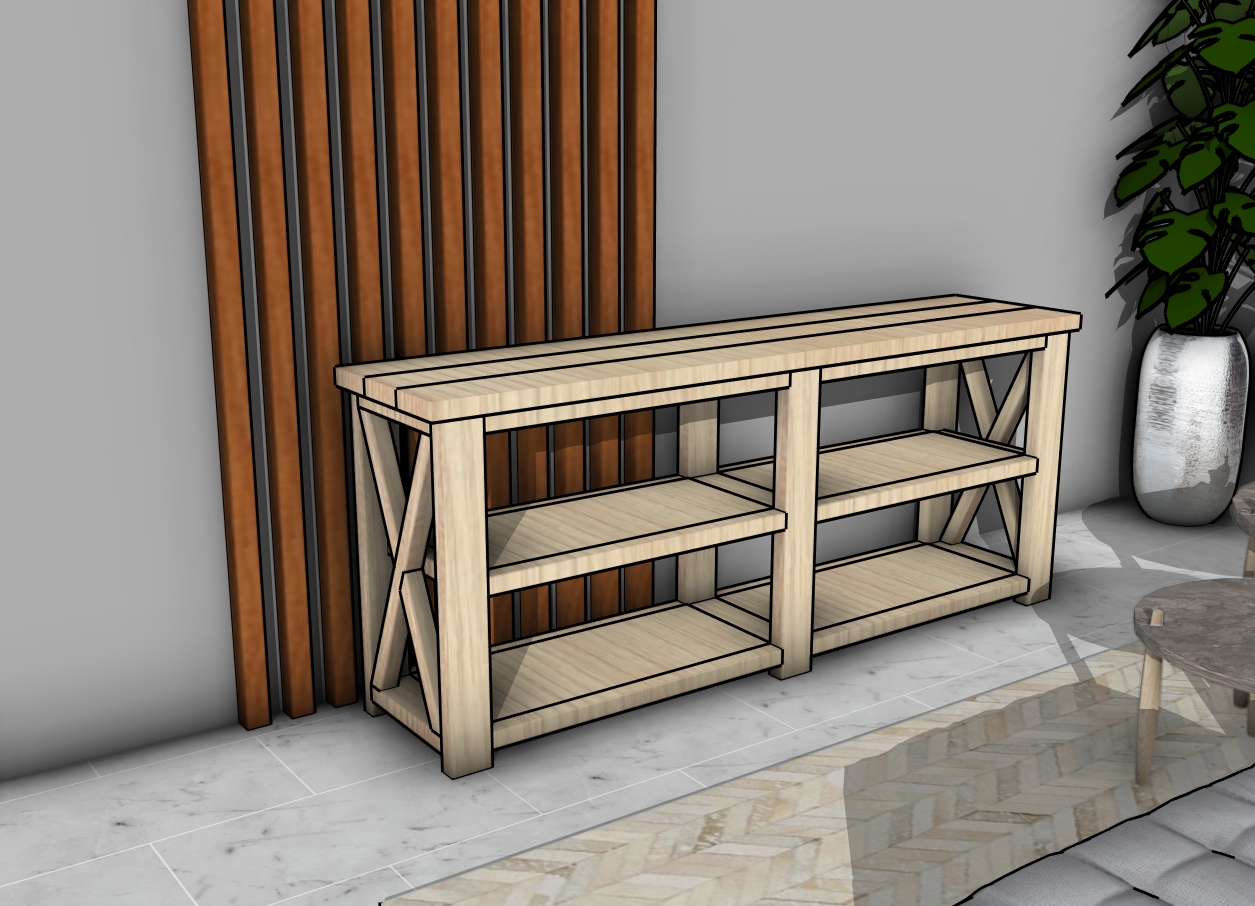
How to build a console table
As you step back and admire your completed farmhouse console table with its eye-catching X-shaped sides, you’ll realize you’ve created more than just a piece of furniture, it’s a statement piece that brings warmth and character to your home. The rustic design pairs beautifully with a variety of decor styles, while the sturdy construction ensures it’s ready to handle everything from decorative items to daily use. This table isn’t just functional; it’s a handcrafted addition to your home that combines classic design with practical utility, making it a piece you’ll enjoy for years to come.
Smart Tip: I can’t wait to see how you make it your own – don’t forget to share your finished projects with me! In addition, take a look over the rest of my shed plans HERE.
Thanks for checking out my farmhouse console table plans! Be sure to explore my other projects for more fantastic ideas. Don’t forget to hit the LIKE button and SHARE with your friends using the social media links below.
