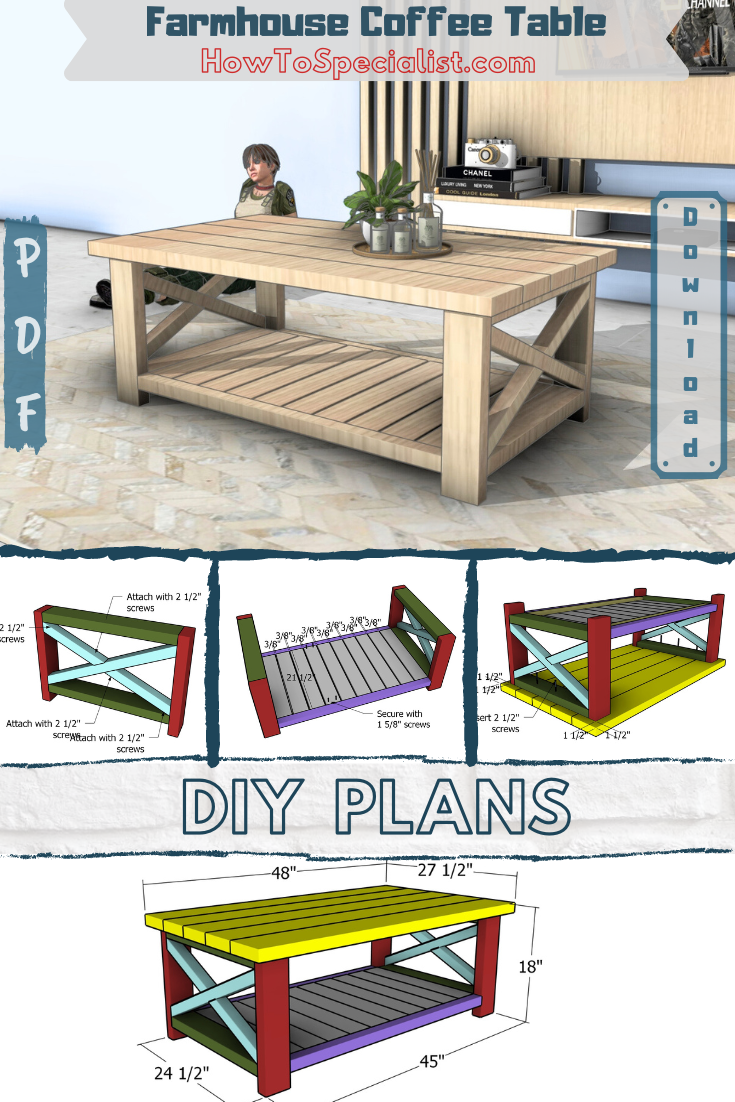
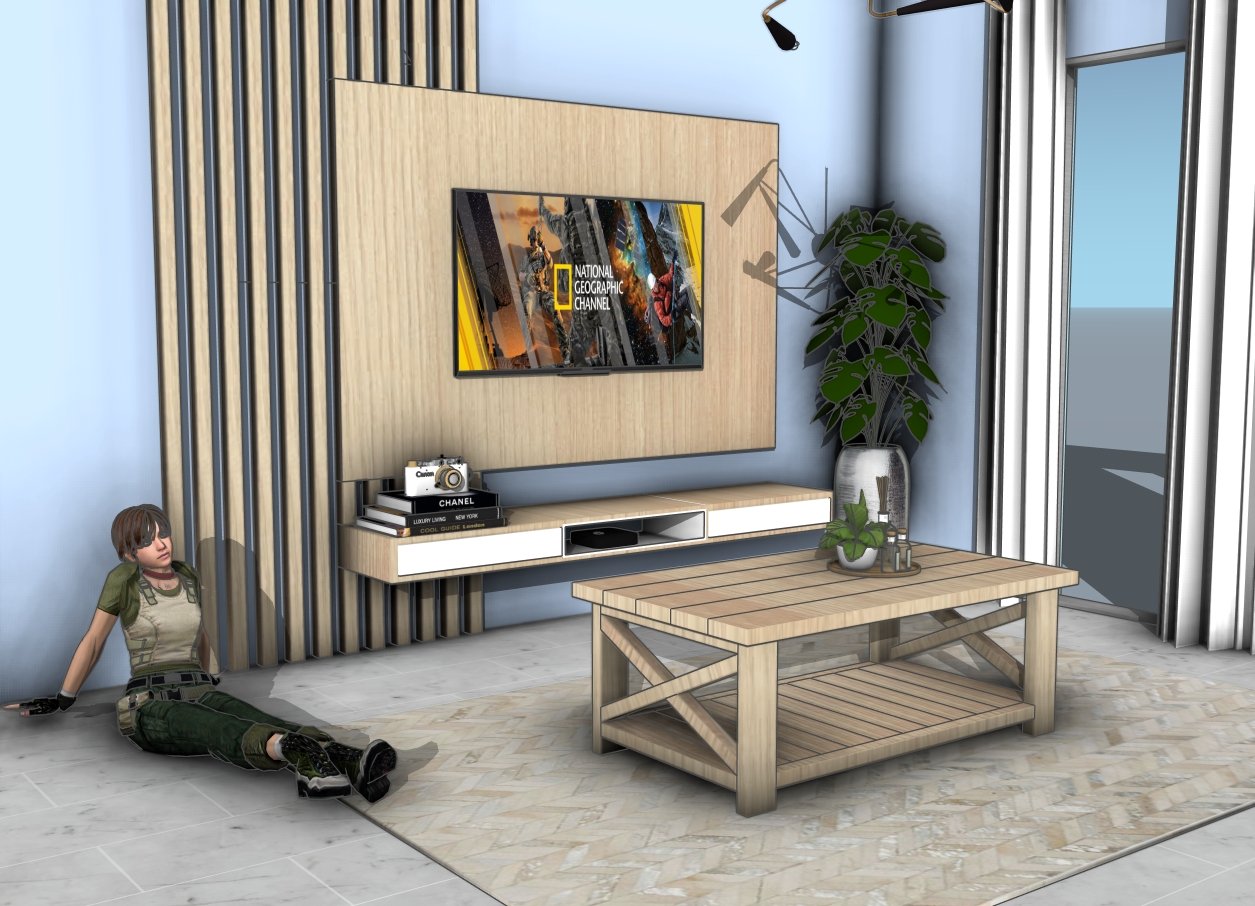
If you’re looking to add a touch of rustic charm to your living room, these farmhouse coffee table plans with classic X trims on both sides and a spacious bottom shelf is the perfect weekend project. Not only does it bring that cozy, farmhouse style into your home, but it’s also super functional with plenty of storage space for books, baskets, or décor. The X-shaped accents on the sides give it that timeless look, while the sturdy design ensures it’s built to last. Let’s dive into the steps to build your own and bring this beautiful piece into your space!
Building this farmhouse coffee table is a great weekend project that you can complete in around 6 to 8 hours, depending on your skill level and tools. In terms of cost, you’re looking at spending between $75 to $125 for materials, with most of the expense coming from quality lumber. The X-shaped trims and bottom shelf add both style and functionality, but they’re also easy to assemble with basic tools. Overall, it’s an affordable and rewarding project that will give you a stunning piece of furniture for your home!
We recommend you to invest in the best materials you could afford. Therefore, you should buy weather-resistant lumber, such as pine or cedar. Always take accurate measurements before adjusting the size of the components at the proper size. Drill pilot holes trough the components before inserting the wood screws, to prevent the wood from splitting. My plans come with a full cut / shopping list and they are PDF Download and Print friendly. See all my Premium Plans HERE.
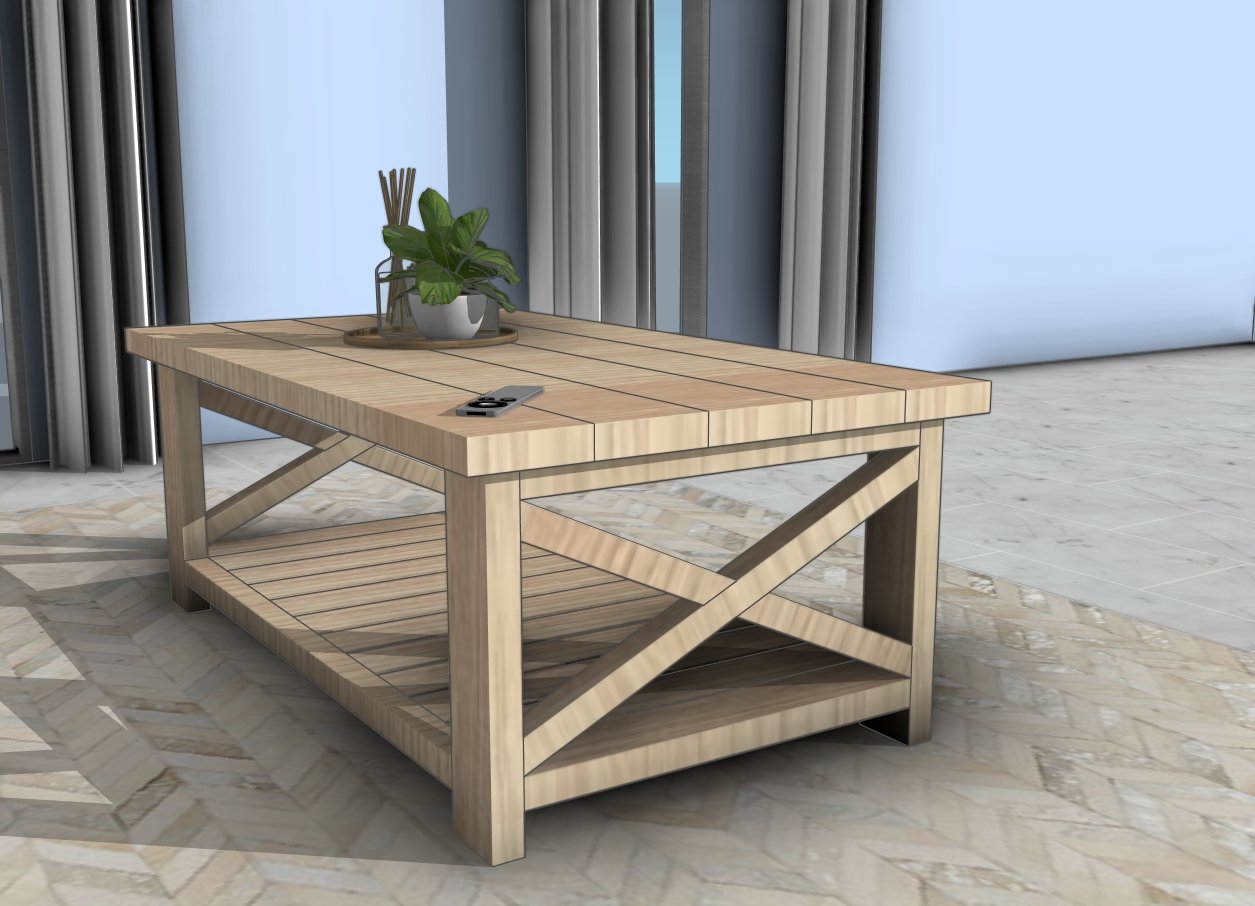
Made from this plan
Farmhouse Coffee Table – Free Plans
Building-a-coffee-table
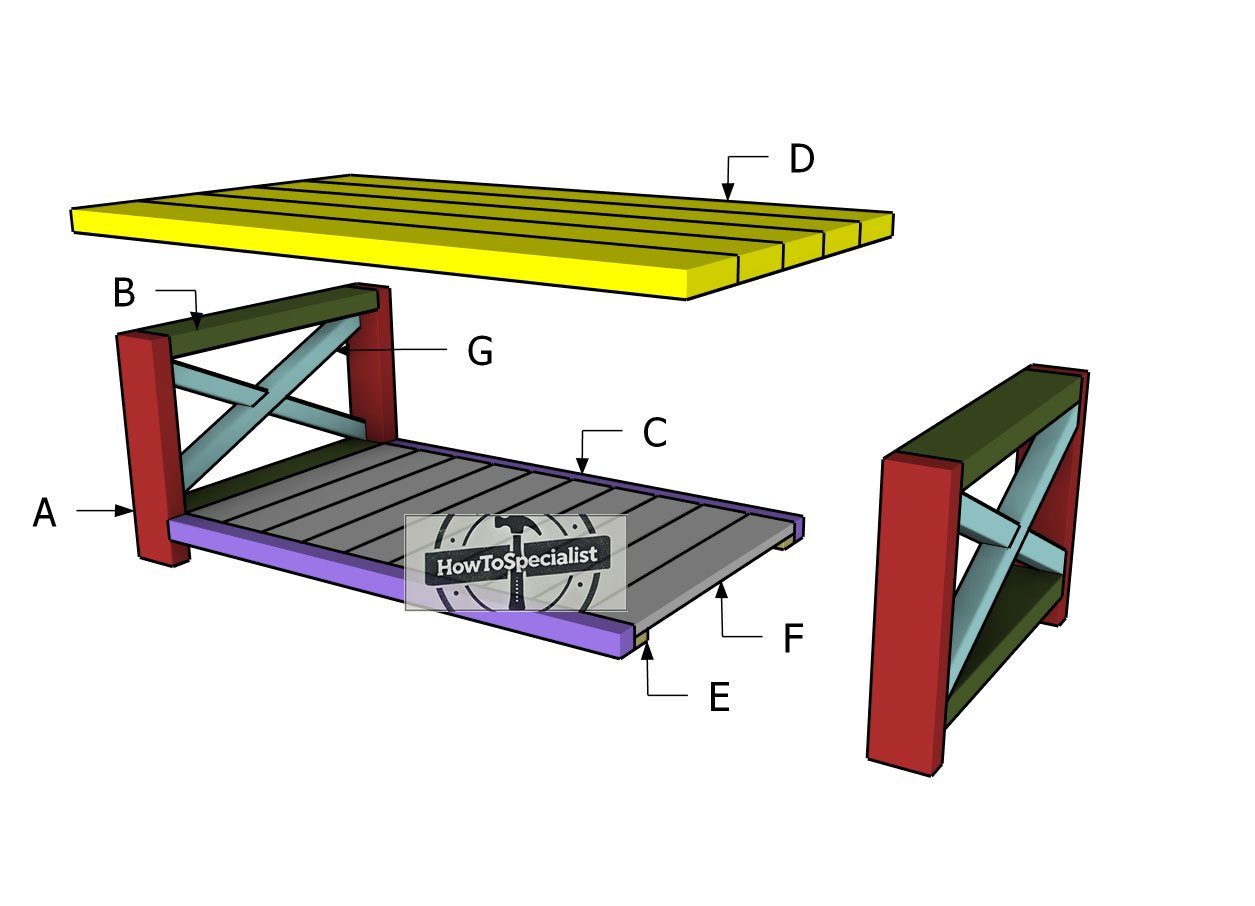
Materials
A – LEGS – 2×4 lumber 16 1/2″ – 4 pieces
B – FRAMES – 2×4 lumber 21 1/2″ – 4 pieces
C – SUPPORTS – 2×2 lumber 38″ – 2 pieces
D – TABLETOP – 2×6 lumber 48″ – 5 pieces
E – CLEATS – 1×2 lumber 38″ – 2 pieces
F – SHELF – 1×4 lumber 21 1/2″ – 3 pieces
G – X TRIMS – 2×2 lumber 24 3/8″ – 2 pieces
G – X TRIMS – 2×2 lumber 11 7/8″ – 4 pieces
- 1 piece of 2×6 lumber – 4 ft
- 2 pieces of 2×6 lumber – 8 ft
- 1 piece of 2×4 lumber – 8 ft
- 1 piece of 2×4 lumber – 6 ft
- 2 pieces of 2×2 lumber – 8 ft
- 1 piece of 1×4 lumber – 8 ft
- 1 piece of 1×2 lumber – 8 ft
- 2 1/2″ screws – 100 pieces
- 1 1/4″ screws – 50 pieces
- glue, stain
Tools
- Circular saw, Pocket hole jig
- Drill machinery, drill bits
- Safety gloves, glasses
- Chalk line, tape measure, spirit level, carpentry pencil
Time
- One weekend
Related
Pin for later!
Rustic Console Table – Building the frames
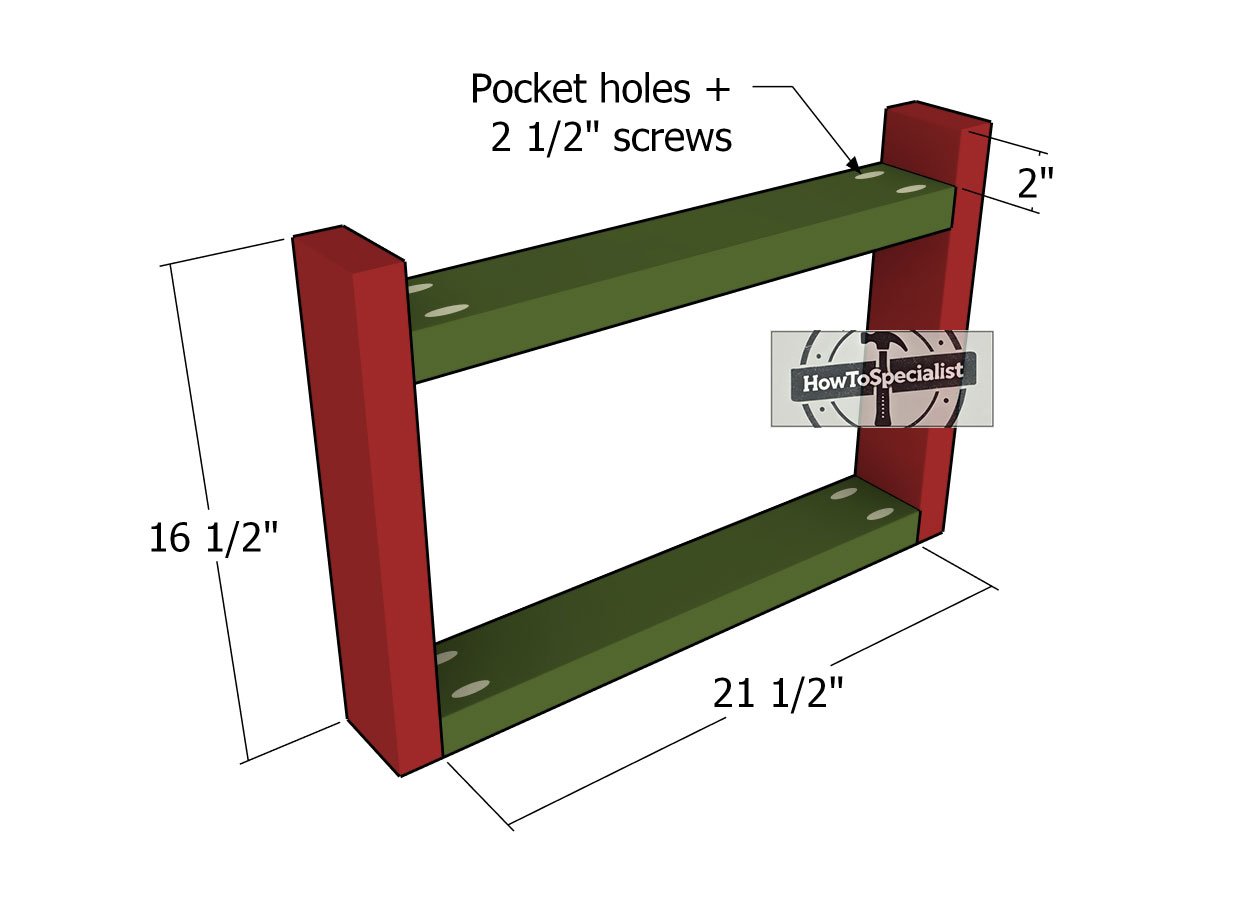
Side-frames-assembly
The first step in building this farmhouse coffee table is to tackle the side frames. Cut the 2×4 lumber according to the diagram, making sure everything is sized correctly. Drill pocket holes at both ends of the horizontal pieces and secure them to the vertical posts using 2 1/2″ screws, remember to use two pocket holes per joint for extra strength. As you assemble, make sure the edges are flush and check that the corners are perfectly square with a speed square for a solid, clean build.
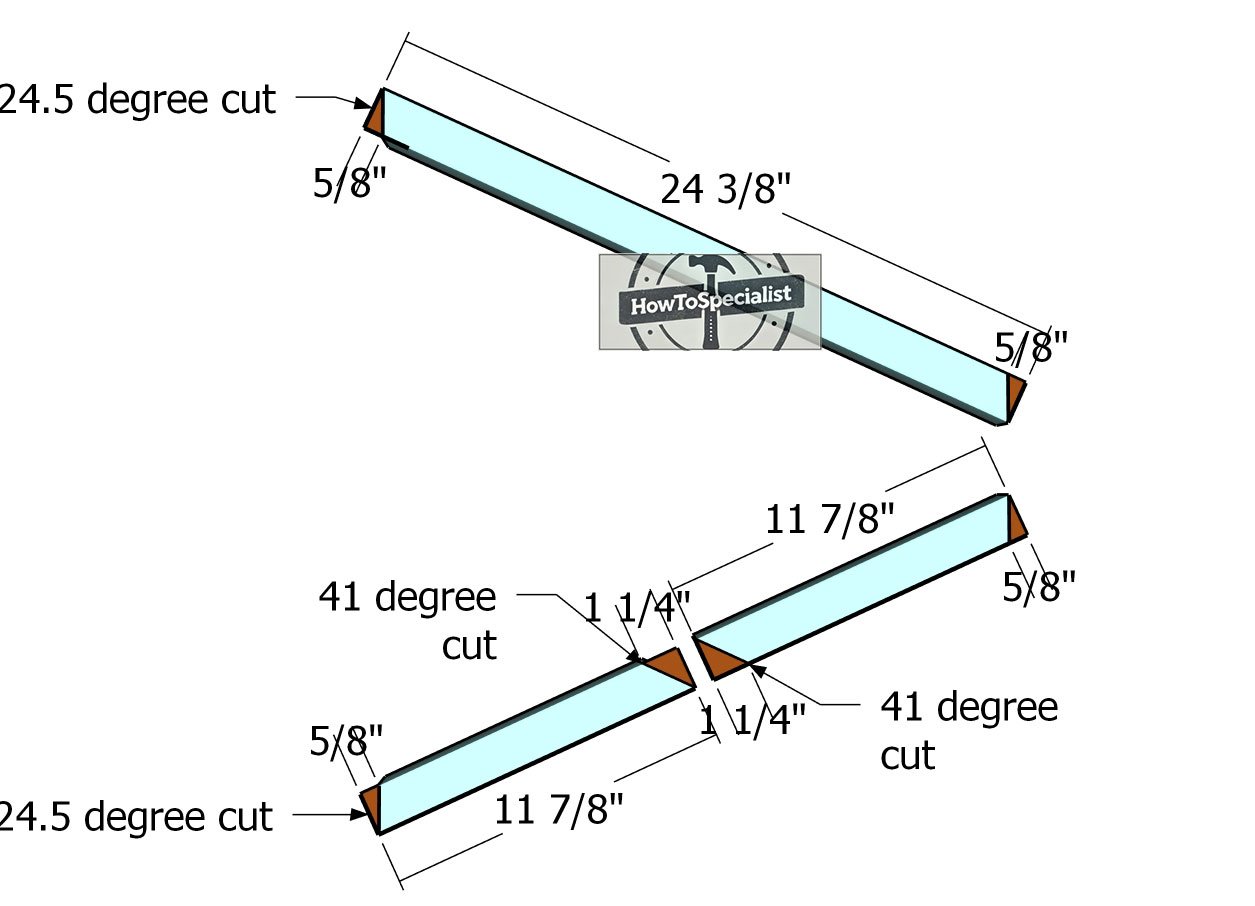
Cutting-the-X-trims
Next, grab some 2×2 lumber for the X trims, which will give the table that classic farmhouse look. Use a miter saw to make angle cuts on both ends of each X trim, following the measurements shown in the diagram.
Once you’ve made the cuts, smooth out the edges with sandpaper to ensure a clean fit. Repeat the process for the X trims on the other side of the table, and you’ll have those eye-catching accents in place in no time!
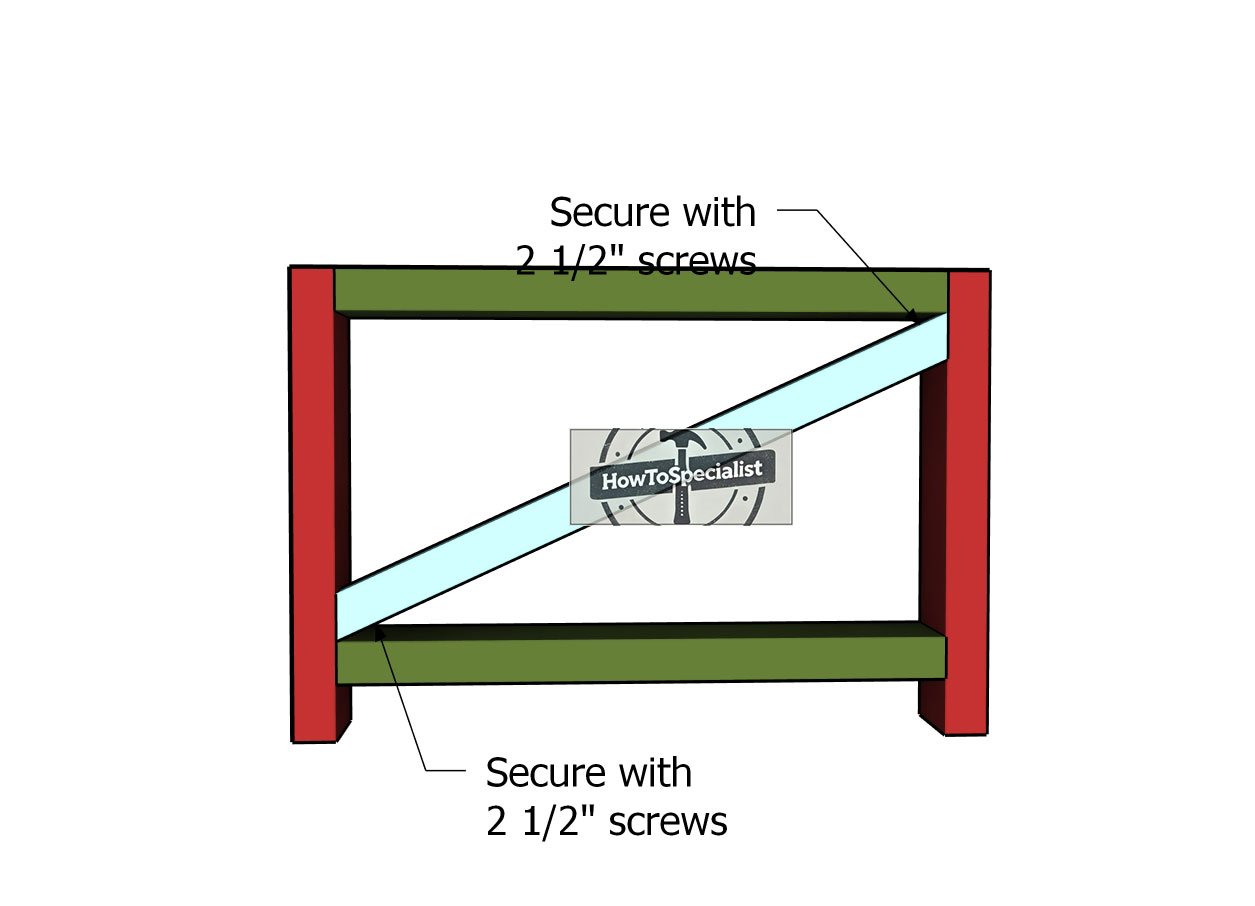
Attaching-the-main-X-trims
Attach the main trim to the sides of the farmhouse coffee table, making sure the edges are perfectly flush with the frame. Secure the trim in place with 2 1/2″ screws, but don’t forget to drill pilot holes first to prevent the wood from splitting. This step not only ensures a clean, professional finish but also adds extra stability to the overall structure.
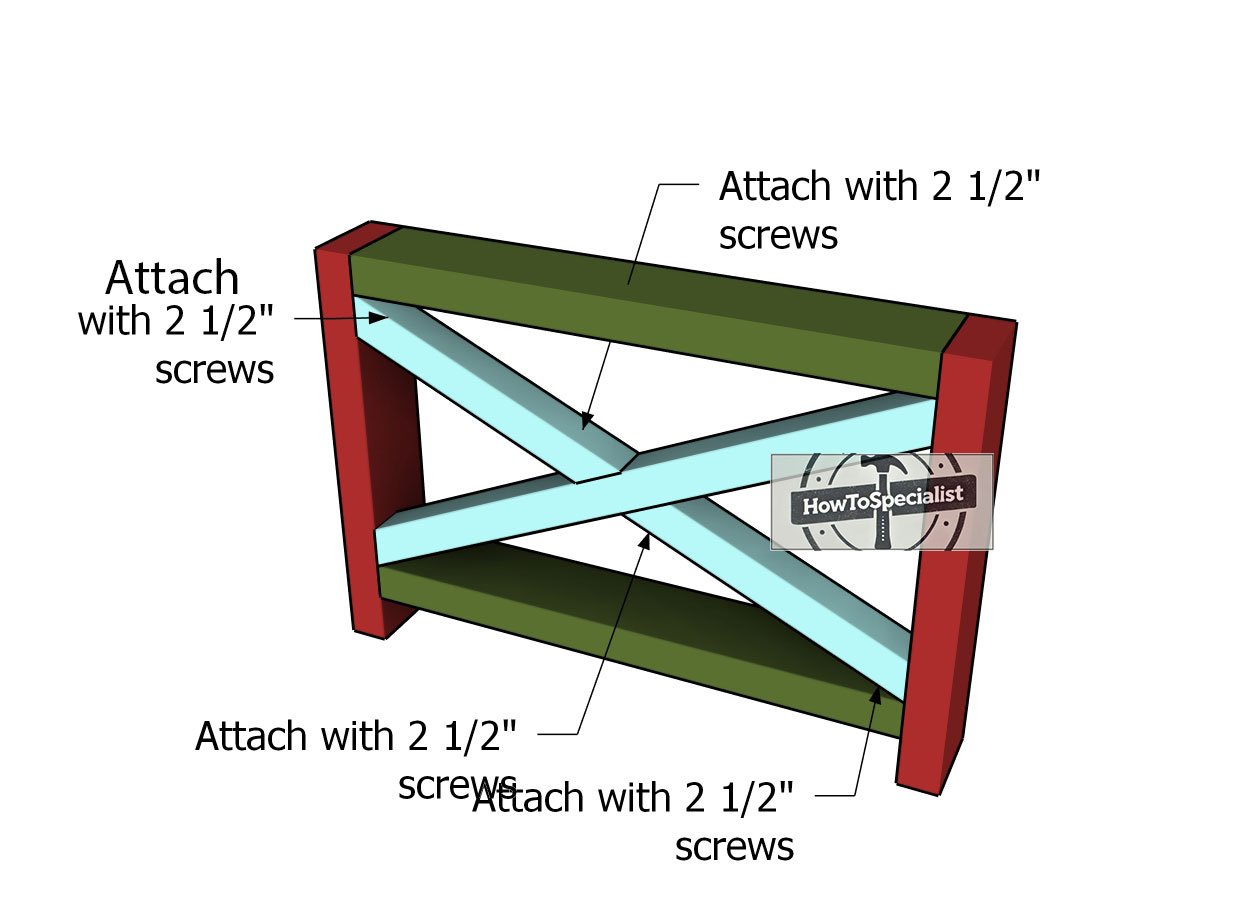
Fitting-the-X-trims
Next, it’s time to attach the remaining X trims to the sides of the table. Start by drilling pilot holes, then secure the trims with 2 1/2″ screws, making sure everything is locked in tightly.
Be sure to countersink the screw heads so that you can fill them with wood putty later for a clean, seamless look. This step adds the final touch to your table’s rustic design while keeping everything sturdy and solid.
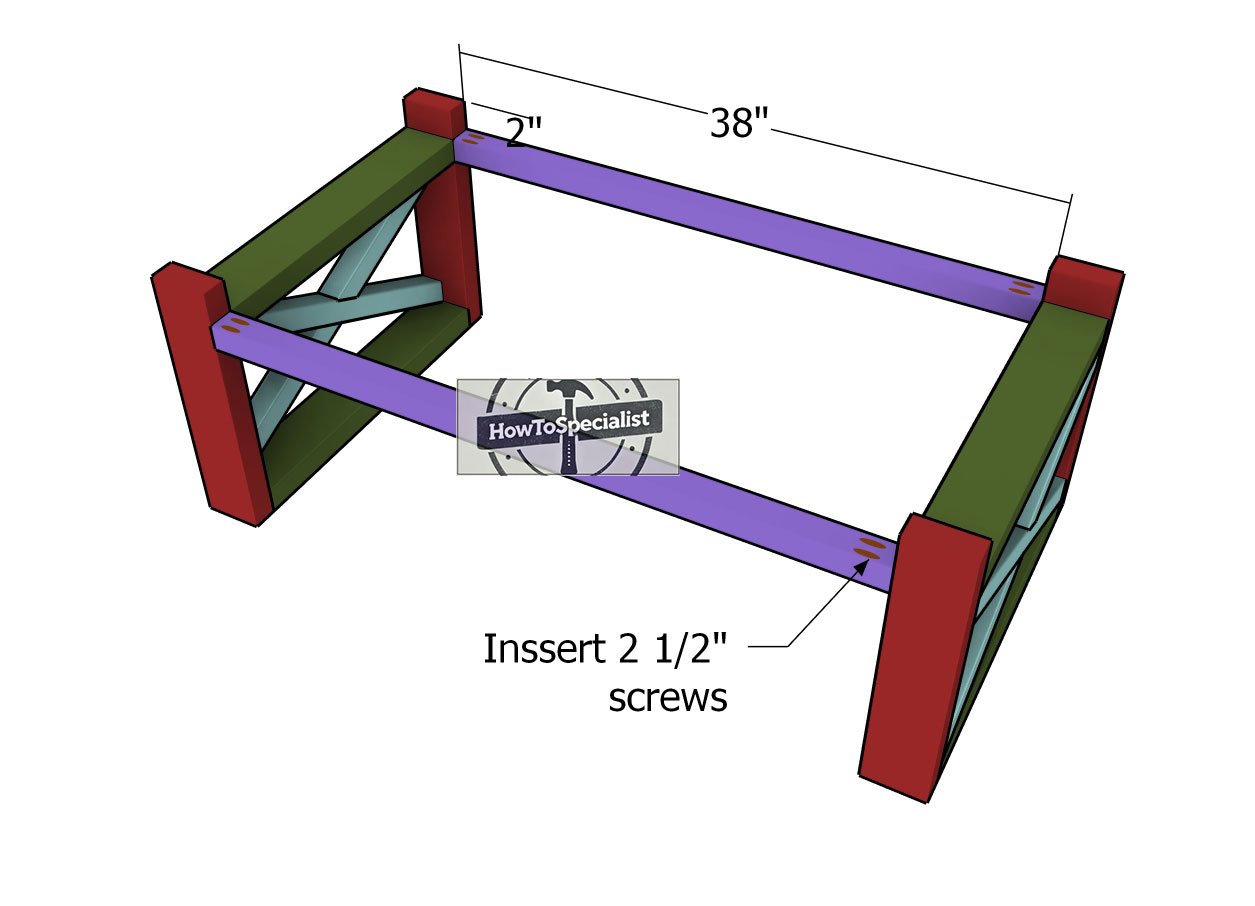
Assembling-the-coffee-table
Once the two side frames are built, it’s time to bring them together by fitting the 2×2 supports into place. Drill pocket holes at both ends of the supports and secure them using 2 1/2″ screws, making sure everything is tight and aligned.
Double-check that the corners are perfectly square, and ensure there are no gaps between the components for a clean, sturdy assembly. This step will lock the entire frame together, providing a solid foundation for your coffee table.
Shelf and Tabletop
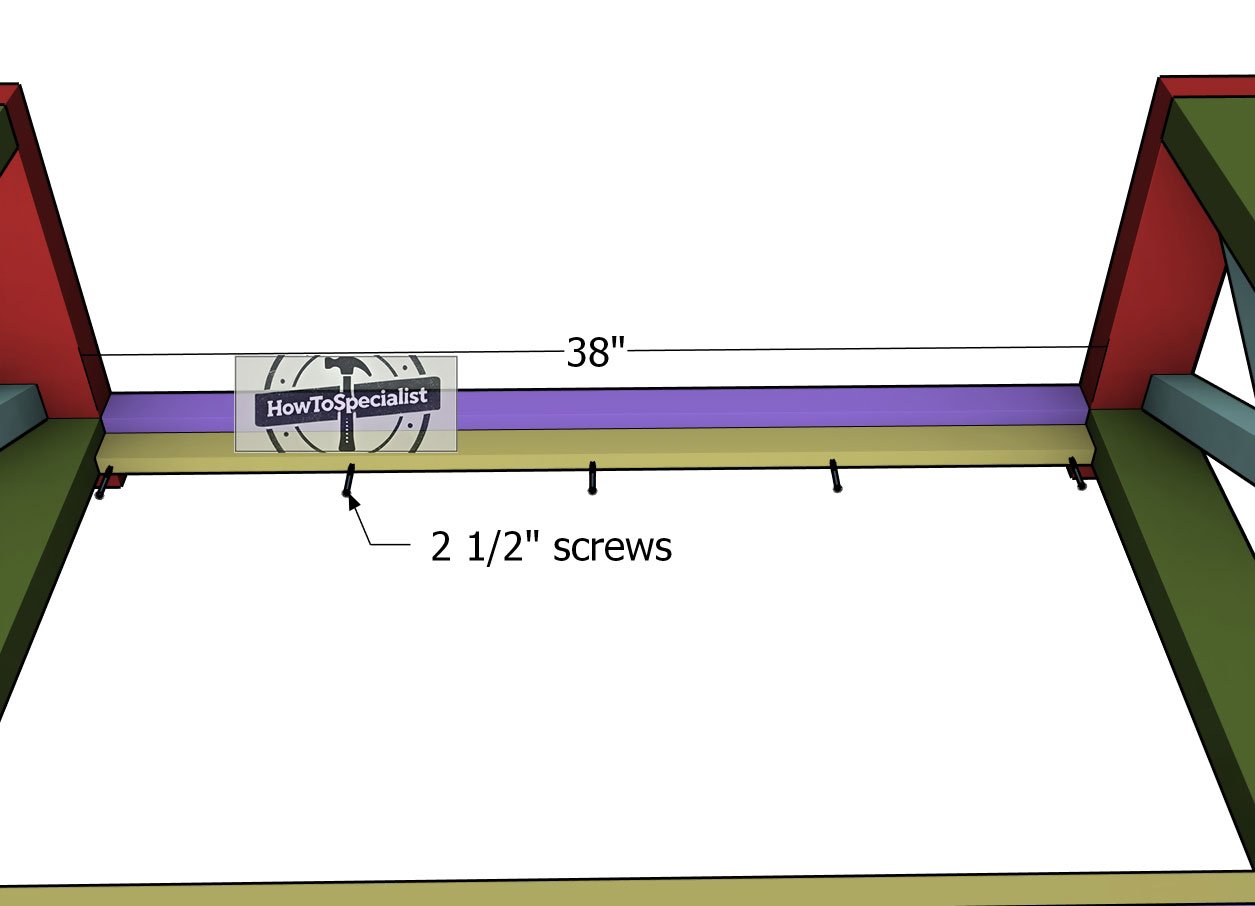
Fitting-the-shelf-cleats
Next, it’s time to attach the 1×2 cleats to the frame, which will support the bottom shelf. Align the cleats flush with the frame and drill pilot holes to prevent the wood from splitting.
Secure each cleat with at least 5 screws, using 2 1/2″ screws to lock them in tightly. This will create a strong base for the shelf, ensuring it can handle the weight and stay securely in place.
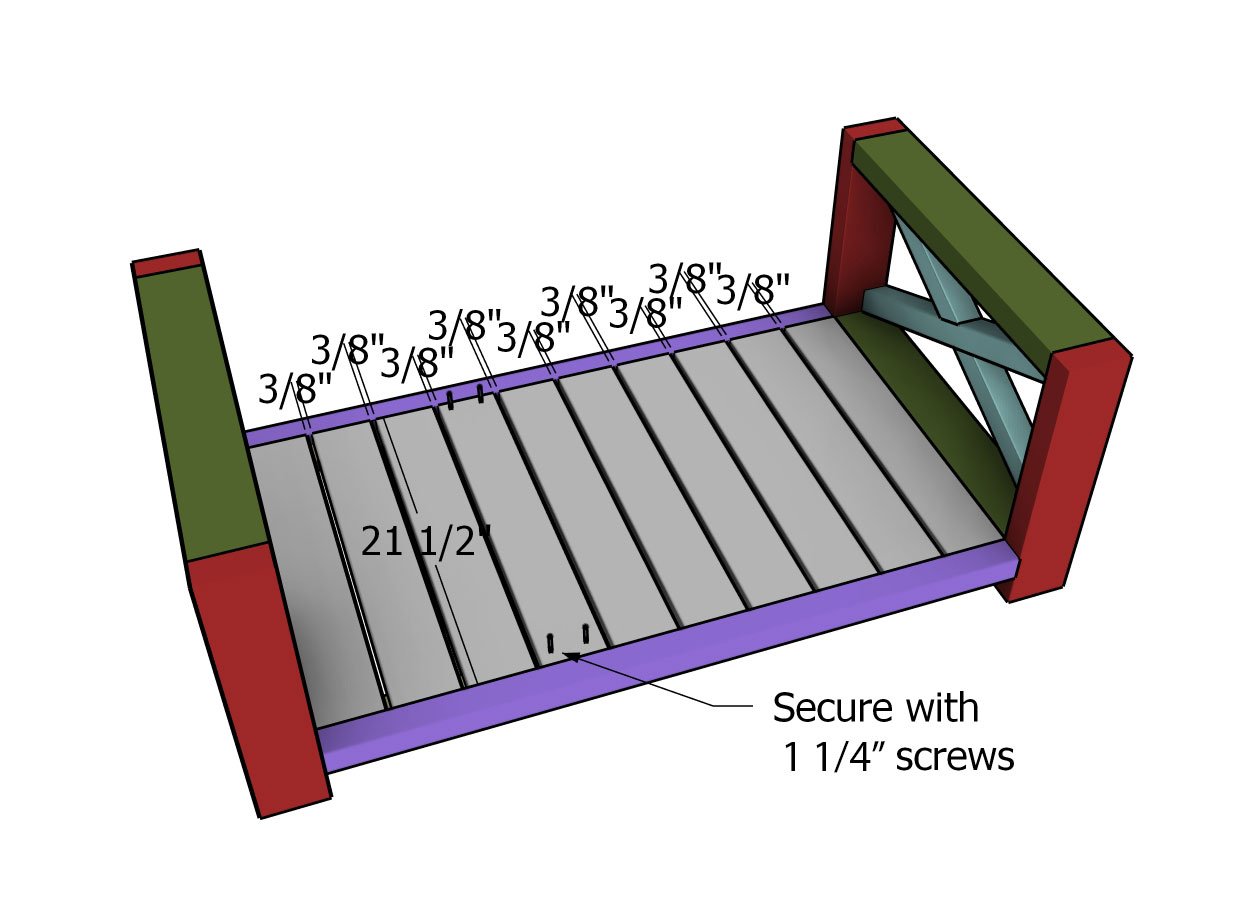
Fitting-the-shelf-boards
Continue your furniture project by fitting the 1×4 boards onto the lower shelf. Use 3/8″ spacers between the boards to ensure consistent, even gaps for a clean look.
Secure the boards in place with 1 1/4″ screws, driving two screws into each joint to reinforce the overall structure. This step not only adds style but also ensures the shelf is sturdy enough for anything you want to store or display.
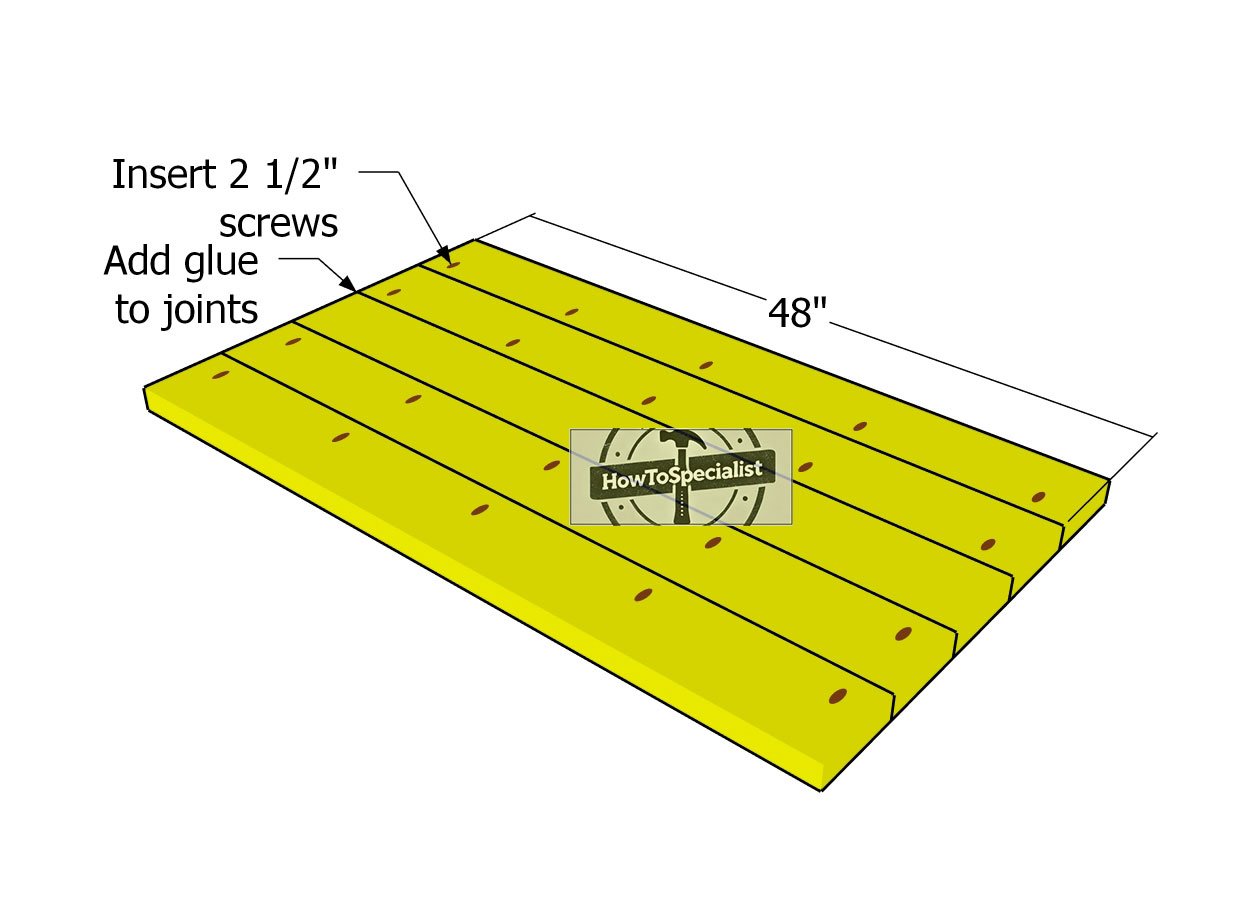
Assembling-the-tabletop
Next, we’ll move on to assembling the tabletop. Start by cutting the 2×6 boards to 48″ as shown in the diagram. Lay the boards out on a level surface, drill pocket holes, and apply glue to the joints.
Align the edges flush at both ends and make sure the boards are tightly fitted against each other. Secure everything together with 2 1/2″ screws to ensure a solid and sturdy tabletop.
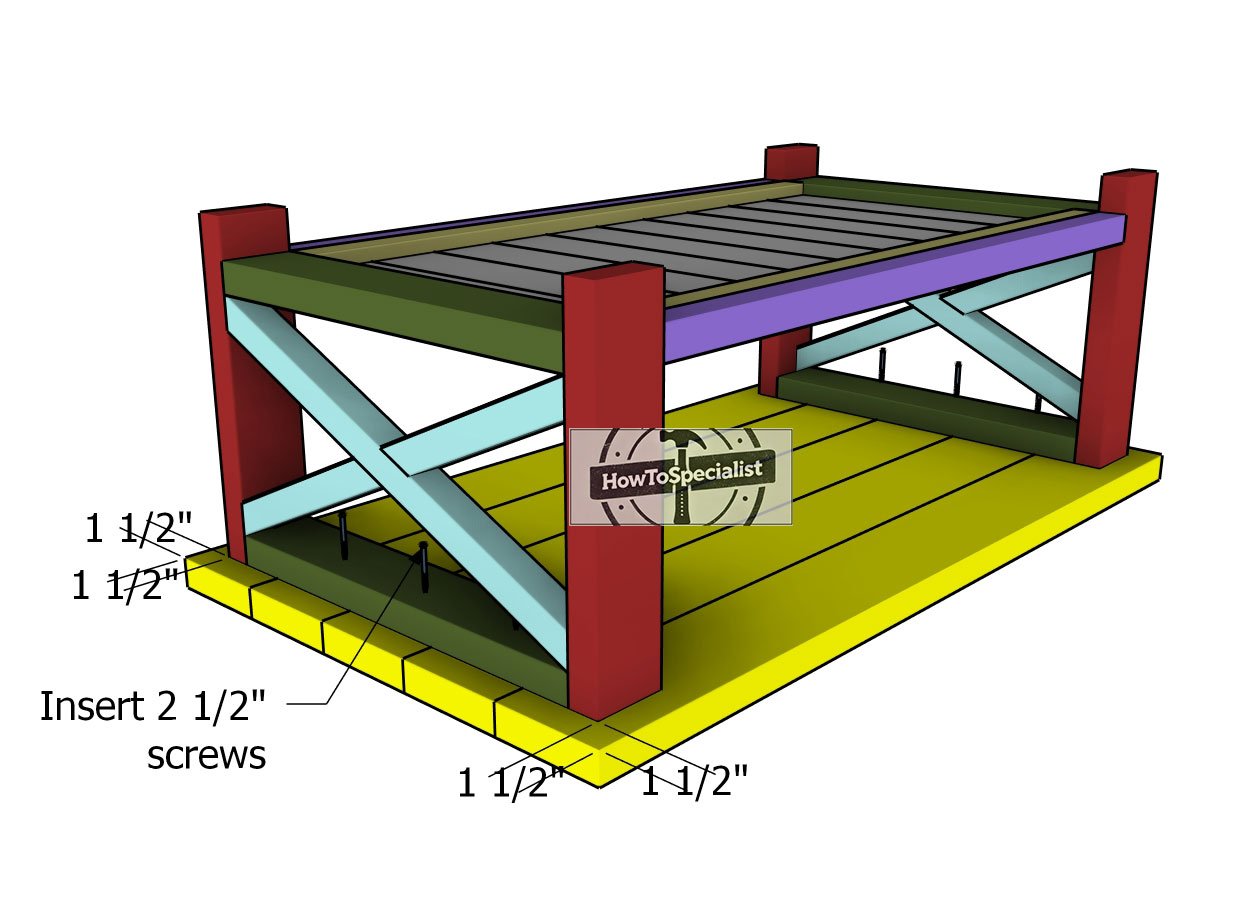
Attaching-the-tabletop
Center the table frame on the tabletop, making sure you have a 1 1/2″ overhang on all sides for a balanced look. Drill pilot holes through the top boards of the side frames, then secure the frame to the tabletop using 2 1/2″ screws.
Be sure to use at least three screws on each side to lock everything firmly into place. This will ensure the tabletop is secure and aligned properly with the frame.
Finishing touches
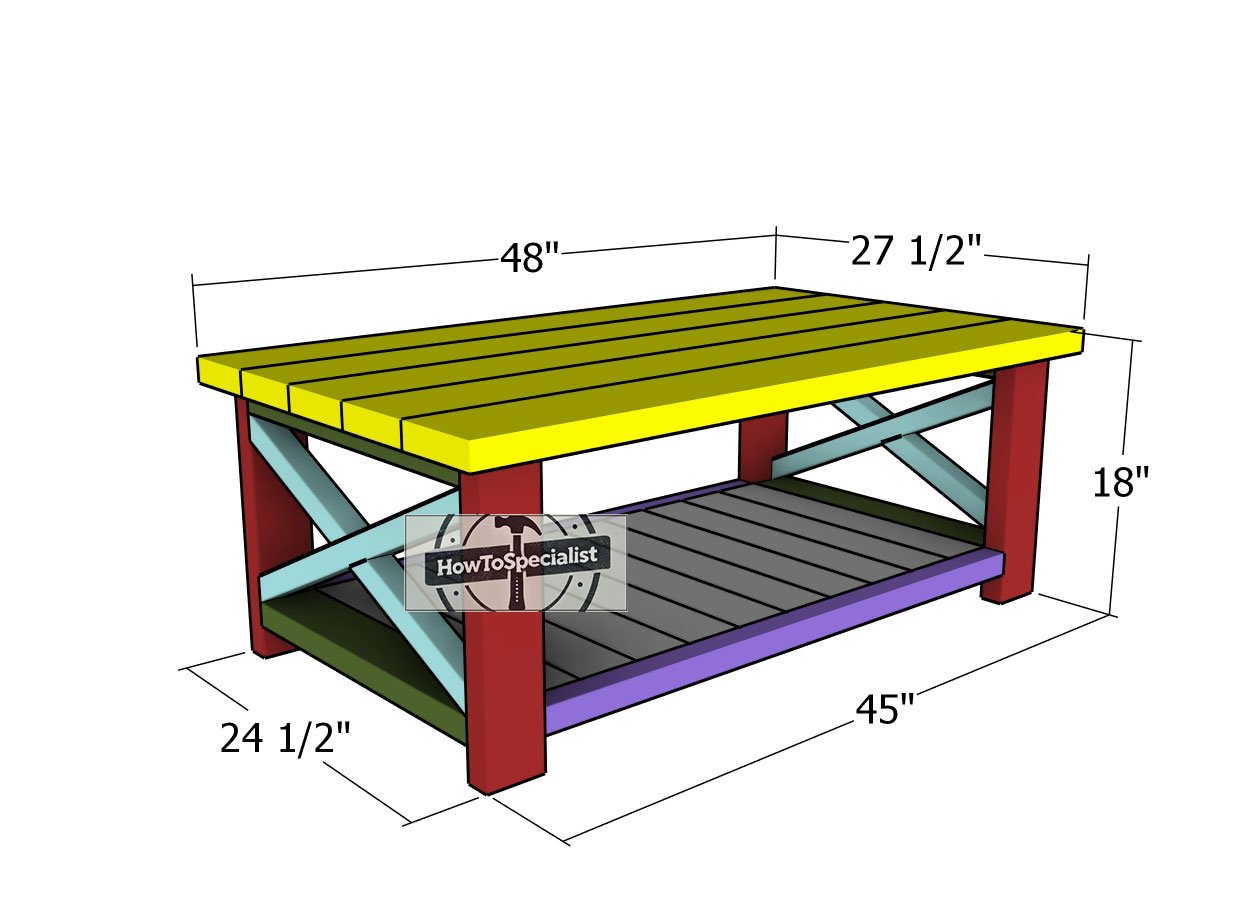
Farmhouse-coffee-table—dimensions
For the finishing touches, start by giving the entire coffee table a good sanding to smooth out any rough edges and prepare the wood for finishing. You can then apply your choice of stain or paint to bring out the natural beauty of the wood or match your home’s décor.
Adding a clear protective coat will help seal the surface and ensure the table withstands daily use. Once dry, take a step back and admire your work—your new farmhouse coffee table is ready to take center stage in your living room!

How to make a coffee table
Building this farmhouse coffee table is a great way to add a personalized, handcrafted piece to your home that blends both style and functionality. The X-trimmed sides and bottom shelf provide not only a unique design but also practical storage space for books, décor, or anything you want to keep handy. Plus, completing this project yourself brings the satisfaction of creating something beautiful and durable with your own hands, all while saving money compared to store-bought options.
Farmhouse coffee table – free plans
There are plenty of ways to customize this farmhouse coffee table to fit your style and needs. You could swap out the X trims for different designs, like straight or slatted sides, to give it a unique look.
Adding drawers or baskets to the bottom shelf can boost its storage potential while keeping things organized. You can also experiment with different stains, paints, or distressing techniques to match your home’s aesthetic and create a truly one-of-a-kind piece.
Wooden coffee table – free plans
With just a few simple tools and materials, this farmhouse coffee table project is a great way to create a beautiful, functional piece for your home. Whether you stick to the original design or add your own custom touches, the result will be a sturdy and stylish table that you can be proud of. So, grab your plans, get to work, and enjoy the satisfaction of building something with your own hands!
Smart Tip: I can’t wait to see how you make it your own – don’t forget to share your finished projects with me! In addition, take a look over the rest of my shed plans HERE.
Thanks for checking out my free farmhouse coffee table plans! Be sure to explore my other projects for more fantastic ideas. Don’t forget to hit the LIKE button and SHARE with your friends using the social media links below.