This article is about how to build a concrete raised garden bed. In this project I show you how to form and pour the concrete walls for the raised garden bed. In PART 2 of this project I will cover the exterior walls of the raised flower bed with travertine tiles. I hope you enjoy this project and consider building one for your garden, as I find it a very creative way to freshen up your backyard. If you have never worked with concrete before, I will help you with my experience and share lots of useful tips to get the job done.
You can adjust the size and the shape of the garden bed to suit your exact needs. In this tutorial I focus on the techniques and materials, so you understand the process and made adjustments to suit your needs. If you don’t want to add the travertine tiles to the exterior of the garden bed, you can just cure the concrete and enjoy the rustic look. See all my Premium Plans HERE.
Made from this plan
Materials
- cement, sand, gravel
- render, plaster
- rebars, construction wire
- construction lumber
- stain
Tools
- Concrete mixer
- Angle grinder
- Hammer Drill
- Drill / Screwdriver
- Miter saw
- Hammer, Tape measure, Safety glasses
- Trowel, Trowel
- Wheelbarrow
- Paint brushes
- Buckets
- Shovel, Shovel
Time
- 1 week
How to Form a Raised Garden Bed
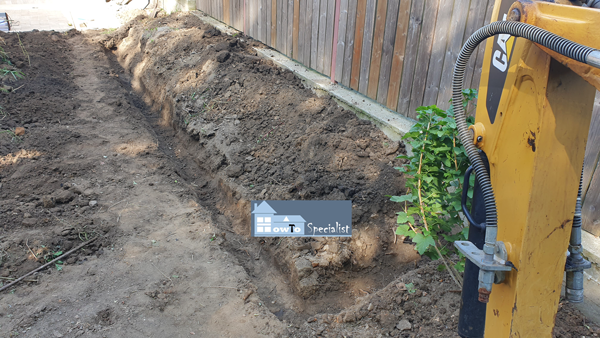
Digging-the-foundation-trench
The first step of the project is to dig the trench for the concrete walls. The depth of the trench is 10-12″ and the width is 8″. You can use a shovel and dig it manually, or you can rent a mini-excavator and go quicker.
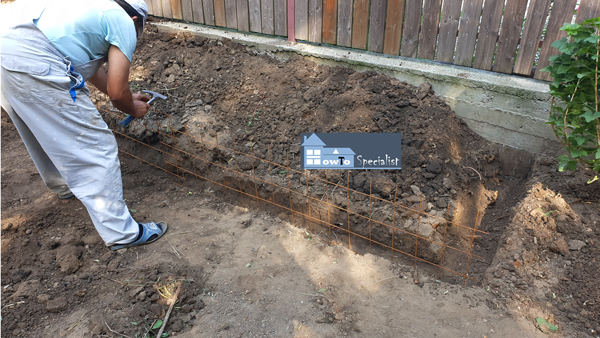
Fitting-the-rebar-mesh
Next, we need to add some kind of reinforcement for the concrete walls. Therefore, the quickest method is to cut #4 rebar mesh and place it into the trenches, as shown in the image. Make sure you cut at the right height, so it does stick outside the concrete, after pouring the walls. The mesh will increate the rigidity of the walls and it will prevent any cracks in the concrete.
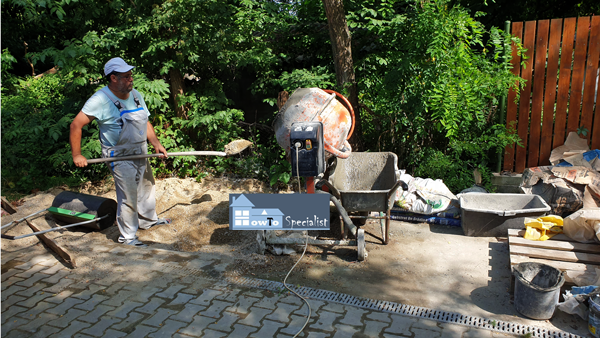
Mixing-concrete
We used a concrete mixer to speed up the process. Also, a wheelbarrow is useful to move the concrete from the mixer to the trenches. Read the manufacturer’s instructions for the right consistency.
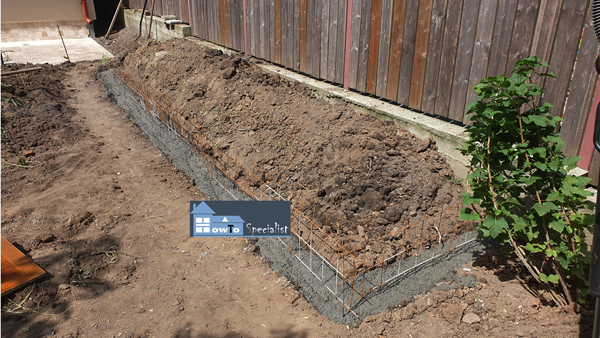
Concrete-trench-filled-with-concrete
Next, we filled the trenches with concrete. This step is required so we can set the form panels for the raised bed walls. After pouring the concrete, you need to let it dry out for a 24 h.
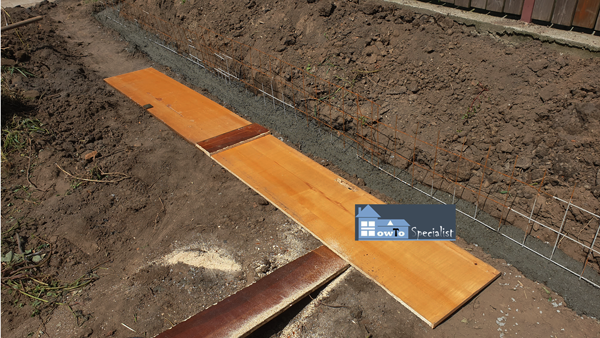
Panels-for-concrete-formwork
The next day we assembled the panels for the formwork. The height of the walls is up to you, but in case you want to know everything about my project, I can say we went for 16″. We used large panels which we cut to the desired dimensions. Panels are better than boards, because they create a smooth and uniform surface, after removing the form.
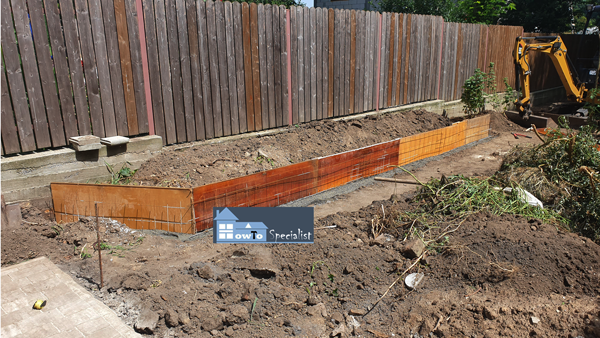
Formwork-for-concrete-retaining-wall
Set the wooden panels to the interior of the raised garden bed. Make sure you join the panels together tightly with 1x4s cleats on the back, and leave no gaps between them.
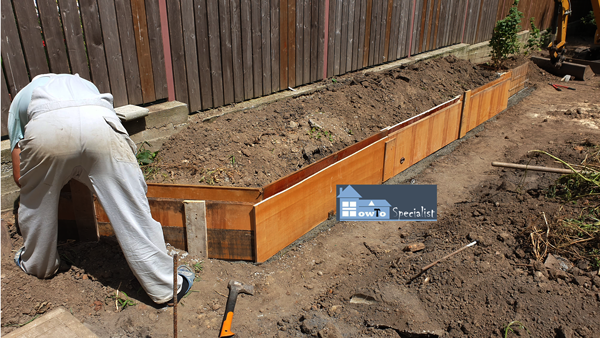
Assembling-the-retaining-wall-formwork
Next, we set the panels to the exterior of the raised bed. Make sure the thickness of the concrete walls is equal along the length of the garden bed.
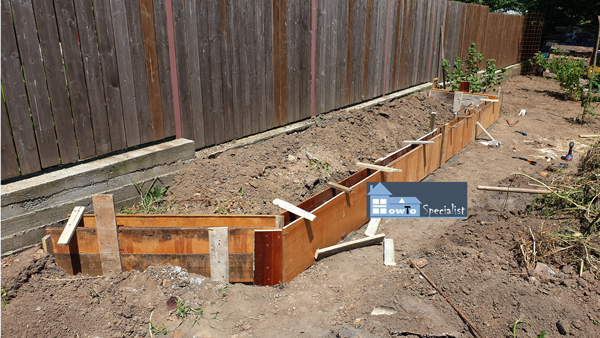
Wooden-formwork-for-concrete-wall
We used 1x2s to lock the top of the interior and exterior forms together. The thickness for my concrete walls is 6″, but you can adjust that according to your needs.
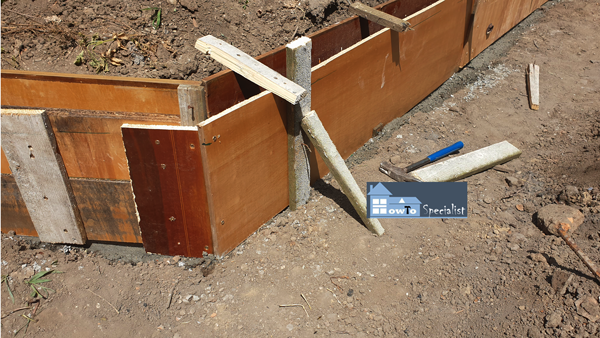
Braces-for-formwork-panels
Also, notice the diagonal braces that lock the panels into place. When you fill the formwork with concrete, it will tend to move the panels from their place, therefore you need to set the braces every 4 ft or so. Make sure the panels are plumb, using a spirit level, before adding the diagonal braces.
Building a concrete raised garden bed
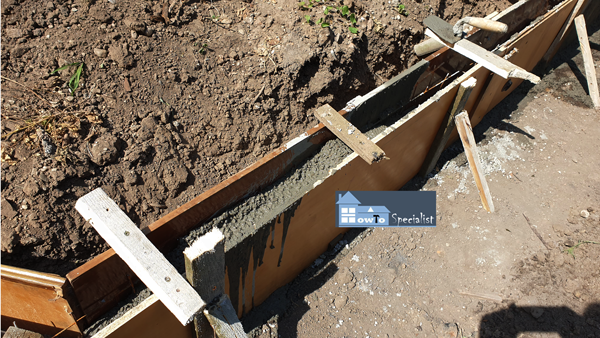
Filling-the-formwork-with-concrete
Next, we mixed some concrete and filled the formwork. Hit the panels gently with a hammer (both interior and exterior) to help the concrete set properly inside the form. Also, this will help with the air pockets inside the concrete and thus enhancing the rigidity of the wall.
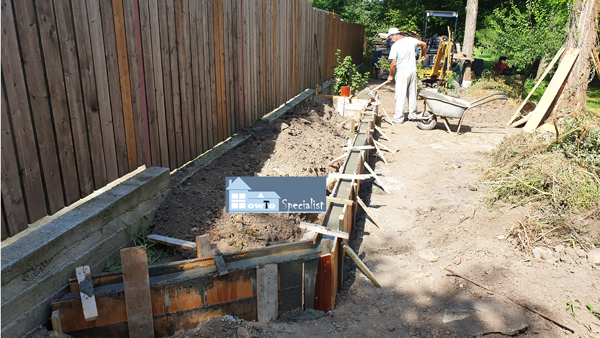
Formwork-with-concrete
A wheelbarrow and a shovel are must haves for this step of the project. Fill the form with concrete up to the desired height and then let it dry out for a couple of days.
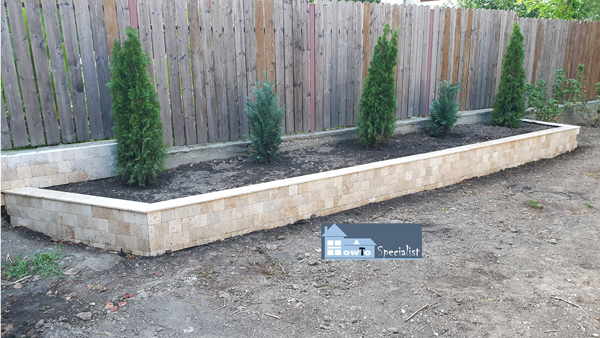
How-to-build-a-flower-bed
In PART 2 of the project I will show you how we covered the exterior walls of the flower bed with travertine tiles and added the decorative capping. Also, he added waterproof membrane to the interior of the garden bed, to protect the concrete from damage.
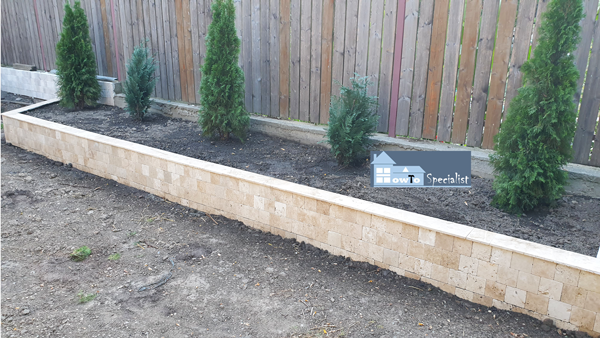
Concrete-flower-bed—retaining-wall
This was a complex project that required all my attention. However, I am really pleased with the final result and I can’t wait to do more upgrades to it. For example, I plan to plant some strawberries and maybe some flowers. All in all, I love it’s unique decorative appearance and it adds tons of appeal to my yard. Make sure you check out the rest of the Episodes of the Fence Series to see how we built the rest of the fences on the countryside property.
Thank you for taking a look over my article on how to build a concrete raised garden bed. Make sure you share this project with your friends if you like it and please take a look over the rest of my projects, because I have tons of plans and ideas to choose from. See all my projects HERE.
