If you’re anything like me, there’s always that one part of the lawn that just doesn’t know what it wants to be. Maybe it’s a forgotten corner, a weird little patch near the patio, or the edge where your pavers take a turn. You mow around it. You glance at it. But it never really does anything. Well, here’s a simple project that turns that awkward spot into a showpiece — without needing heavy equipment, a landscaping crew, or a full weekend of digging. We’re talking clean edges, rich color contrast, and just enough plant life to say, “Yes, someone takes care of this place.”
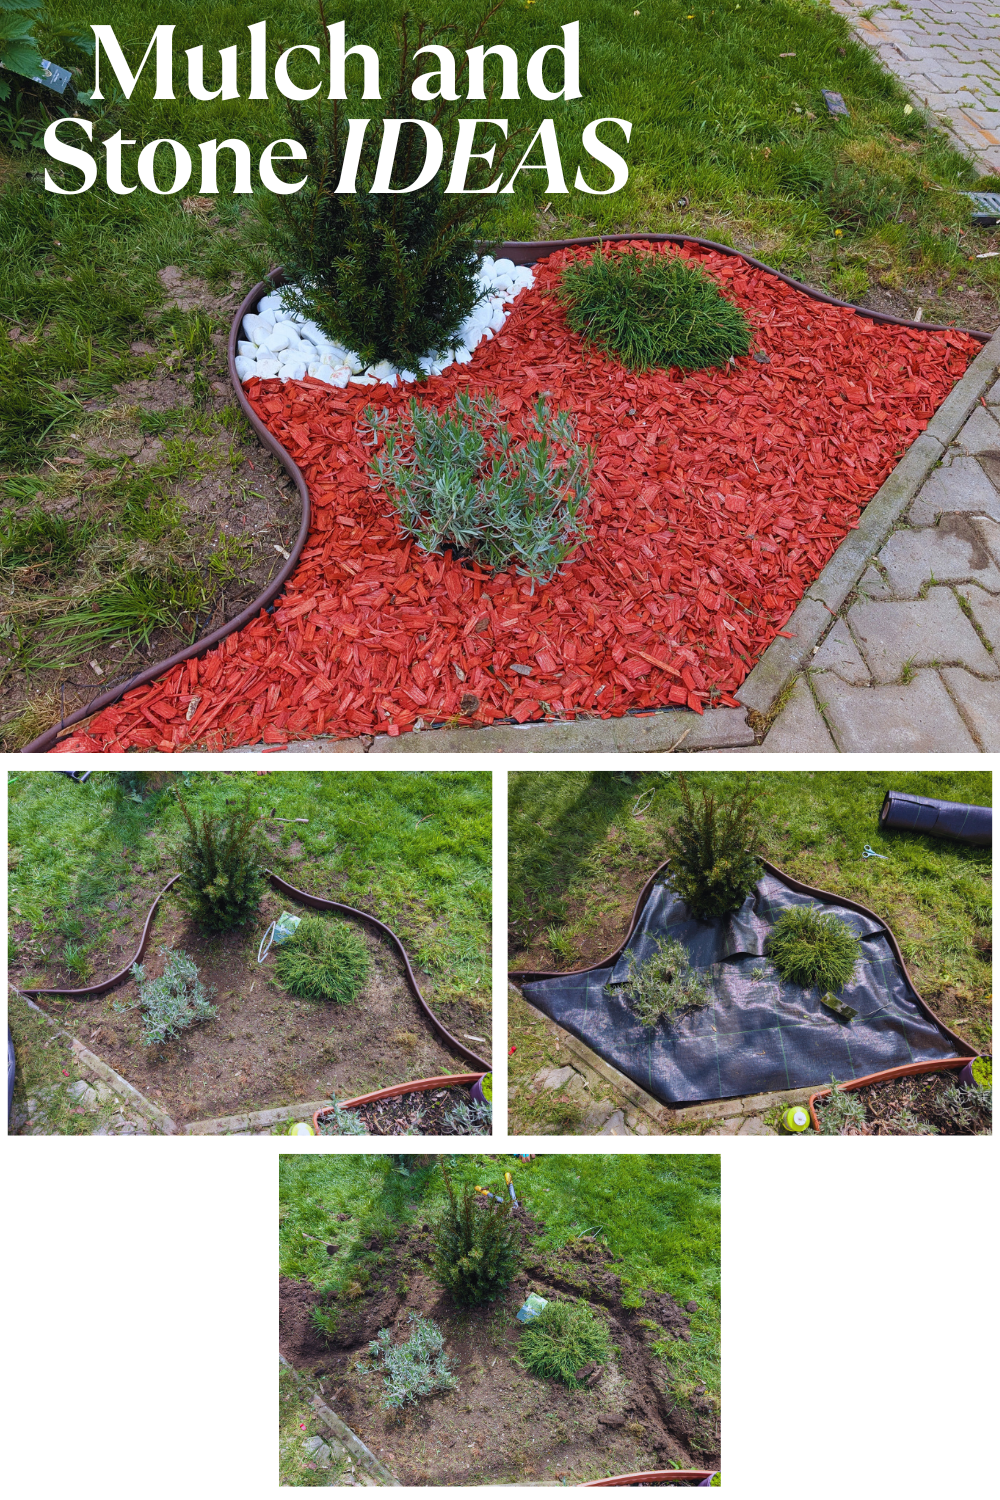
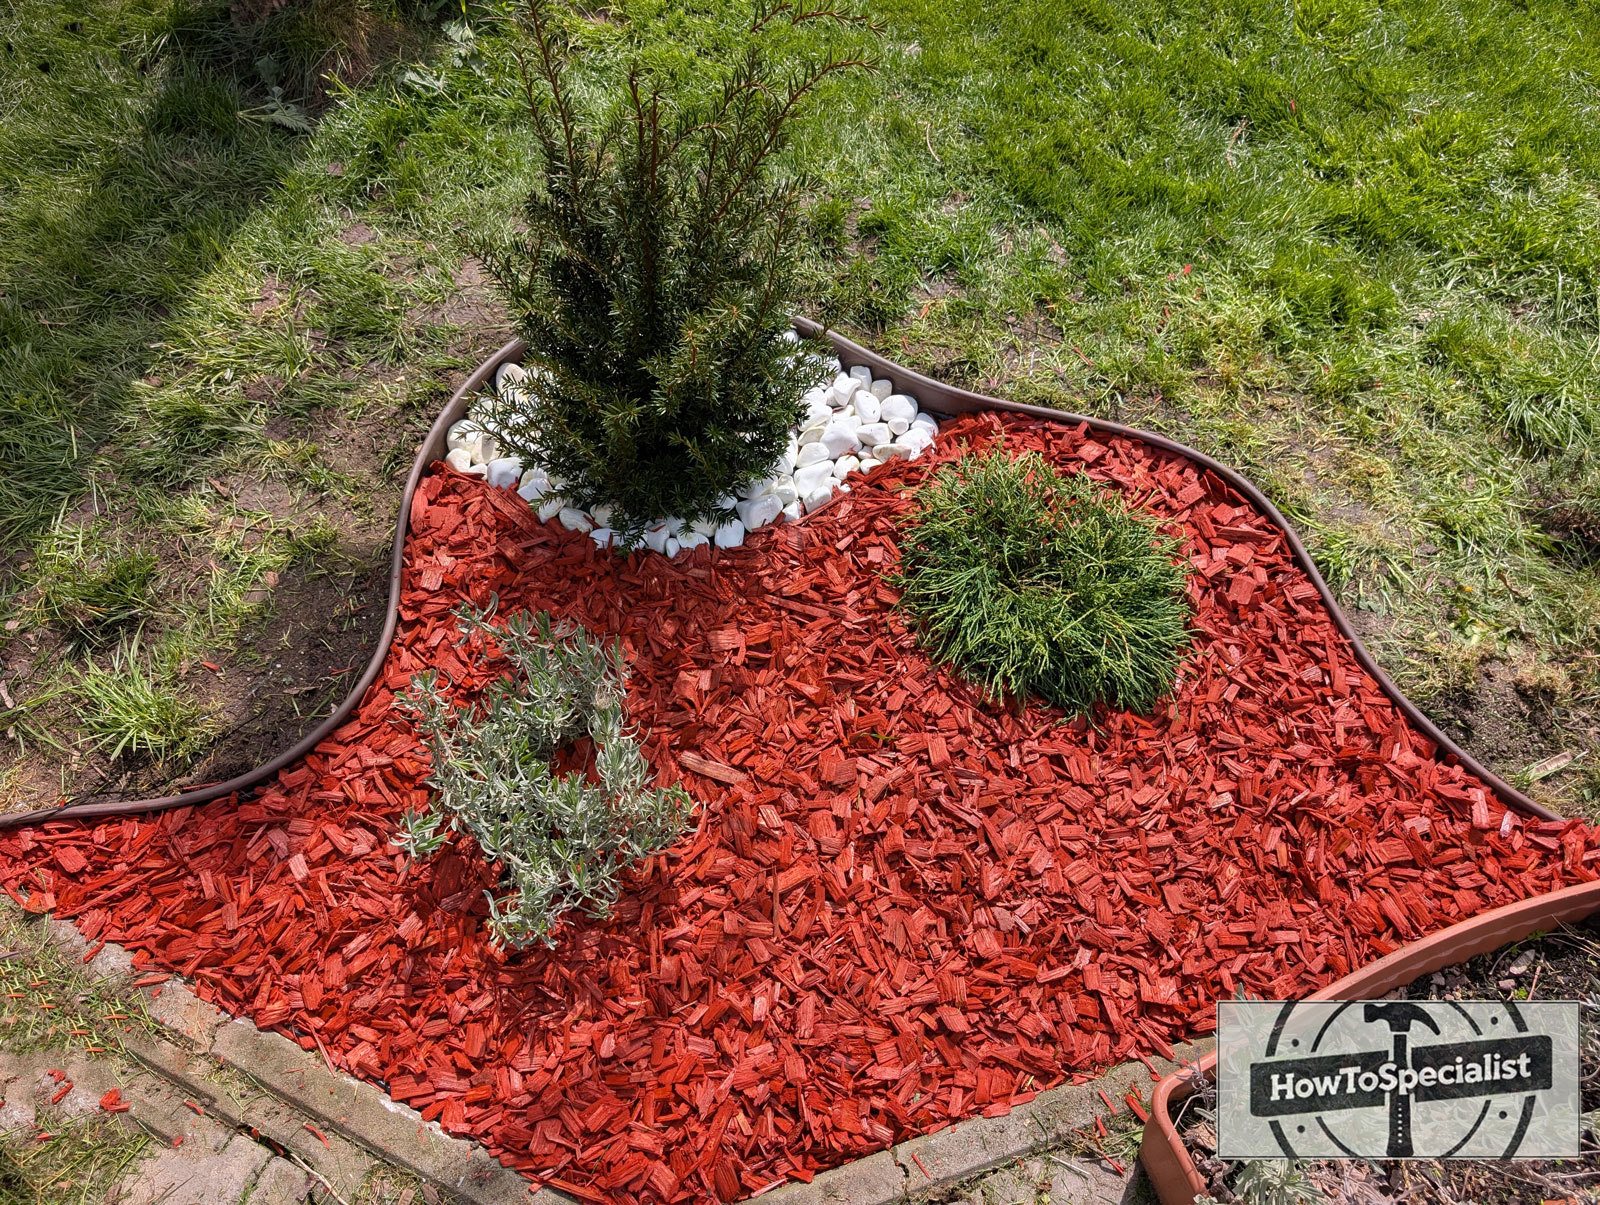
We’re going to build a small, curved accent area using flexible plastic border, landscape fabric to keep the weeds away, red mulch for warmth and contrast, crisp white stones for definition, and three low-maintenance plants that’ll make your yard feel just a little more “put together.” What’s cool about this is how customizable it is. You can go bold or subtle, switch up the mulch color, or change the plants to suit your zone. But the idea is simple: give your landscape a little love and turn a bland corner into something worth showing off. We did ours in a corner where the lawn meets a curve in the paver walkway — and now, it looks like it was always meant to be part of the design. Let’s get into it. Step-by-step. Just how we like it.
Materials You’ll Need
- Plastic garden edging (flexible, roll-type works great)
- Landscape fabric (weed barrier)
- Red mulch
- White decorative stones
- 3 small to medium landscape plants (I went with a boxwood, a lavender, and a dwarf ornamental grass)
- Garden staples or landscape pins
- Utility knife or scissors
- Small shovel or hand trowel
- Rubber mallet
- Gloves (optional but helpful)
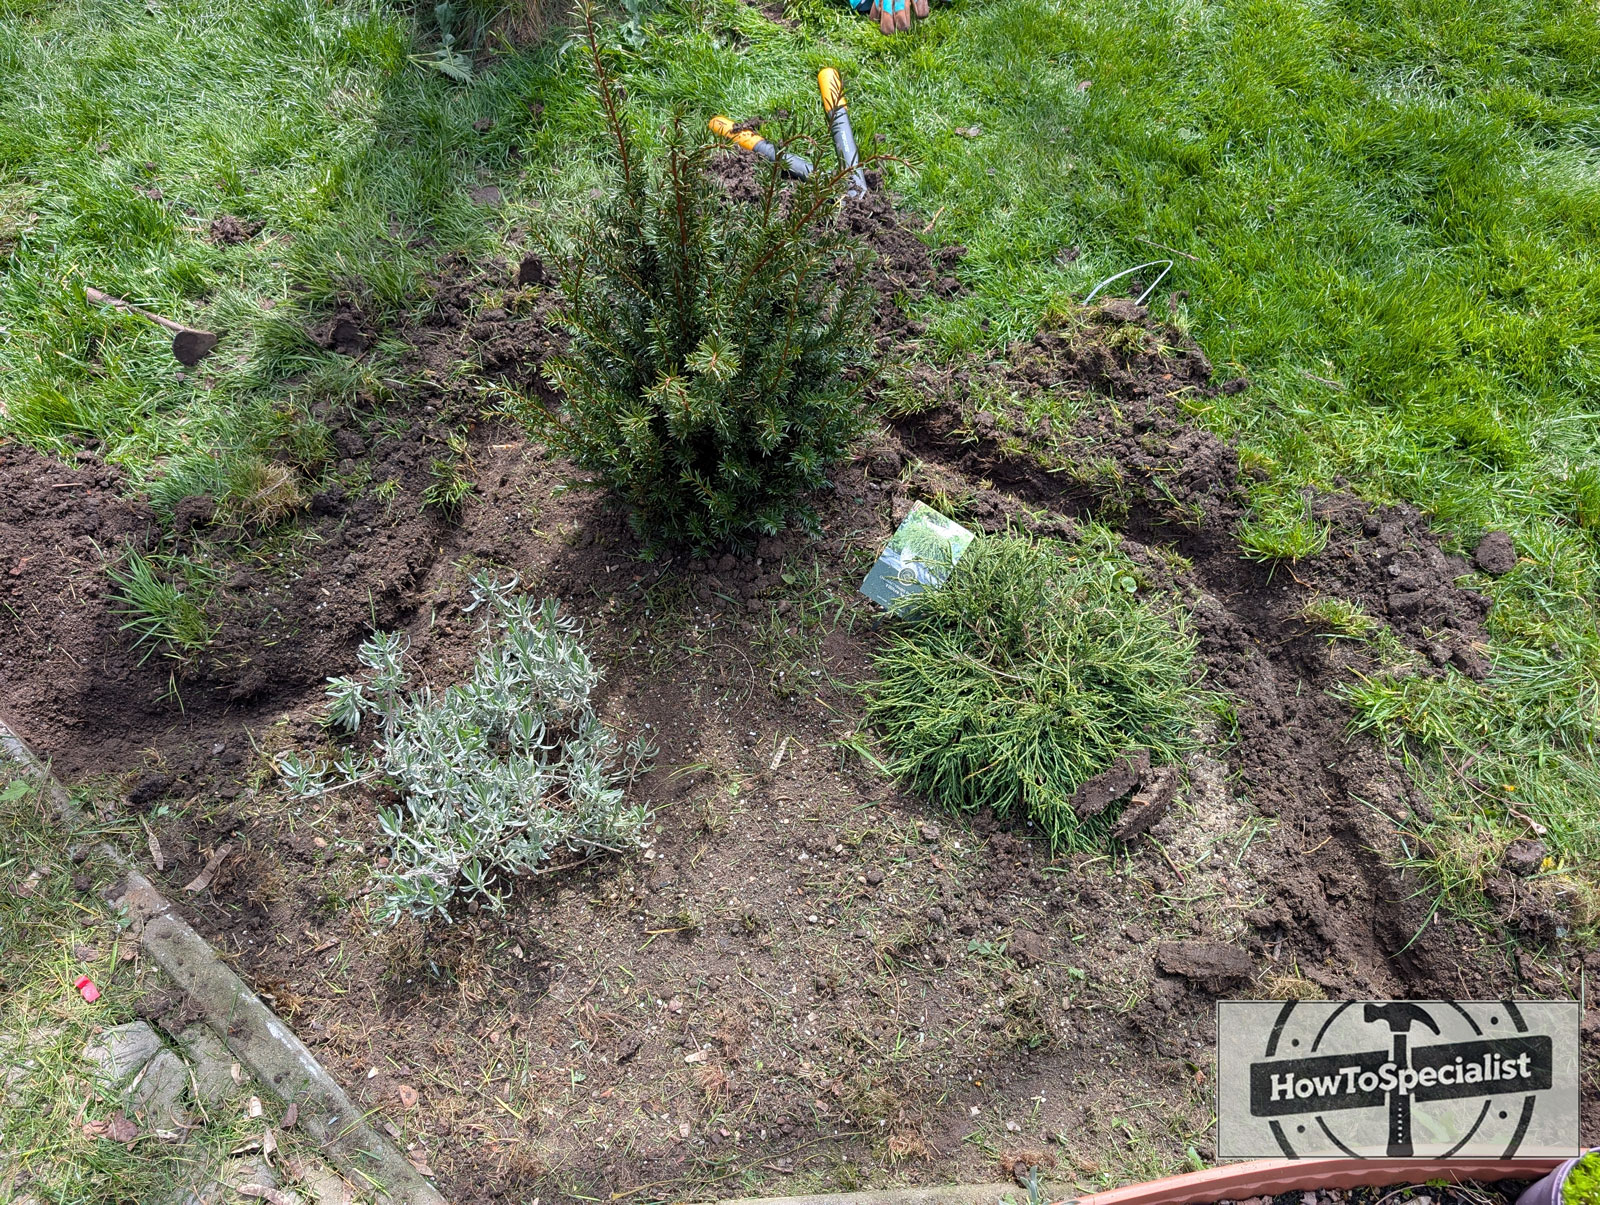
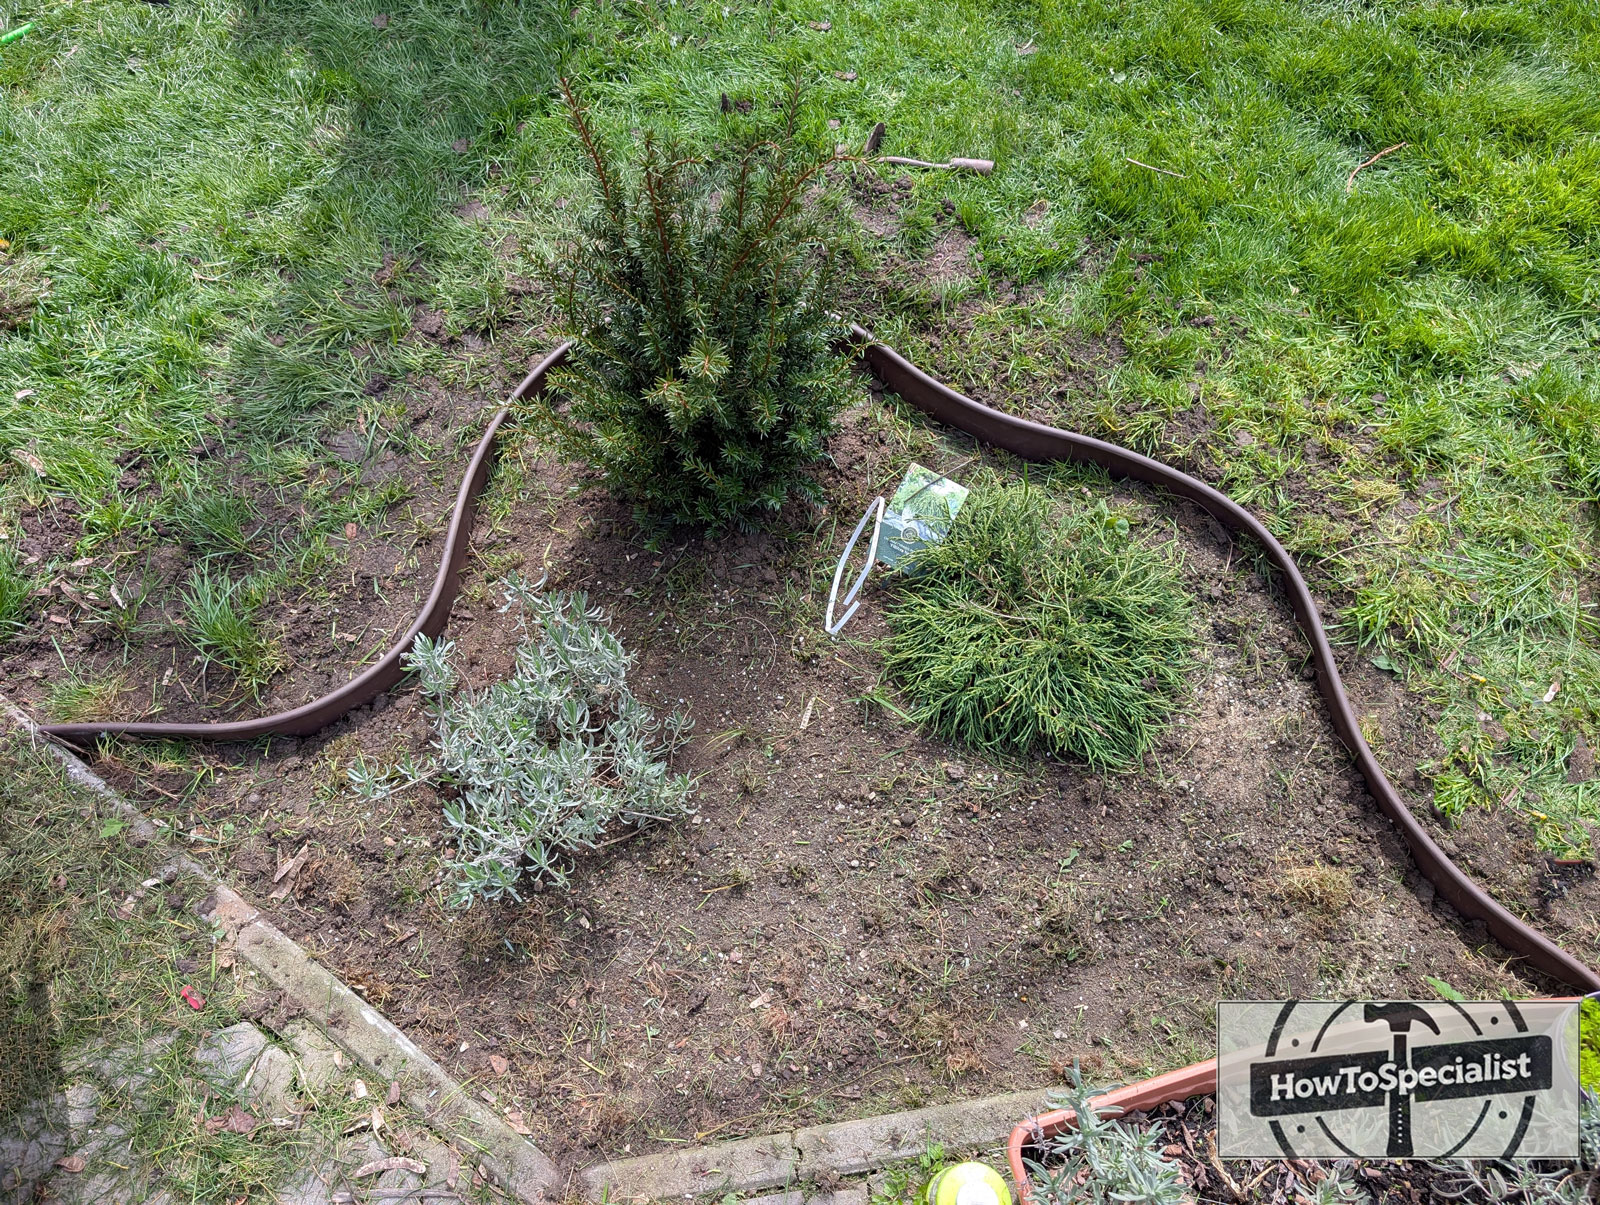
Step 1: Pick the Spot and Plan the Curve
Find the area you want to accent. We picked a corner where the paver path makes a turn — it’s a perfect transition point and already had a bit of natural separation from the rest of the lawn.
Lay your plastic garden edging out in the sun for 10–15 minutes to make it easier to curve. Then start shaping your design — a flowing curve works great here. You want something that feels intentional, not random.
Step 2: Install the Plastic Border
Once you’re happy with the curve, start edging it into the ground.
- Use your shovel or an edging tool to create a shallow trench (about 2–3″ deep).
- Set the plastic border in place and drive the included stakes or landscape spikes every couple of feet to keep it firm.
- Give it a few taps with the rubber mallet to seat it nicely.
This is what defines your shape, so take your time here.
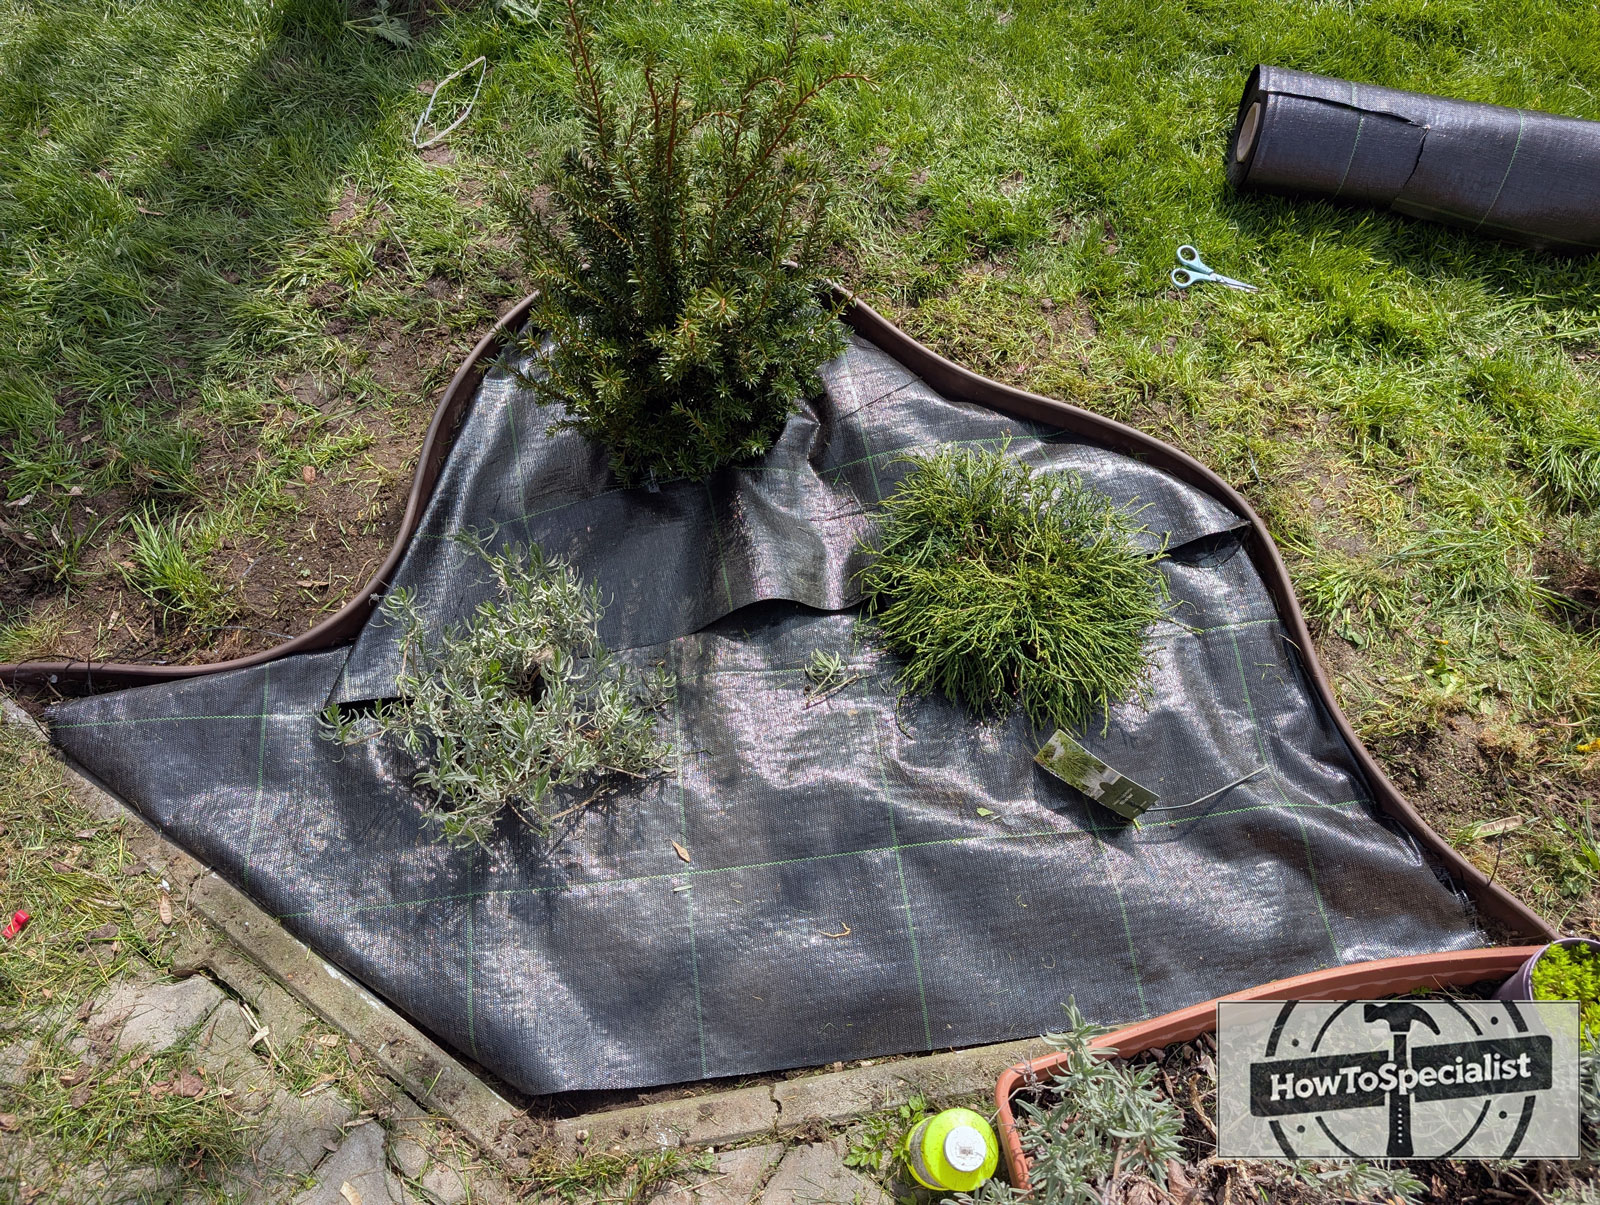
Step 3: Lay Down Landscape Fabric
Roll out your weed barrier inside the newly defined border. Overlap pieces by 6–8 inches if you’re using multiple sections.
- Use garden staples or landscape pins to secure it in place.
- Cut holes where your plants will go. A small X with a utility knife does the trick — just fold back the flaps when planting.
The fabric stops weeds but still lets water drain — it’s a must if you want this to stay low maintenance.
Step 4: Plant Your Greenery
Dig holes right through the fabric and pop your plants in.
Tip: Place taller or bushier plants toward the back (near the pavers in this case), and keep the lower ones toward the front. Triangle layouts work well — just like planting in containers.
Backfill the soil, press it down gently, and give everything a drink of water.
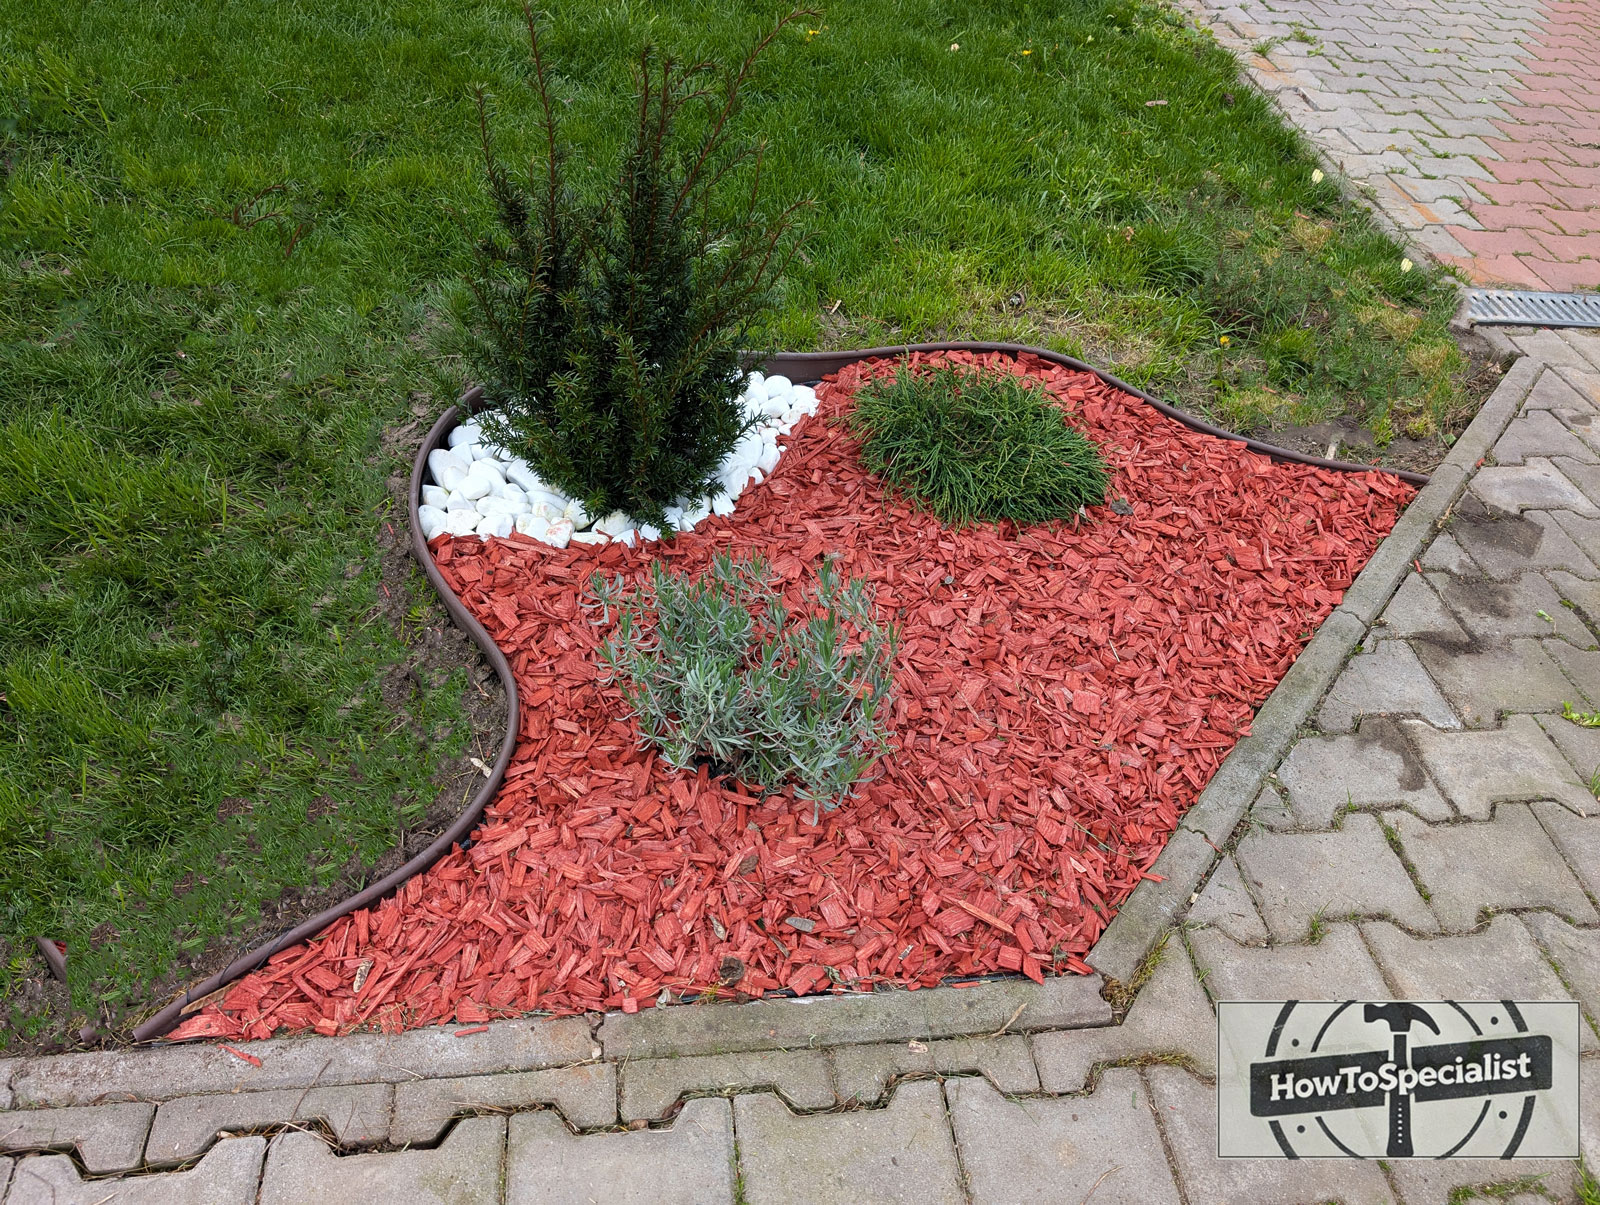
Step 5: Add Mulch and Stones
Here’s where it all comes together:
- Spread the red mulch evenly around the plants — aim for 2–3″ deep.
- Then, use the white stones to edge the plantings or create a swirl or contrasting strip — think of them as the highlight reel.
You could make a crescent moon shape in white rock and fill the rest with red mulch, or do a ring around each plant. Play with it!
Step 6: Clean the Edges and Admire the Upgrade
Grab a broom or leaf blower and clean off any debris. Tug the landscape fabric taut one last time and tuck in any corners.
Stand back and admire. What was once a forgotten patch of grass is now an eye-catching garden accent that brings out the best in your paver path and ties your landscaping together like a rug in a fancy living room.
Wrapping Up
Creating a defined accent area in your lawn does more than just fill up space — it adds structure, contrast, and visual balance to your entire landscape. When you break up open green space with a well-placed border, mulch, stones, and greenery, it guides the eye and creates a sense of intentional design. This kind of visual layering can make even a small yard feel professionally landscaped. The curve of the border softens hard lines from walkways or fences, while the mix of textures (like mulch and stones) adds depth and richness you just can’t get from grass alone.
But it’s not all about looks — this project is functional too. The landscape fabric cuts down on weed growth, saving you time on maintenance. Mulch helps retain soil moisture around your plants and protects roots from harsh weather. Plus, the decorative stones act as a natural deterrent for pests and give you a tidy, finished look that lasts all season. Whether you’re looking to boost curb appeal or just want to enjoy a nicer view from your porch, a simple lawn accent like this brings value in both beauty and practicality. You can also take a look my this raised flower bed project, as well.
Got a favorite mulch-stone combo? Tag me in your yard makeovers — I’d love to see how yours turns out! Until next time, keep building and keep enjoying your yard!