This step by step project is how to build a small paver pad. I wanted to complete my pizza oven project and the last thing to do on the list was the paver pad. In this tutorial I show you how to set a small area with block pavers on a cement screed support layer. This was a quick one day project because the area is small and I had all the materials at hand. You can use the same techniques described in this projects for larger pads, as well. See all my Premium Plans HERE.
A paved area will not only make your yard more beautiful, but it will also keep the surface dry and clean. You can use the small paver area for setting a table with a few chairs. In my case it’s a functional area around the pizza oven which will handle a lot of traffic. That is why I used cement screed as base layer.
Made from this plan
Materials
- paver blocks
- rebars
- sand with pea gravel
- cement
Tools
- Angle grinder
- Rubber Hammer
- Trowel
- Shovel
- Concrete mixer
Time
- 1 day
How to Install Travertine Tiles on Concrete
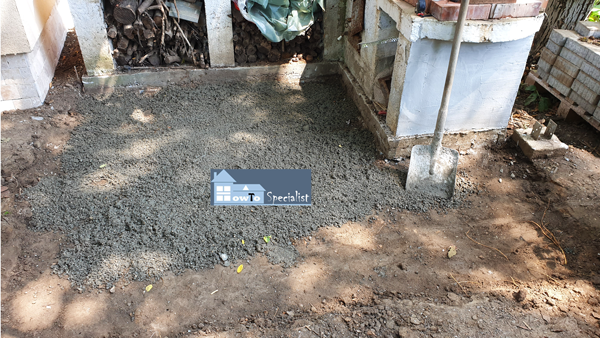
Spreading-the-support-layer
The first step of the project is to remove the top soil and dig about 4″-6″ inches inside the ground. Notice the digging depth also depends on the desired level of the finished pad. Therefore, start with that in mind and deduct the thickness of the pavers and the thickness of the support layer (for pedestrian use 4″ is more than enough).
Since it was a small pad, we used a shovel to take out the soil. We also used a level to make sure the surface is uniform. We spread a 2″ layer of screed along the surface of the pad.
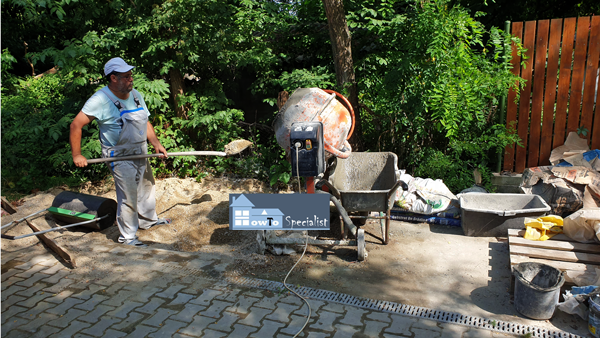
Mixing-concrete
We used a concrete mixer to speed up the process. We used 6 parts sand with pea gravel and 1 part cement. We added enough water to get a properly mixed screed, which needs to be damp and not fluid.
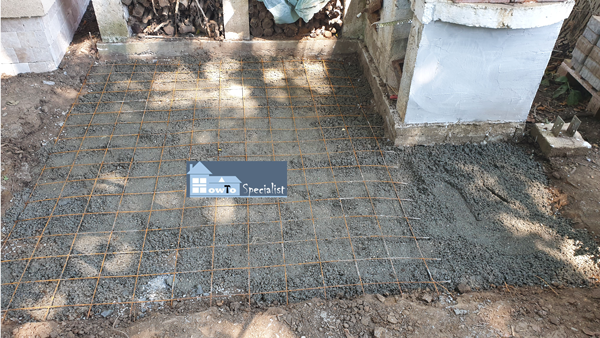
Rebar-mesh-for-concrete-pad
Next, after spreading the base layer, we need to add some rebar mesh to give more structure to the pad. While this not compulsory for pedestrian use, I decided to go ahead and add it, just in case.
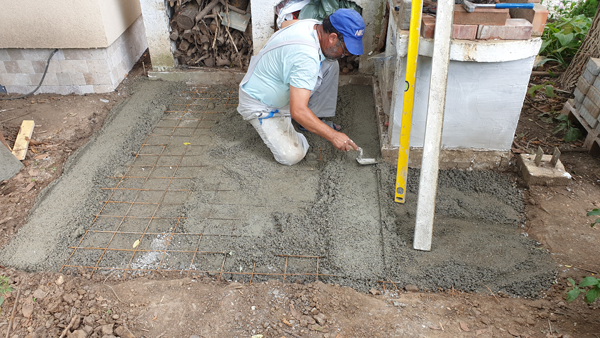
Screeds-for-the-support-layer
Screeding-the-concrete-pad
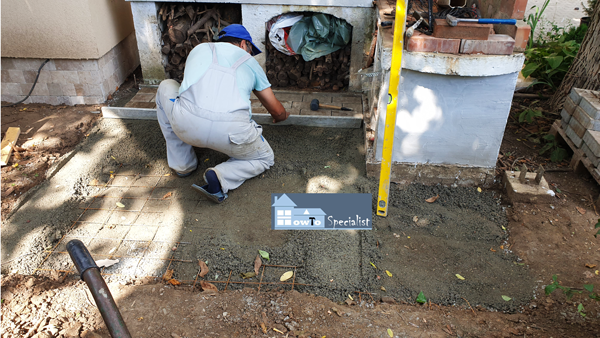
After that, we finished the support layer by adding the remaining 2″ top part. Nitice the screeds on both sides of the pad. The screeds are leveled and then we used a straight edges to fill the remaining area. By following the screeds with the straight edge you will get a perfectly flat surface, just perfect for laying the pavers.
Laying-pavers
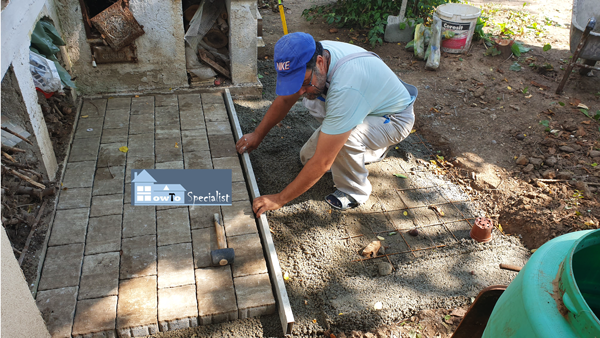
Lay the pavers after laying the screed. Using this technique you do not need any sand under the pavers. The blocks go directly over the screed. That is why is important to use a mix of sand with pea gravel and make it damp. Lay the pavers and use a rubber hammer to level if needed. Also use the straight edge to check if the rows are perfectly straight.
Paver-pad-edges
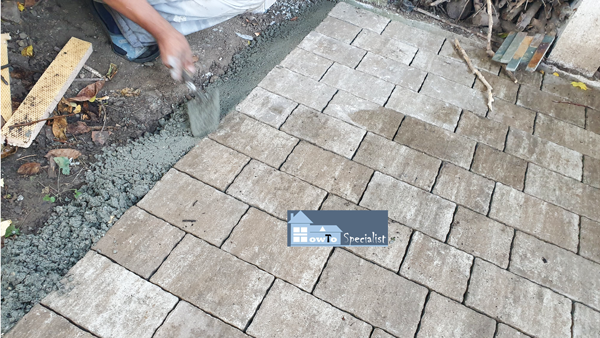
To lock the pavers pad into place we need to address the edges. Therefore you can use paver edging or you can use a much simple technique: concrete and a trowel. I chose plan B and it went really well. Make the edging 45 degree, to ease the water drainage.
Small-paver-pad—diy-project
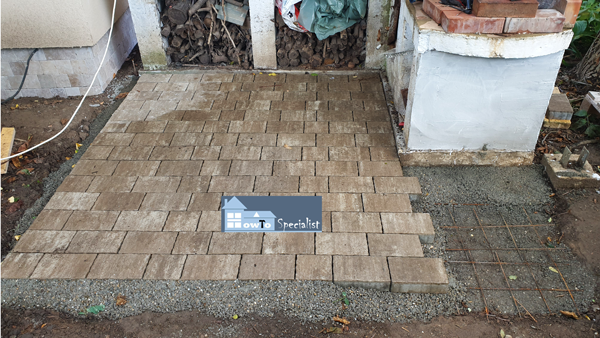
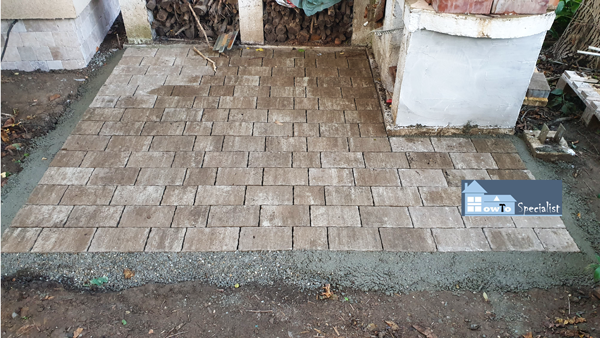
Next, I continued the project with the small portion in the right. I used the same techniques: screed, rebar mesh and pavers.
How-to-do-a-small-pavers-pad
I also set the concrete edging to lock the pavers into place. Really happy with the result. As the screed dried out it will lock to the pavers and create a super rigid base.
Make sure you check out the rest of the Episodes of the Paving Series to see how we built the rest of the fences on the countryside property.
My best tips on doing a small paver pad:
A small paver pad is a simple and versatile project that can enhance your outdoor space. Whether you’re looking to create a cozy seating area, a stable base for a grill, or a walkway in your garden, a paver pad is an excellent choice. Here are my best tips to ensure your paver pad is both durable and attractive.
1. Plan and Measure the Space
- Determine the Size and Shape: Decide the size and purpose of your paver pad. Is it for a small patio, a base for a shed, or a garden path? Measure the area carefully, keeping in mind the size of the pavers you’ll be using.
- Choose the Layout: Choose a layout that complements your space, such as a square, rectangular, or circular pad. You can also decide on the paver pattern, such as a herringbone, basket weave, or simple grid pattern.
- Check for Slope: Make sure the area has a slight slope for drainage, so water doesn’t pool on top of the pad.
2. Gather Your Materials
- Pavers: Select pavers that match your style and project needs. For a small pad, concrete or brick pavers work well. Make sure you purchase about 10% more than you need to account for cuts or breakage.
- Gravel and Sand: Use gravel (crushed stone) as a base and sand for leveling the surface before laying the pavers.
- Edging Material: Choose plastic, metal, or wood edging to keep the pavers in place and prevent shifting.
- Tools: You’ll need a shovel, rake, rubber mallet, level, tamper (or plate compactor), and a broom for spreading sand.
3. Prepare the Ground
- Mark the Area: Mark the outline of your paver pad using stakes and string, or use spray paint for more complex shapes.
- Excavate the Area: Dig out the area to a depth of about 6-8 inches. This includes space for the gravel base and sand, as well as the height of the pavers. Make sure to remove any grass, roots, or debris from the area.
- Compact the Soil: Use a hand tamper or a plate compactor to compact the soil. This step is essential to ensure that the ground is stable and won’t shift over time.
4. Lay the Gravel Base
- Spread Gravel Evenly: Pour 3-4 inches of gravel (crushed stone) into the excavated area. This provides a solid base that allows for proper drainage and prevents the pavers from sinking over time.
- Compact the Gravel: After spreading the gravel, use a tamper or compactor to press it down firmly. Make sure it’s level and solid.
- Check for Slope: As you compact the gravel, ensure that the base slopes slightly away from structures to help water drain properly.
5. Add Sand for Leveling
- Spread the Sand: Pour 1-2 inches of leveling sand over the compacted gravel base. Use a rake to spread the sand evenly across the entire area.
- Screed the Sand: Use a long board or screed to level the sand. You want a smooth and even surface before you start laying the pavers.
- Check the Depth: Make sure the sand layer is level and that the pavers will sit flush with the surrounding ground when installed.
6. Lay the Pavers
- Start in a Corner: Begin laying the pavers from one corner or edge, working your way out. Place each paver on the sand, gently pressing it into place.
- Use a Rubber Mallet: Tap each paver with a rubber mallet to ensure it sits level and snug against the surrounding pavers.
- Maintain Spacing: Use spacers to maintain even gaps between pavers, especially if you’re working with a pattern that requires consistent spacing.
- Check for Level: Continuously check the pavers with a level as you work to make sure the surface is even and aligned.
7. Install Edging
- Add Edging Around the Pad: Once all the pavers are in place, install edging around the perimeter to hold them securely. Edging prevents the pavers from shifting over time and helps keep the shape of the pad intact.
- Secure the Edging: Secure the edging with spikes, making sure it fits snugly against the outer edge of the pavers.
8. Fill the Gaps with Sand
- Spread Jointing Sand: After laying the pavers, sweep fine sand or polymeric sand over the surface. The sand fills the gaps between the pavers and locks them in place.
- Use a Broom to Fill Gaps: Use a broom to work the sand into the joints. Continue adding sand and sweeping until the gaps are completely filled.
- Water the Surface (for Polymeric Sand): If you’re using polymeric sand, lightly mist the surface with water to activate the sand’s bonding properties. Be careful not to flood the area.
9. Compact and Finalize the Surface
- Compact the Pavers: After filling the joints with sand, run a plate compactor over the entire surface to press the pavers into the base. This ensures a solid and level finish.
- Add More Sand if Needed: After compacting, you may notice the sand has settled. Add more sand and sweep it into the gaps as needed.
10. Maintain Your Paver Pad
- Keep the Surface Clean: Sweep the paver pad regularly to remove dirt and debris. This helps keep the surface looking fresh and prevents weeds from growing.
- Replenish Sand Over Time: Over time, jointing sand may settle or wash away. Reapply sand as needed to keep the pavers secure.
- Seal the Pavers (Optional): For added protection and to prevent stains, consider applying a sealer to the pavers. This can also enhance their color and prolong their life.
Thank you for taking a look over my article on how to do a small paver pad. Make sure you share this project with your friends if you like it and please take a look over the rest of my projects, because I have tons of plans and ideas to choose from. See all my projects HERE.
