If you’re looking for a simple yet impactful DIY project, this plan on how to make a wooden star is a fantastic way to add charm and character to any space. This beginner-friendly project uses basic materials and tools, and the results are stunning. Perfect for home decor, holiday accents, or even as thoughtful handmade gifts, these stars can be customized to suit any style. In this guide, we’ll walk you through each step, from cutting and assembling to finishing touches, so you can create a star that shines in your home. Let’s dive in and get building!
This wooden star project is quick and budget-friendly, perfect for a weekend DIY. With just a 1×2 board, some finish nails, wood glue, and basic tools like a miter saw, you’ll have everything you need to get started. Depending on the size of the star and whether you choose to add paint or stain, the whole project can be completed in about 1-2 hours. As for cost, the materials typically run around $5-$15, especially if you already have some supplies on hand. It’s an affordable way to create a beautiful handmade decor piece without breaking the bank!
We recommend you to invest in the best materials you could afford. Therefore, you should buy weather-resistant lumber, such as pine or cedar. Always take accurate measurements before adjusting the size of the components at the proper size. Drill pilot holes trough the components before inserting the wood screws, to prevent the wood from splitting. My plans come with a full cut / shopping list and they are PDF Download and Print friendly. See all my Premium Plans HERE.
Made from this plan
Pin it for Later!
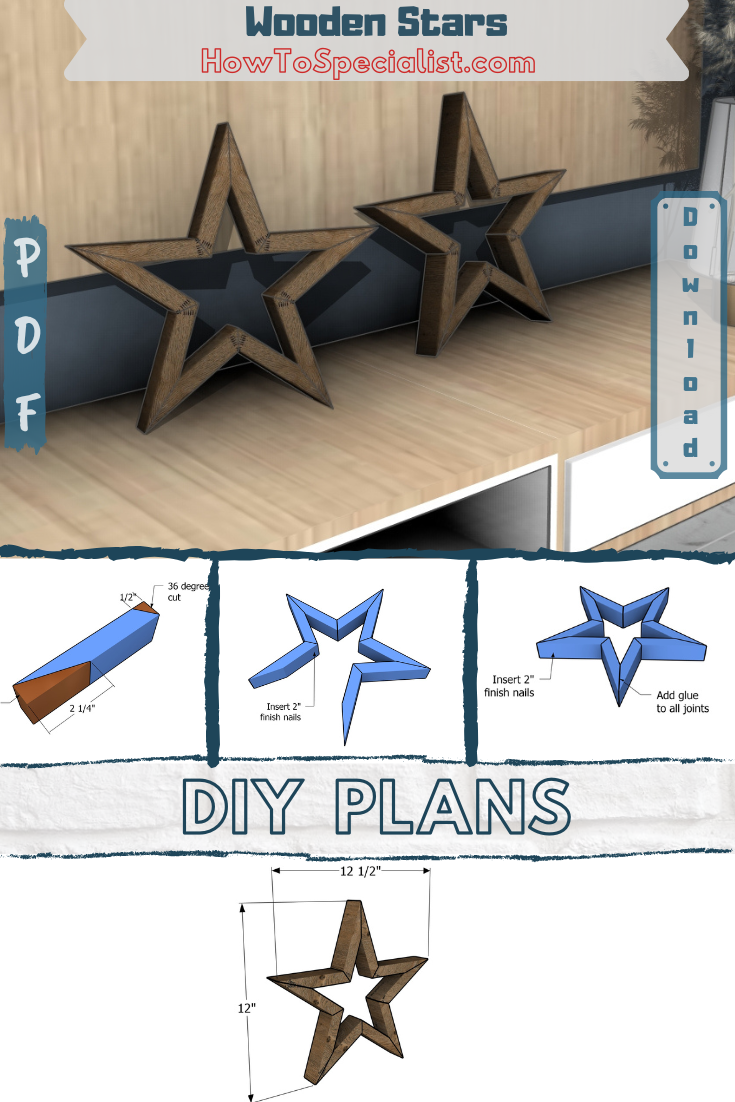
Wooden star plans
Materials
A – 1×2 lumber 5 1/4″ – 10 pieces
- 1×2 lumber 6 ft – 1 piece
- 1 1/2″ / 2″ finish nails – 50 pieces
- Stain / paint – 1 piece
- Glue – 1 piece
Tools
- Miter saw
- Drill machinery, drill bits
- Safety gloves, glasses
- Chalk line, tape measure, spirit level, carpentry pencil
Time
- One week
Related
Step 1: Cutting the parts
Building-the-parts
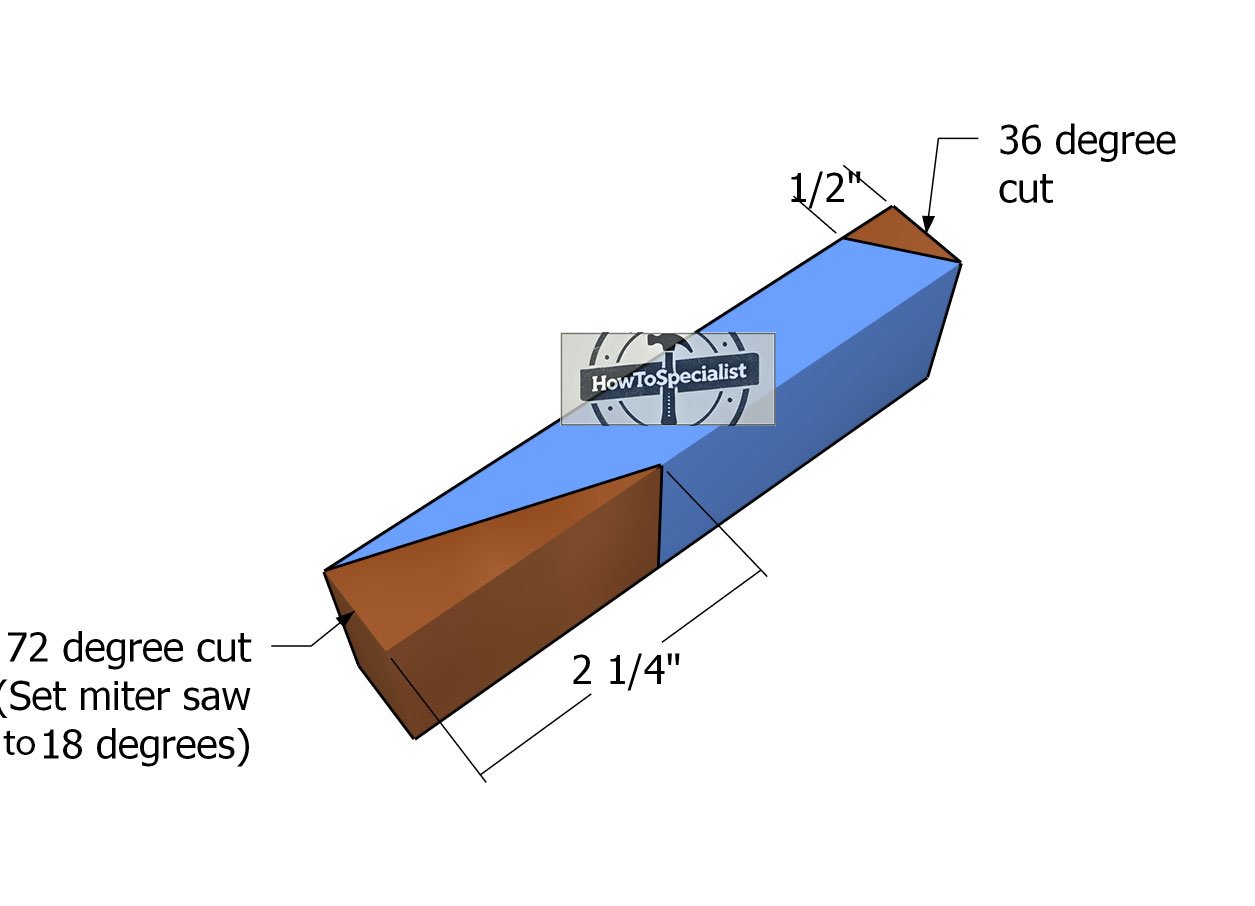
To kick off this project, let’s start by cutting the pieces for the wooden star. Grab a 1×2 board and your miter saw to make those angled cuts. Start with a 72-degree cut on one end, and then follow it up with a 36-degree cut on the other end. These precise angles are key to getting that star shape just right!
Step 2: Assembling the top point
Assembling-the-star-top-angle
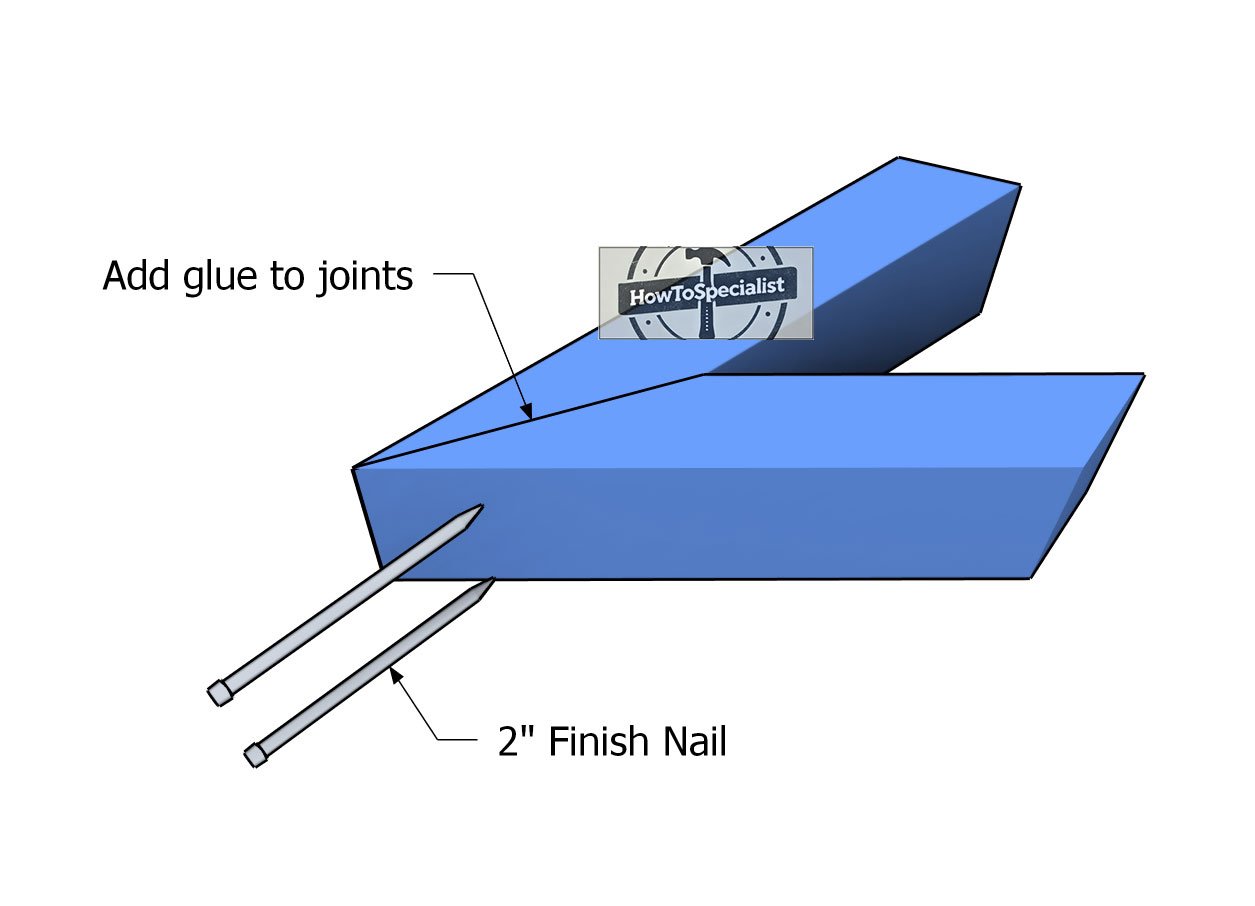
Now, let’s bring the top point of the star together! Lay the cut pieces on a flat surface, making sure the edges line up nice and flush, just like in the diagram. Add a dab of glue to the joints, and then drive in 1 1/2″ or 2″ finish nails to secure everything in place. For extra hold, insert the nails at an angle, it’ll make the whole piece sturdier and give it a cleaner look.
Step 3: Attaching the side elements
Assembling-the-wooden-star
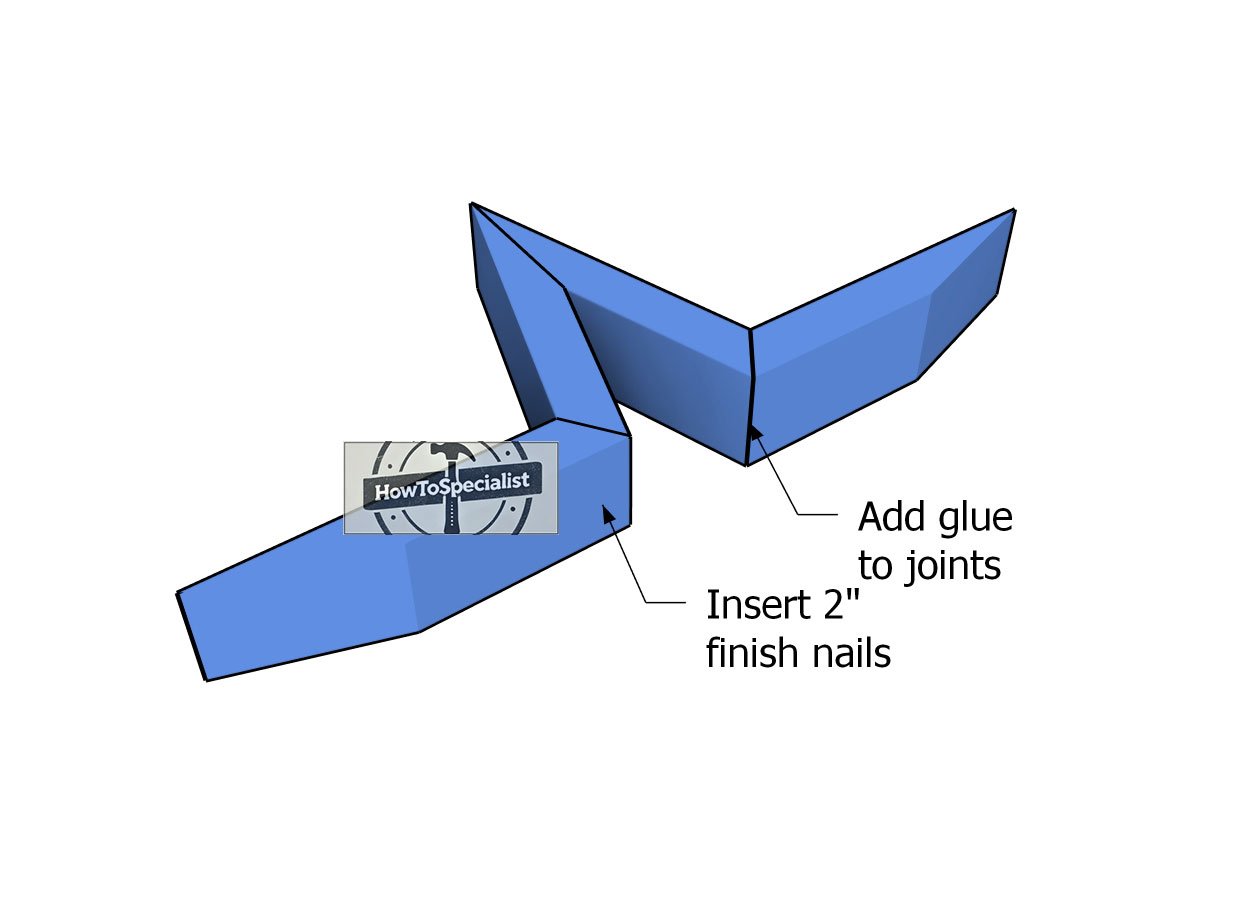
Keep building out the star by attaching the side elements. Line up the edges perfectly, making sure there are no gaps between the pieces for a seamless look. Add some glue at each joint, and then secure everything with 1 1/2″ or 2″ finish nails. For a strong hold, go with two nails per joint—it’ll keep those pieces locked together tightly!
Step 4: Making the side points
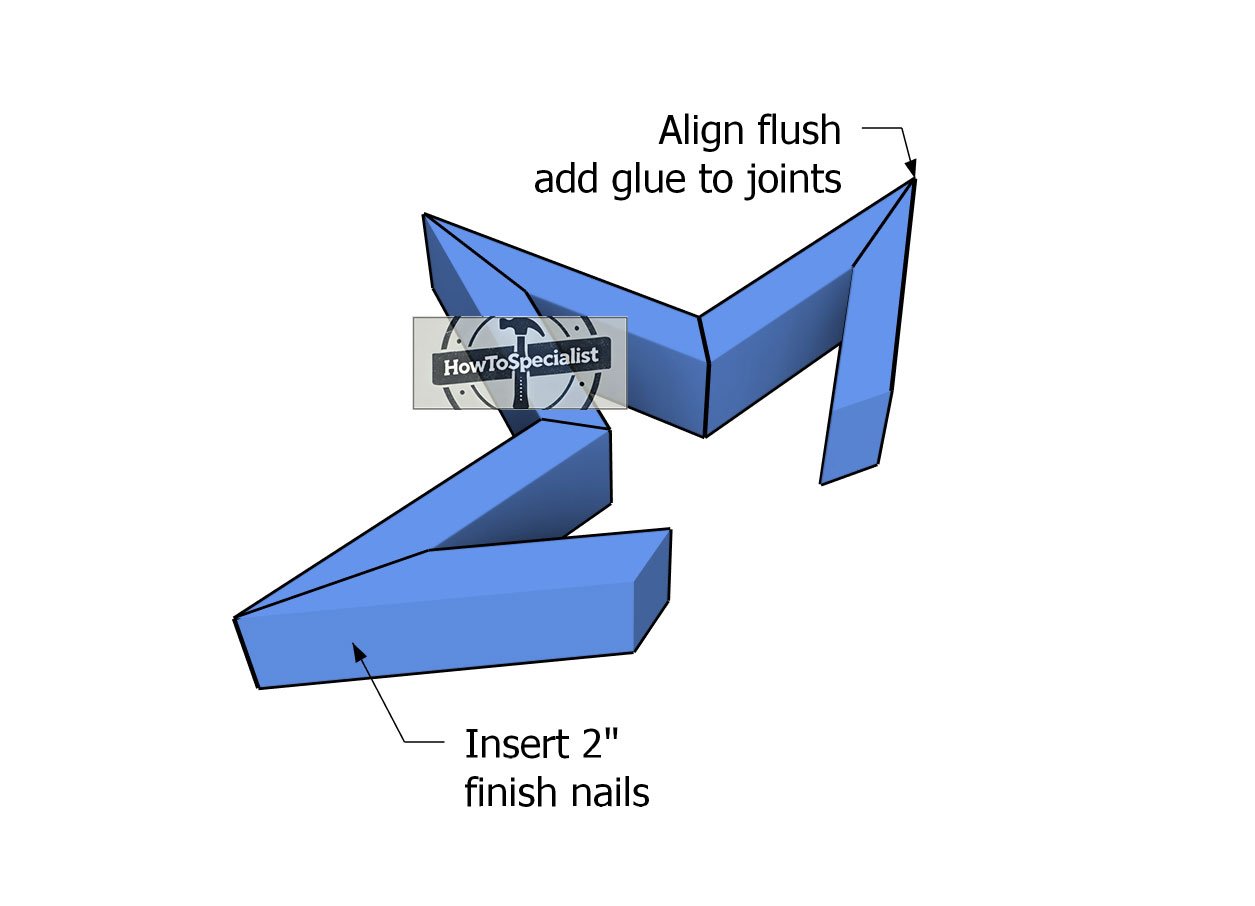
Building-a-star
Now, let’s tackle the side points by adding the next set of elements. Just follow the same steps as before: align the edges flush, add a bit of glue, and secure each joint with 1 1/2″ or 2″ finish nails. Keep everything tight and locked in, and your star will start coming together nicely!
Step 5: Attaching the bottom elements
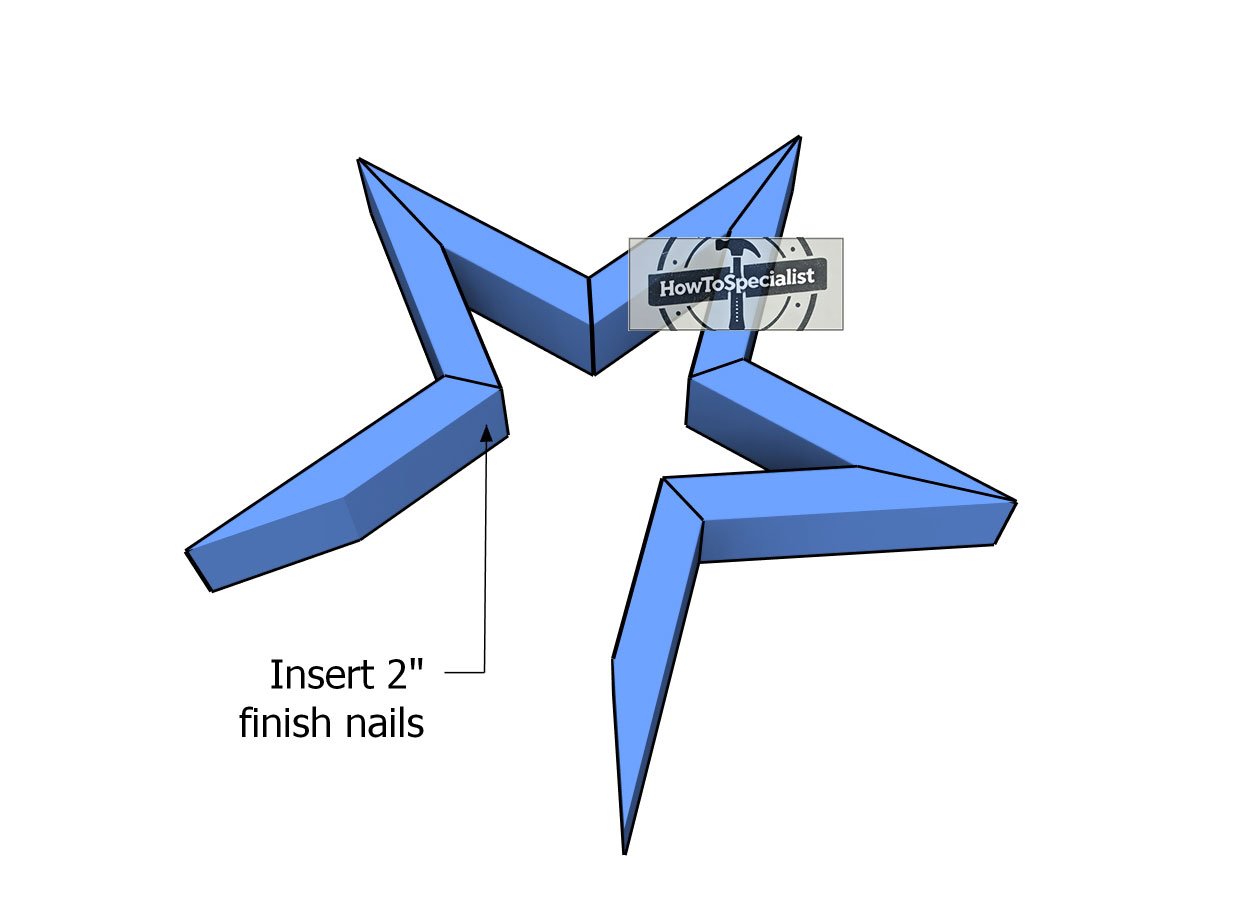
Attaching-the-parts
Finally, let’s wrap up by adding the bottom points to complete our wooden star. Fit the remaining pieces into place, ensuring they align perfectly with the rest of the star. Secure each joint with 1 1/2″ or 2″ finish nails, locking everything together for a solid finish. Your star is almost ready to shine!
Step 6: Building the bottom points
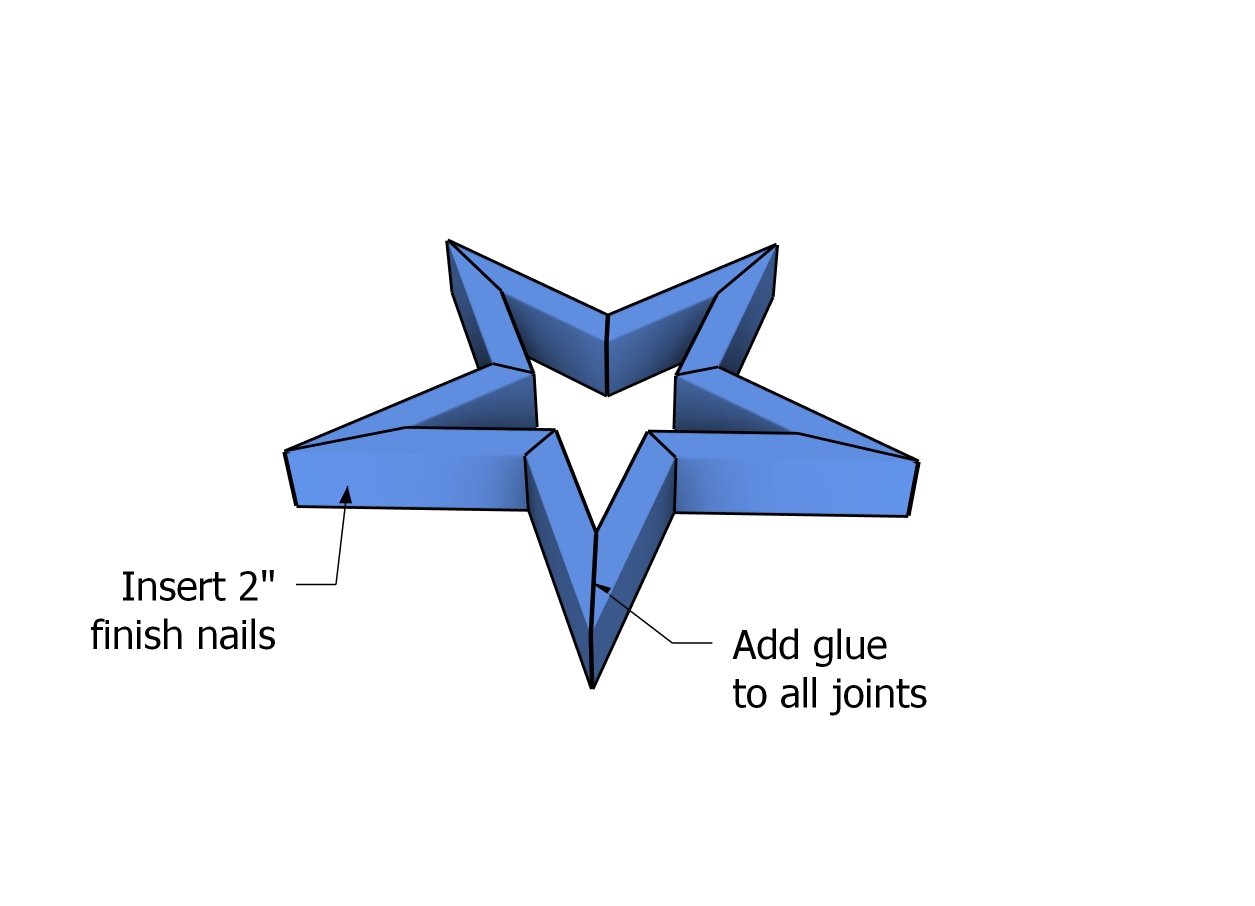
Assembling the star
To bring it all together, let’s fit the final components to complete the star. Attach the remaining boards, making sure everything lines up smoothly, and close up the star. Secure each piece with finish nails as before, and check for a snug fit. That’s it—your wooden star is ready to go!
Step 7: Finishing touches
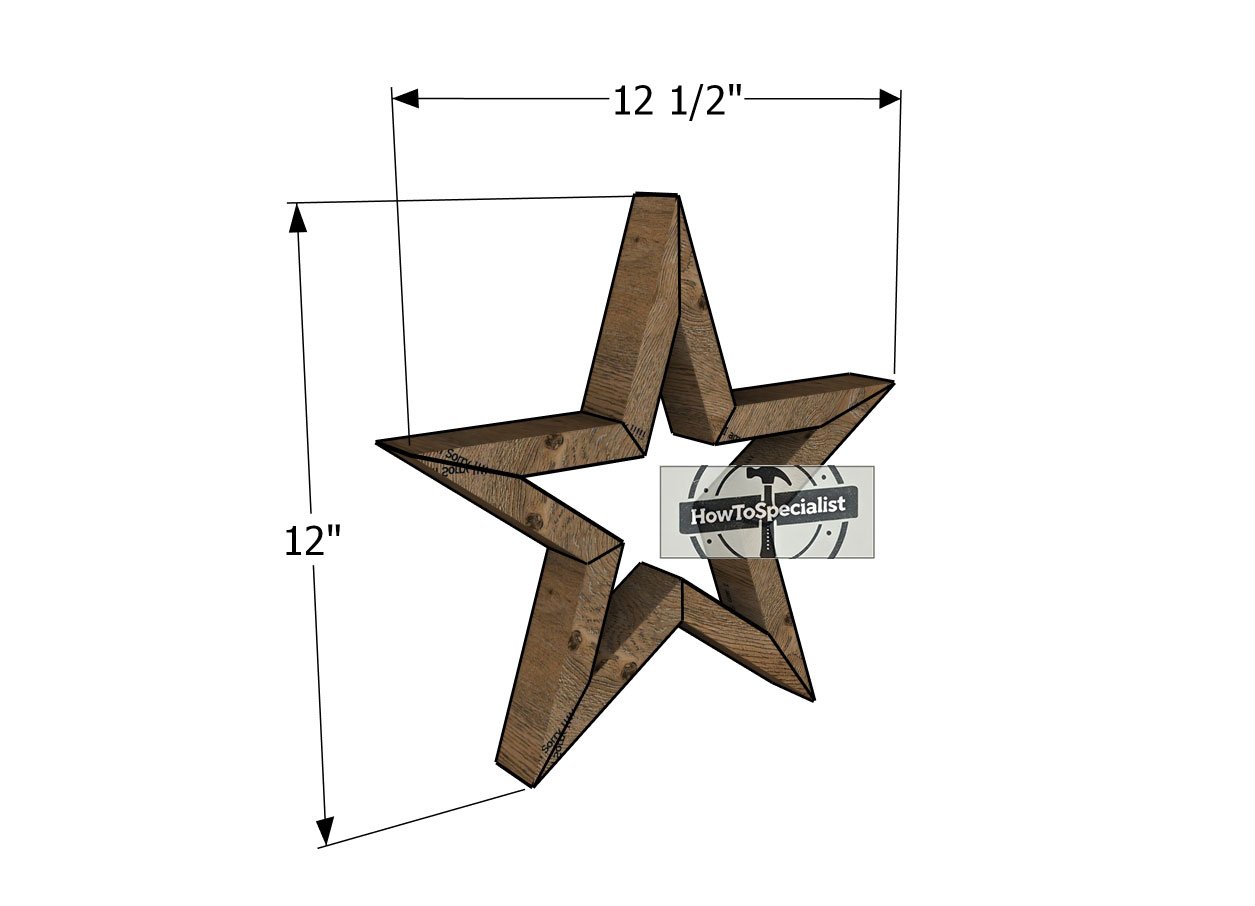
Wooden-star—dimensions
For the finishing touches, sand down any rough edges or uneven spots to give your wooden star a smooth, polished look. Apply a coat of stain or paint if you want to add a splash of color, or leave it natural for a rustic vibe. Seal it with a clear finish to protect the wood and bring out its grain. Once dry, your star is ready to hang or display, an eye-catching piece with a handcrafted charm!
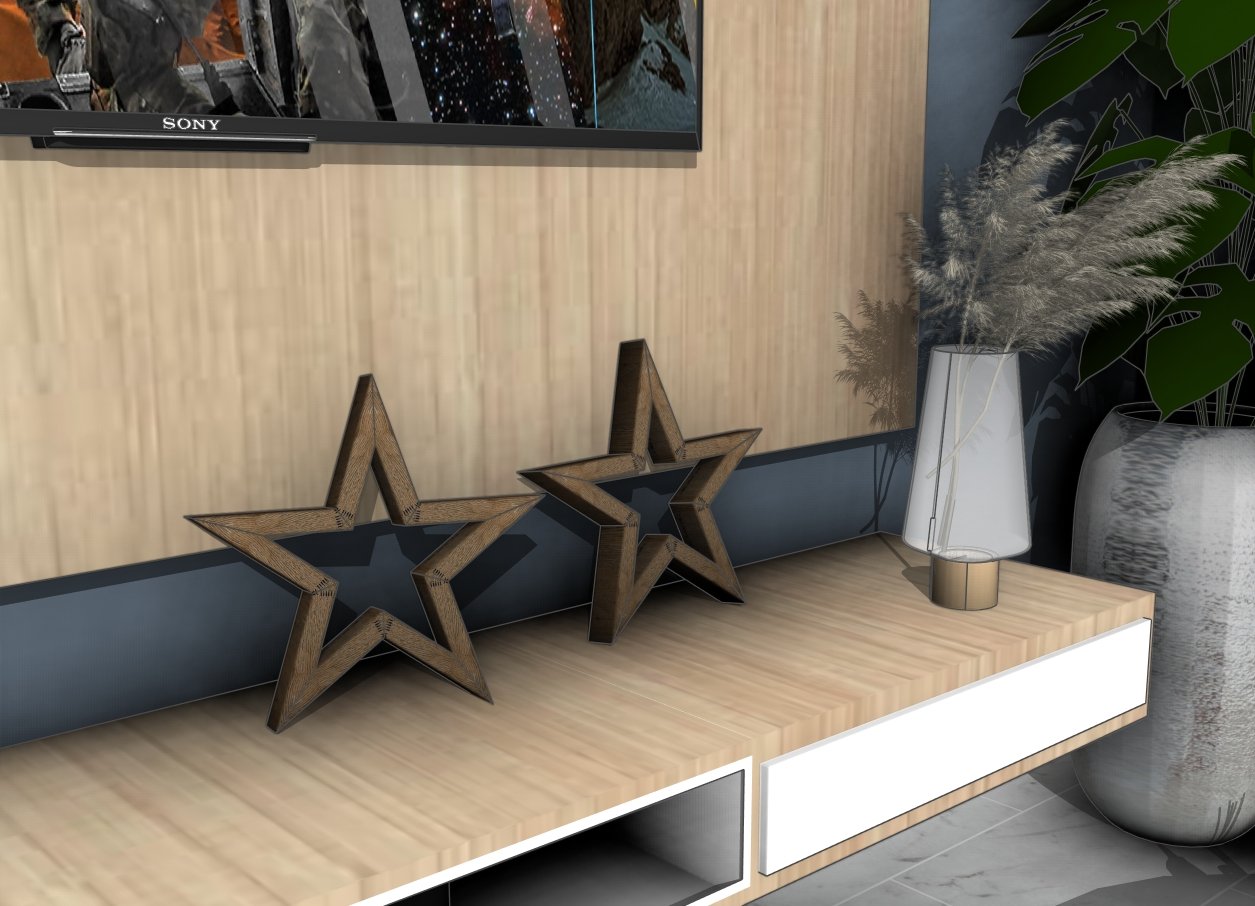
Wooden star – free plans
Once your wooden stars are finished, there are plenty of ways to showcase them! Hang them on a wall as a statement piece, place them on shelves for a cozy, rustic touch, or even add them to your holiday decor for a festive feel. They also make great gifts or outdoor accents, especially if you seal them for weather protection. Whether indoors or out, these wooden stars add warmth and character to any space!

How to make a wooden star
With just a few cuts, some nails, and a bit of creativity, you’ve crafted a beautiful wooden star that’s versatile and full of character. Whether it finds a place on your wall, a cozy nook, or becomes a unique gift, this DIY project brings a handmade touch that truly stands out. Remember, part of the fun is making it your own, so experiment with different finishes, sizes, or even try making a few to create a charming display. Thanks for following along, and build your dreams, one project at a time!
Thanks for checking out my free wooden star plans! Be sure to explore my other projects for more fantastic ideas. Don’t forget to hit the LIKE button and SHARE with your friends using the social media links below.

2 comments
Beautiful star’s. I have made over fifty bigger stars using a fifty four and a thirty six degree angles great craftsmanship
Thank you! Wow, over fifty stars—that’s amazing! Sounds like you’ve perfected those angles. Appreciate you sharing and being part of the community!