This step by step diy article is about how to build a deck on the ground. Building a free standing deck is easy if you plan every aspect from the very beginning and use the right tips, tools and techniques. Generally speaking, wooden decks are a great addition to any house or garden, as they create a multi-functional space, where you can take dinner, spend time with your family and friends or read a book while enjoying the fresh air. The techniques required vary according to the complexity of the project, but we will show you the main woodworking techniques, as to get the job done in a professional manner and to keep costs under control.
Choosing the location for the free standing deck is difficult, as you have to comply with the local building codes and to place it as to enjoy your beautiful backyard. As we speak of a light construction, you don’t have to build a concrete slab foundation, but dig several holes, install tube forms and pour concrete. These footings have to be perfectly aligned and level, otherwise the deck won’t have a professional look.
Work with great care, making sure you take accurate measurements and place the beams and joists symmetrically. Don’t forget that you have to secure the joints between the wooden components by using corner brackets, metal joist hangers and several long screws. If you use screws, you have to drill pilot holes with a drill machinery, as to avoid the wood from splitting.
Made from this plan
In order to build a deck on the ground, you need the following:
Materials
- Tube forms
- 4” and 6” long nails / screws
- Adjustable post anchors
- 2×6 joists
- Cement, sand, gravel
Tools
- Safety gloves, glasses
- Circular saw, chalk line
- Hammer, spirit level, carpentry pencil
- Posthole digger
- Power mixer
Tips
- Lay out the deck in a professional manner, using batter boards and string
- Plan the deck according to your needs and tastes
Time
- Two weekends
How to build a deck on the ground
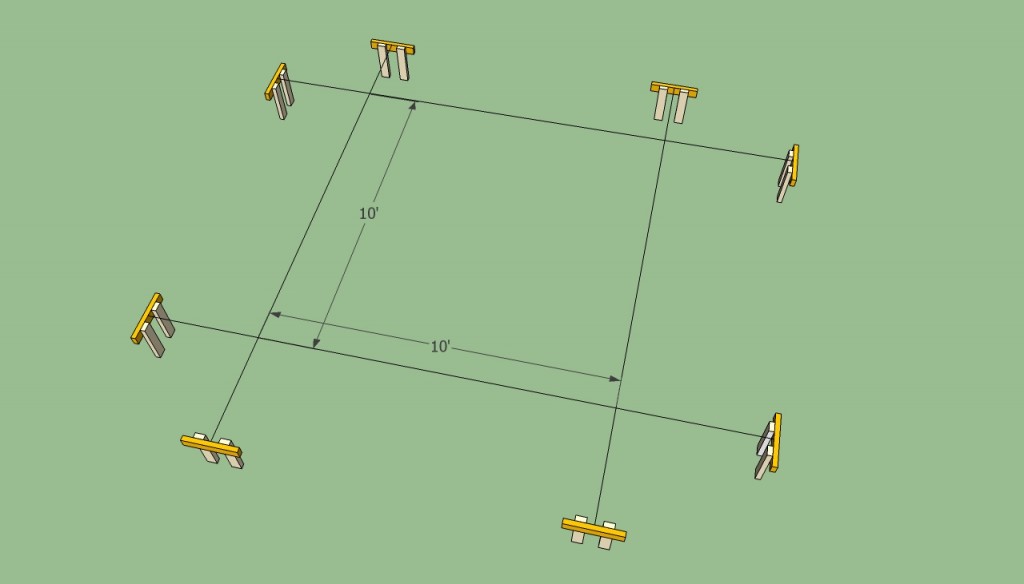
Stand alone deck layout
First of all, you have to set out the free standing deck accurately. In order to work like a qualified professional, we recommend you to build batter boards from 2×4 wooden boards and string. Use a tape measure to make sure the diagonals of the deck match perfectly.
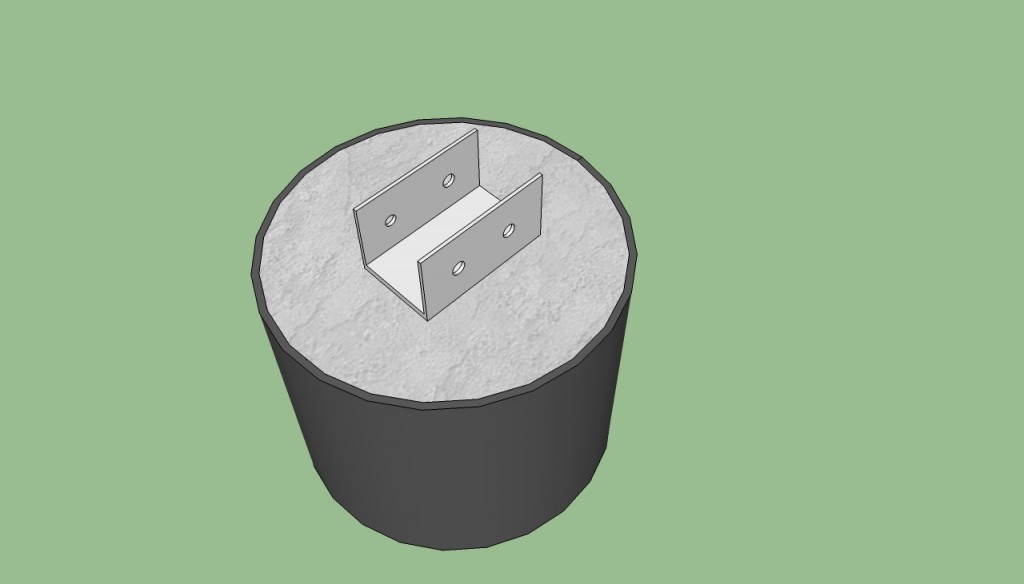
Deck footings
If you want to build a 10×10′ or 8×10′ deck on the ground, you have to pour several concrete footings. Therefore, we recommend you to pour the footings on each corner and consider adding at least one more, on two sides of the deck.
Dig 15” holes with a posthole digger, pour a 3-4” layer of gravel and install the tube forms. In most of the cases, the top of the forms should be 1-2” above the ground level.
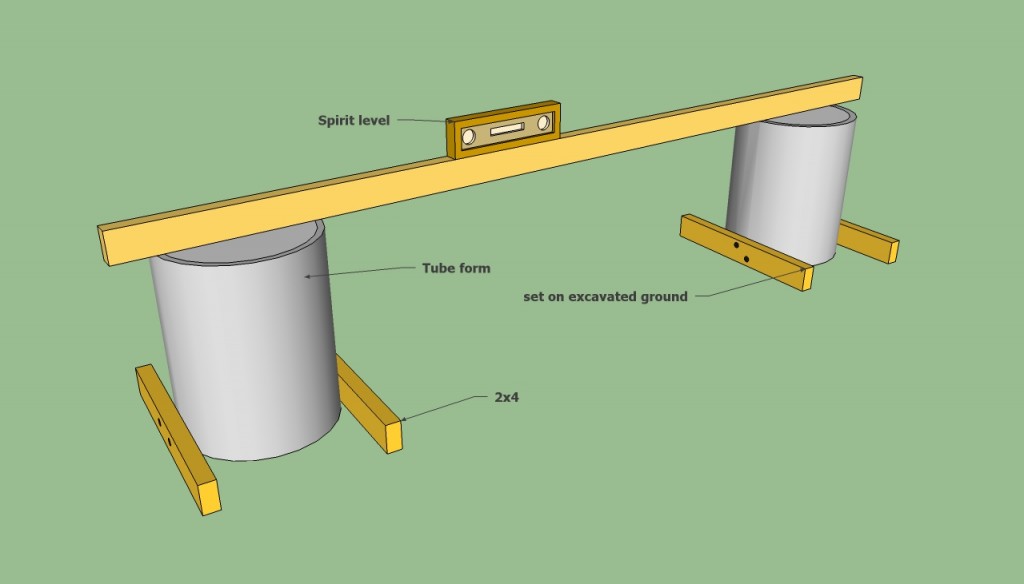
Floating deck footings
Afterwards, use a long straight edge and a level to make sure the footings are perfectly aligned and horizontal. Mix a small quantity of concrete and fill the tube forms, as in the image. Level their surface and install the metal anchors into place.
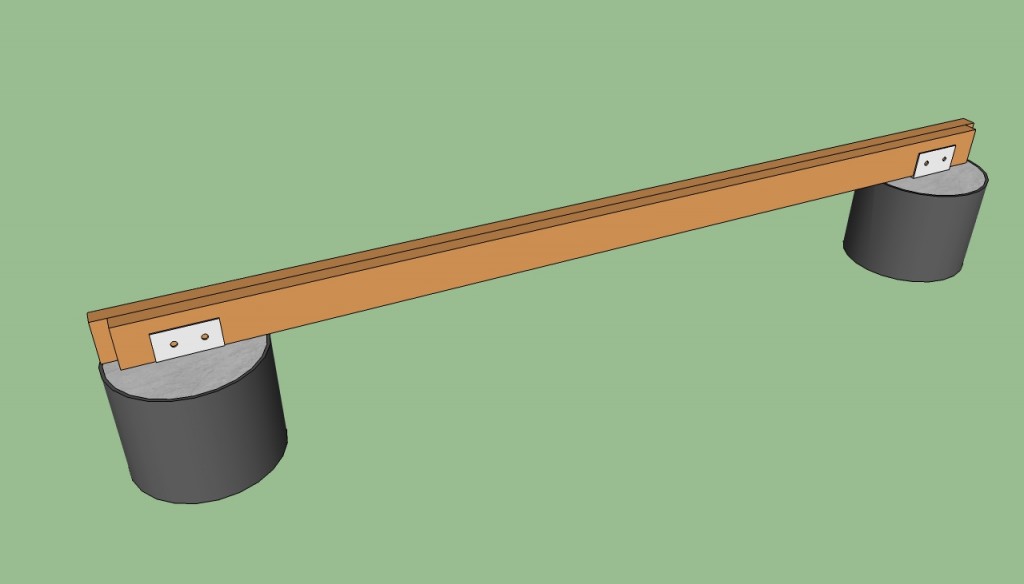
Building perimeter beams
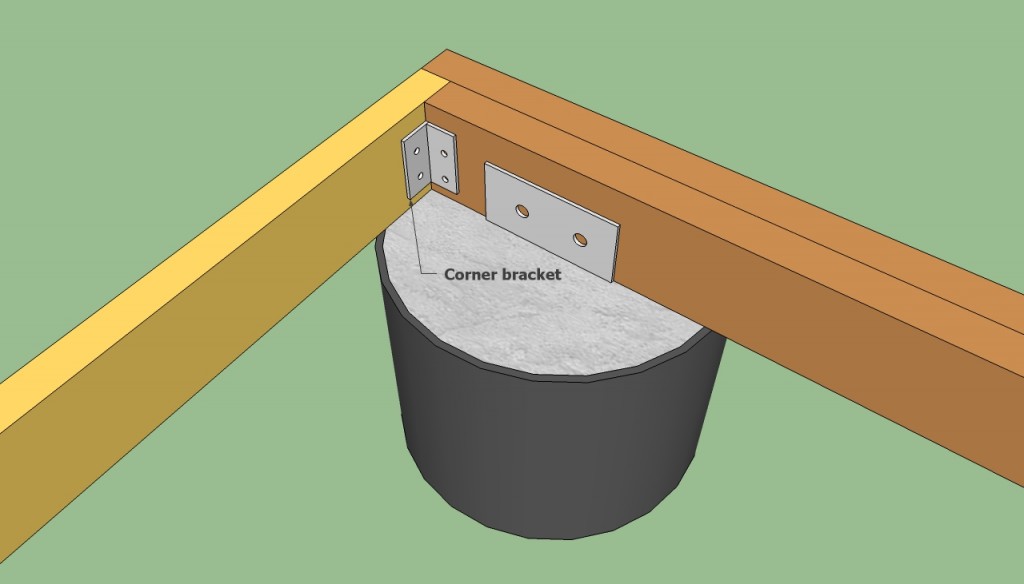
Next, install a beam made of two 2×6, in the post anchors. Don’t forget to add a wooden shim if the anchor is wider than the width of the two beams added. In order to secure the beams into place, you have to drill pilot holes and insert several lag bolts.
Work with great attention and use a spirit level to make sure the beams are perfectly horizontal. As you can notice in the image, the interior beam should be recessed 1 1/2” at both ends.
Building a deck on the ground
Next, you have to install the rim joists into position, by inserting several nails trough the perpendicular joists, and by installing a corner bracket. Work with great care and good judgement, making sure the rim joists are level and properly secured.
Building a deck on the ground
Building a stand alone deck
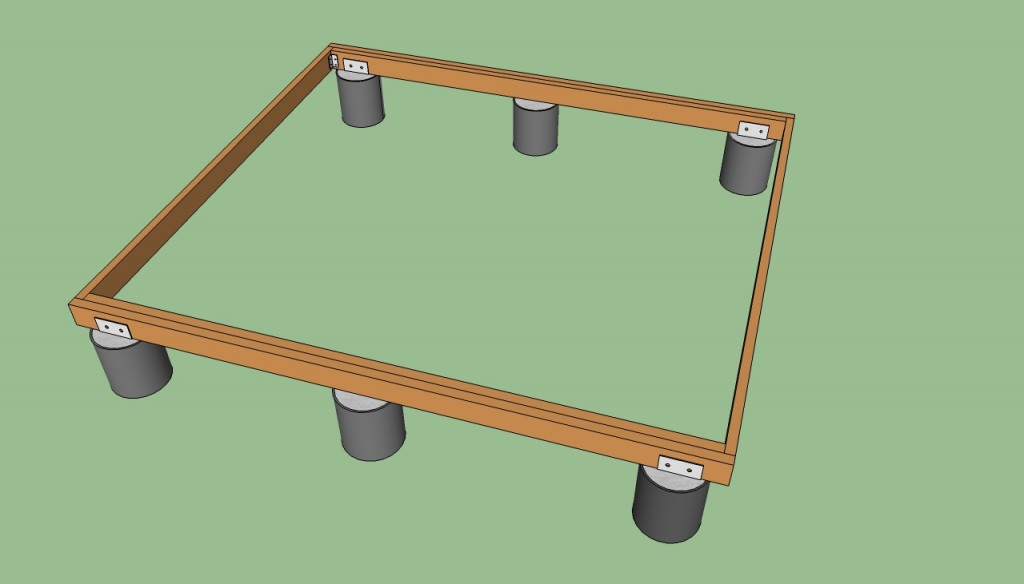
If you have followed our tips and step by step guide, the structure of the free standing deck should look similar to the construction in the image. As you can easily notice, building a deck on the ground is easy if you lay out the structure properly, level the beams with a spirit level and use quality materials.
Before starting the project, you have to make sure the location of the deck is level and the soil structure is able to support the construction.
Installing deck beams
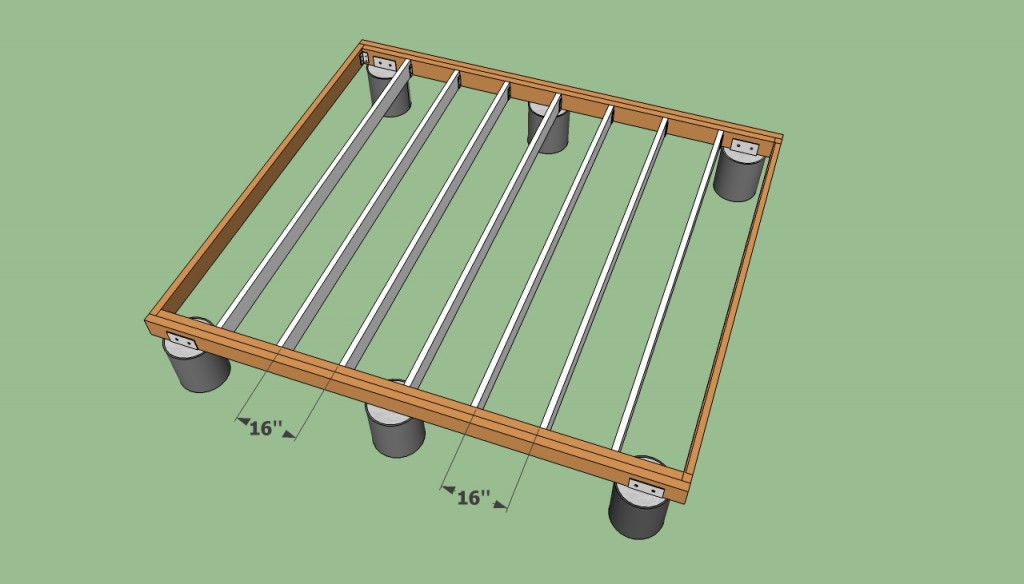
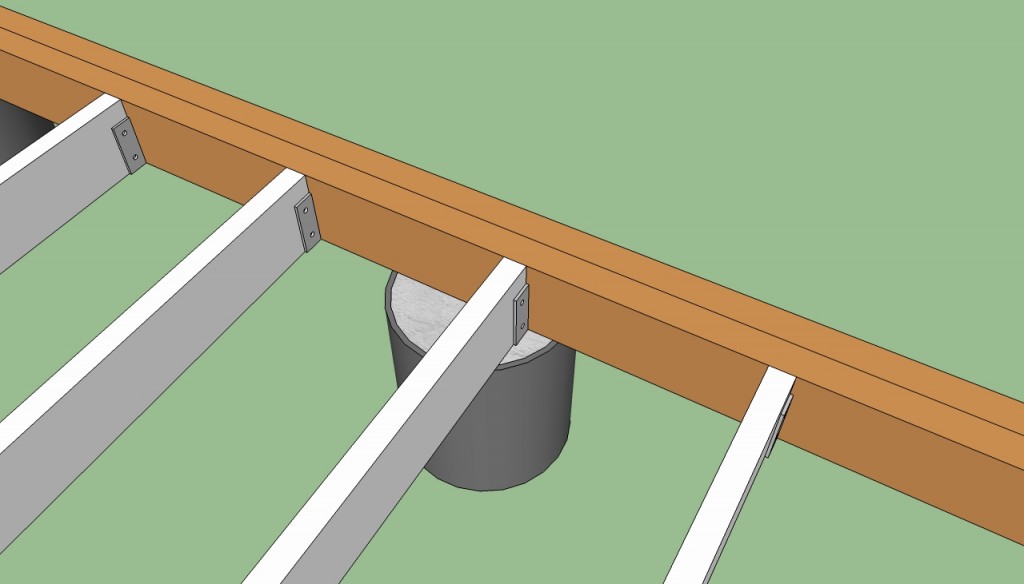
The next step is to install the joists every 16” on center. Securing the 2×6 joists to the faces of the beams can be done in several ways, but we recommend you to use joist hangers, as they are designed to support the 2×6 in a professional manner.
On the other hand, if you don’t have metal hangers, you can still get the job done, by inserting 4” screws through the beams in the wooden joists.
Securing the joists with hangers
In this close up image, you should easily notice the manner in which you have to secure the joists to the beams. Don’t forget that you have to use a tape measure, in order to place the joists equally spaced (every 16” on center).
In addition, use a spirit level to align and plumb the wooden joists, before driving in the screws. Work with great care and attention, if you want to obtain a professional result.
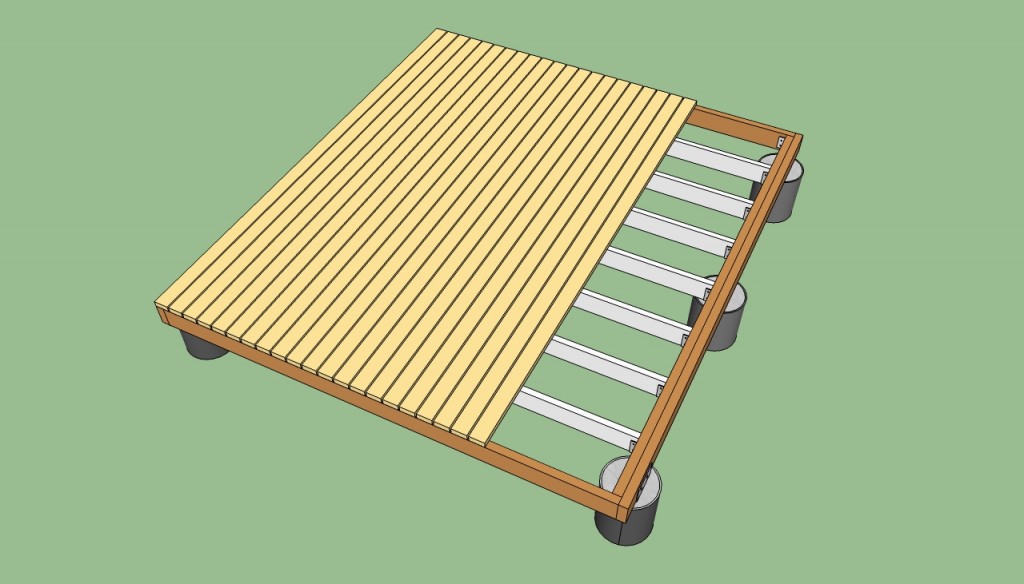
Installing decking boards
Next, you have to attach the decking boards by inserting two screws trough the boards into each joist. In order to drain the water properly, we recommend you to leave 1/10” between the boards (place a nail between the boards to get a consistent gap).

How to build a deck on the ground
After you have installed decking boards on the whole surface of the free standing deck, you should use chalk line to mark the straight cutting line. Next, use a circular saw or a jigsaw to cut the decking boards along the cut line.
In order to smooth the edges of the decking boards, you should either use a router or a sand block with medium sand-paper. Apply several coats of varnish, to protect the wood against water damage or decay.
Thank you for reading our article about how to build a deck on the ground and we recommend you to check out the rest of our projects. Don’t forget to share our articles with your friends, by using the social media widgets.
