This article is about balcony railing designs. Building a balcony railing is not as difficult as it seems at first glance, but the hardest decision is about the design and materials one should use. Consequently, the list of options is almost infinite from traditional wooden railing to glass panels, composite materials or wrought iron. There is no correct or right decision, as it all depends on the design of your house. When choosing balcony railing design, you have to make sure it fits with the other decorative elements of your house and garden, to use the central theme, shapes, materials and colors. Therefore, you have to pay attention when deciding the balcony railing designs as to create a beautiful unitary appearance.
Another aspect you have to take into account when deciding on the balcony railing design is the cost of the materials. Consequently, although a wrought iron railing might look very appealing, you should know it comes at a higher price as compared to traditional balcony wooden railing. Therefore, you should spend a decent amount of time searching for the perfect balance between the cost and look of each option you have on your list.
Last but not least, you should be aware of the following fact: some balcony railing can be maintained easier than other, due to the materials they are made of. Consequently a composite railing will be easier to clean as compared to a balcony wooden railing, which needs to be repainted every 3-5 years, to get a fresh look. See all my Premium Plans in the Shop.
Made from this plan
In order to build an x-shaped balcony railing, you need the following:
Materials
- 4×4 wooden posts
- Post anchors and screws
- 2×3 timber for the x-shaped balusters
- 3×4 bottom rail
- 3×4 handrail
- 6” wood screws
- 3” screws for securing the balusters
Tools
- Safety gloves, glasses
- Circular saw and miter saw
- Hammer, spirit level, carpentry pencil
- Concrete mixer
- Electric screwdriver
Tips
- Use a laser level for accuracy
Time
- One weekend
Top Tips for Choosing Balcony Railing Designs
A well-designed balcony railing can enhance the aesthetics, safety, and functionality of your outdoor space. Whether you prefer a modern, traditional, or rustic look, choosing the right design for your balcony railing is crucial. Here are my best tips for selecting and designing balcony railings that fit your style and needs.
1. Consider the Material
The material of your balcony railing sets the tone for its overall design, durability, and maintenance needs:
- Wood: A classic choice, wood railings provide a warm and natural look. They can be stained or painted to match your outdoor decor, but they require regular maintenance to prevent rot or weathering.
- Metal: Wrought iron, steel, and aluminum railings are popular for modern or industrial designs. These materials are durable and can be powder-coated for long-lasting protection. Metal railings often feature sleek lines or intricate detailing.
- Glass: For a contemporary, open look, glass railings are a great choice. They allow unobstructed views and give a balcony a clean, airy feel. Choose between clear, frosted, or tinted glass to suit your privacy preferences.
- Cable: Stainless steel cable railings are a minimalist option that pairs well with both modern and rustic styles. They offer an open, streamlined appearance and are low-maintenance.
- Vinyl: If you’re looking for a low-maintenance option, vinyl railings can mimic wood or metal but are more resistant to weathering, making them ideal for areas with high exposure to the elements.
2. Match the Style to Your Home
Choose a railing design that complements the architectural style of your home:
- Modern homes: Opt for clean lines, minimal detailing, and materials like metal, glass, or cable. These styles create a sleek, contemporary look.
- Traditional homes: Go for wood or wrought iron railings with classic details like turned spindles, balusters, or ornamental scrollwork to match the traditional aesthetics.
- Rustic homes: Choose wood or metal railings with a rough, natural finish. Log railings or weathered wood can complement a rustic or country-style home beautifully.
- Coastal homes: Consider white wood or vinyl railings, paired with glass or cable to allow for open views of the ocean or natural surroundings.
3. Prioritize Safety
Safety is key when designing a balcony railing, especially for upper-level balconies:
- Height requirements: Check local building codes for the minimum height requirement for balcony railings, typically around 36 to 42 inches.
- Spacing: Ensure the spacing between balusters or rails is no wider than 4 inches to prevent children or pets from slipping through.
- Sturdy materials: Use durable, weather-resistant materials that won’t degrade or weaken over time, especially in harsh weather conditions.
Prioritizing safety doesn’t mean sacrificing style—many beautiful designs meet or exceed safety standards.
4. Incorporate Vertical or Horizontal Lines
The orientation of the railing elements—whether vertical or horizontal—can impact the overall look of the balcony:
- Vertical balusters: Traditional designs often feature vertical spindles or balusters, creating a more classic and enclosed feel. Vertical designs are great for both wood and metal railings.
- Horizontal rails: For a modern or industrial look, opt for horizontal rails or cables. Horizontal lines emphasize a wider, more open appearance.
- Mixed designs: Consider combining both vertical and horizontal elements for a unique, balanced design that adds visual interest to your balcony.
5. Open vs. Solid Railings
The amount of openness in the railing can dramatically change the feel of your balcony:
- Open designs: Cable, glass, or spindle railings allow light and air to flow freely while giving you an unobstructed view. These designs create a sense of openness and space.
- Solid designs: For added privacy, consider using solid panels made of wood, metal, or frosted glass. Solid designs are great for balconies in close proximity to neighbors or busy streets, giving you more privacy without compromising style.
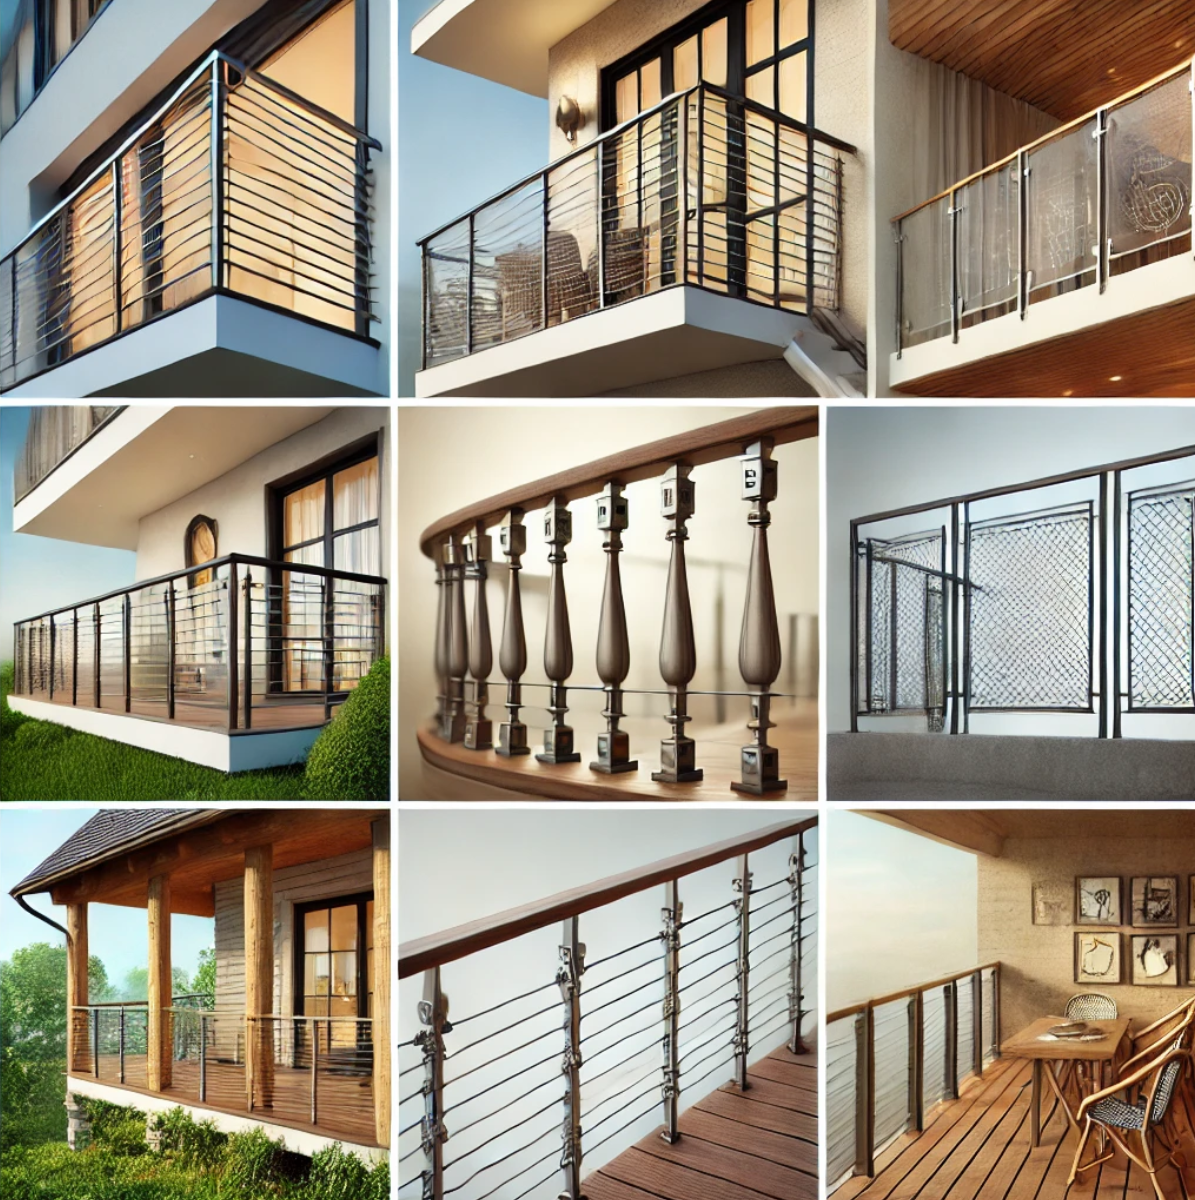
6. Consider the View
If your balcony has a scenic view, you’ll want to choose a railing design that enhances rather than obstructs it:
- Glass panels or cable railings are ideal for preserving the view, as they provide an unobstructed sightline.
- For more subtle, minimal designs, thin metal or wood railings can complement the landscape without blocking the view.
If privacy is a concern, but you don’t want to obstruct the view completely, consider frosted glass panels.
7. Add Decorative Details
Decorative elements can elevate the look of your balcony railing:
- Metal railings often feature ornamental designs like scrollwork, curved balusters, or intricate patterns for a more personalized and artistic touch.
- Wood railings can be accented with carved posts, caps, or decorative trims that add charm to the overall design.
- For a rustic look, use natural wood with knots and grain patterns visible, or incorporate wrought iron detailing in between the wood slats.
Decorative details can personalize your railing design and tie it into your overall outdoor decor.
8. Maintenance Considerations
Choose a railing design that suits your maintenance preferences:
- Wood railings require regular maintenance, including staining or sealing to protect against weathering and rot.
- Metal railings are durable, but may need to be repainted or re-coated over time to prevent rust, especially in humid or coastal areas.
- Glass railings require regular cleaning to keep them clear and streak-free but offer long-lasting durability.
- Vinyl and cable railings are low-maintenance, requiring little more than periodic cleaning to keep them looking great.
Bonus Tip: Use Lighting to Enhance the Design Incorporate LED lighting or solar lights into the railing design to create a soft glow at night. Lighting not only improves safety but also highlights the beauty of your balcony railing in the evening.
Build balcony railing

House balcony
First of all, you have to measure your balcony as to get its dimensions. In order to get the job done in a professional manner, you have to measure its width in more places, as to see if the balcony is even. Next, you have to use a 4′ spirit level to check the floor of the balcony. If you notice some problems, you have to adjust the balcony floor until you get the desired result. The preparation stage might look unimportant, but we assure you it is essential for your project.

Installing post anchors
Next, after you have prepared the balcony surface and you have chosen the railing design, you have yo install the post anchors. In order to do a professional job, you should use a tape measure and line chalk, as to make sure the post anchors are aligned.
Remember that you should place the post hardware equally space one with another, otherwise your balcony railing design won’t look good.
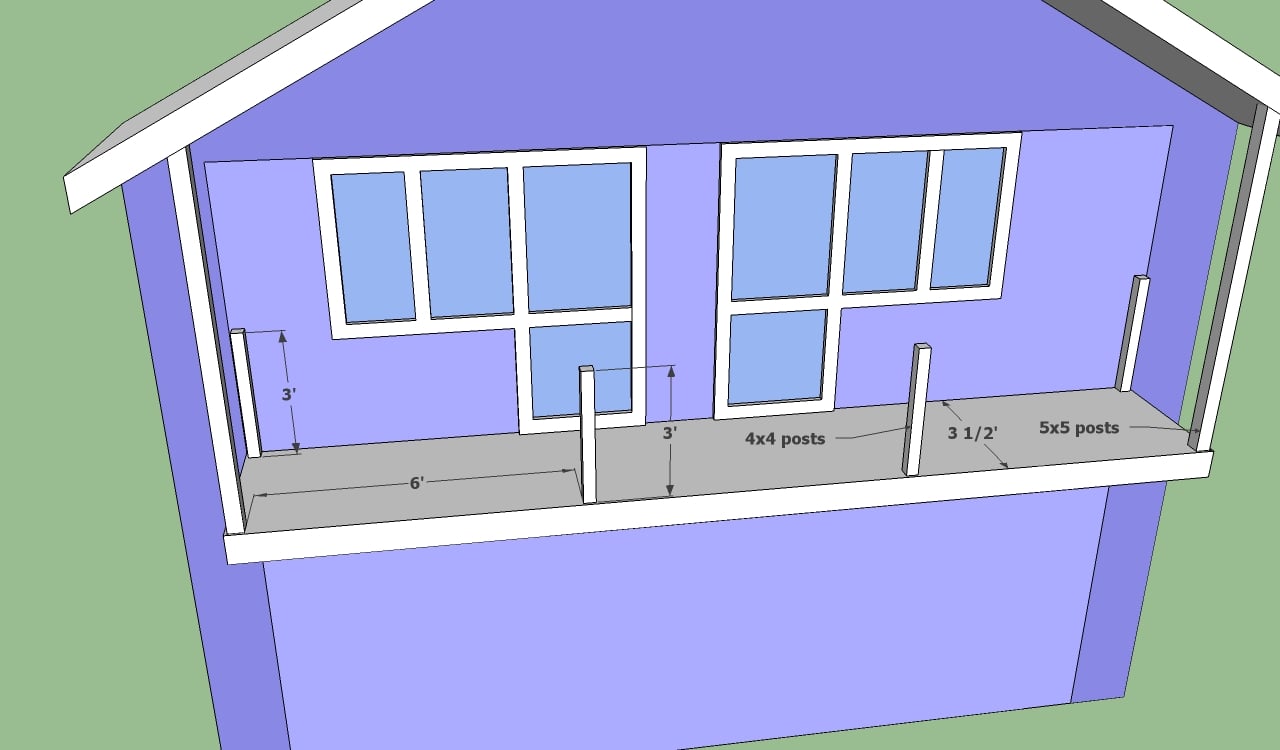
Installing balcony posts
Next, you have to lock the wooden posts into position, by using several lag screws and a wrench key. This operation is not difficult, provided you use a spirit level and make sure the posts are plumb on all sides.
You should notice that you have to install posts along the walls, on both sides of the balcony railing. Use a water level to make sure the top of the posts are perfectly level.
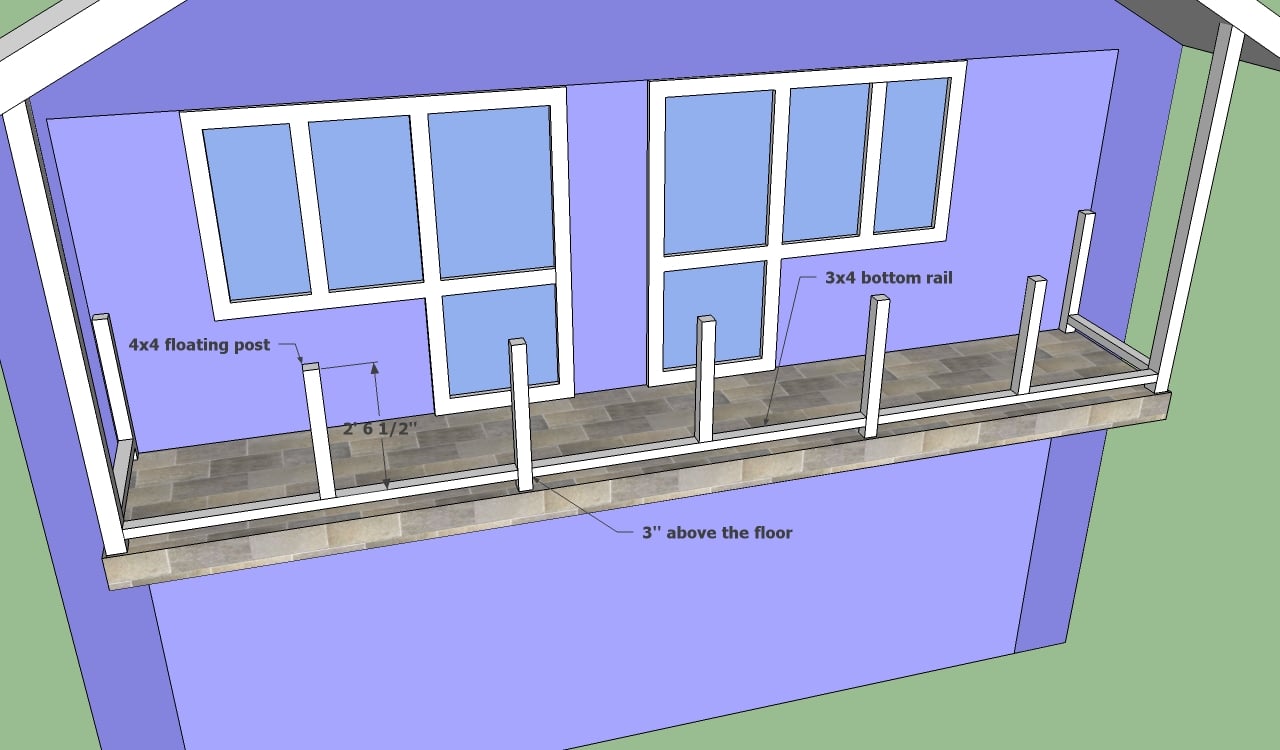
Installing balcony bottom rail
Next, you have to install the bottom rail of your balcony railing. You should notice that on the middle of each bottom rail segment you have to install a floating post, by using a dowel joint, glue and a 6” wood screw.
It is important to follow these balcony railing plans, otherwise the space between the balusters will be too large. Choose the best materials you can afford, as to build a durable balcony railing.

Installing balcony balusters
Next, you have to cut and install the x-shaped balusters between the wooden posts. In order to do that, you have to drive in a couple of 3” wooden screws at each end of every baluster. The most efficient way to cut the balusters at angle is to use a good miter saw.
When securing the balusters, you have to make sure they are perfectly aligned, otherwise you won’t get the desired result.

Balcony wooden railing
Last but not least, you have to install the handrail. Consequently, the handrail should be secured properly to the balcony posts, as to lock it into position. You could use 6-7” wood screws to fasten the handrail to each post, after you have made pilot holes.
For a neat look, try to countersink the heads of the screws and fill them with wood putty.
Balcony railing designs
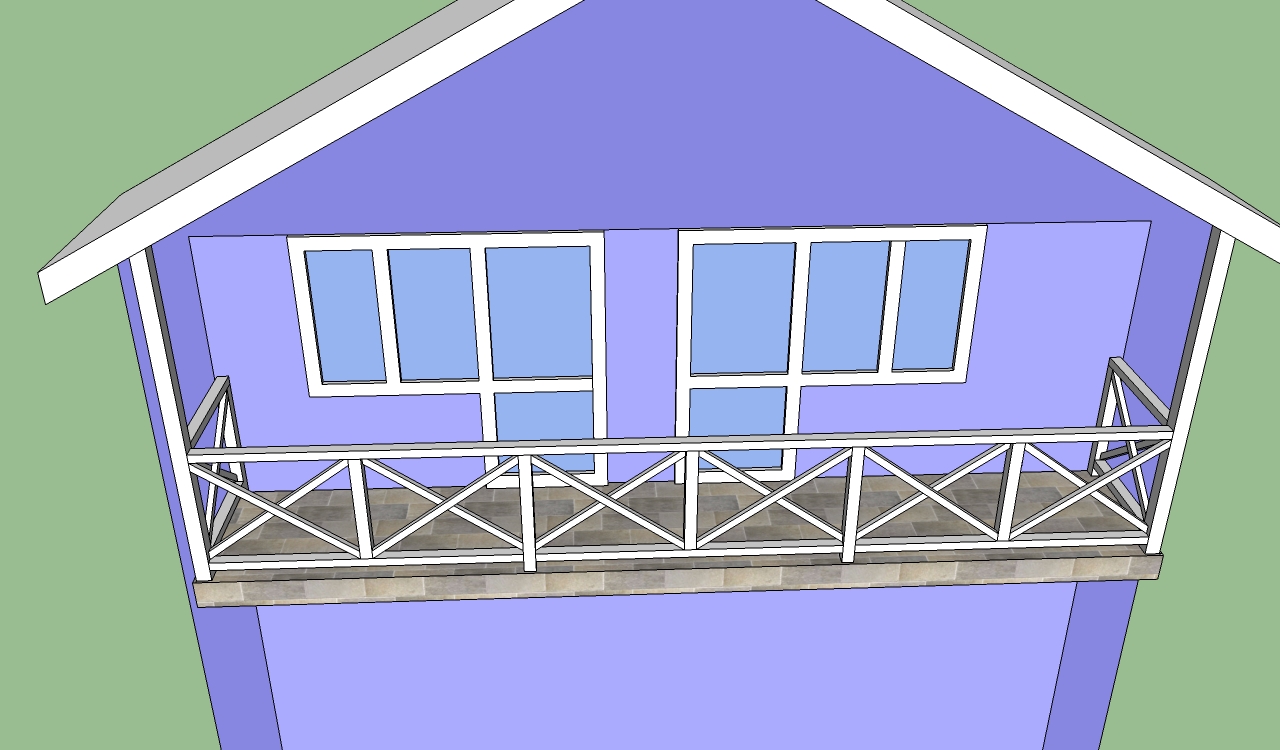
Balcony railings
In this article we have talked about balcony railing design by illustrating this subject with a nice looking balcony railing with x-shaped balusters. This balcony might look simple, but we can assure you it will fit perfectly with a modern house or with a lodge house.
If you use pressure treated wood, your balcony railing will last for many years in a row. The only drawback is that you have to apply new coats of paint every 3-5 years, as to freshen up its look.
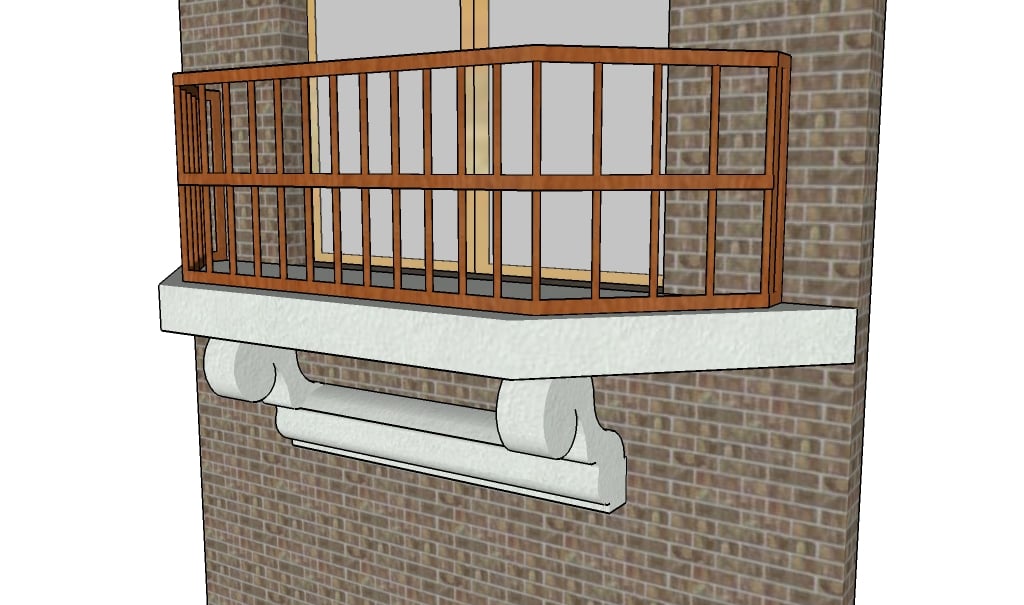
Balcony railing designs
If you want to enhance the look of your home, this balcony design might be exactly what your are looking for. The simple balcony railings can be made out of wood or metal.
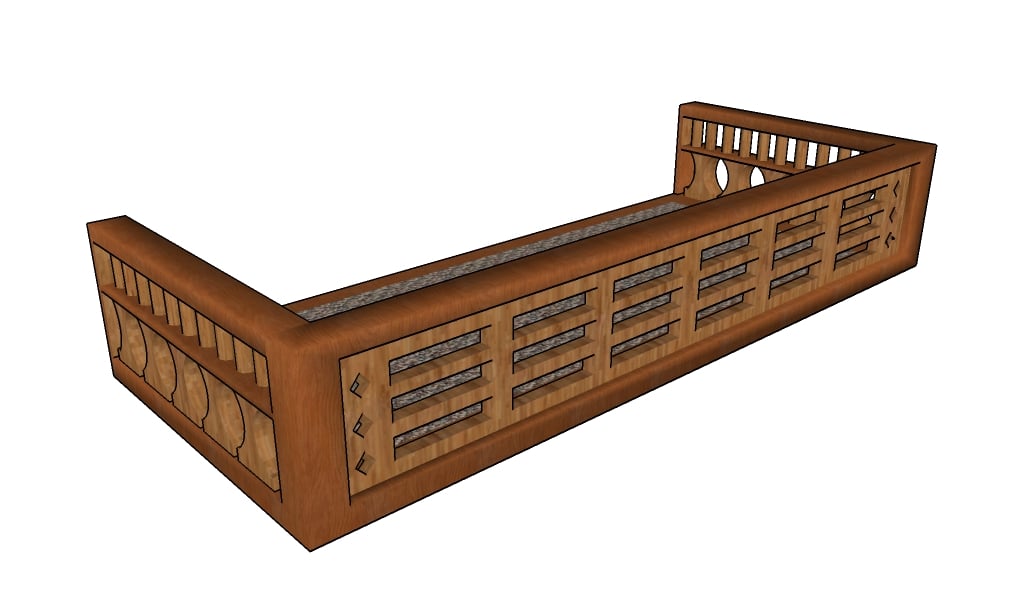
Old-fashioned balcony
If you want to build a home with an ever lasting design, we recommend you to build these old-fashioned balcony railings. It requires expert craftsmanship, but the end result will be breathtaking.
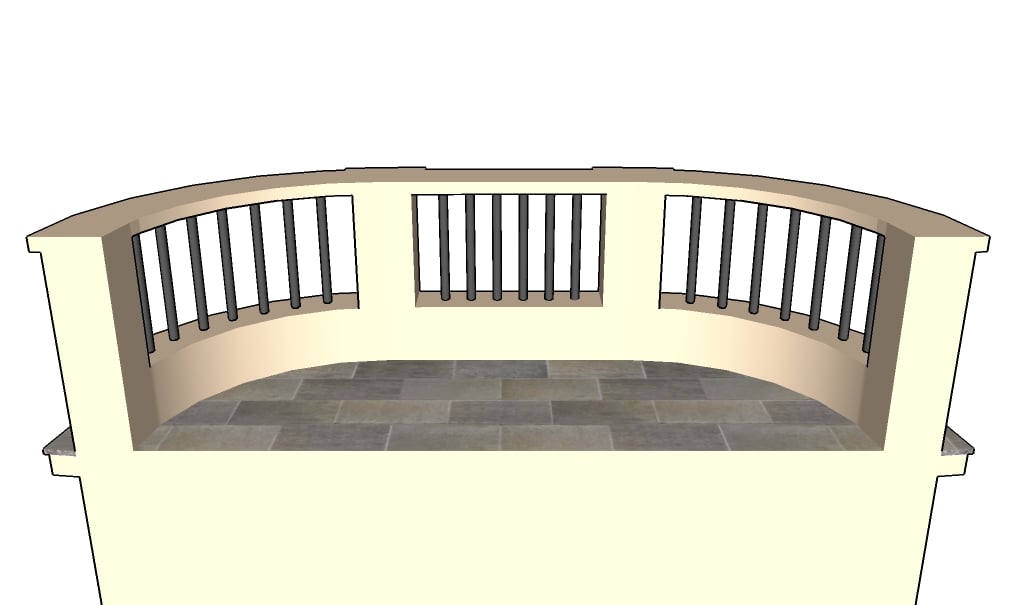
Concrete balcony
A concrete balcony is a common solution, as it adds character to any construction. Make sure the balcony is strong enough to support the extra-weight of the concrete balcony.
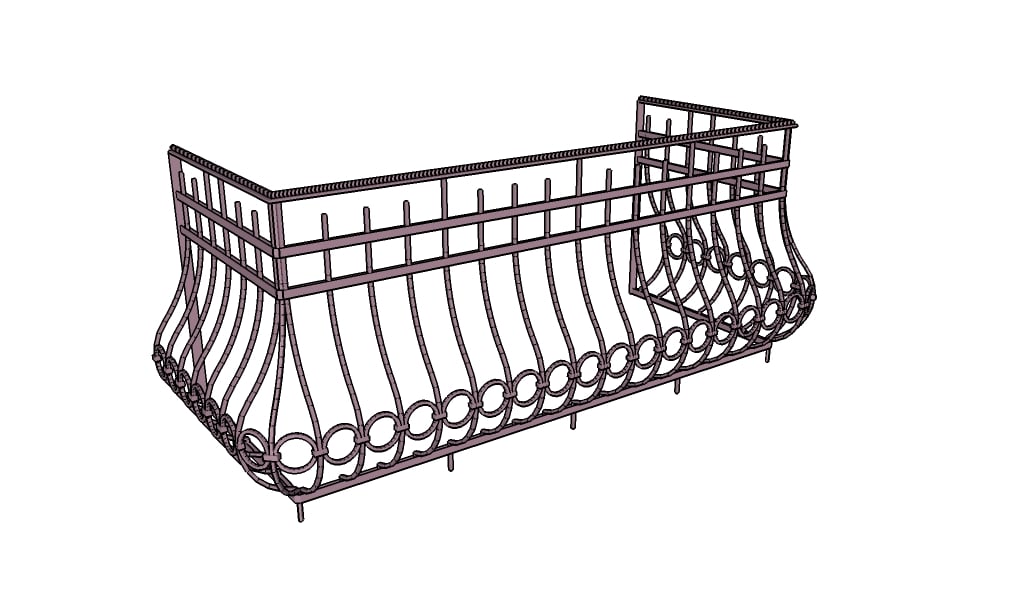
Wrought iron balcony
Last but not least, using wrought iron for the balcony railing is a great idea, especially if you have an appropriate budget for it. Work with attention and select the design that suits your needs best.
By following these tips, you’ll be able to choose or design a balcony railing that balances safety, style, and functionality. Whether you prefer a modern, rustic, or classic look, a well-designed railing can elevate your outdoor space and enhance your home’s aesthetic.
Thank you for reading our article on balcony railing designs and plans, and we recommend you to check out the rest of our projects. Please share our articles with your friends, by using the social media widgets.
