Looking to add a touch of handcrafted magic to your holiday decor? This wooden snowflake plan is the perfect blend of rustic charm and festive cheer! Whether you’re decking out your walls, windows, or even your front porch, this DIY snowflake is a showstopper. With easy-to-follow plans and endless customization options, it’s time to grab your tools, channel your inner artist, and let it snow, woodworking style!
This wooden snowflake is as versatile as it is charming! Use it as a statement piece for your holiday décor by hanging it on a wall, door, or above the fireplace to create a cozy, festive vibe. It also makes a perfect outdoor decoration, place it on your porch, lean it against a tree, or even mount it to a fence to spread holiday cheer to your neighborhood. Want to go the extra mile? Add lights or glitter for some eye-catching sparkle!
We recommend you to invest in the best materials you could afford. Therefore, you should buy weather-resistant lumber, such as pine or cedar. Always take accurate measurements before adjusting the size of the components at the proper size. Drill pilot holes trough the components before inserting the wood screws, to prevent the wood from splitting.
Made from this plan
Pin it for Later!
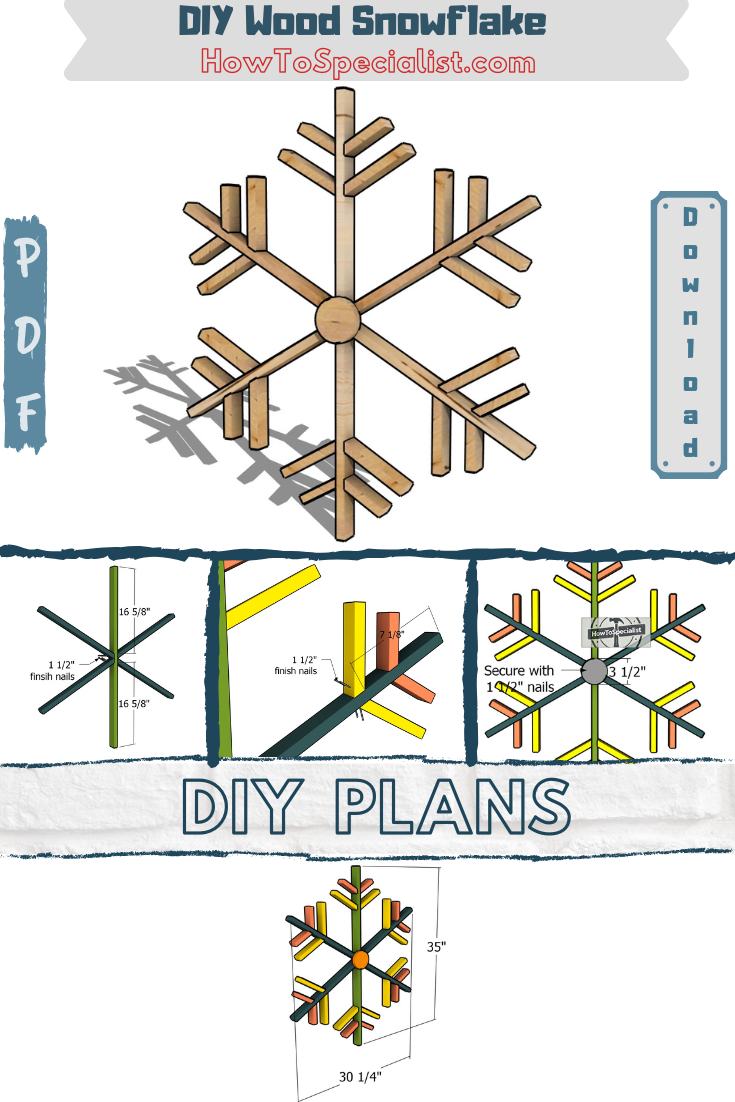
How to Make a Wooden Snowflake – Free DIY Plans
Building-a-wooden-snowflake
Materials
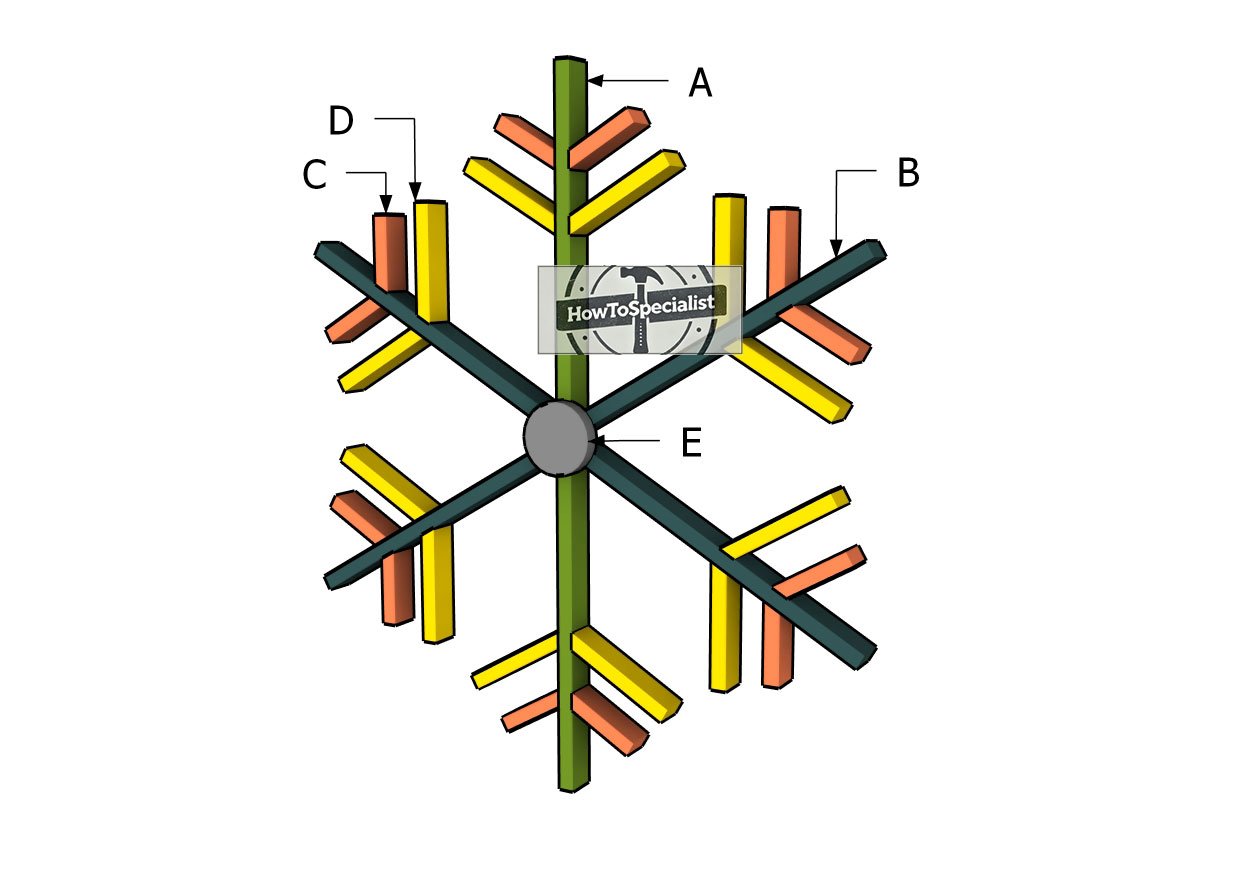
A – MAIN ELEMENT – 1×2 lumber 35″ – 1 piece
B – SIDE ARMS – 1×2 lumber 17″ – 4 pieces
C – DECORATIVE PIECES – 1×2 lumber 3 7/8″ – 12 pieces
C – DECORATIVE PIECES – 1×2 lumber 6″ – 12 pieces
- 1×2 lumber 10 ft – 2 pieces
- 100 pieces of 1 1/2″ finish nails
- stain / paint- 1 can
- Glue – 1 bottle
- Wood putty – 1 can
Tools
- Miter saw, Nail gun
- Drill machinery, Drill bits
- Safety gloves, Glasses
- Chalk line, tape measure, spirit level, carpentry pencil
Time
- One weekend
Related
Cut layout diagram

Step 1: Building the snowflake

Components
The first step in creating your snowflake is cutting the components to size. Use a miter saw to make precise 30-degree bevel cuts, following the diagram for reference.
Take your time to ensure accurate measurements, as this will make assembly much smoother. Once all the pieces are cut, give the edges a good sanding to remove any splinters and achieve a clean, polished finish. Let’s get started on this festive masterpiece!
Fitting-the-flake-arms
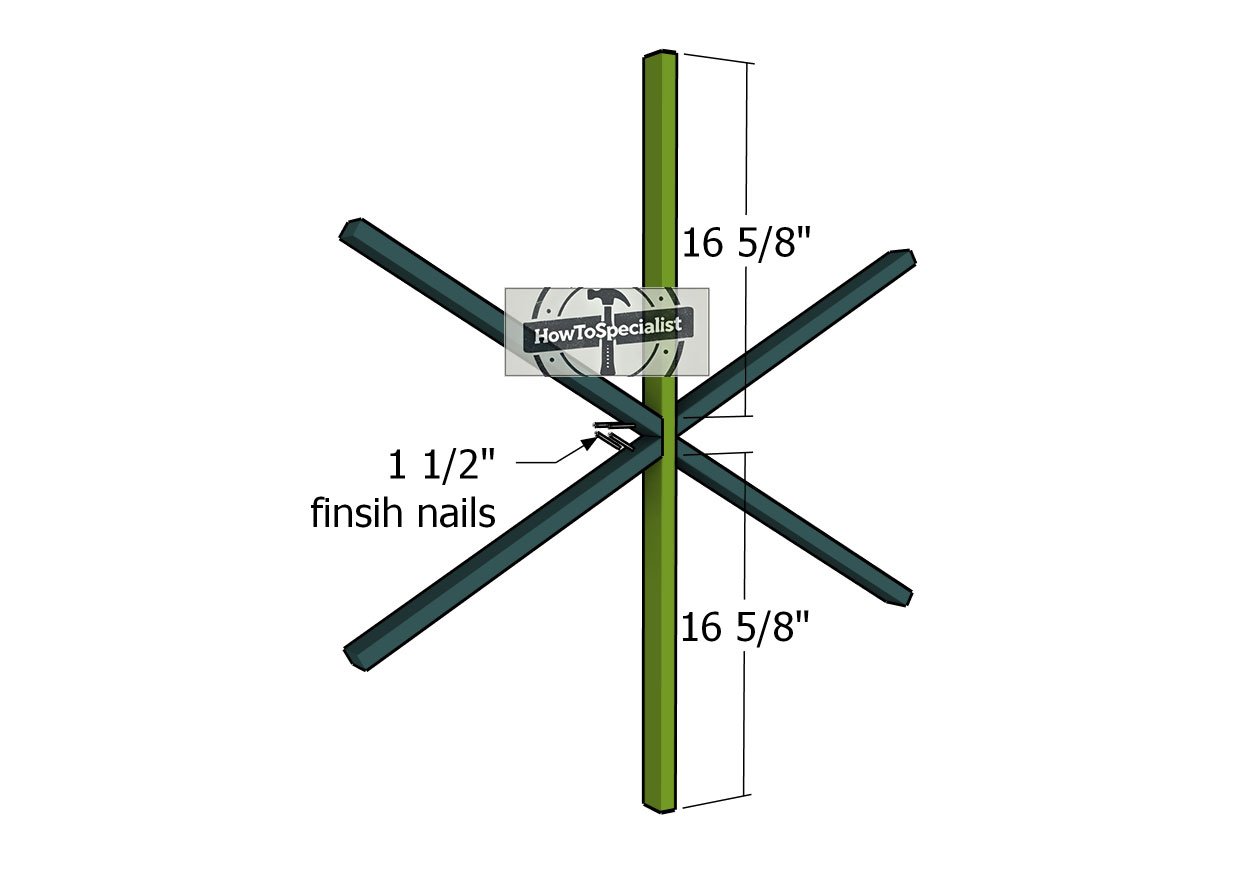
Next, it’s time to frame the structure of the snowflake. Start by attaching the side arms to the main vertical piece. Carefully center the side arms in place for a balanced look.
Apply wood glue to the joints for added strength, then secure them tightly with 1 1/2″ finish nails. Take your time to align everything properly, this is where your snowflake starts to take shape!
Attaching-the-end-decor-elements-to-flake-arm
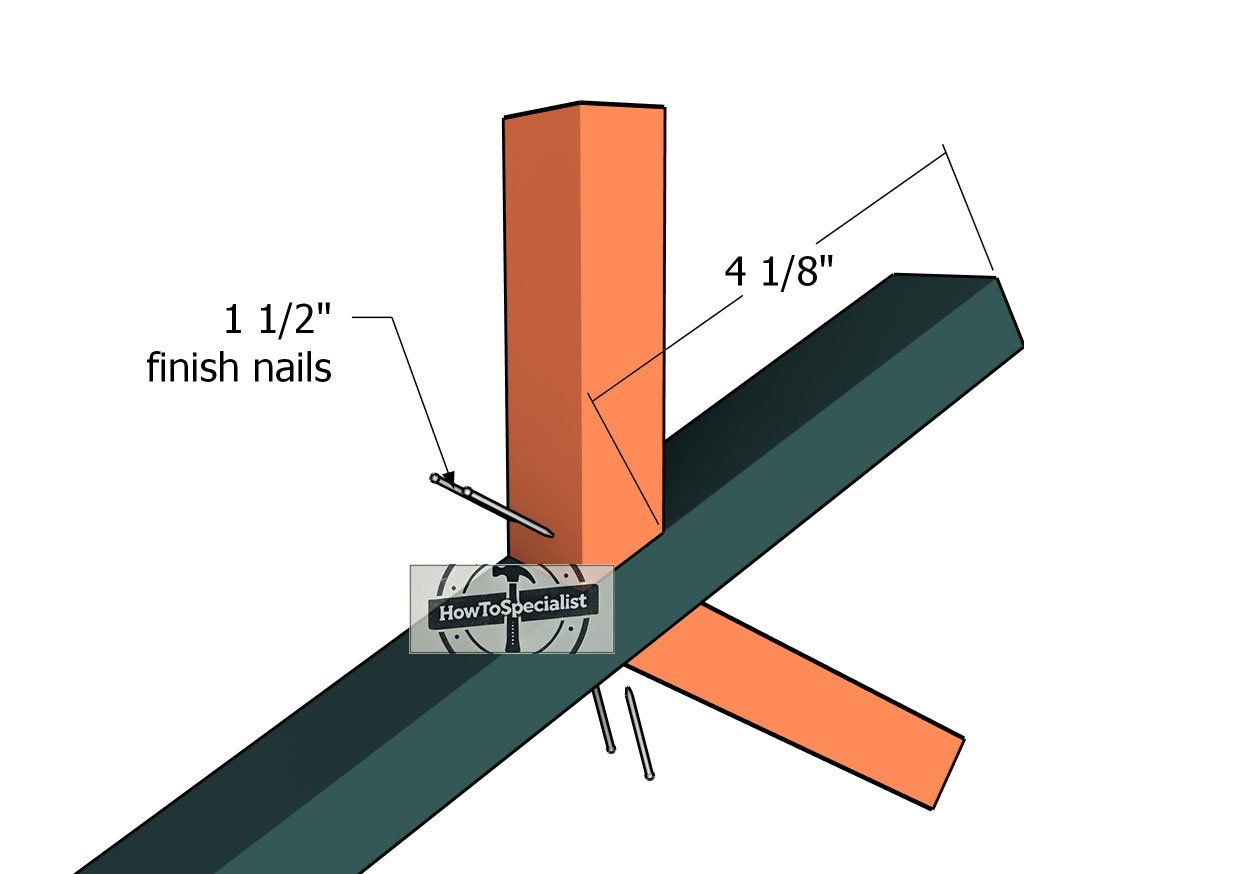
Now let’s add the decorative elements to the ends of the snowflake arms. Begin with the smaller pieces, carefully aligning them into place for a symmetrical design. Apply wood glue to the joints for extra strength, then secure them using 1 1/2″ finish nails. Take your time to ensure everything is even and tidy, these details will make your snowflake truly stand out!
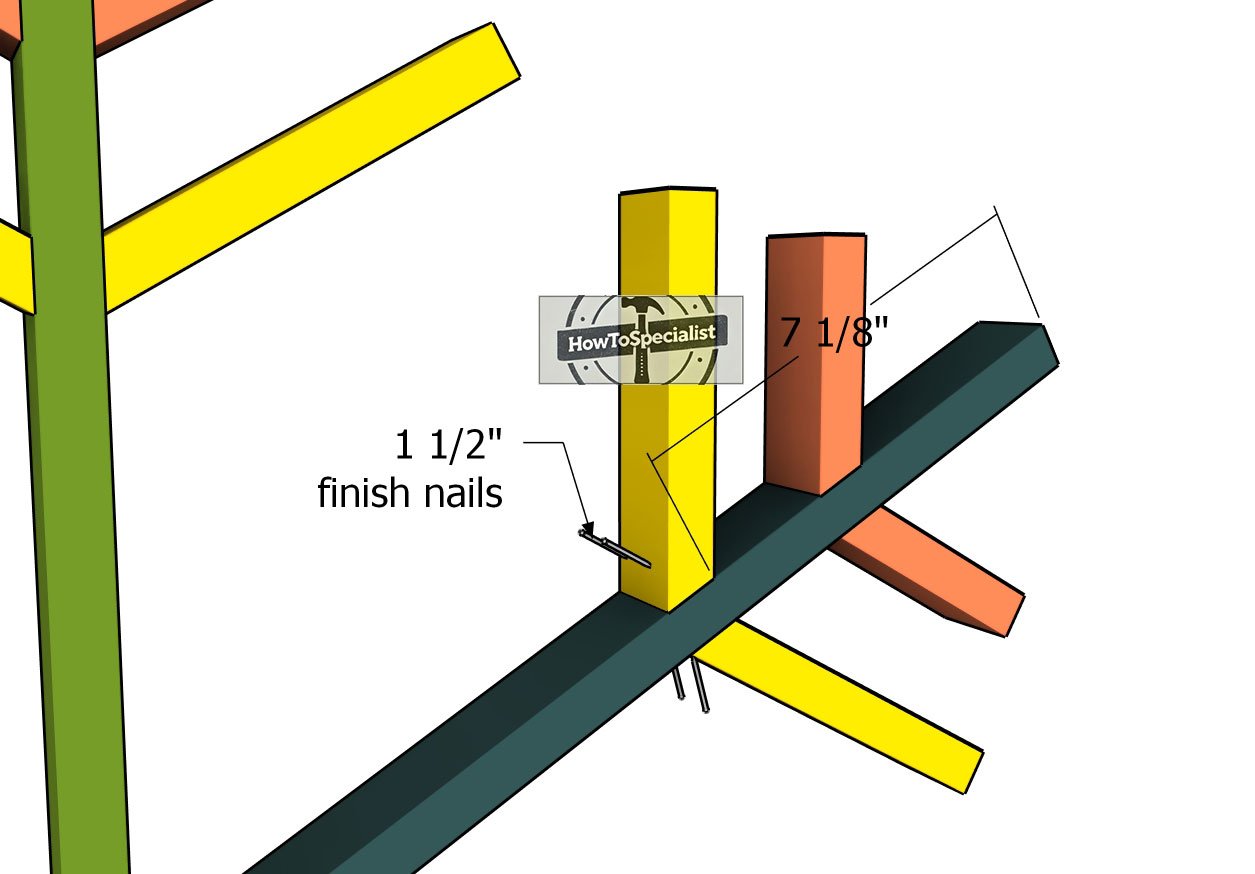
Attaching-the-second-end-elements
Next, repeat the process for attaching the longer decorative elements. Align each piece carefully, add glue to the joints, and secure them with 1 1/2″ finish nails.
Once all the elements are in place, let the glue dry thoroughly to ensure a strong bond. With the structure complete, you’re ready to move on to the finishing touches that will bring your snowflake to life!
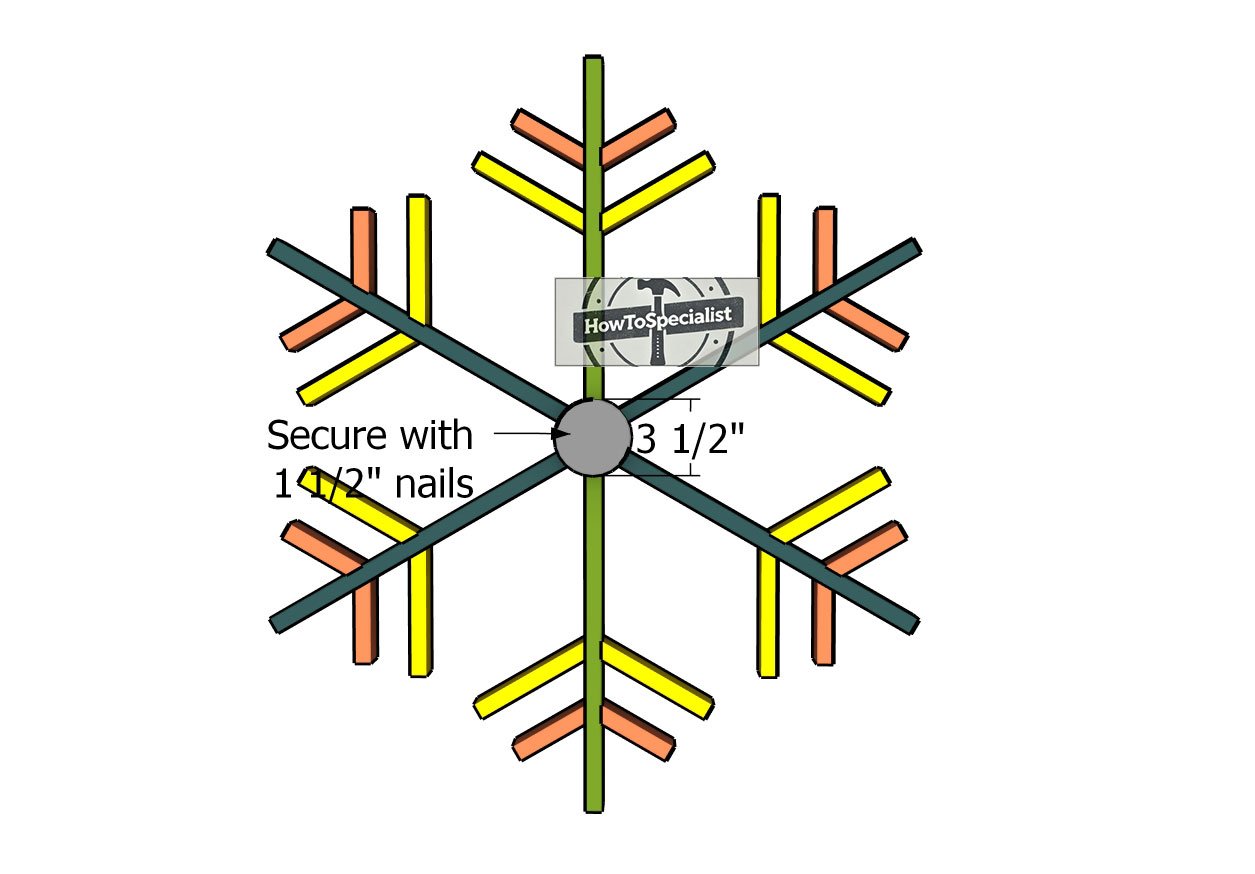
Fitting-the-center-element
For an extra touch of charm, consider adding a decorative circle to the center of your snowflake. Use a hole saw drill bit or a jigsaw to cut the circle from a scrap piece of wood. Once cut, smooth the edges with sandpaper to create a clean, polished look.
Position the circle in the middle of the snowflake, apply wood glue to the back, and secure it in place with 1 1/2″ finish nails. This simple addition will give your snowflake a beautifully finished and unique look!
Step 2: Finishing touches
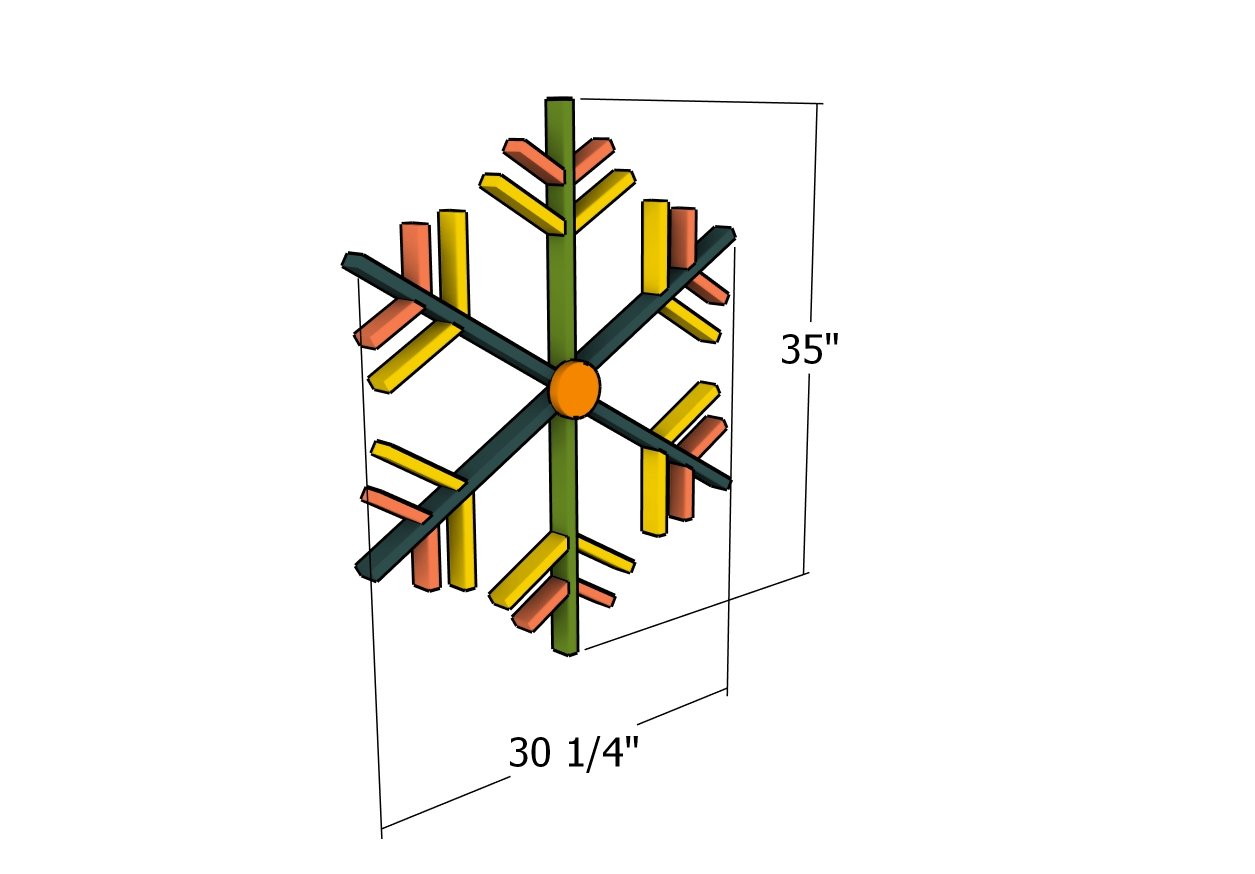
DIY Wood flake – dimensions
With the snowflake fully assembled, it’s time to add the finishing touches that make it truly shine. Start by filling any gaps or nail holes with wood putty for a smooth and seamless look. Once the putty dries, sand the entire surface to ensure a flawless finish.
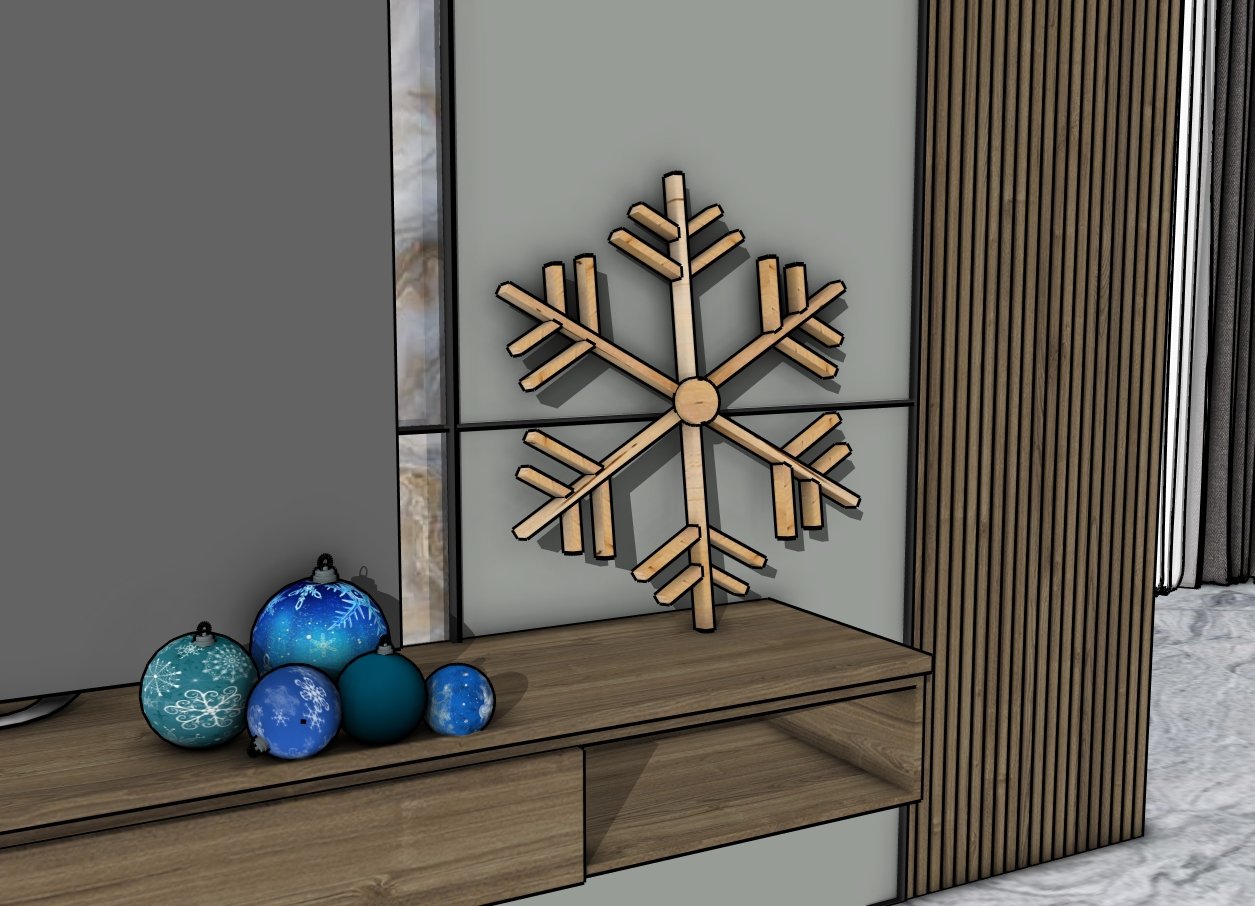
How to make a wooden snowflake
Depending on your style, you can stain the wood for a warm, natural look or paint it in festive colors to match your holiday décor. For added protection and a bit of sparkle, consider sealing it with a clear coat or glitter spray.

DIY wooden snowflake plans
Your snowflake is now ready to bring charm and joy to your holiday season! You can download these plans for free by reading the blog FAQs.
Thanks for checking out my DIY Wooden Snowflake Plans! Be sure to explore my other projects for more fantastic ideas. Don’t forget to hit the LIKE button and SHARE with your friends using the social media links below.
