Get ready to dive into a fun and festive DIY project! This step-by-step plans guide will walk you through building your very own DIY wooden Christmas tree, a charming piece that’s perfect for decorating your home or gifting to a loved one. With easy-to-follow instructions and plenty of room for customization, this project is a great way to get into the holiday spirit while creating something truly unique.
This project is budget-friendly, with costs ranging from $5 to $10 depending on materials and finishes. To make the most of it, choose quality wood like pine for a polished look or reclaimed wood for rustic charm. Sand your pieces before assembly to save time and ensure smooth edges, and use clamps to keep parts steady while gluing and nailing. Customize your tree by staining it for a warm glow, painting it in festive colors, or adding hooks for ornaments or lights. With a little creativity, this wooden Christmas tree can become a unique and personal holiday centerpiece!
We recommend you to invest in the best materials you could afford. Therefore, you should buy weather-resistant lumber, such as pine or cedar. Always take accurate measurements before adjusting the size of the components at the proper size. Drill pilot holes trough the components before inserting the wood screws, to prevent the wood from splitting.
Made from this plan
Pin it for Later!
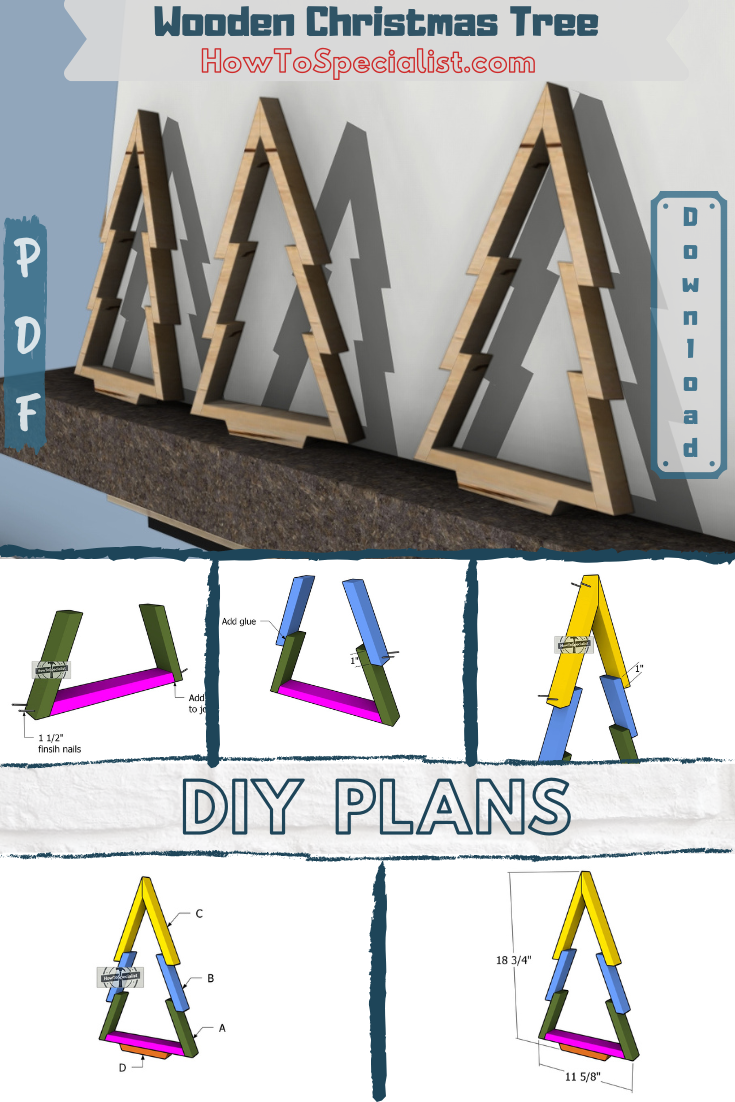
How to Make a Wooden Christmas Tree – Free DIY Plans
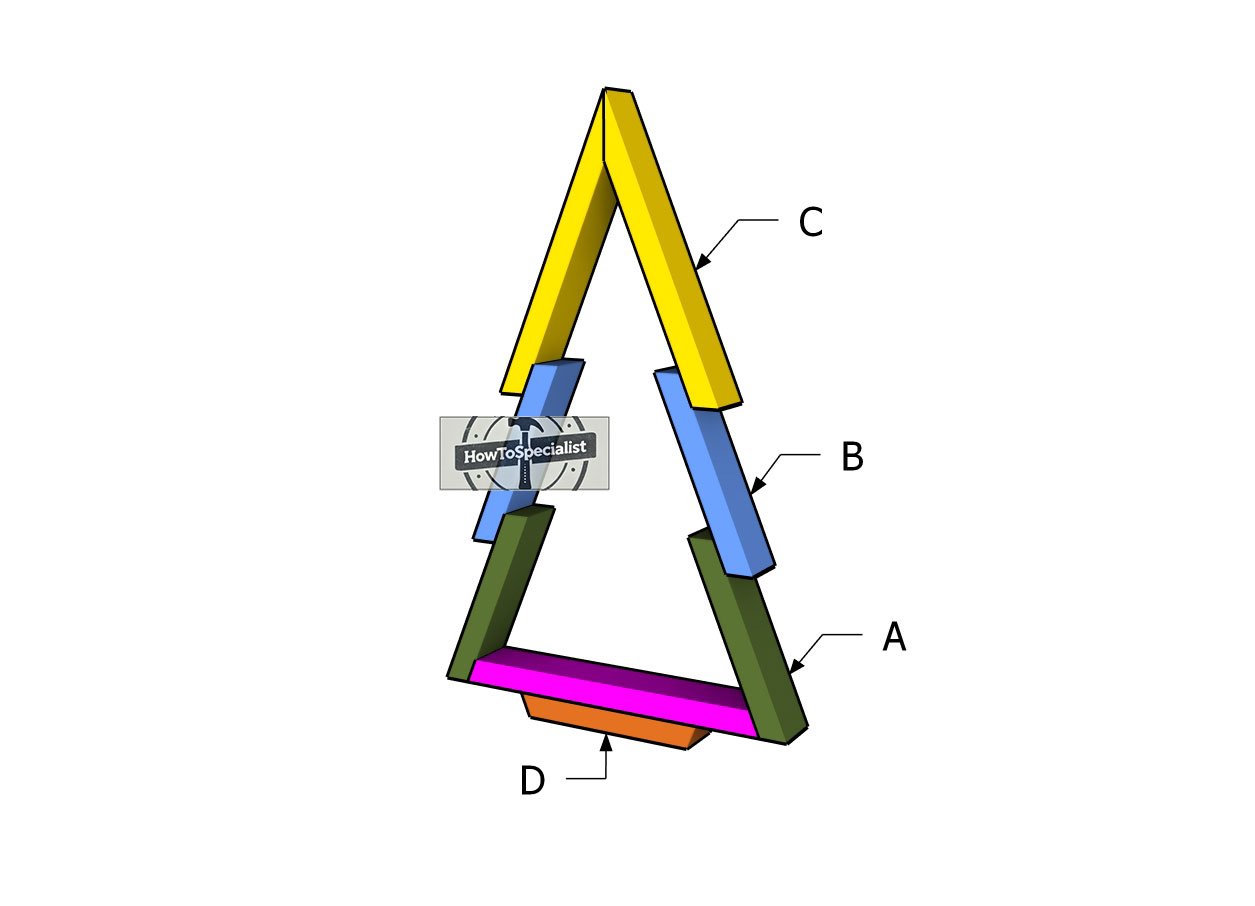
Building-a-wood-Christmas-tree
Materials
A – BASE SLATS – 1×2 lumber 6 1/4″ – 2 pieces
B – MIDDLE SLATS – 1×2 lumber 6 1/4″ – 2 pieces
C – TOP SLATS – 1×2 lumber 9 3/8″ – 2 pieces
D – BASE – 1×2 lumber 10″ – 1 piece
D – TRUNK – 1×2 lumber 6″ – 1 piece
- 1×2 lumber 6 ft – 1 piece
- 20 pieces of 1 1/2″ finish nails
- stain / paint- 1 can
- Glue – 1 bottle
- Wood putty – 1 can
Tools
- Miter saw
- Drill machinery, Drill bits
- Safety gloves, Glasses
- Chalk line, tape measure, spirit level, carpentry pencil
Time
- One weekend
Related
Cut layout diagram

Step 1: Building the tree crown
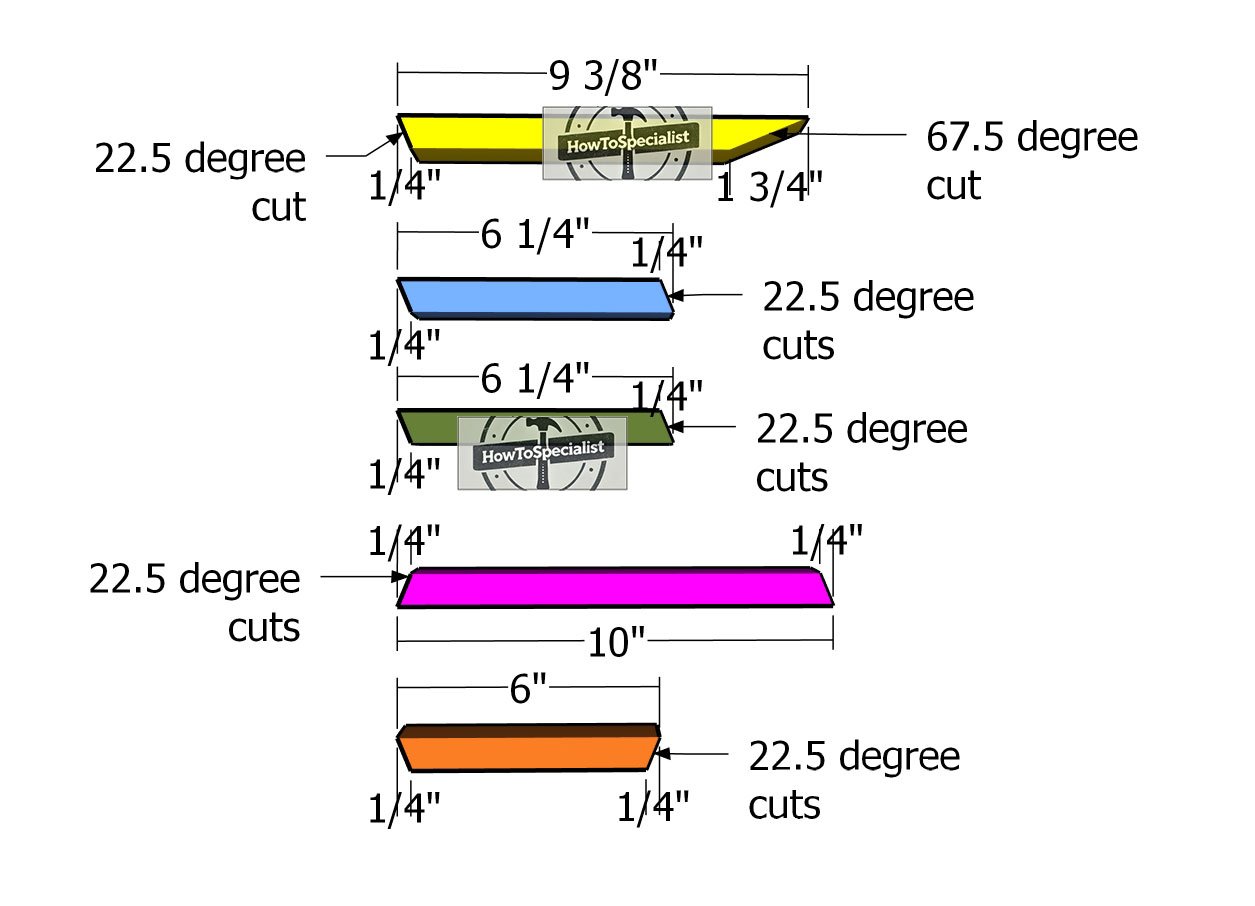
Cut-list—detailed
Let’s kick off this fun decor project by cutting the pieces for your wooden tree! Grab some 1×2 lumber and cut the boards to size, making those angle cuts just like in the diagram. Don’t rush it, precision here makes all the difference.
Once the cuts are done, take a few minutes to smooth the edges with sandpaper. Trust me, this step not only gives the wood a polished look but also makes everything safer to handle. Let’s get those creative juices flowing and bring this tree to life!
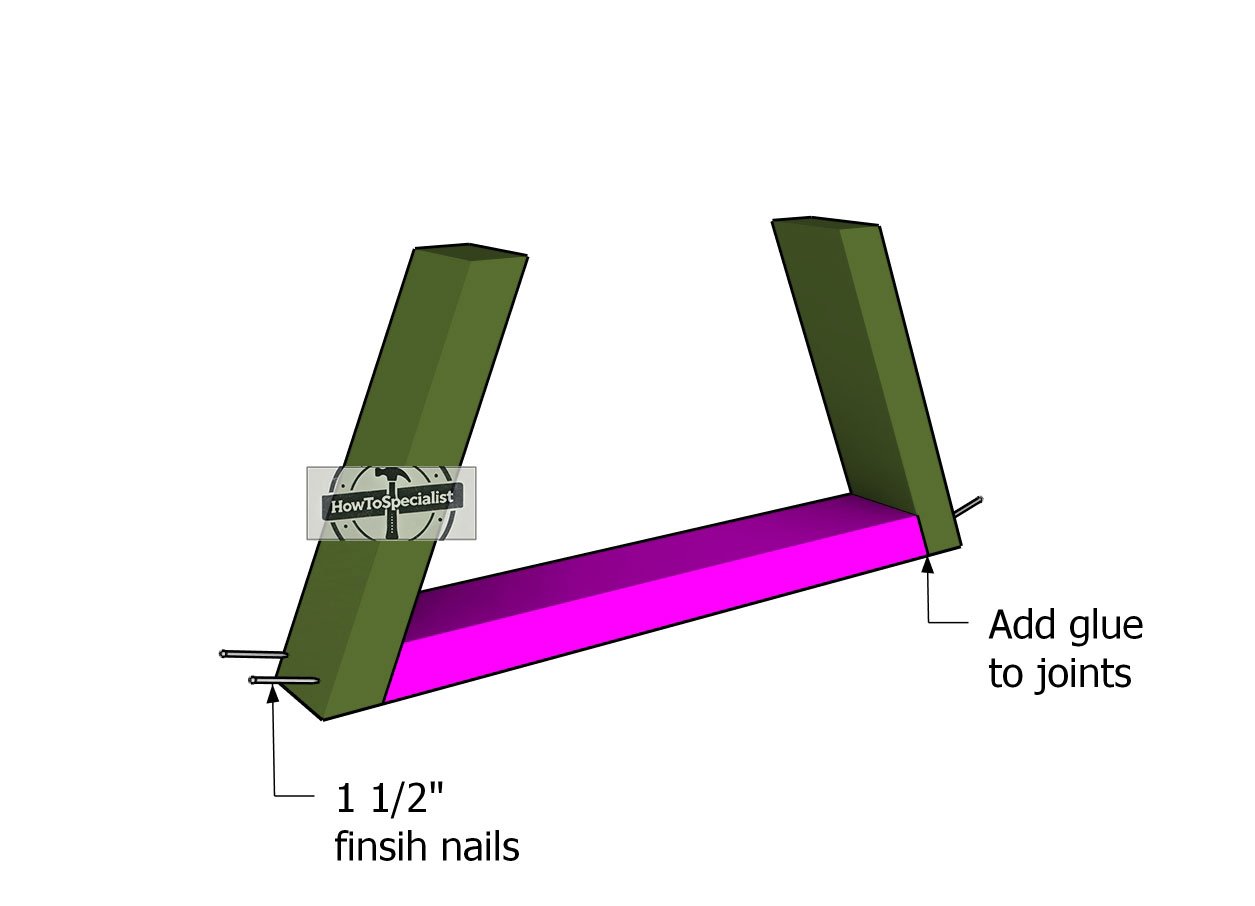
Building-the-crown-of-the-wooden-tree
Time to bring your Christmas tree to life! Start by assembling the base of the crown. Lay the baseboard flat on a level surface—this will make the process smooth and frustration-free. Attach the side slats to the base using 1 1/2″ finish nails and a bit of wood glue for extra hold.
Make sure everything is lined up perfectly flush, with no gaps between the pieces. A little patience here goes a long way toward making your tree look clean and professional. Let’s keep it rolling—you’re already off to a great start!
Fitting-the-middle-slats
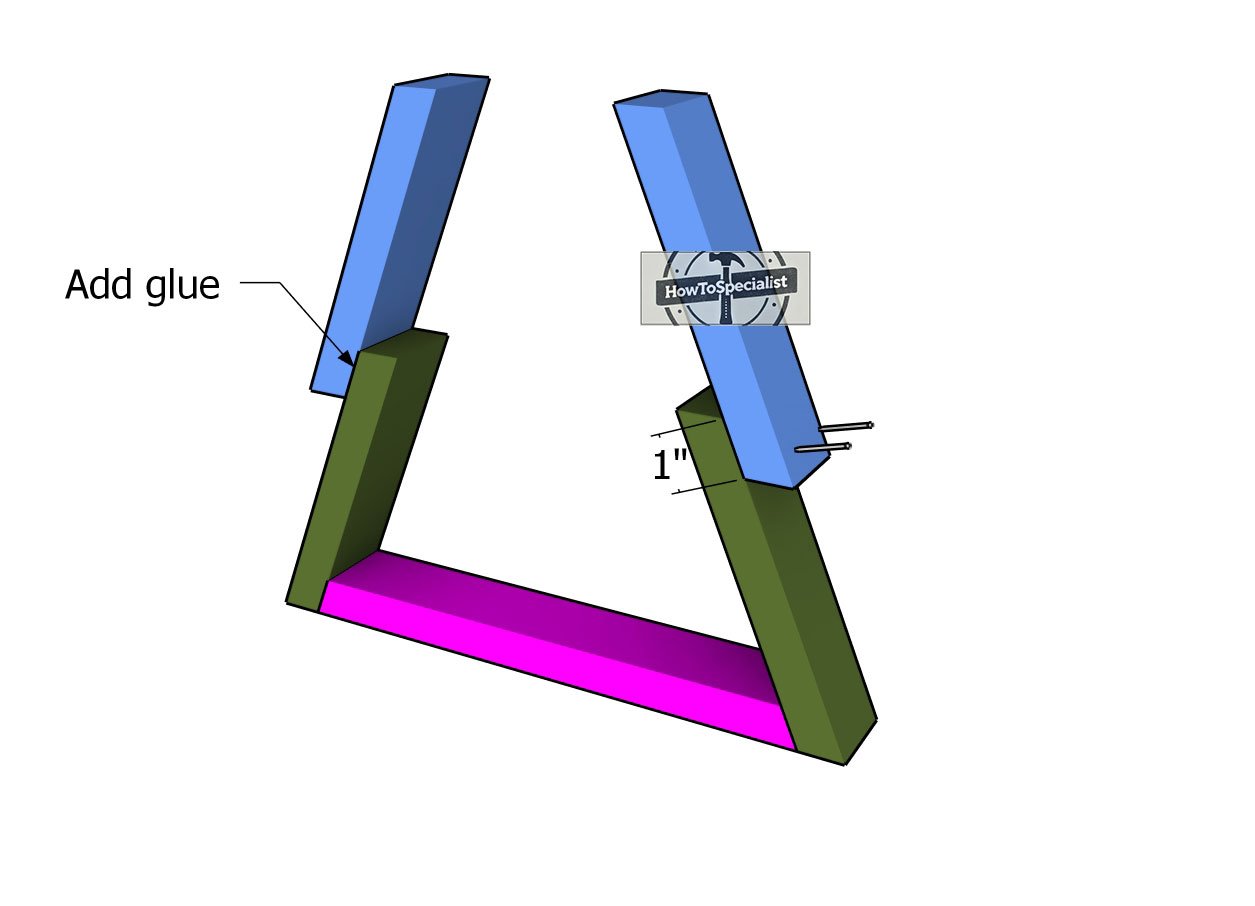
Next up, it’s time to attach the 1×2 slats to your wooden Christmas tree. Follow the diagram closely to get that perfect layered look. Overlap the middle slats by 1″ onto the base slats, making sure all the edges are flush for a clean and polished finish. Secure them in place with 1 1/2″ finish nails, two on each side, to create strong, sturdy joints. Take your time here; precision is key to making your tree look seamless and professional.
Fitting-the-top-top-slats
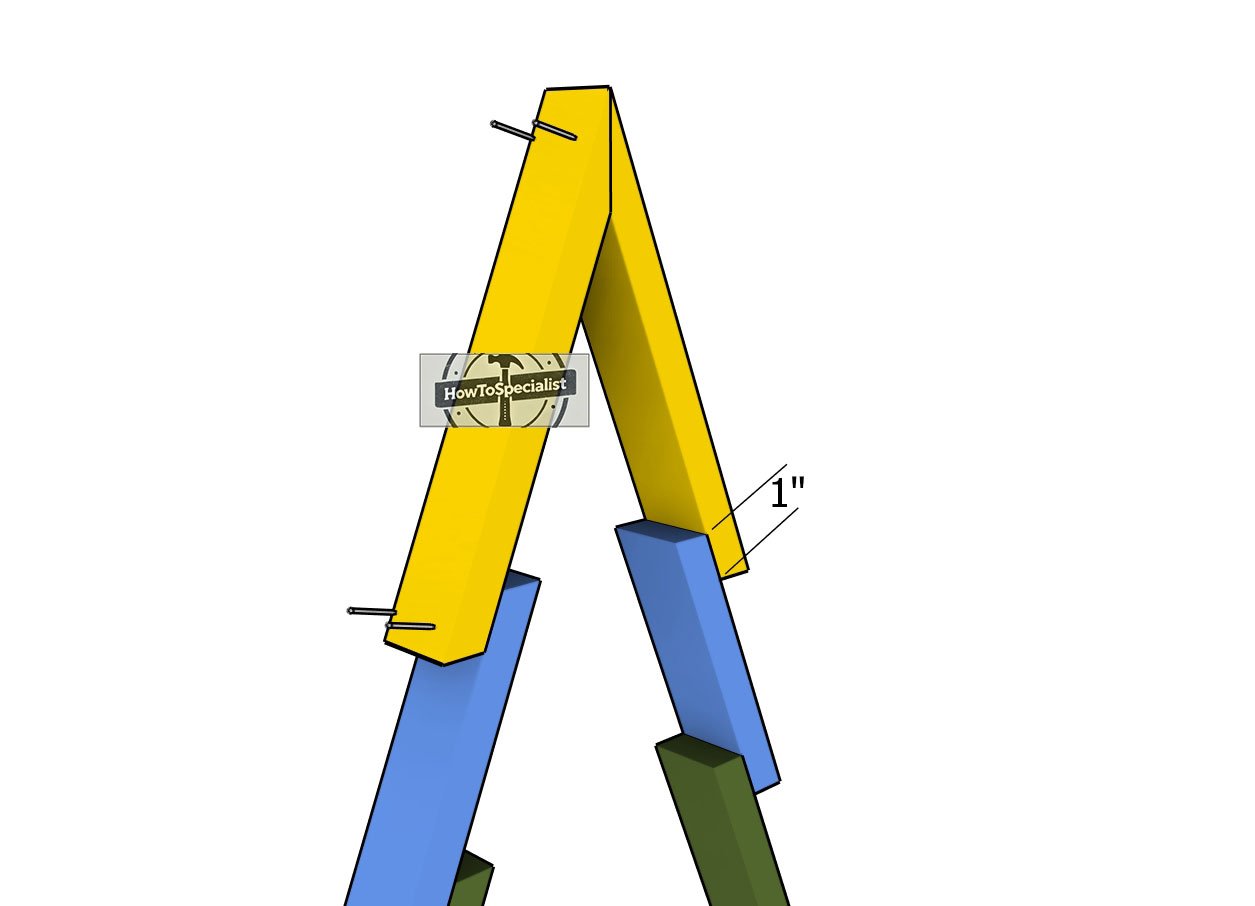
Now let’s tackle the top slats for your wooden tree! Carefully align the slats at the peak, ensuring they overlap the middle slats by 1″ for a smooth, cohesive look. Secure each joint with two 1 1/2″ finish nails and a dab of wood glue for extra strength.
Take your time to eliminate any gaps between the pieces—this not only gives your tree a professional finish but also helps prevent splitting.
Fitting-the-base-to-the-tree
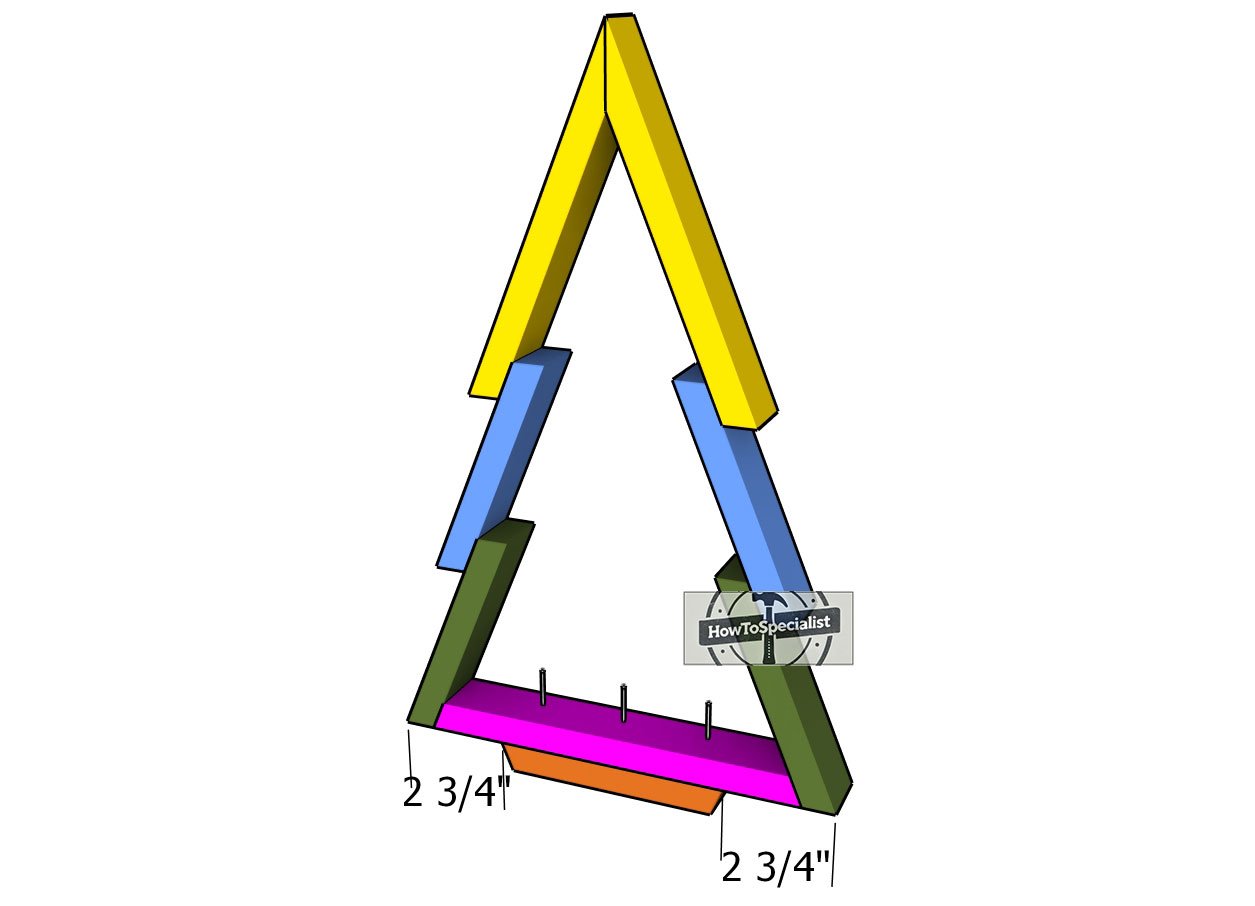
Let’s give your wooden fir tree its finishing touch by attaching the trunk piece! Center the trunk at the base of the tree, making sure it’s perfectly aligned. Once it’s in position, secure it with 1 1/2″ finish nails, and don’t forget to add a bit of wood glue to the joints for extra stability. This little step gives your tree that final pop of charm and sturdiness.
Step 2: Finishing touches
Wood Christmas tree plans – dimensions
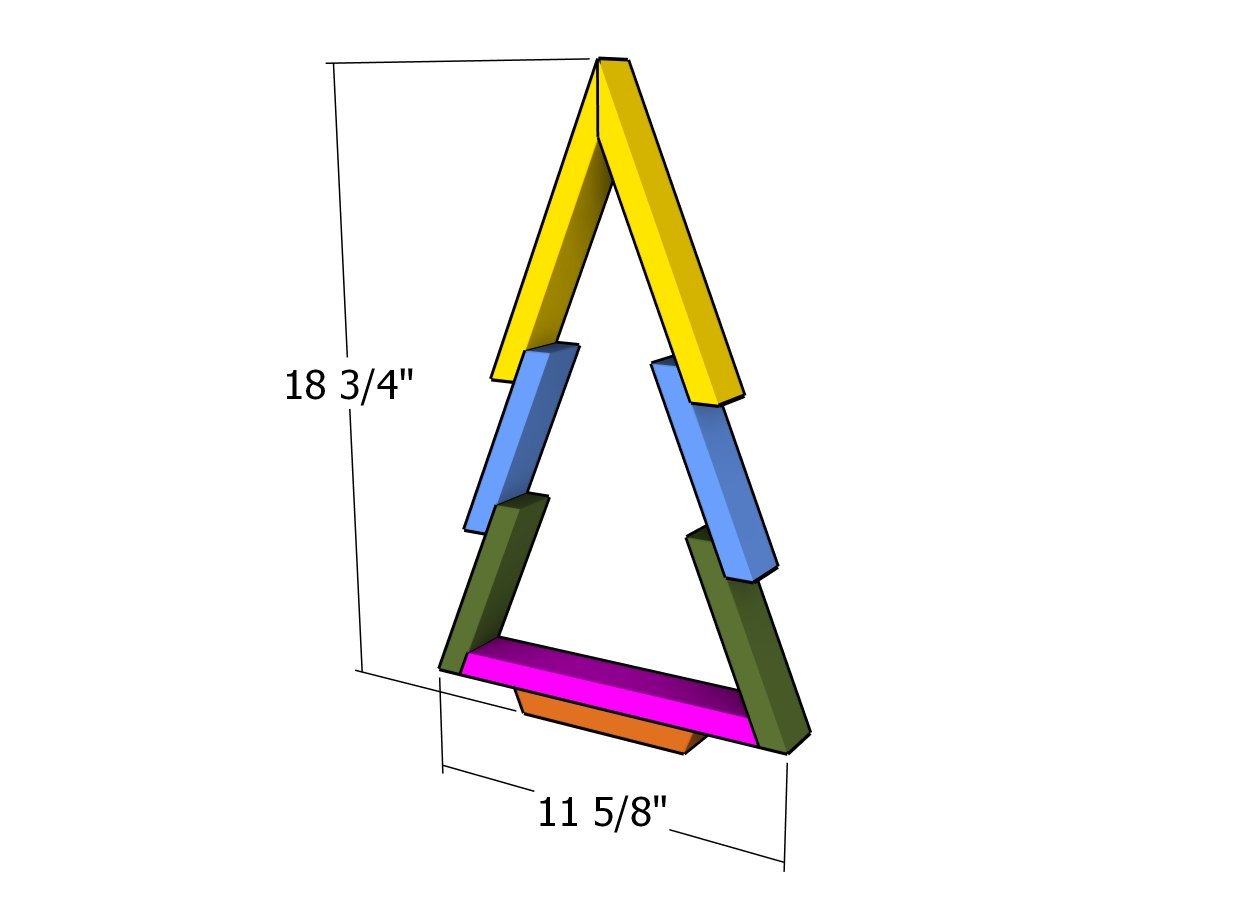
With your wooden Christmas tree fully assembled, it’s time to add those finishing touches that make all the difference. Start by filling any nail holes or gaps with wood putty for a seamless look. Once the putty dries, give the entire tree a light sanding to smooth out rough edges and ensure a polished surface.
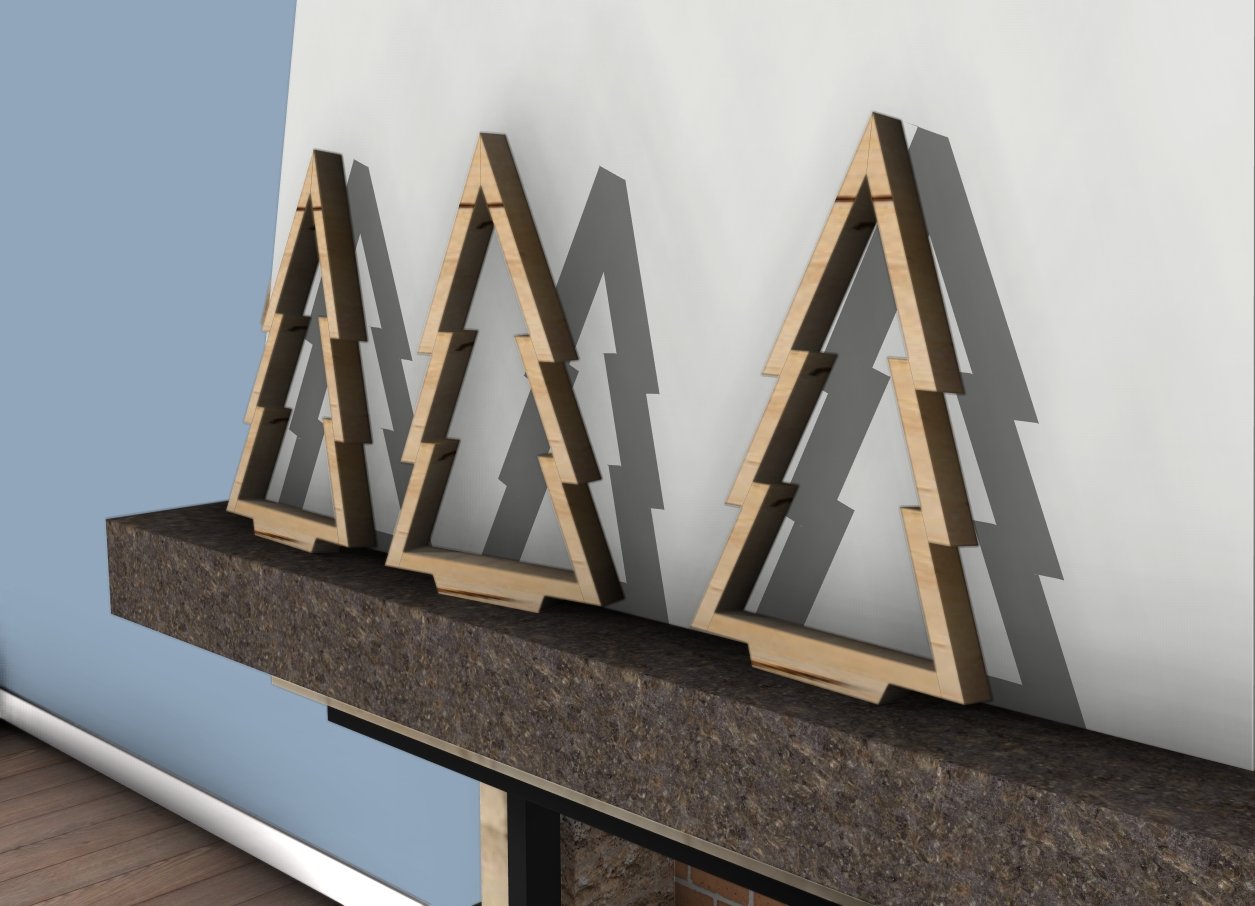
DIY Christmas tree
Depending on your style, you can leave the natural wood finish for a rustic charm, stain it for a warm glow, or paint it in festive colors to match your holiday décor. A coat of clear sealant will protect your masterpiece and keep it looking great for years to come. Now, step back and admire your work—it’s ready to shine this holiday season!
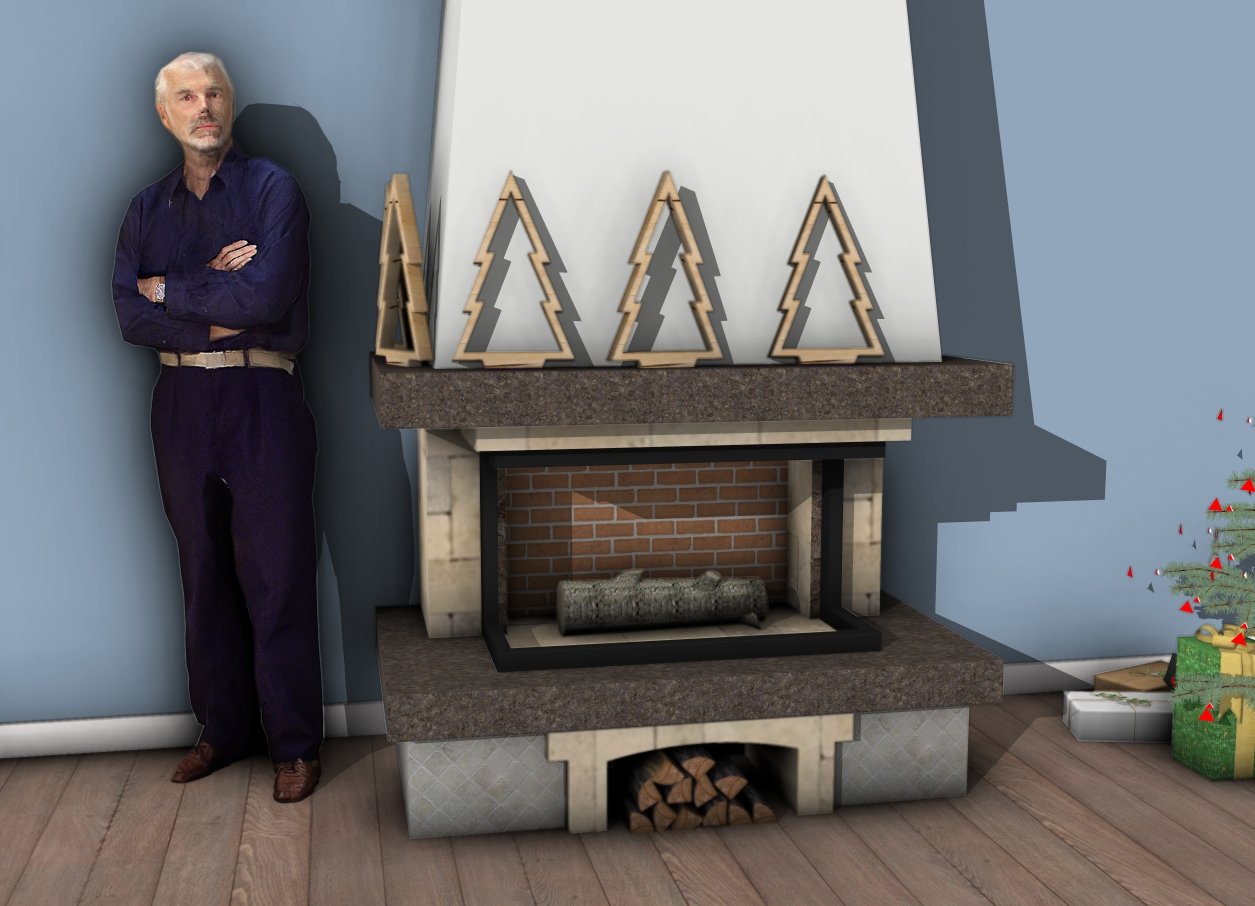
DIY Wooden Christmas tree plans
These DIY projects are not just fun to build; they’re incredibly versatile and can add charm and functionality to your home. Use your wooden Christmas tree as a festive centerpiece, a backdrop for ornaments, or even a creative advent calendar by adding hooks or clips for small gifts. The projects like the wooden tray or sled make excellent holiday décor or thoughtful handmade gifts for loved ones. Whether you’re decking out your space or sharing the joy of something you built with your own hands, these creations are sure to bring warmth and holiday spirit to every corner they touch.
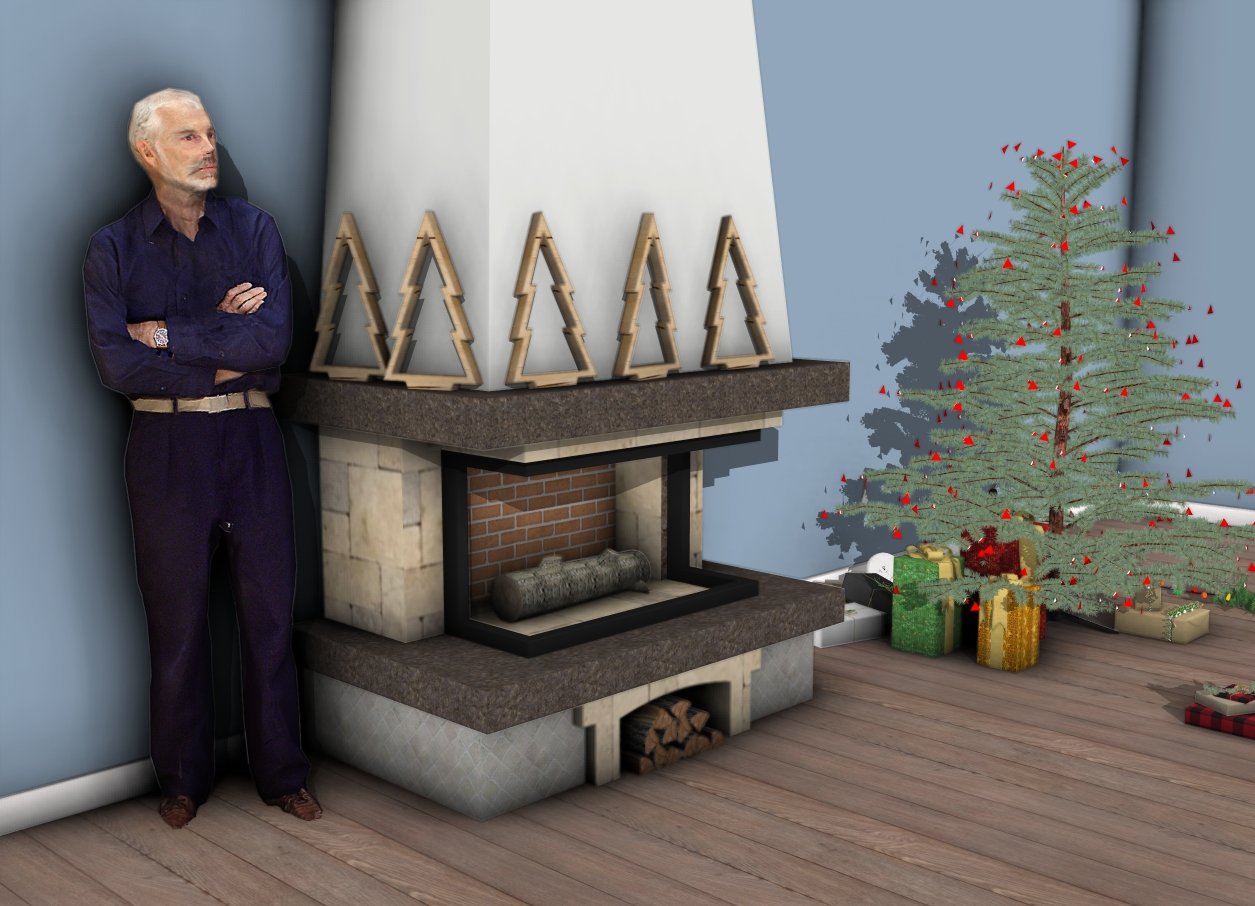
Wood Christmas tree plans
You can download these plans for free by reading the blog FAQs.
Thanks for checking out my DIY Wooden Christmas tree plans! Be sure to explore my other projects for more fantastic ideas. Don’t forget to hit the LIKE button and SHARE with your friends using the social media links below.

