Looking to add a touch of festive magic to your holiday decor? My DIY Santa Sleigh plans are here to help you create a beautiful, handcrafted sleigh that will make your space sparkle with seasonal cheer! Whether you’re looking to bring some North Pole vibes to your front yard or a charming holiday accent indoors, this sleigh is the perfect project to get you into the Christmas spirit. With straightforward instructions and easy-to-follow steps, these plans are ideal for DIYers of all levels. So, grab your tools, and let’s build a sleigh that even Santa would be proud to see on Christmas Eve!
The DIY Christmas sled plan is affordable and can be completed in about a weekend! Expect to spend around $50-$90 on materials, including lumber, screws, wood glue, and optional paint or stain. For time, set aside roughly 4-6 hours for cutting and assembling, another hour or two for sanding and final touches, and an additional 6-8 hours for painting or staining with drying time. This sleigh project is a quick, budget-friendly way to bring festive charm to your holiday decor!
We recommend you to invest in the best materials you could afford. Therefore, you should buy weather-resistant lumber, such as pine or cedar. Always take accurate measurements before adjusting the size of the components at the proper size. Drill pilot holes trough the components before inserting the wood screws, to prevent the wood from splitting. My plans come with a full cut / shopping list and they are PDF Download and Print friendly. See all my Premium Plans HERE.
Made from this plan
Pin it for Later!
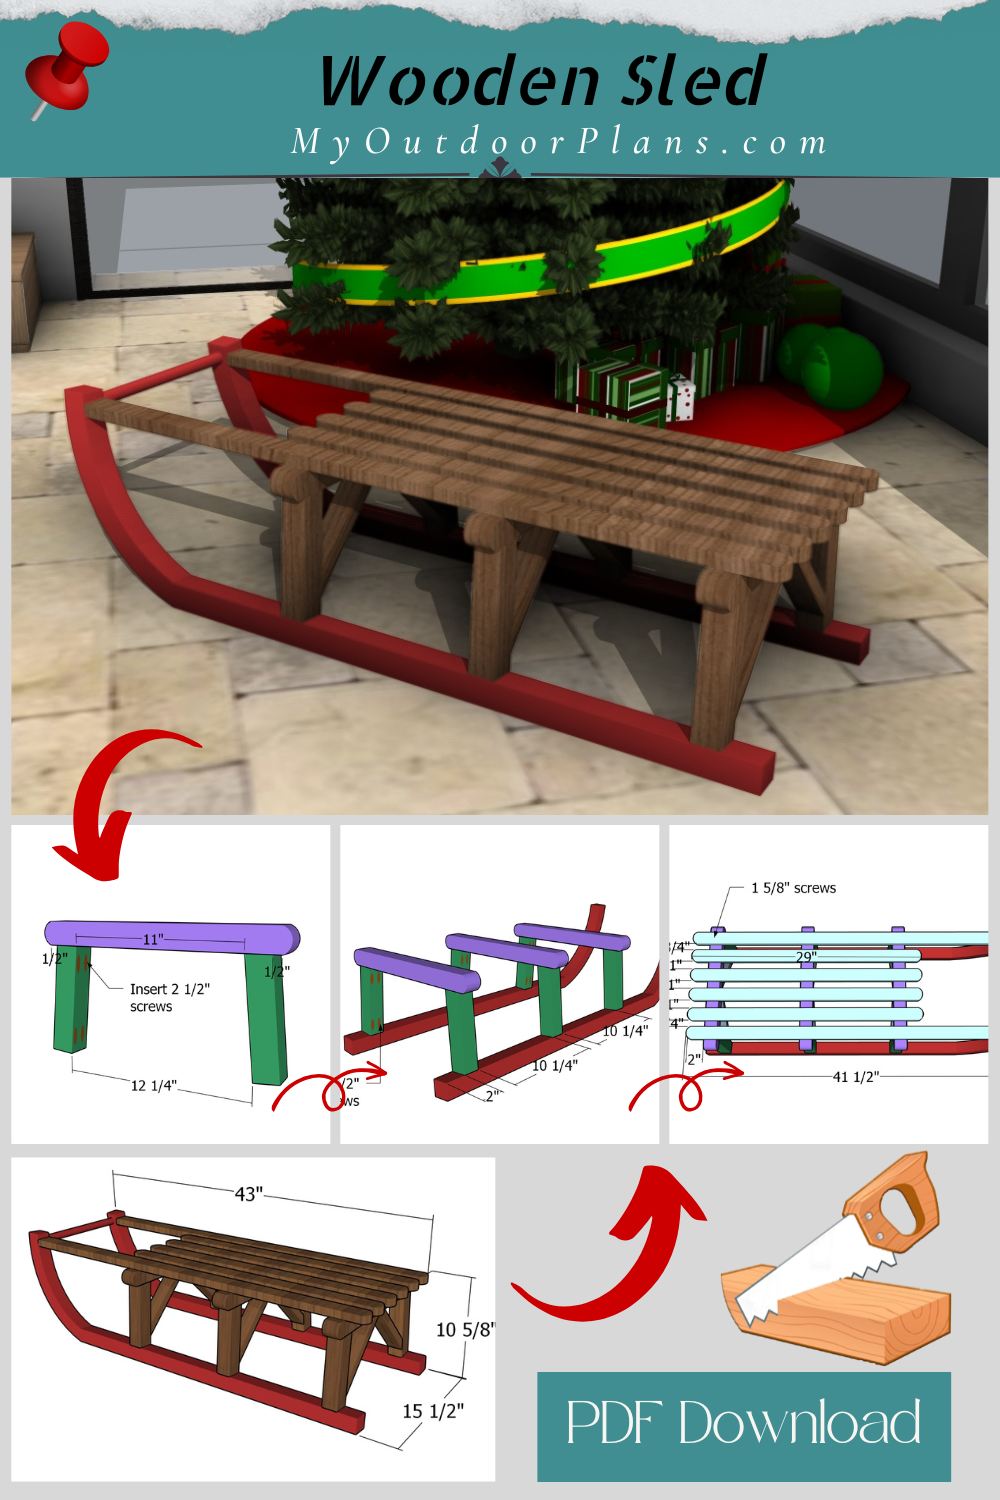
DIY Santa Sleigh
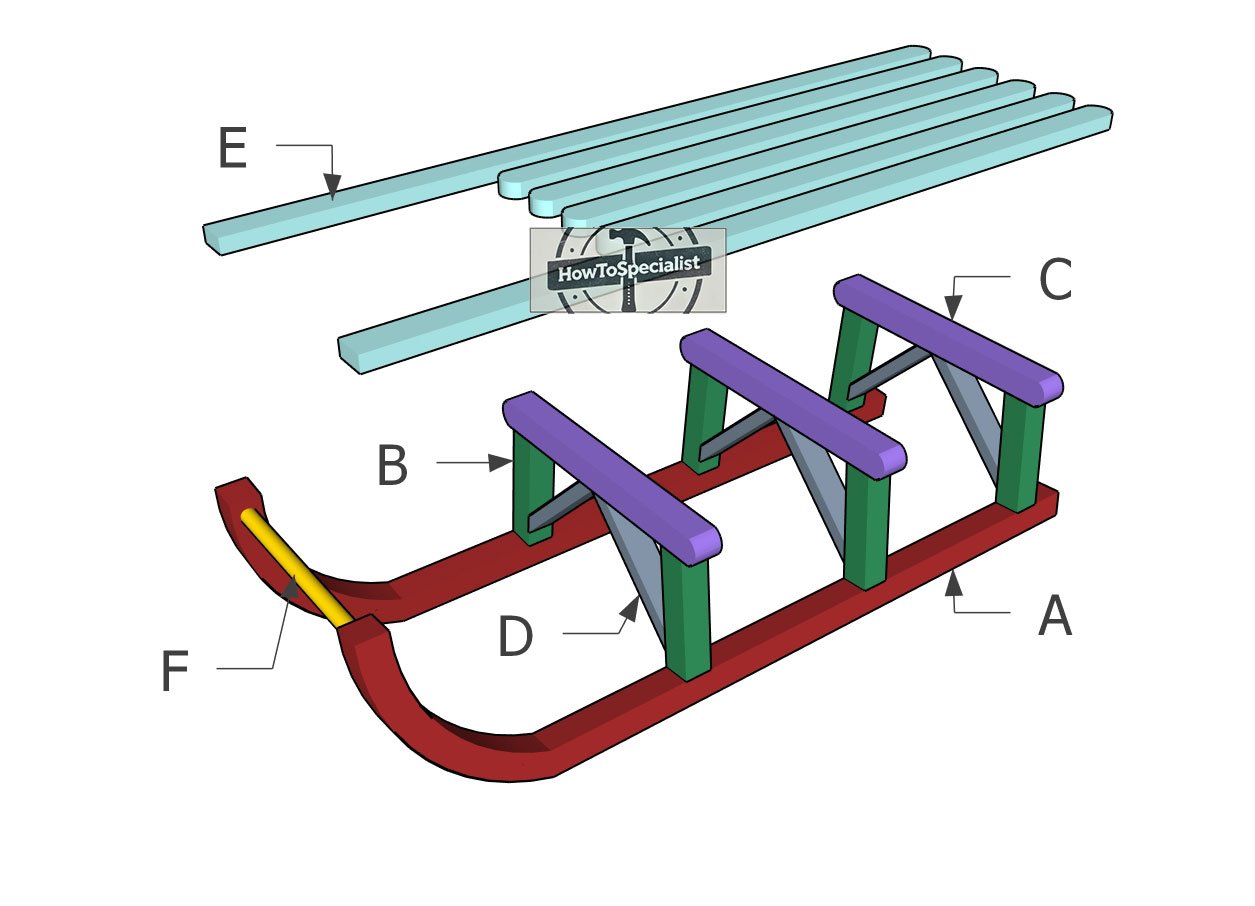
Building-a-wooden-sleigh
Materials
A – RUNNERS – 2×12 lumber 43″ – 2 pieces
B – SUPPORTS – 2×2 lumber 7″ – 6 pieces
C – SUPPORTS – 2×2 lumber 16″ – 3 pieces
D – BRACES – 1×2 lumber 8 1/2″ – 6 pieces
E – SEAT – 1×2 lumber 41 1/2″ – 2 pieces
E – SEAT – 1×2 lumber 29″ – 4 pieces
E – HANDLE – 3/4″ dowel 10 3/4″ – 1 piece
- 1×2 lumber 6 ft – 1 piece
- 1×2 lumber 8 ft – 1 piece
- 1×2 lumber 10 ft – 1 piece
- 2×2 lumber 8 ft – 1 piece
- 2×12 lumber 8 ft – 1 piece
- 3/4″ dowel – 1 ft
- 30 pieces of 2 1/2″ screws
- 50 pieces of 1 5/8″ screws
- 4 pieces of 1 1/4″ screws
- Stain / paint – 1 piece
- Glue – 1 piece
Tools
- Miter saw, Pocket hole jig
- Drill machinery, Drill bits, Jigsaw
- Safety gloves, Glasses
- Chalk line, tape measure, spirit level, carpentry pencil
Time
- One week
Related
Cut layout diagram
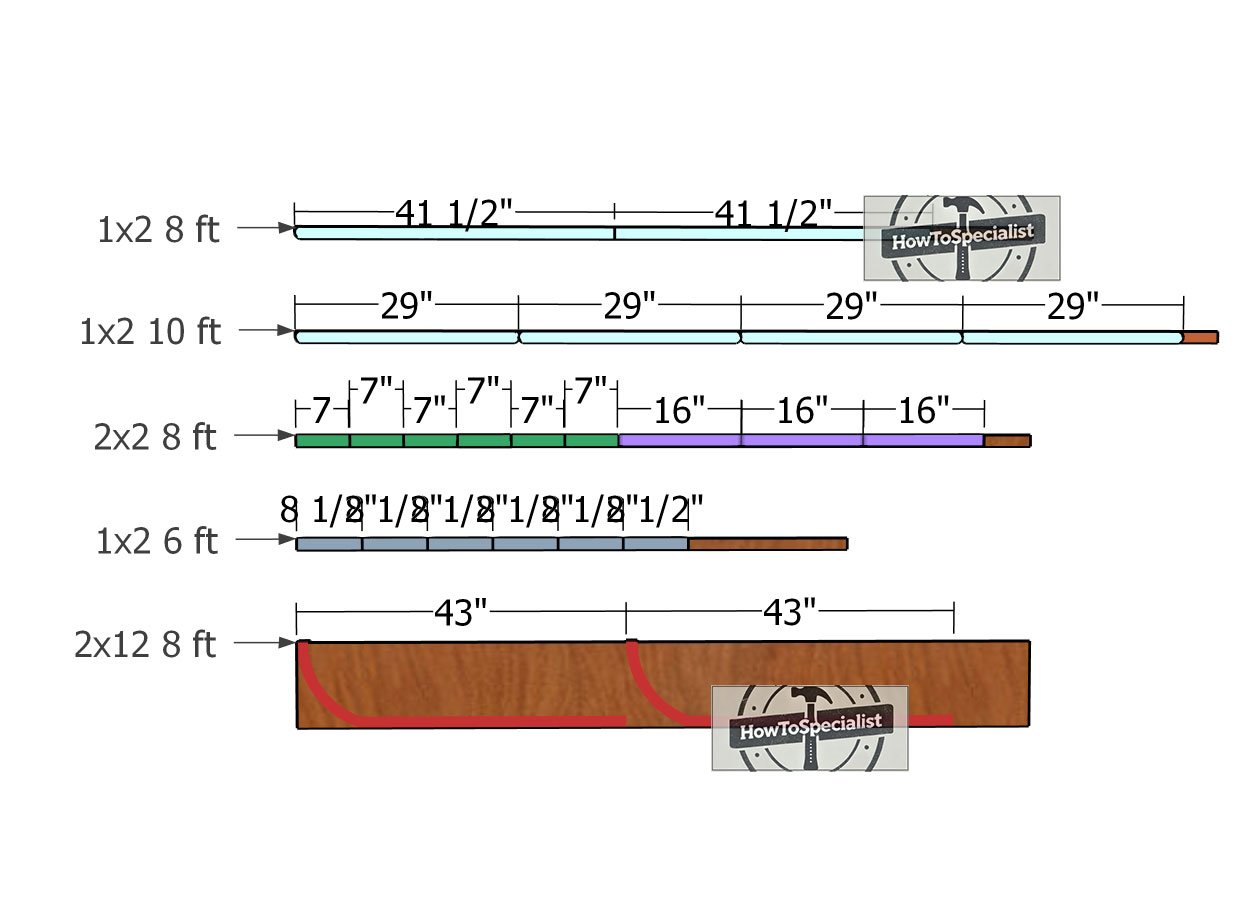
Step 1: Cutting the parts
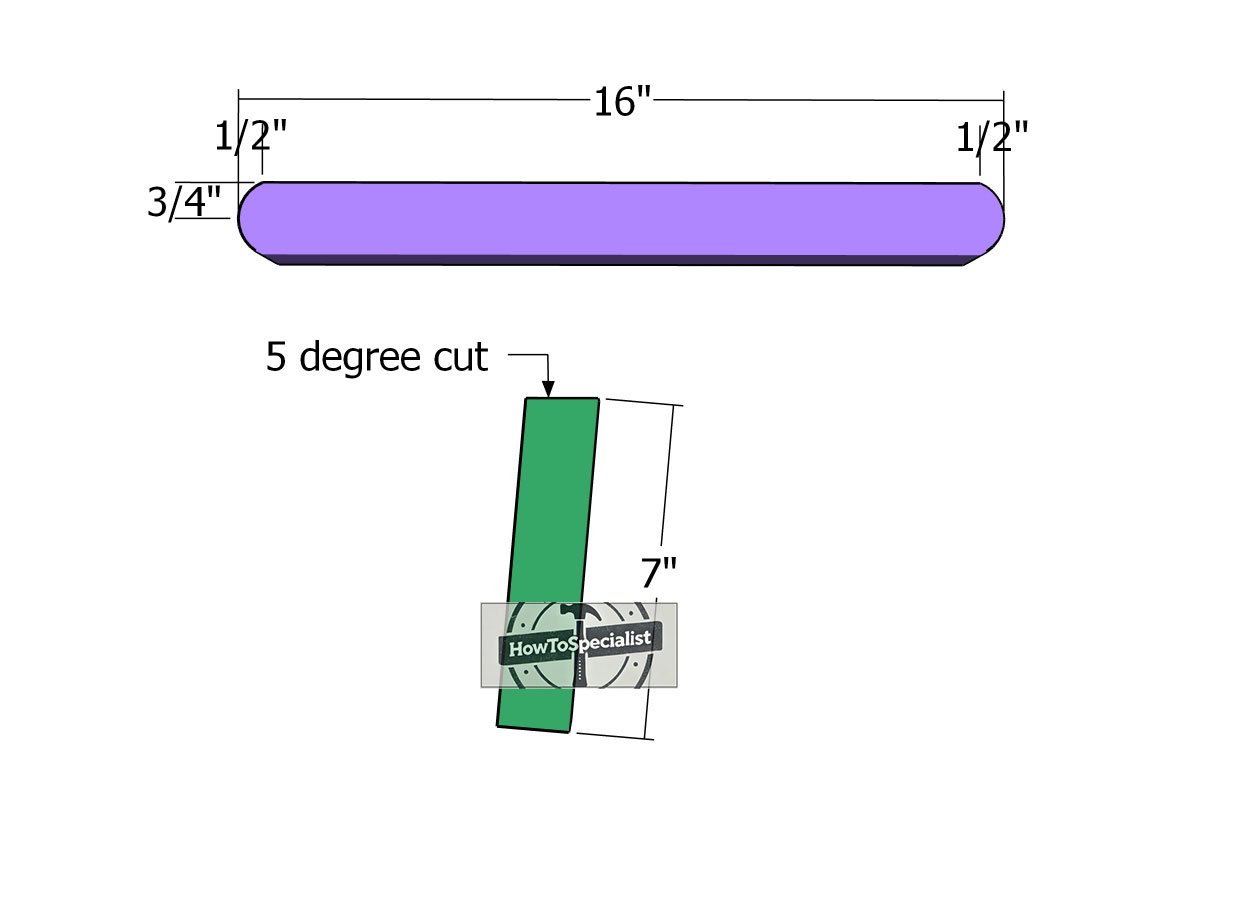
Frame-components
To kick off this project, start by cutting the pieces for your wooden sled. Grab some 2×2 lumber and cut each component to size as shown in the plans. For a classic look, round off both ends of the top pieces. Then, add a 5-degree angle cut to one end of the vertical supports to give the sled that perfect slope.
Cutting-the-runners
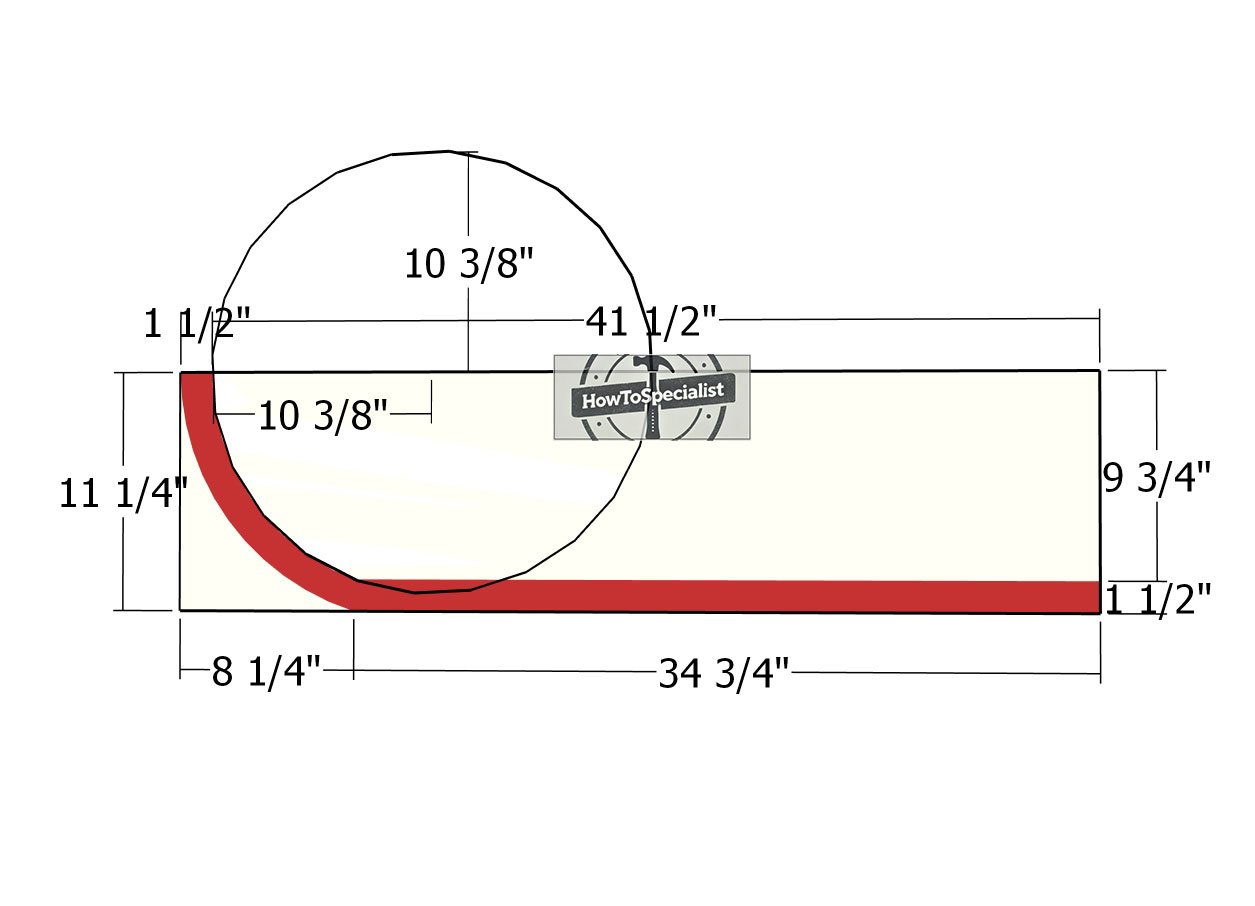
Now it’s time to build the runners for your Christmas sled! Mark the cut lines on the 2×12 boards, following the diagram, and cut along those lines with a jigsaw to get that classic sled shape. Smooth out the edges and consider adding a chamfer for a clean, polished look, and to keep those splinters at bay!
Step 2: Assembling the frame
Assembling-the-frames
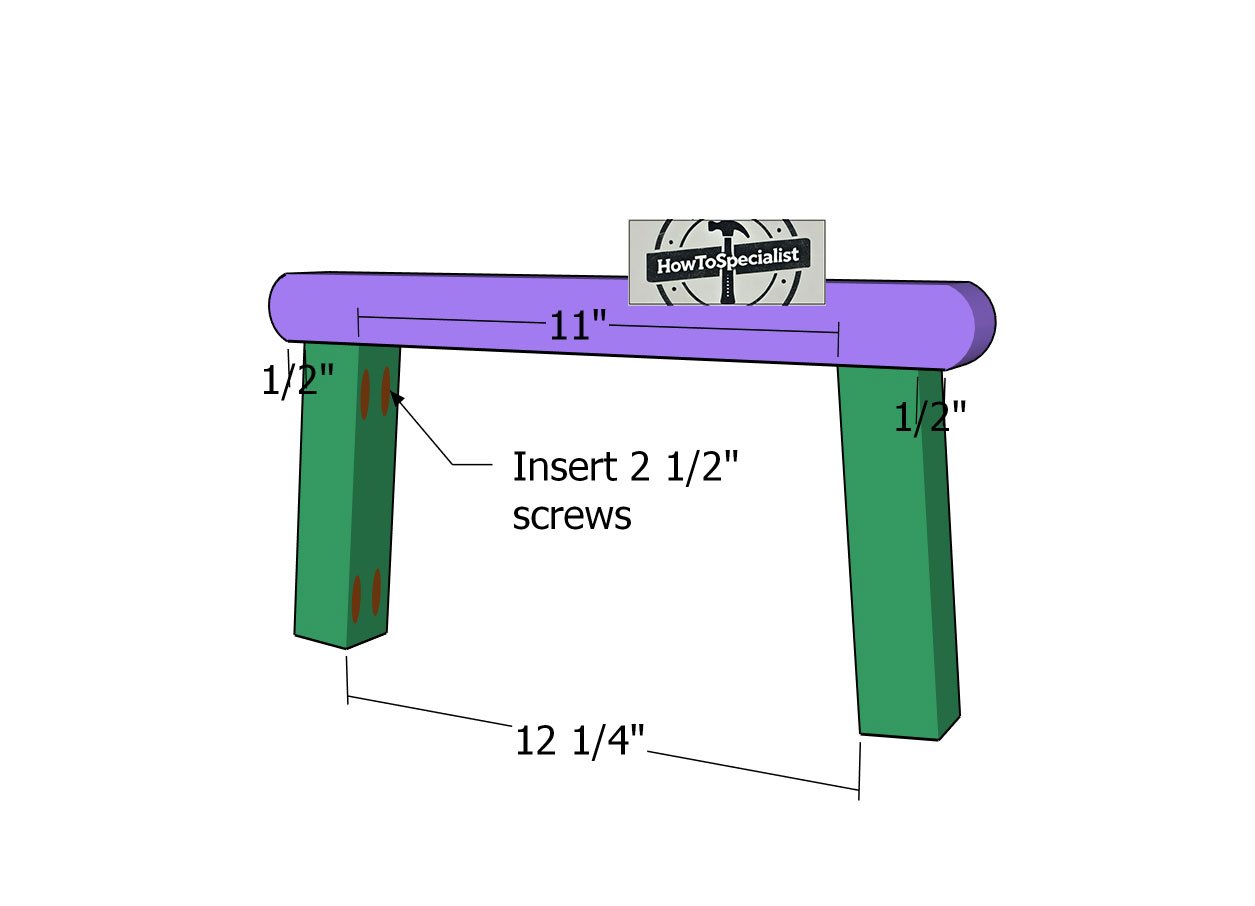
Drill pocket holes on both ends of the vertical supports, making sure they’re on the interior faces for a seamless look. Align the edges as shown in the plans, apply wood glue to each joint, and secure the frame with 2 1/2″ screws. This will lock everything together nice and tight!
Fitting-the-frames
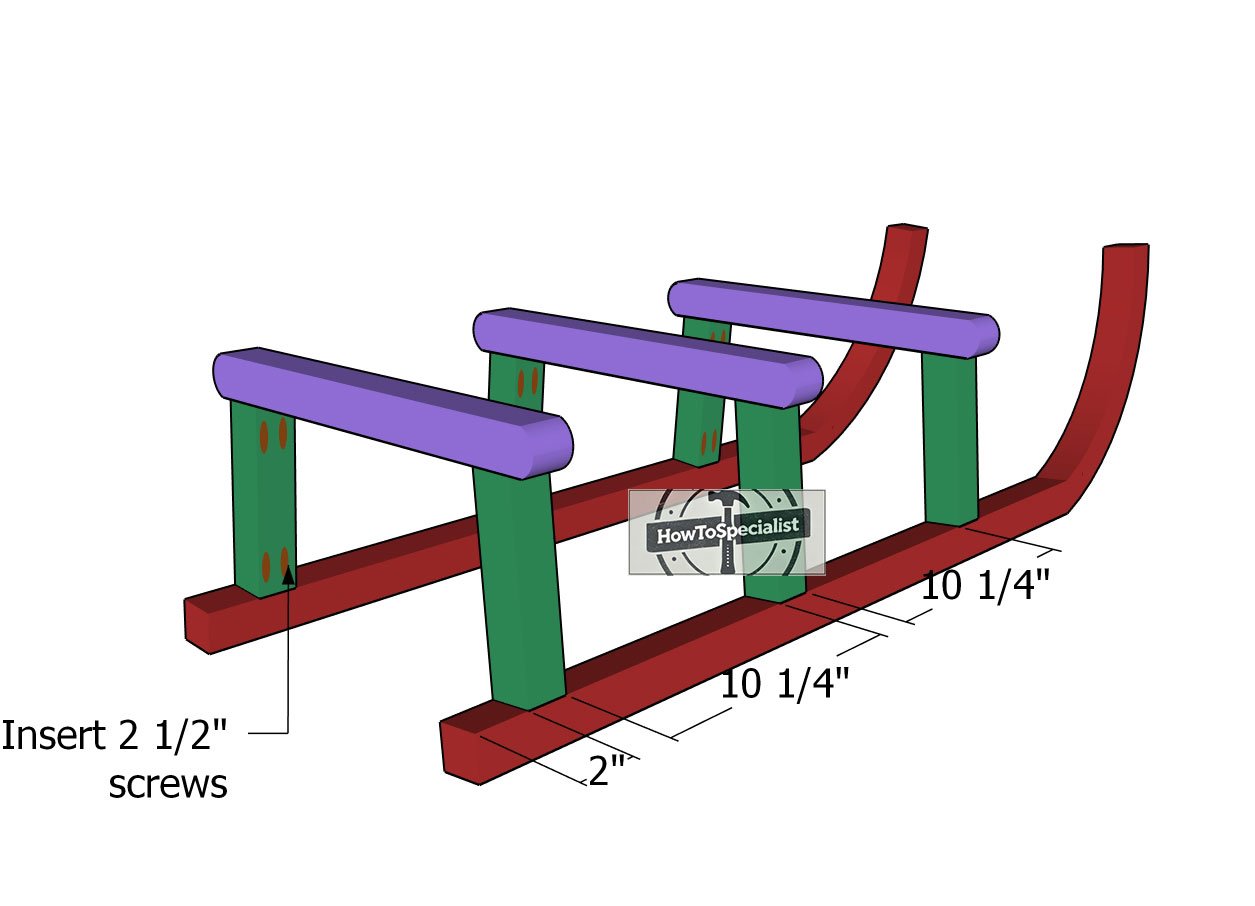
With the three frames assembled, it’s time to attach them to the runners! Carefully align each frame in place, making sure everything is square. Add glue to the joints, then secure everything with 2 1/2″ screws for a sturdy, tight fit.
Cutting-the-braces
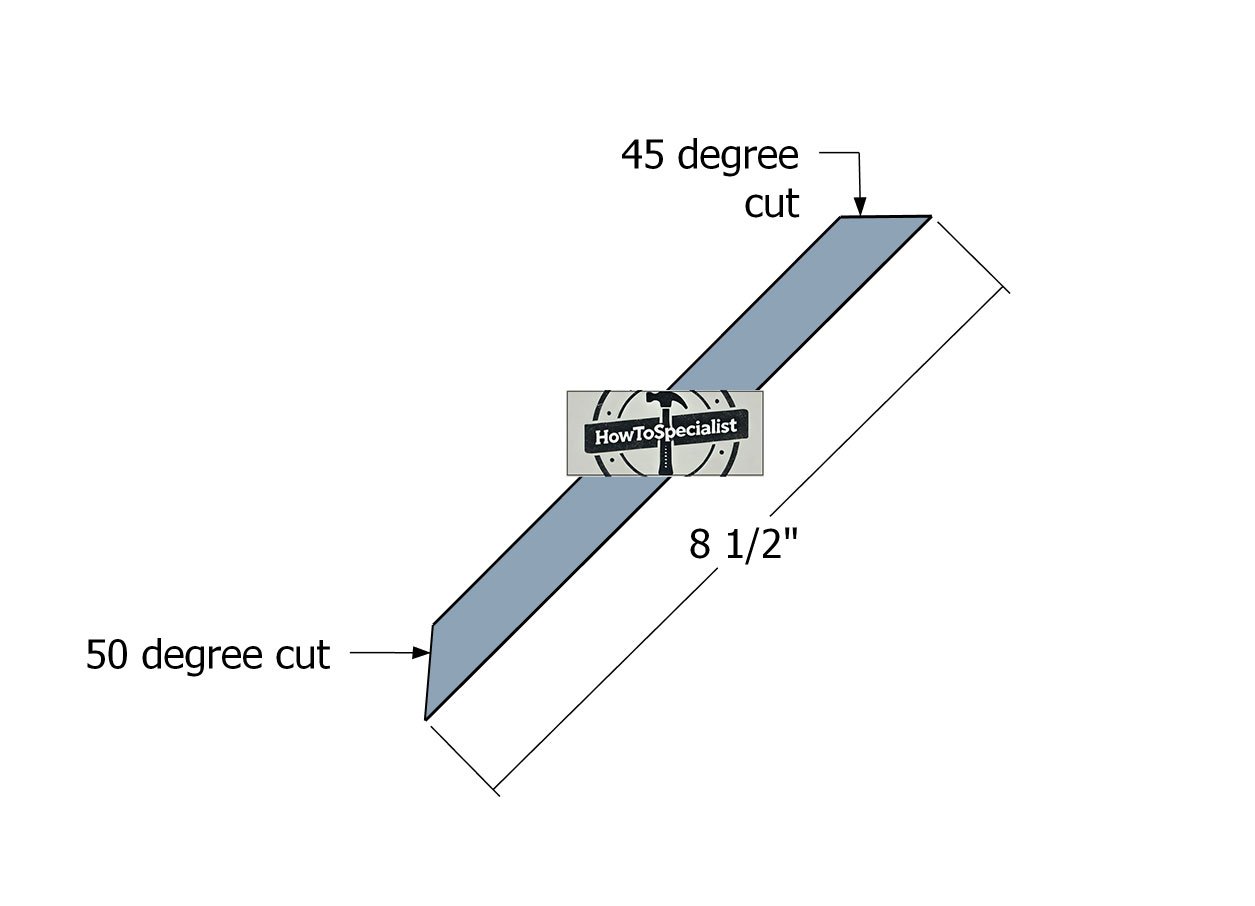
Cut the braces from 1×2 lumber, making angle cuts on both ends as shown in the plans. Use a miter saw to get those precise 50-degree and 45-degree angles on each brace, ensuring a perfect fit for added stability and style.
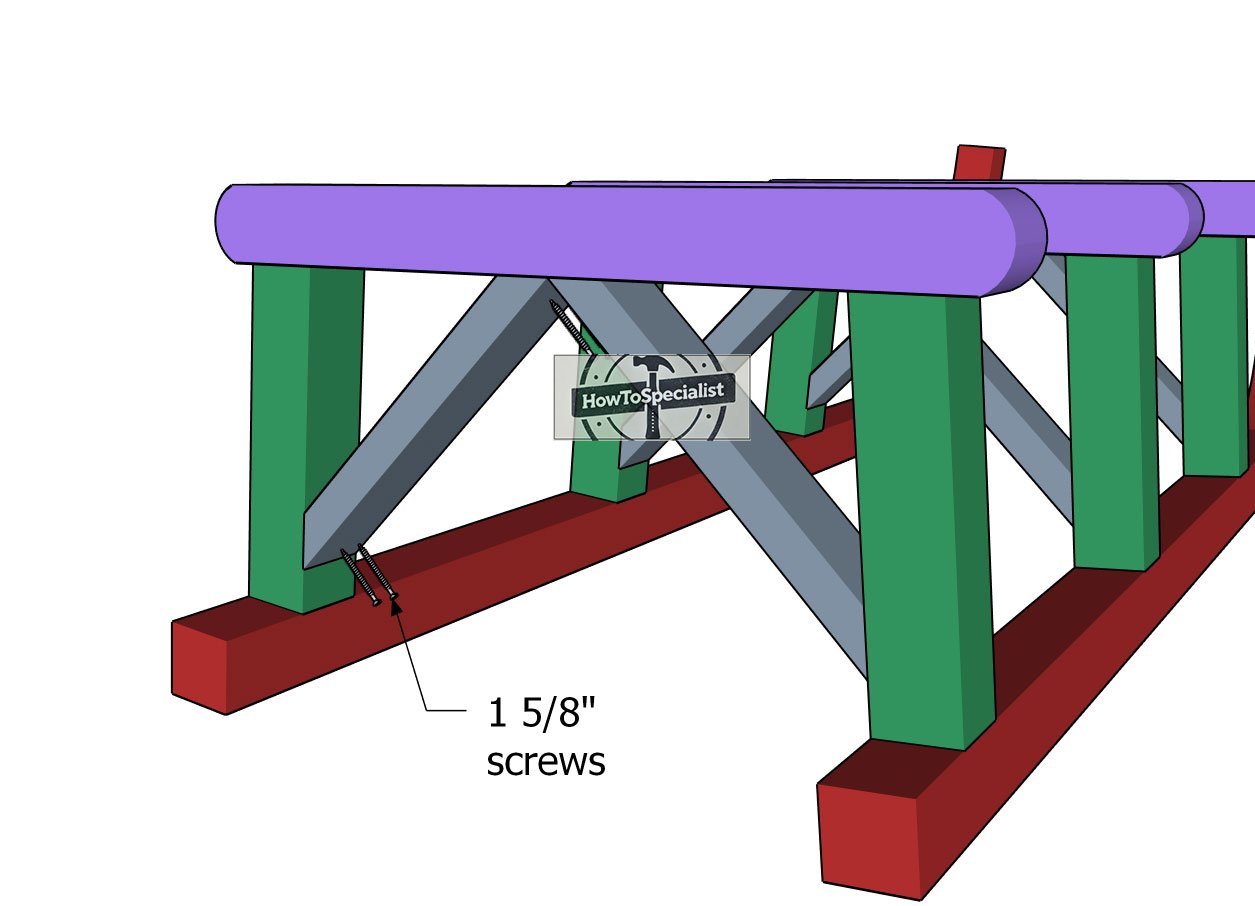
Fitting-the-braces
Attach the braces to the sled frame, making sure to drill pilot holes first to prevent splitting. Secure them with 1 5/8″ screws to lock everything in place. These diagonal braces add essential stability, making the sled strong and ready for holiday decor!
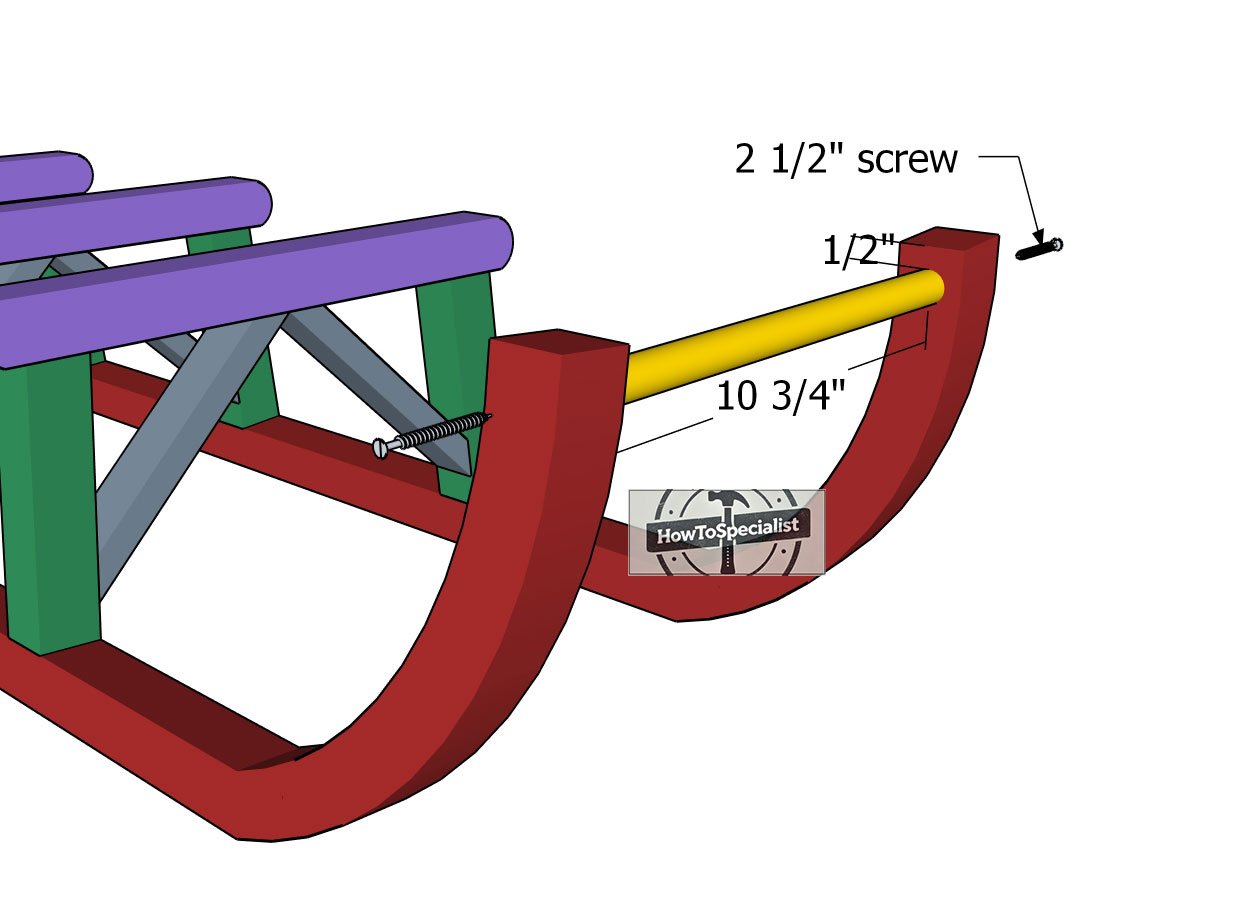
Fitting-the-handle
Now it’s time to connect the two runners by fitting the handle! Grab a 3/4″ dowel and position it between the runners, securing it with 2 1/2″ screws from the sides. Be sure to drill pilot holes first to avoid any splitting. Cut both ends of the dowel at a 5-degree angle for a snug, precise fit that ties the sled together beautifully!
Step 3: Building the seat
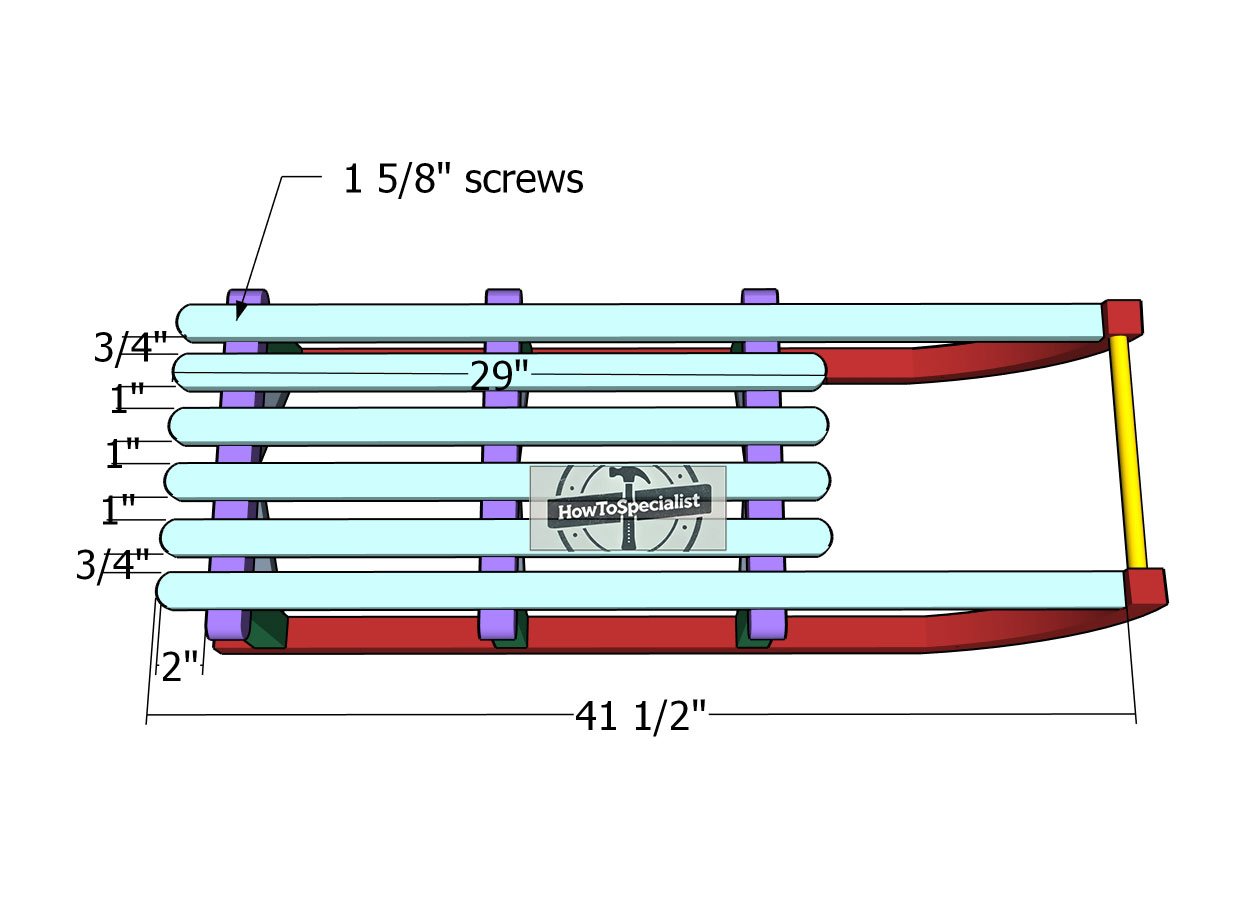
Fitting-the-seat-slats
For the seat slats, use 1×2 boards and round off both ends for a smooth, finished look. Place spacers between each slat to ensure consistent gaps, giving the sled a professional touch. Drill pilot holes, then secure the slats to the frame with 1 5/8″ screws to keep everything sturdy and in place.
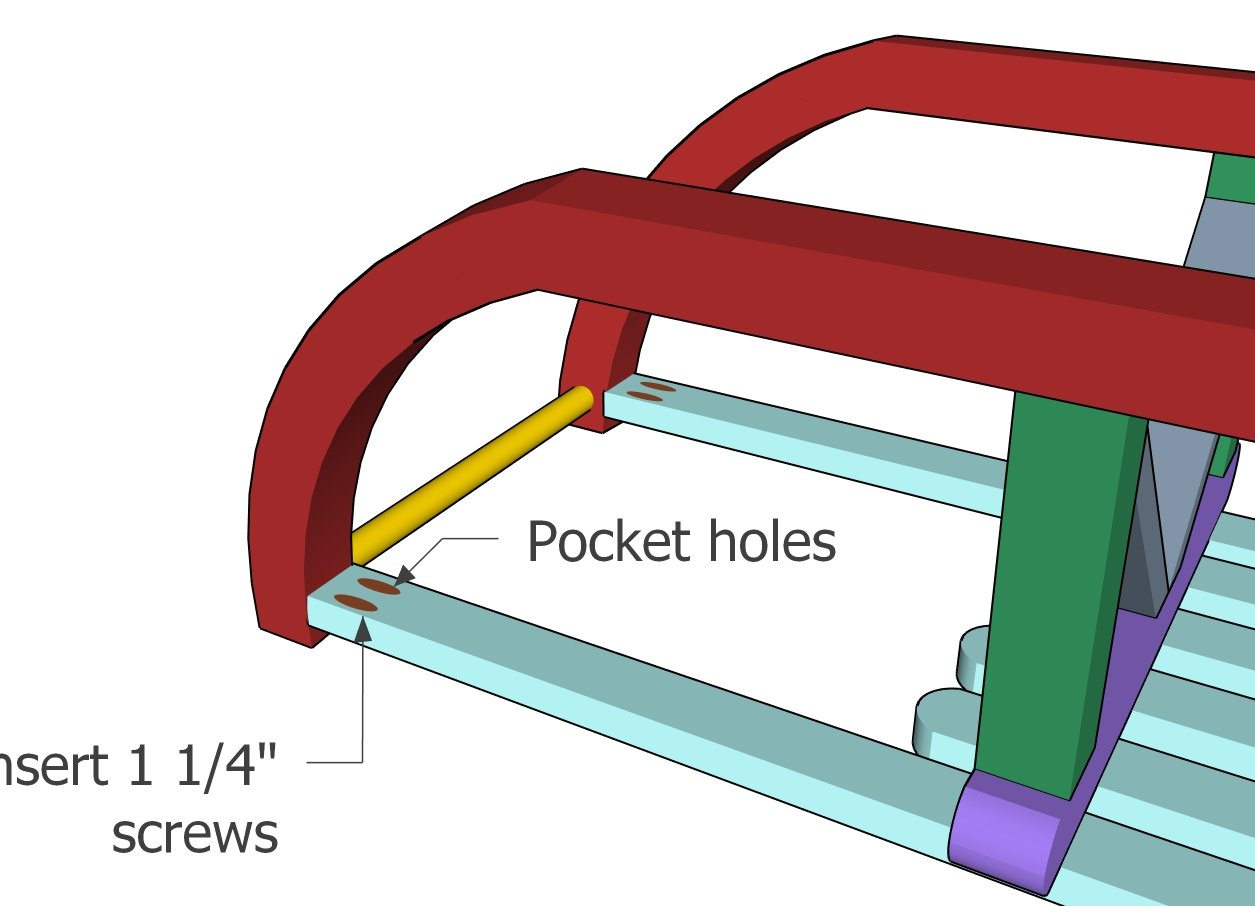
Detail
Drill pocket holes on one end of each side slat, then secure them to the runners using 1 1/4″ screws. This will ensure a tight, sturdy connection, adding both strength and style to your sled!
Step 4: Finishing touches
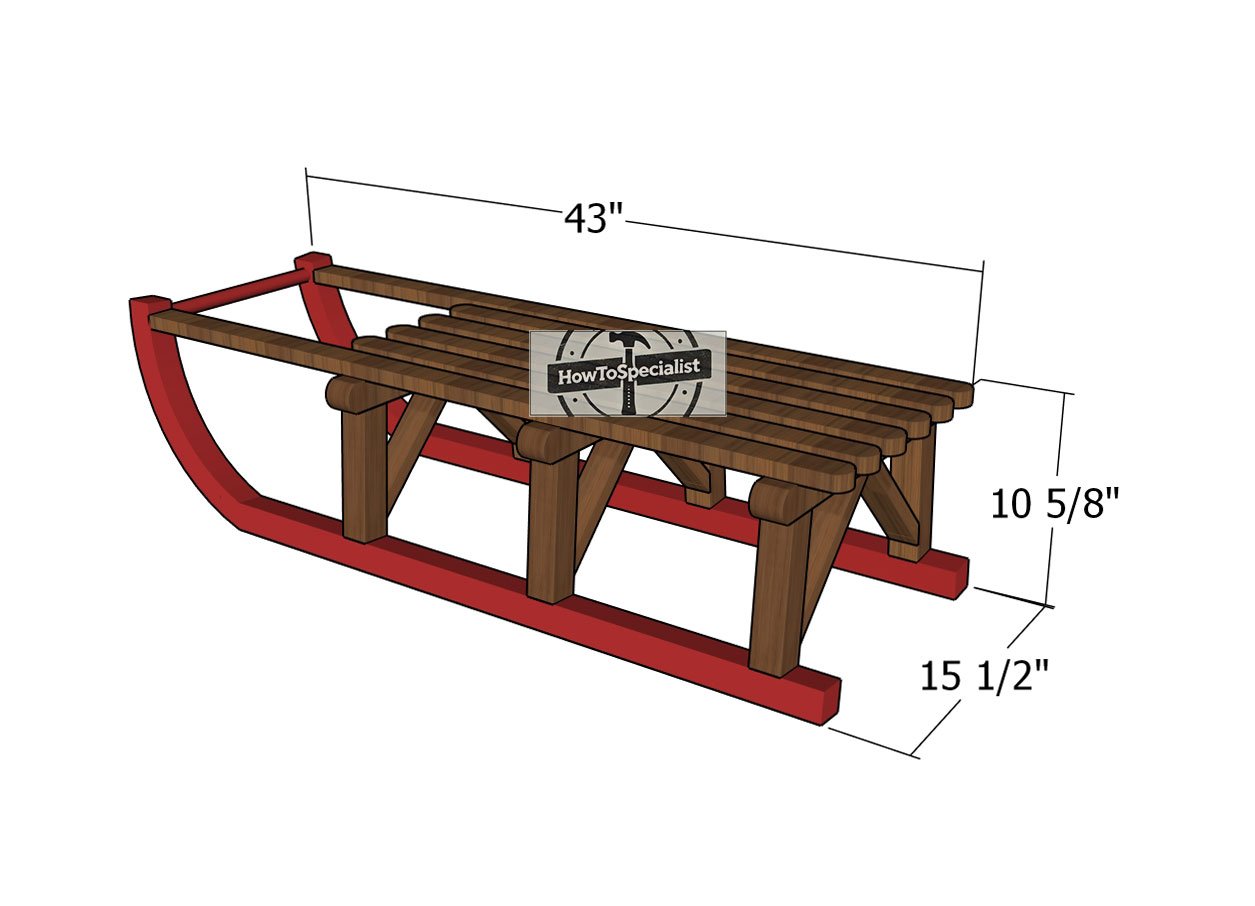
Christmas-sled—dimensions
To complete the project, let’s add those all-important finishing touches! Start by filling any visible holes with wood filler for a seamless look, then sand the entire sled to smooth out rough edges and bring out the wood’s natural beauty.
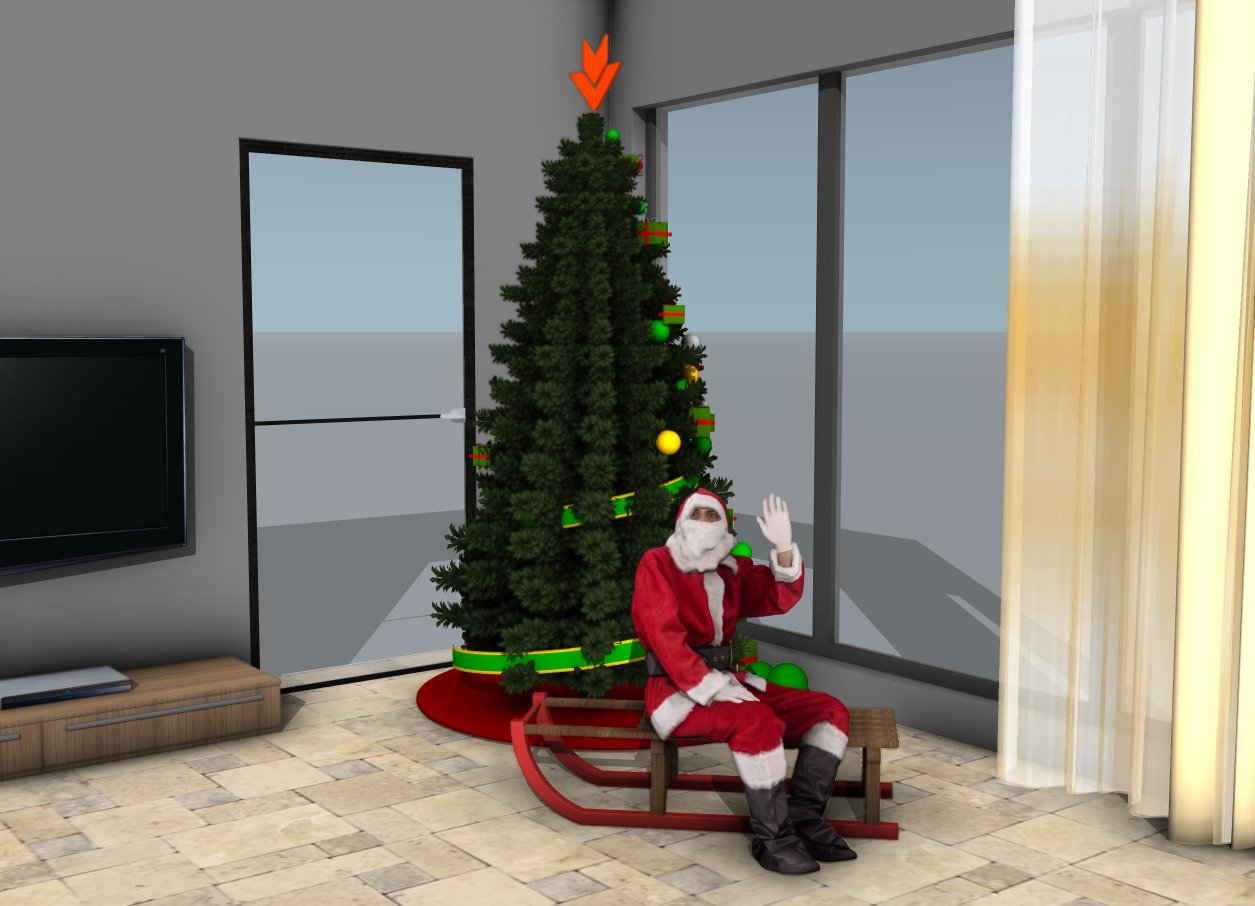
Christmas sleigh – free plans
If you want to add extra charm, consider staining or painting the sled in festive colors, or keep it natural for a rustic feel. Finally, apply a protective clear coat to seal and protect your work, ensuring it can withstand the elements if displayed outdoors. With these final details, your sled is ready to shine as a beautiful addition to your holiday decor!
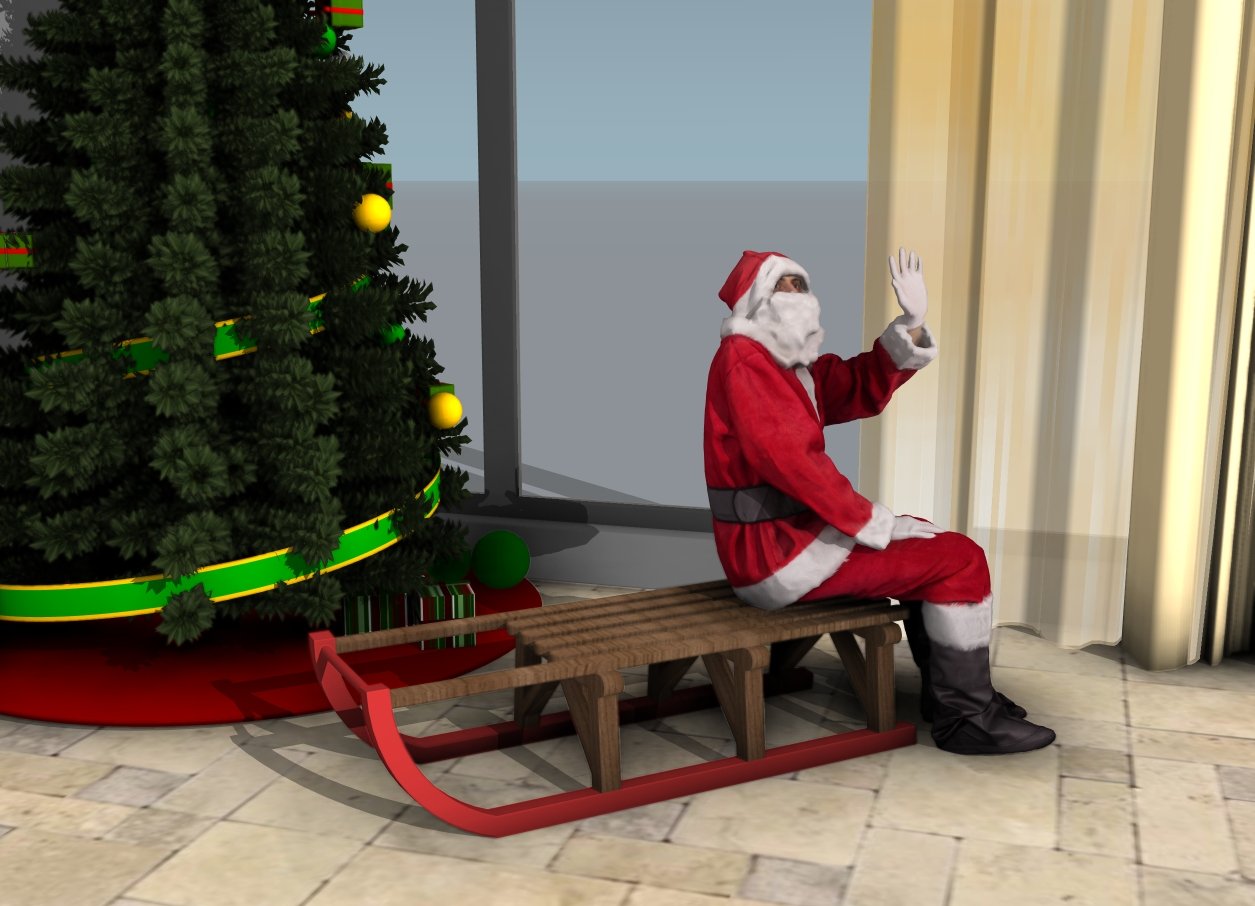
How to build a Christmas sled
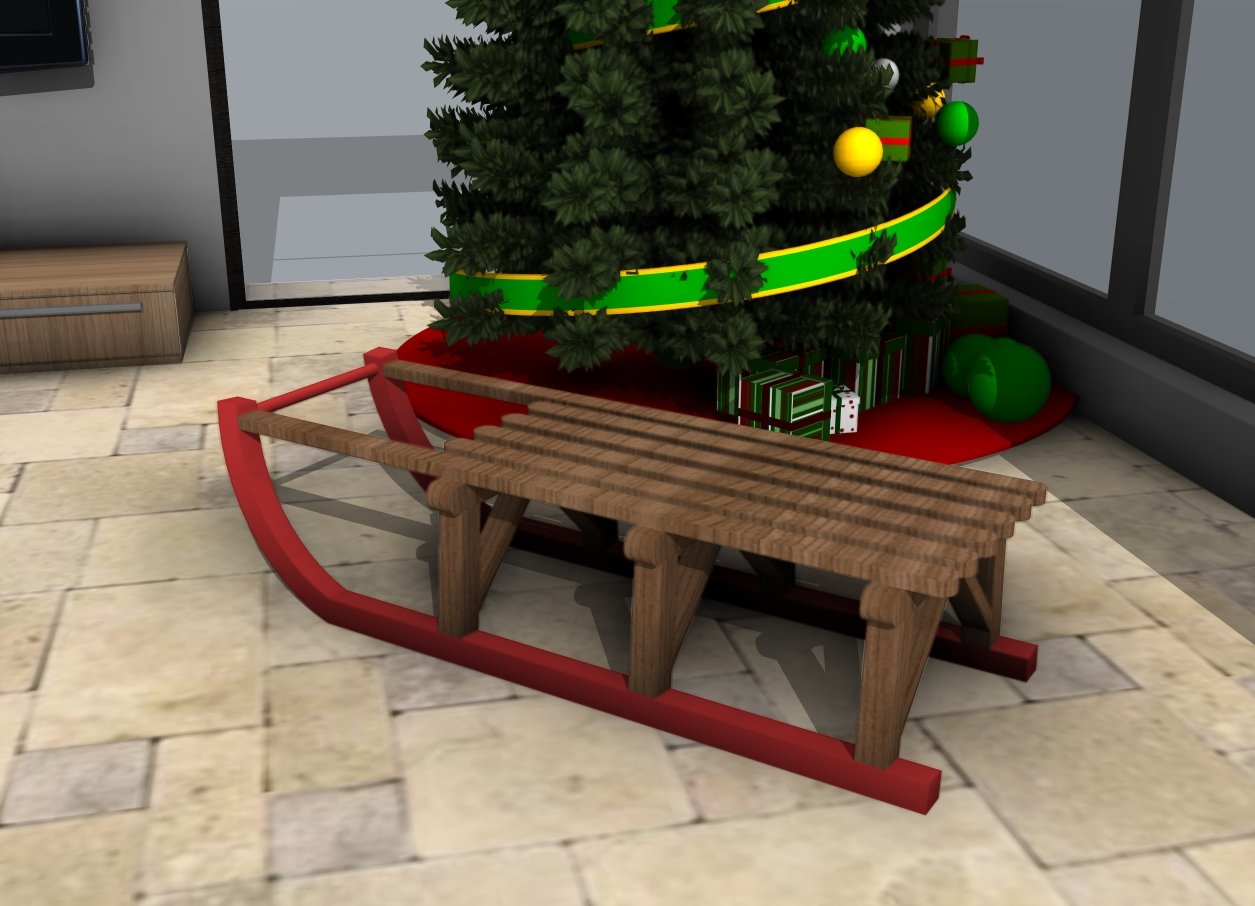
This wooden sled is a versatile piece that can add holiday charm to any corner of your home! Set it on the front porch with pine branches, a festive bow, or even wrapped presents for a warm, welcoming display. Indoors, it makes a cozy addition by the fireplace or as a unique base for a holiday centerpiece with candles, pinecones, and greenery.
It’s also a fun photo prop for seasonal pictures with kids or pets, and you can even use it to showcase your gifts in a creative twist on the traditional tree display. However you choose to style it, this sled brings nostalgic, festive cheer to your decor!
DIY Wooden sled plans
DIY Wooden Sled – Video!
Thanks for checking out my free Christmas sleigh plans! Be sure to explore my other projects for more fantastic ideas. Don’t forget to hit the LIKE button and SHARE with your friends using the social media links below.

