This article is about how to tile inside corners. Tiling your bathroom or kitchen walls is a straight forward process, but you have to master several techniques to get the desired result. From our experience, we consider that you should use plastic trims if you don’t have experience in cutting tiles and installing them on the walls, otherwise the poor cuts might be noticeable even after applying the grout.
If you have worked before with tiles and you have the right skills for the job, you could tile the inside corners without installing the plastic trim. Irrespective of your choice, we recommend you to read our article with attention and use our tips, to get the job done in a professional manner. We recommend you to fill the corner line with caulk, as the grout would most likely crack due to tile expansion. Therefore, you should let the adhesive dry for about a day and fill all the gaps between the tiles with grout, except for the corner line. After another day, caulk the internal corners with a water-resistant sealant and remove the excess with a damp sponge.
If you tile the walls starting from the middle, the tiles placed along the corners will have to be cut in most of the cases, to fit into position. Therefore, you should take accurate measurements and use the right techniques to obtain a neat look, irrespective if you use plastic trim or not.
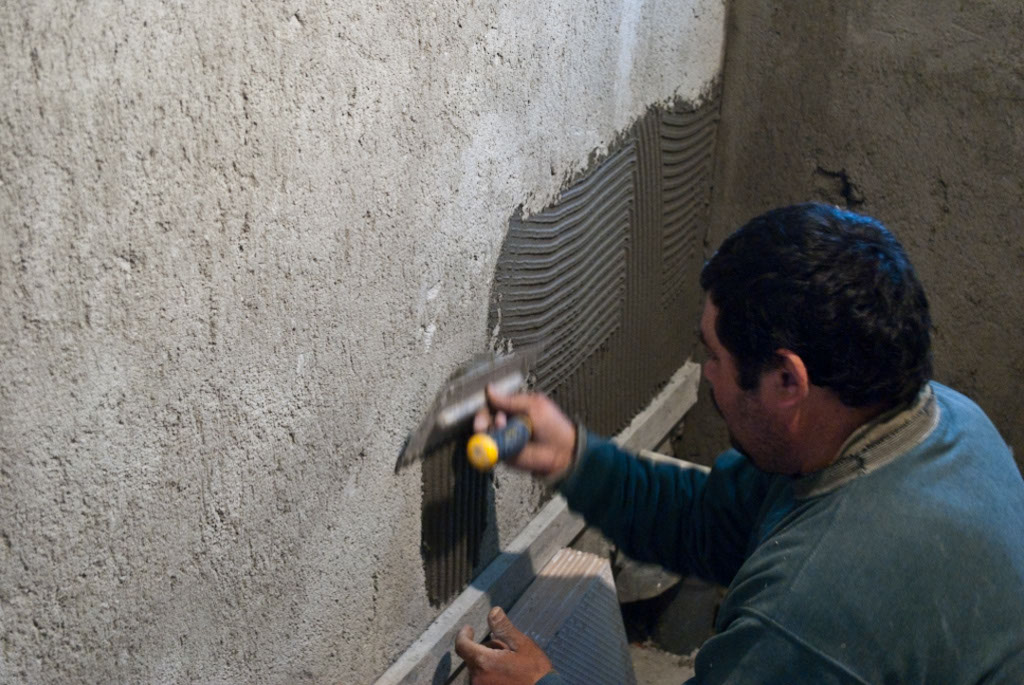
There are several techniques for spreading tile adhesive on the walls, if you want to get the job done like a pro. If you have to install full tiles along the internal corners, we recommend you to spread tile adhesive directly to the wall, by using a large notched trowel. On the contrary, if you have to install cut tiles, you should spread the thinset to the back of the tiles and install it with the cut edge pointing towards the inside corner.
Made from this plan
In order to tile corners, you need the following:
Materials
- Thin set mortar / premixed mastic
- Tiles
- Tile corner trim
- Tile spacers
Tools
- Safety gloves, glasses
- Drill machinery with mixing palette
- Bucket, rubber hammer
- Cutter / miter saw
- Score and snap cutter, wet saw
Tips
- Use tile plastic corner trims for a neat look
- Caulk the corners rather than applying grout
- Leave enough room for til expansion
Time
- 2 hours, one person
How to tile inside corners using a plastic trim

First of all, you have to prepare the wall before installing the ceramic tiles. If the wall is made of bricks, you should make sure the cement render is uniform and remove the irregularities by using a large scrapper. If you have installed drywall, you should seal their joints with paper tape and take into consideration using backer boards in the areas exposed to water (in the shower, near the sink).

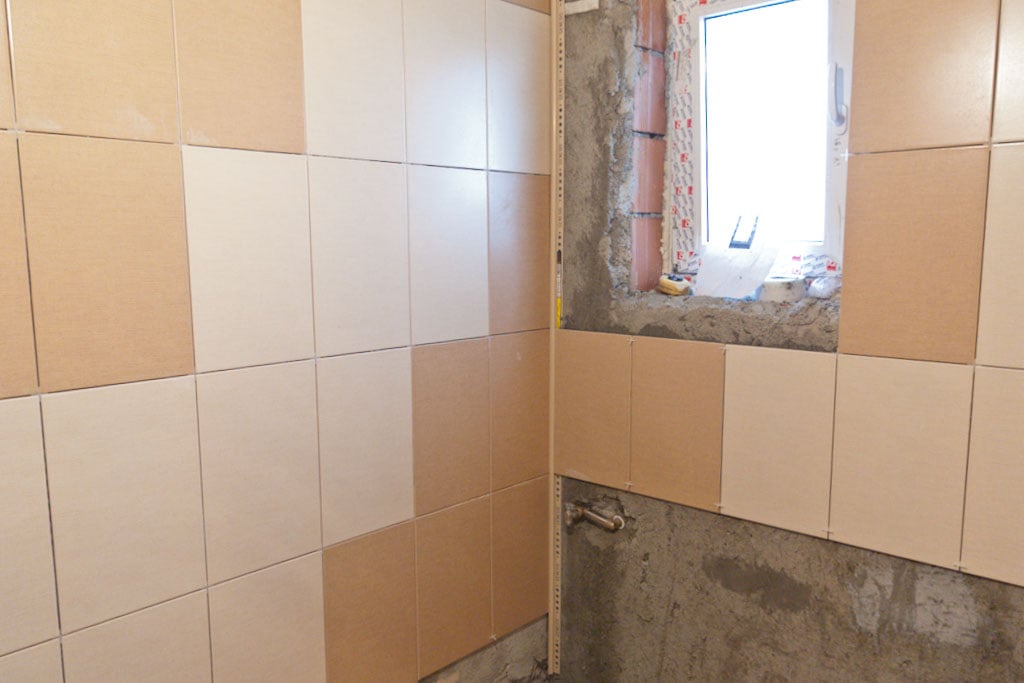
Start installing the wall tiles from the corner, as in the image. You should remember that it is essential to install tile spacers at the end of the rows, just along the corner, to leave enough room for expansion.
Use a spirit level to check if the wall tiles are perfectly plumb and tap them gently with a mallet if needed. Use a sponge to remove the excess adhesive off the tiles, as after it dries out it will be difficult to clean it.

After you tile one side of the inside corner, you should install the plastic trim from top to bottom, as you can notice in the image. First, spread thinset along the corner and secure the trim by pushing it gently in the adhesive. Use a spirit level to check if the corner trim is plumb and attach it again if needed.
Next, start installing the wall tiles making sure you fit them inside the corner trim. Nevertheless, leave enough room for expansion (about 1/10′)’.

Continue installing the rest of the tiles, making sure you place them inside the trim properly. Work with patience and with great care, otherwise the internal corner might not end up as you desire.

Work with attention and use the spirit level every time you add another tile. This aspect is essential if you want to obtain a neat look, therefore we recommend you to pay attention to our tips and take your time.
If you have to install strips of tile along the inside corner, you should measure the distance from the last tile in the row to the corner, making sure you take into account the expansion gap. Next, spread tile adhesive on the back of the tiles and install them into position. Work with great care, as you might move the plastic trim from position.
How to tile inside corners without using trims

If you don’t want to install corner trims, you can still tile the inside corners in a professional manner, but you need to pay more attention while cutting the tiles. Therefore, you should start by spreading tile adhesive on one side of the internal corner and then install the tiles, as in the image.
Place tile spacers between the tiles and along the corner line, as tiles tend to expand or contract due to changes in temperature and humidity (these changes are common in bathrooms and kitchens).

After you have finished installing tiles on one side of the internal corner, you should continue by laying tiles on the other side. Therefore, you should spread tile adhesive on the wall with a notched trowel and install the tiles.
As you can see in the image, you should place spacers along the inside corner and between the tiles. Use a spirit level to check if the wall is plumb and make adjustments if necessary.

If you have to cut the tiles to fit along the inside corner, you should measure first the distance from the last tile in the row to the corner. Don’t forget to subtract the expansion gap (1/8”) and the tile spacer.
Next, use a wet saw or a tile cutter to adjust the tile dimensions. Afterwards, you should install them along the corners and let adhesive dry for a day. Remove the spacers and fill the corner line with caulk, rather than grout (it is more flexible – the expansion of the tiles might damage the grout).
Best tips to tile interior corners:
Tiling interior corners can be a bit tricky, but with the right approach, you’ll get clean, professional-looking results. Here are my best tips to help you tackle those corners like a pro:
1. Plan Your Layout: Before starting, dry-lay your tiles and think about how they’ll meet in the corner. You want to avoid thin, uneven slivers of tile at the corner, so adjust your layout to ensure that tiles on both sides of the corner look balanced and symmetrical.
2. Leave a Gap for Expansion: Always leave a small gap, about **1/8 inch**, between the tiles in the corner to allow for natural expansion and contraction. This will help prevent cracking or buckling over time. You can use tile spacers to maintain even gaps as you work.
3. Cut Tiles to Fit: When tiling into a corner, it’s often necessary to cut the edge tiles to fit. Measure carefully, cut the tiles with a wet saw or tile cutter, and ensure they fit snugly but without forcing them into the corner.
4. Use Caulk Instead of Grout in the Corner: Instead of grouting the corner seam, use a **silicone caulk** that matches your grout color. Corners are subject to movement, and caulk is flexible, allowing it to handle small shifts without cracking, which often happens with grout in corners.
5. Work One Side at a Time: It’s best to tile one wall at a time when working in corners. This allows you to focus on aligning each side properly and ensures the tiles stay flush. Once one side is dry, move on to the adjacent wall.
6. Check for Level and Plumb: As you approach the corner, make sure your tiles stay level and plumb (vertically straight). Use a level to check your alignment regularly so the tiles meet cleanly in the corner.
7. Use Tile Trim for a Clean Finish: If you want a polished, professional look, consider using **tile trim** (also known as edging) to finish the corner. This can help hide any imperfections in your cuts and give the corner a sleek, clean finish.
By following these tips, your interior corners will look sharp, and you’ll have a durable, long-lasting tile job that can handle the natural movement of your walls.
Thank you for reading our article on how to tile inside corners and we recommend you to check out the rest of our projects. Don’t forget to share our articles with your friends, by using the social media widgets.
