This step by step woodworking project is about free 2 car carport plans. I have designed this simple carport with a gable roof, so you can protect 2 cars from the elements. This carport is super sturdy and it features a classical design. My plans come with step by step instructions and you can easily adjust all the dimensions to suit your needs. See my other DIY projects HERE [1]. I have a Premium Plans for this project in the STORE [2].
We recommend you to invest in the best materials you could afford. Therefore, you should buy weather-resistant lumber, such as pine or cedar. Always take accurate measurements before adjusting the size of the components at the proper size. Drill pilot holes trough the components before inserting the wood screws, to prevent the wood from splitting. See all my Premium Plans HERE [2].
Made from this plan
Single Carport Plans
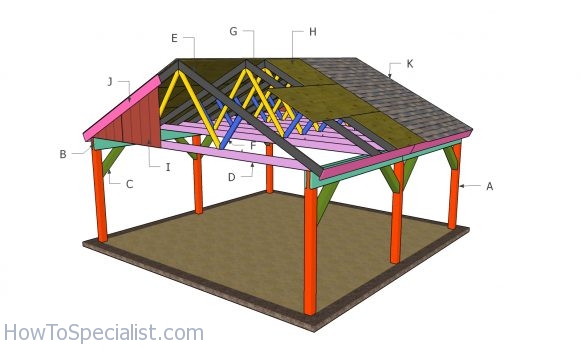
Building a 2 car carport
Materials
- A – 6 pieces of 6×6 lumber – 8 ft long POSTS
- B – 8 pieces of Support Beams – 2×12 lumber 10′ long BEAMS
- C – 8 pieces of 6×6 lumber 36″ long BRACES
- 6 pieces of 6×6 lumber – 8 ft long
- 8 pieces of 2×12 lumber – 10 ft long
- 2 pieces of 6×6 lumber – 12 ft long
- 11 pieces of 2×6 lumber – 20 ft long
- 22 pieces of 2×6 lumber – 12 ft long
- 22 pieces of 2×4 lumber – 10 ft long
- 6 pieces of T1-11 5/8″ siding – 4’x8′
- 1 piece of 1×8 lumber – 8 ft long
- 4 pieces of 1×8 lumber – 10 ft long
- 4 pieces of 1×8 lumber – 12 ft long
- 15 pieces of 1/2″ plywood – 4’x8′
- Tar Paper & Asphalt Shingles – 500 sq ft
- tube form, post anchor
- 500 pieces of 2 1/2″ screws, 1 1/4″ screws, 6″ screws
- wood glue, stain/paint, wood filler
Tools
- Safety gloves, glasses
- Miter saw, jigsaw
- Chalk line, tape measure, spirit level, carpentry pencil
- Drill machinery and drill bits
Time
- One Day
Building a single car carport
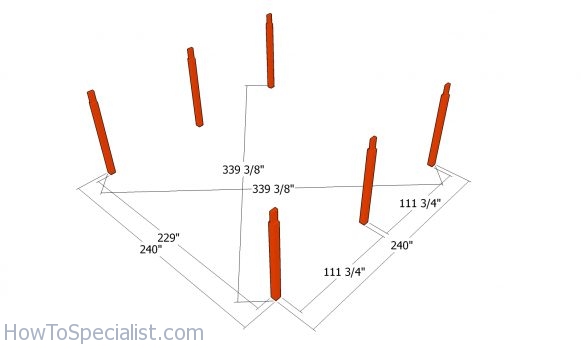
Laying the posts
First, layout the posts for the 20×20 carport. Use batter boards and string to determine the location of the posts. Apply the 3-4-5 rule to every corner of the carport, so you make sure they are right angled. Make sure the diagonals are equal. Determining the location for the structure is essential, as you have to comply with the local building codes. Make sure the surface is level and remove the vegetation layer.
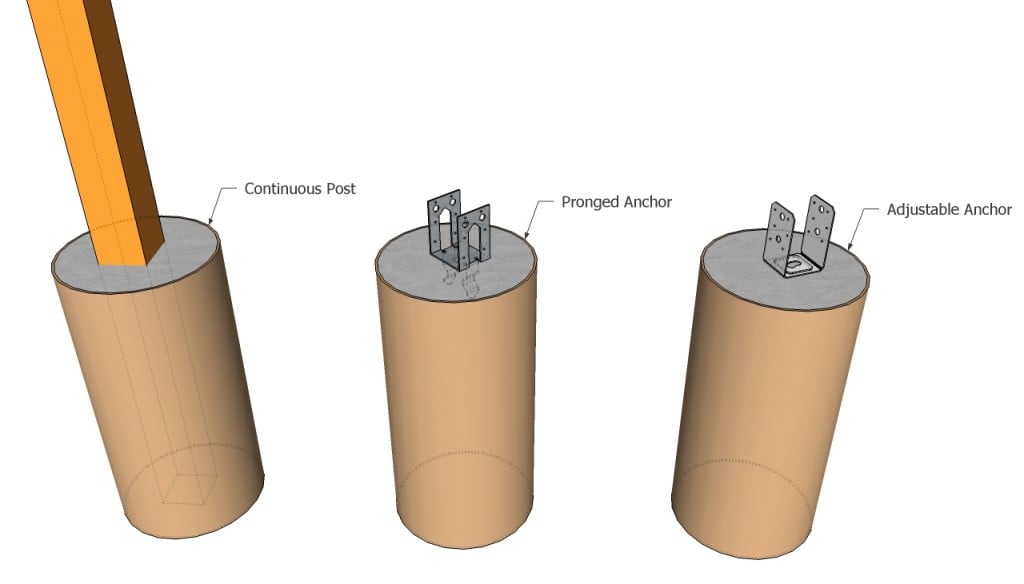
Anchoring the post into concrete
Dig 3 ft holes into the ground, making sure they have about 16″ in diameter. Fit the tubes then the posts into the ground and plumb them with a spirit level. Use temporarily braces to make sure the posts are locked into placed while filling the holes with concrete. Let the concrete dry out for several days.
Read the local codes for more details on how to secure the posts.
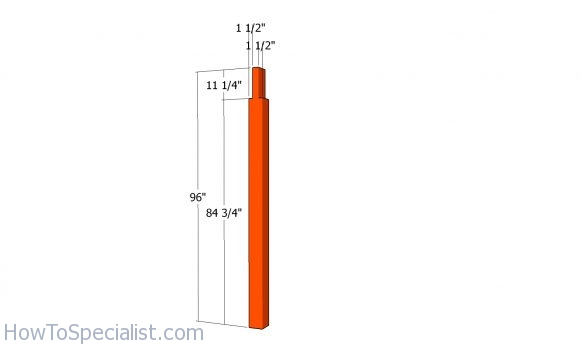
Cutting the posts
Use circular saw to make the cut-outs to the top of the posts. Set the circular saw to 1 1/2″ depth and make parallel cuts inside the marked areas. Use a hammer to remove the excess material. Smooth the surface with a chisel and sandpaper.
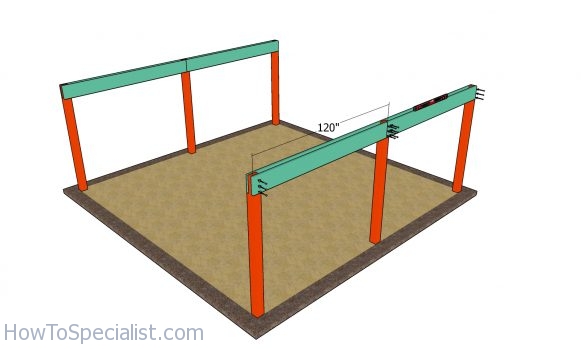
Fitting the support beams
Use lag screws to secure the posts to the anchors. Before pouring the concrete you need to make sure the top of the posts are horizontal one to another. Use a laser to mark the level to the top of the posts and use a circular saw, if you need to make cuts.
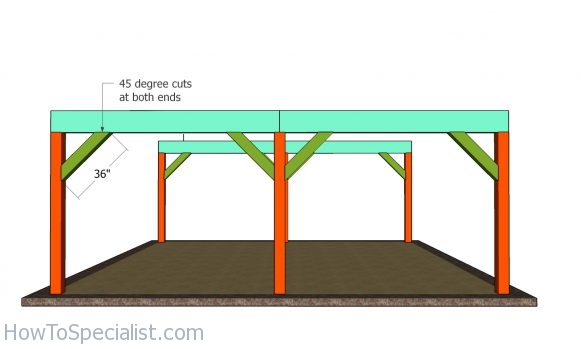
Fitting the braces
Use 2×12 lumber for the top support beams. Fit the support beams to the top of the posts, inside the notches. If everything was done properly till this step, the beams should be perfectly horizontal.
Clamp the beams to the posts and drill pilot holes through both the beams and the posts. Insert 6″ carriage bolts with nuts and washers. Use 3 bolts at both ends of the beams.
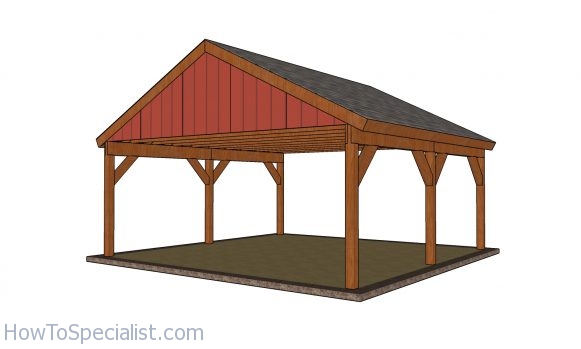
2 car Gable Carport Plans
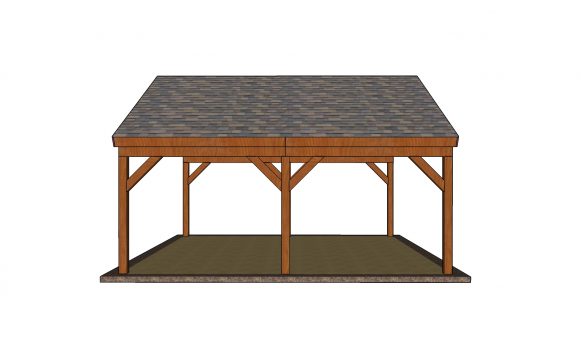
Side view – 2 car carport
This carport with a gable roof is large enough for two cars. You can build this large carport in one week and then start using it to shelter your cars. Make sure you read the local codes and make adjustments to suit your local requirements. If you like my project, don’t forget to SHARE it on Facebook and Pinterest. I have a Premium Plans for this project in the STORE [2].
Thank you for reading our project about free single carport plans and I recommend you to check out the rest of the projects. Don’t forget to LIKE and SHARE our projects with your friends, by using the social media widgets. SUBSCRIBE to be the first that gets our latest projects.
<< Previous | Next >> [4]


