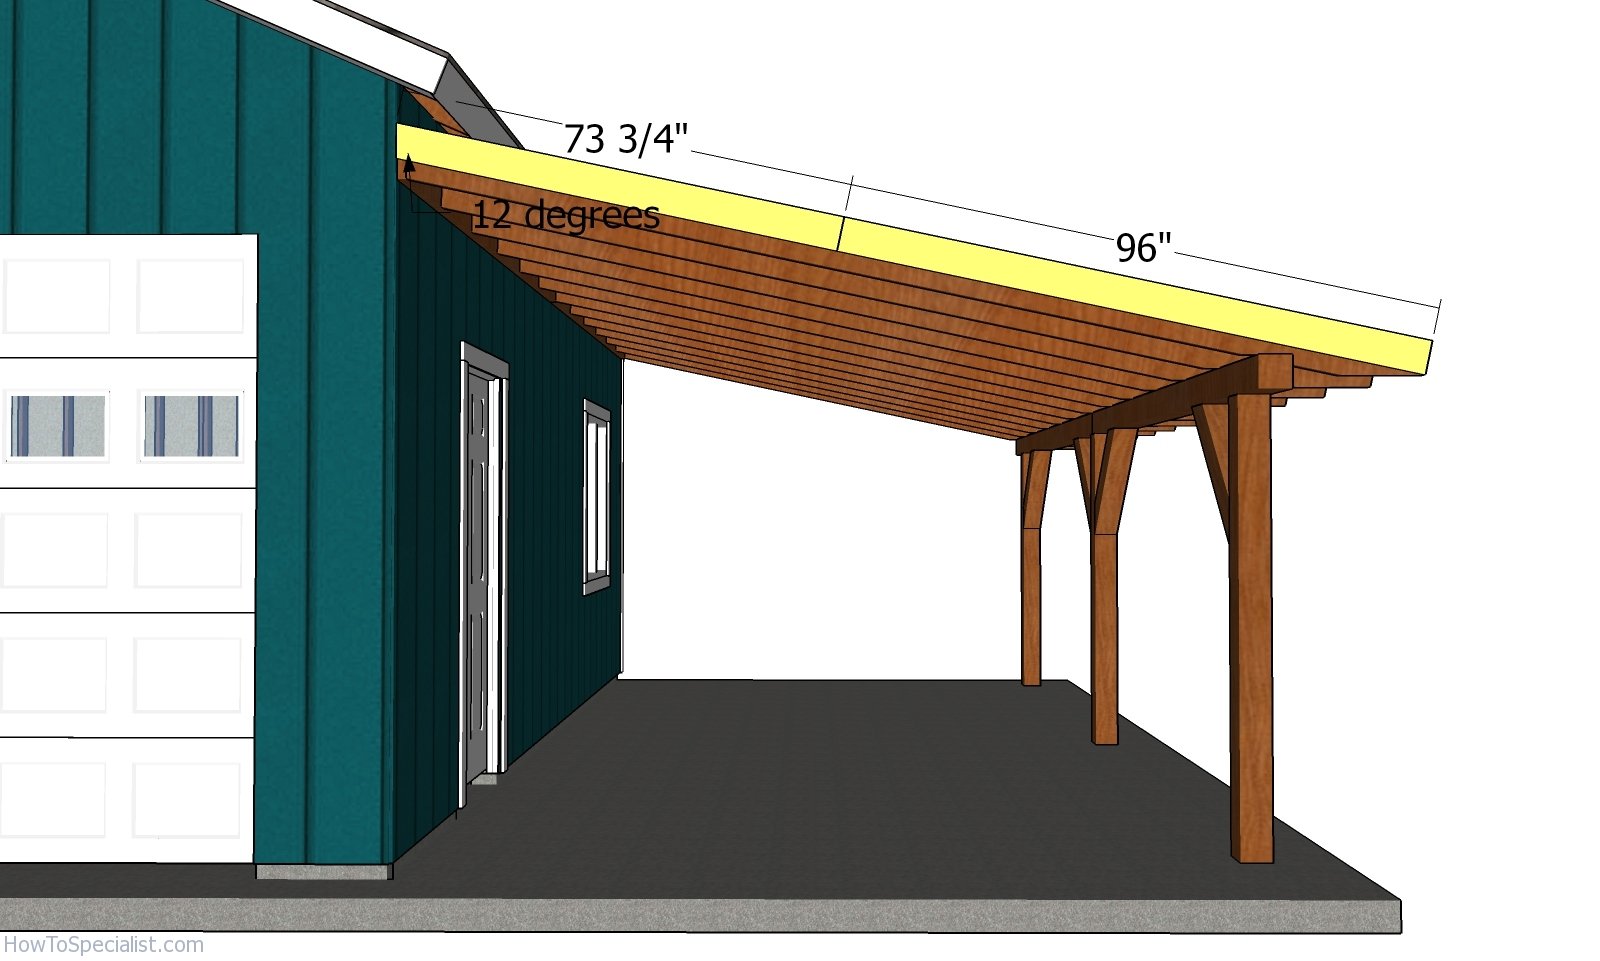
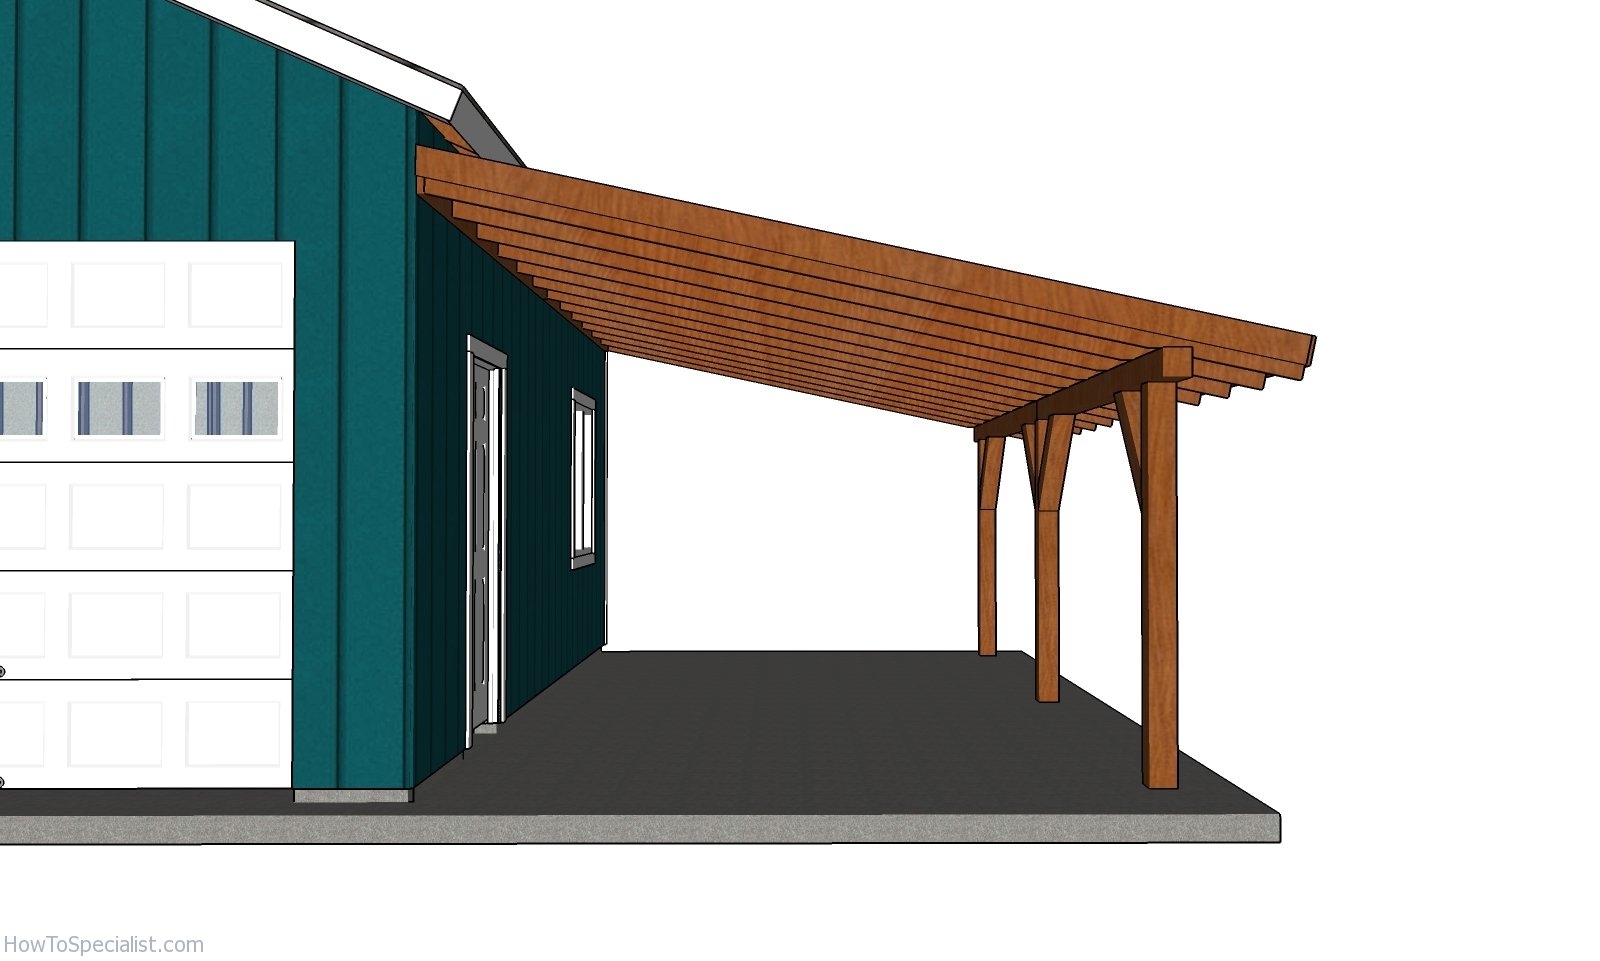
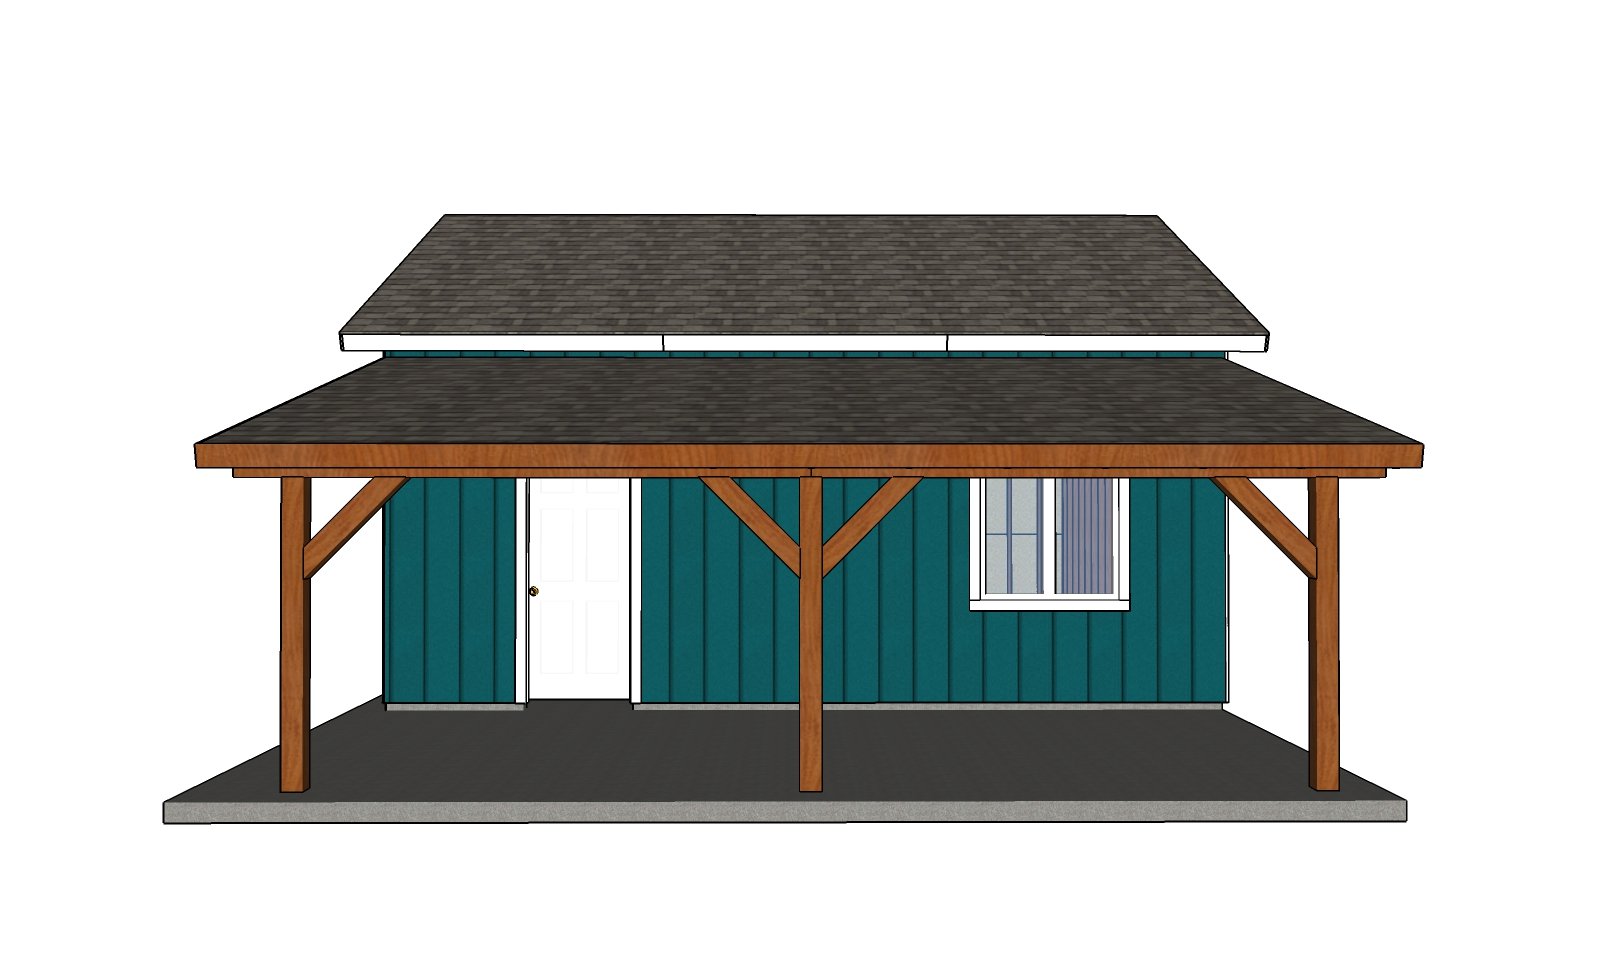
This step by step diy woodworking project is about 12×24 attached carport plans. I had many requests for a large 12×24 carport with a lean roof. This carport features a sturdy 6×6 framing and a roof with a 3:12 slope. The roof structure is built on a sturdy 2×10 rafter structure, every 24″. This is a wooden carport that is easy to build an budget friendly.
In most of the cases, a building permit is required so make sure you go to the town hall and ask information about the legal requirements you have to comply with. In this manner, you will also find out useful details about your carport construction. When building the carport, you should make sure the plans are detailed and come with step by step instructions, as well as with a complete list of the materials. See all my Premium Plans HERE.
Made from this plan
12×24 Attached Carport – Free DIY Plans
Building a 12×24 carport
Materials
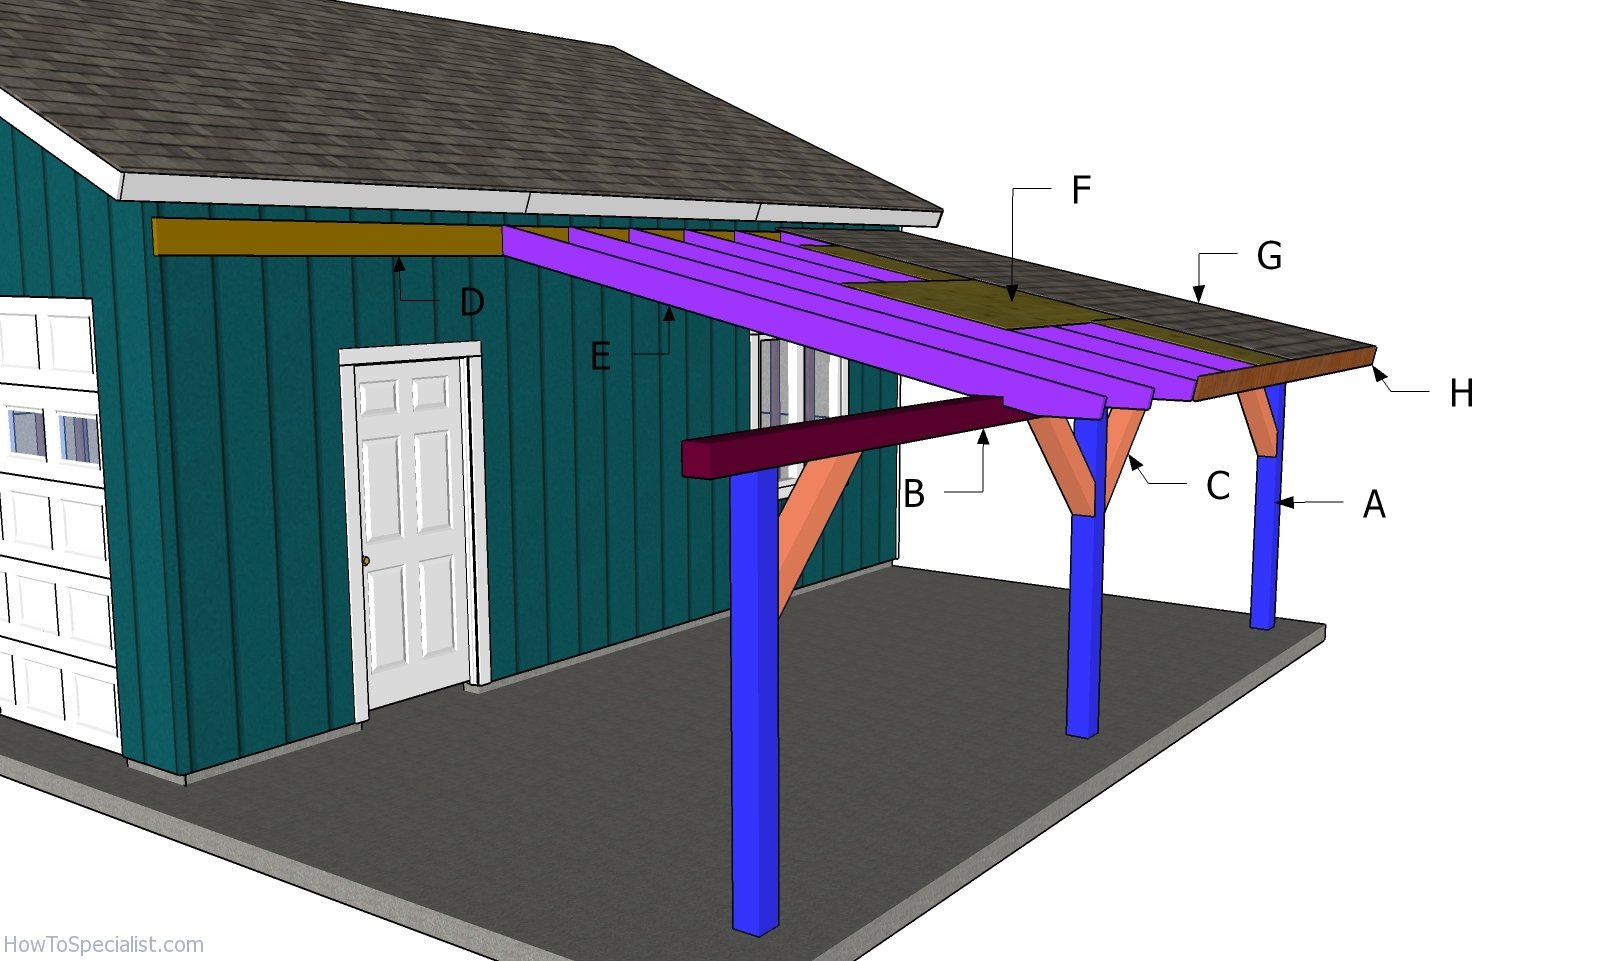
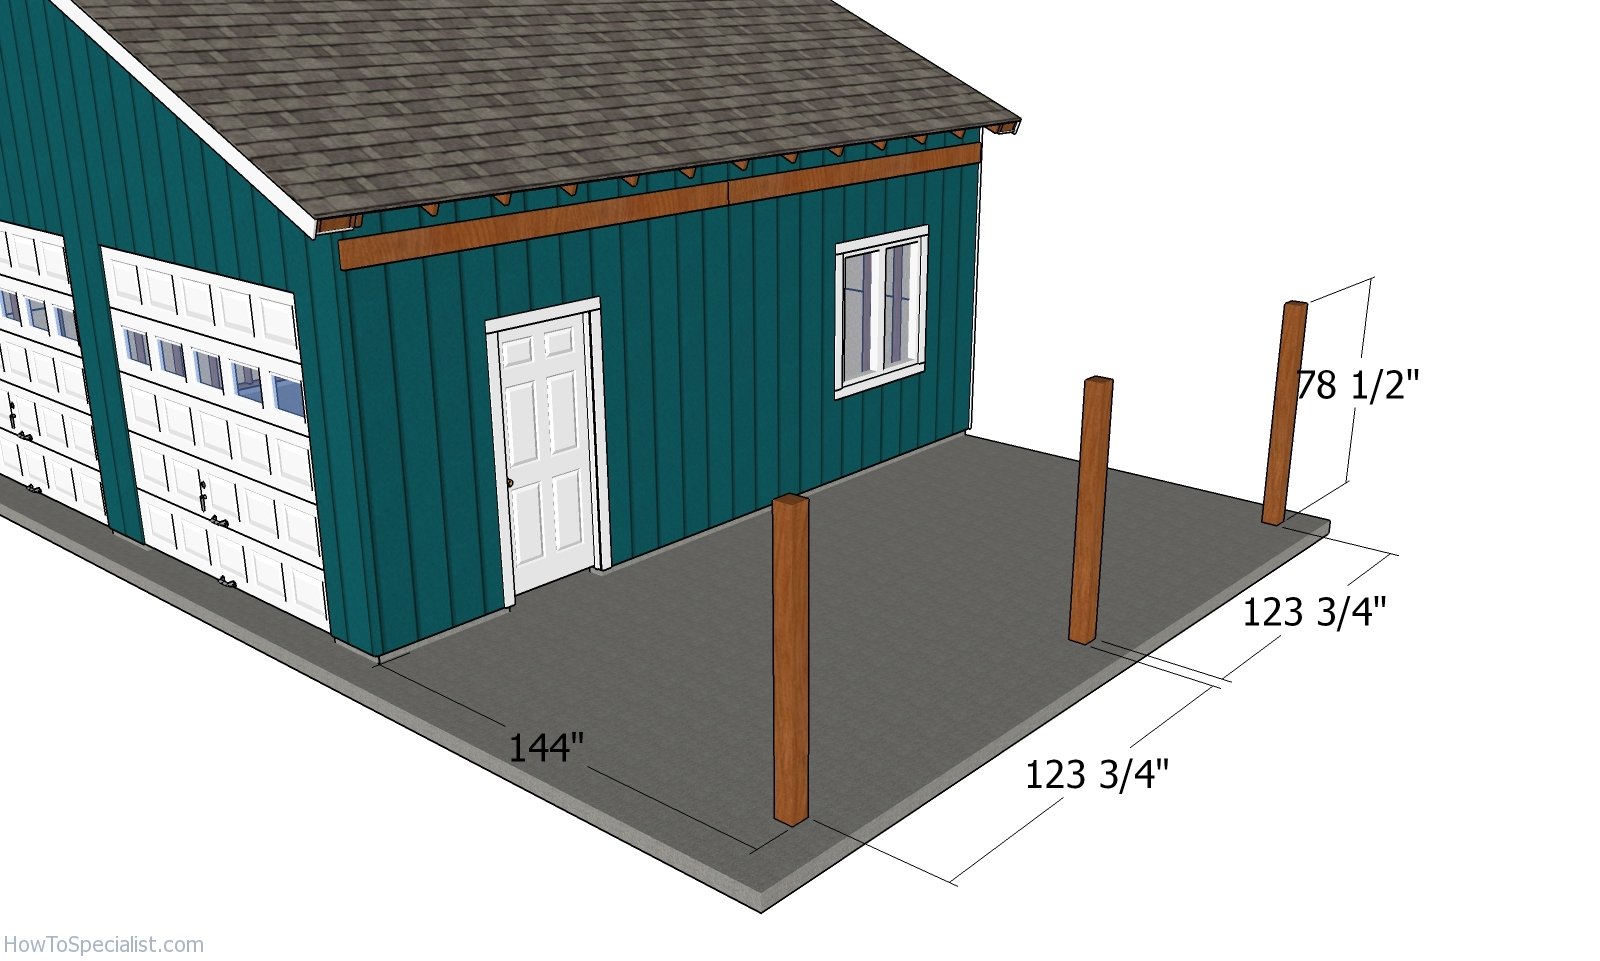
- A – 3 pieces of 6×6 lumber – 78 1/2″ long POSTS
- B – 2 pieces of 6×6 lumber – 144″ long SUPPORT BEAMS
- C – 4 pieces of 6×6 lumber – 36″ long BRACES
- D – 2 pieces of 2×8 lumber – 144″ long SUPPORT BEAMS
- E – 13 pieces of 2×8 lumber – 168″ long RAFTERS
- F – 8 pieces of 1/2″ plywood – 4’x8′ long, 2 pieces – 4’x4′ long, 2 pieces – 25 1/2″x48″ long, 2 pieces – 25 1/2″x96″ long ROOF SHEETS
- G – 350 sq ft of metal roofing ROOFING
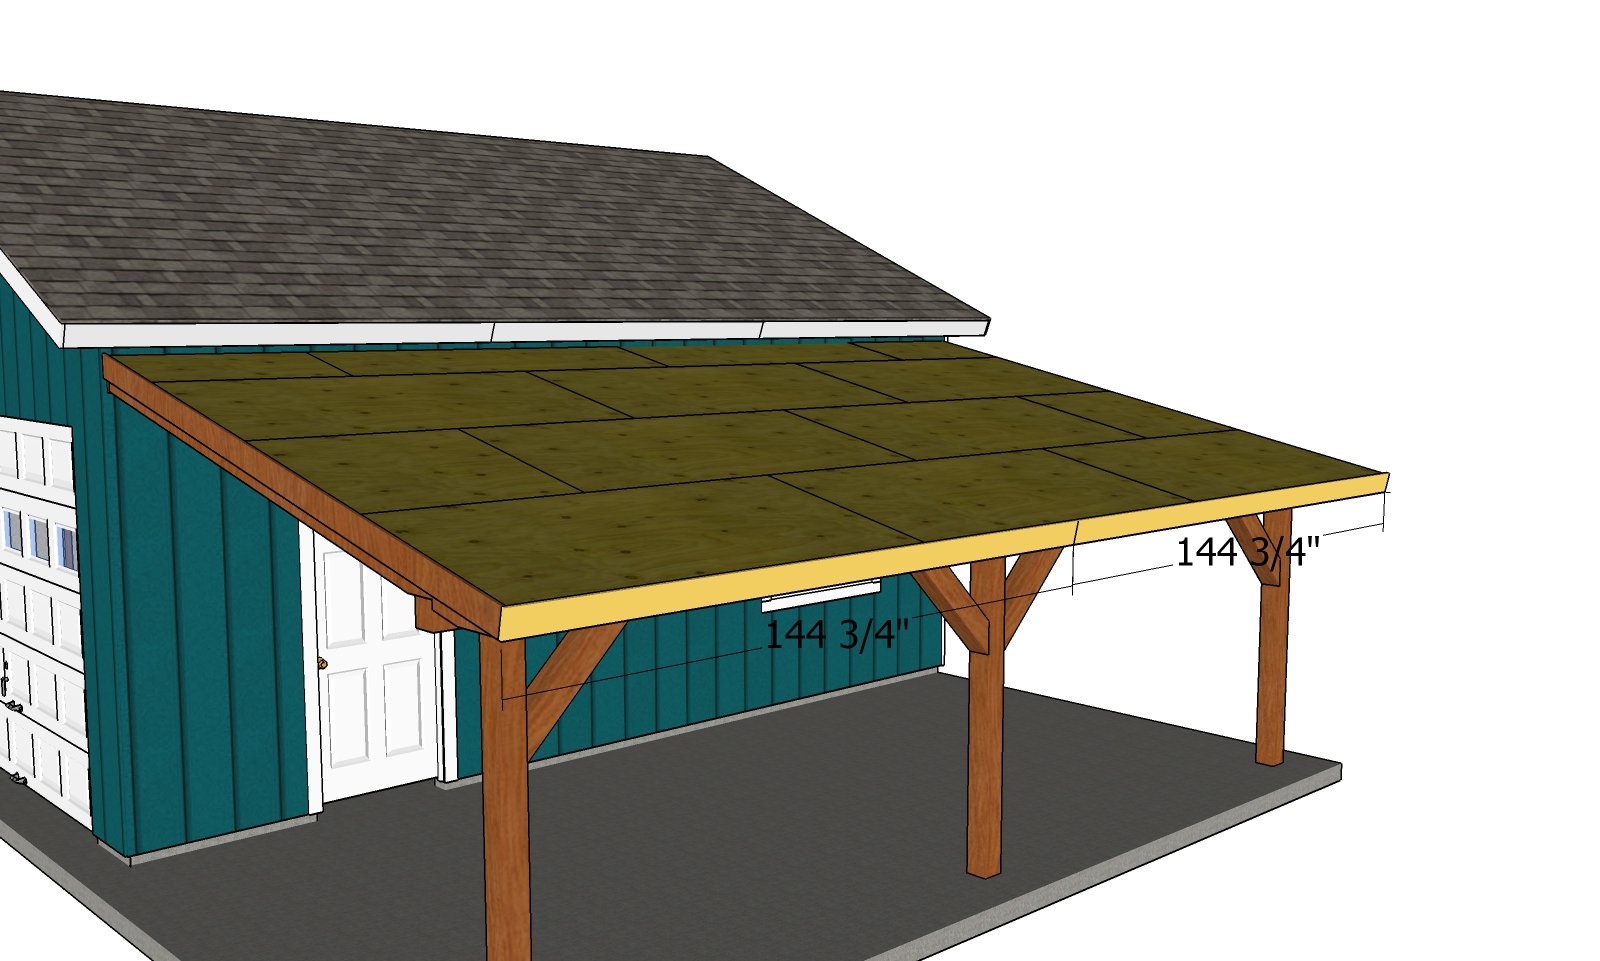
- H – 2 pieces of 1×6 lumber – 144 3/4″ long, 2 pieces – 96″ long, 2 pieces – 73 3/4″ long TRIMS
- 5 pieces of 6×6 lumber – 8 ft
- 2 pieces of 6×6 lumber – 12 ft
- 2 pieces of 2×8 lumber – 12 ft
- 13 pieces of 2×8 lumber – 14 ft
- 12 pieces of 1/2″ plywood – 4’x8′
- 2 pieces of 1×6 lumber – 14 ft
- 4 pieces of 1×6 lumber – 8 ft
- 350 sq ft of shingles
- 60 ft of drip edges
- 500 pieces of 1 5/8″ screws
- 3 post anchors
- 3 post to beam connectors
- rafter ties
- 1 1/2″ structural screws
- 2 1/2″ screws
- 5 1/2″ screws
- 2″ nails
- tube form
Tools
- Safety gloves, glasses
- Miter saw, jigsaw
- Chalk line, tape measure, spirit level, carpentry pencil
- Drill machinery and drill bits
Time
- One Week
Related
Building an attached carport
Laying out the posts
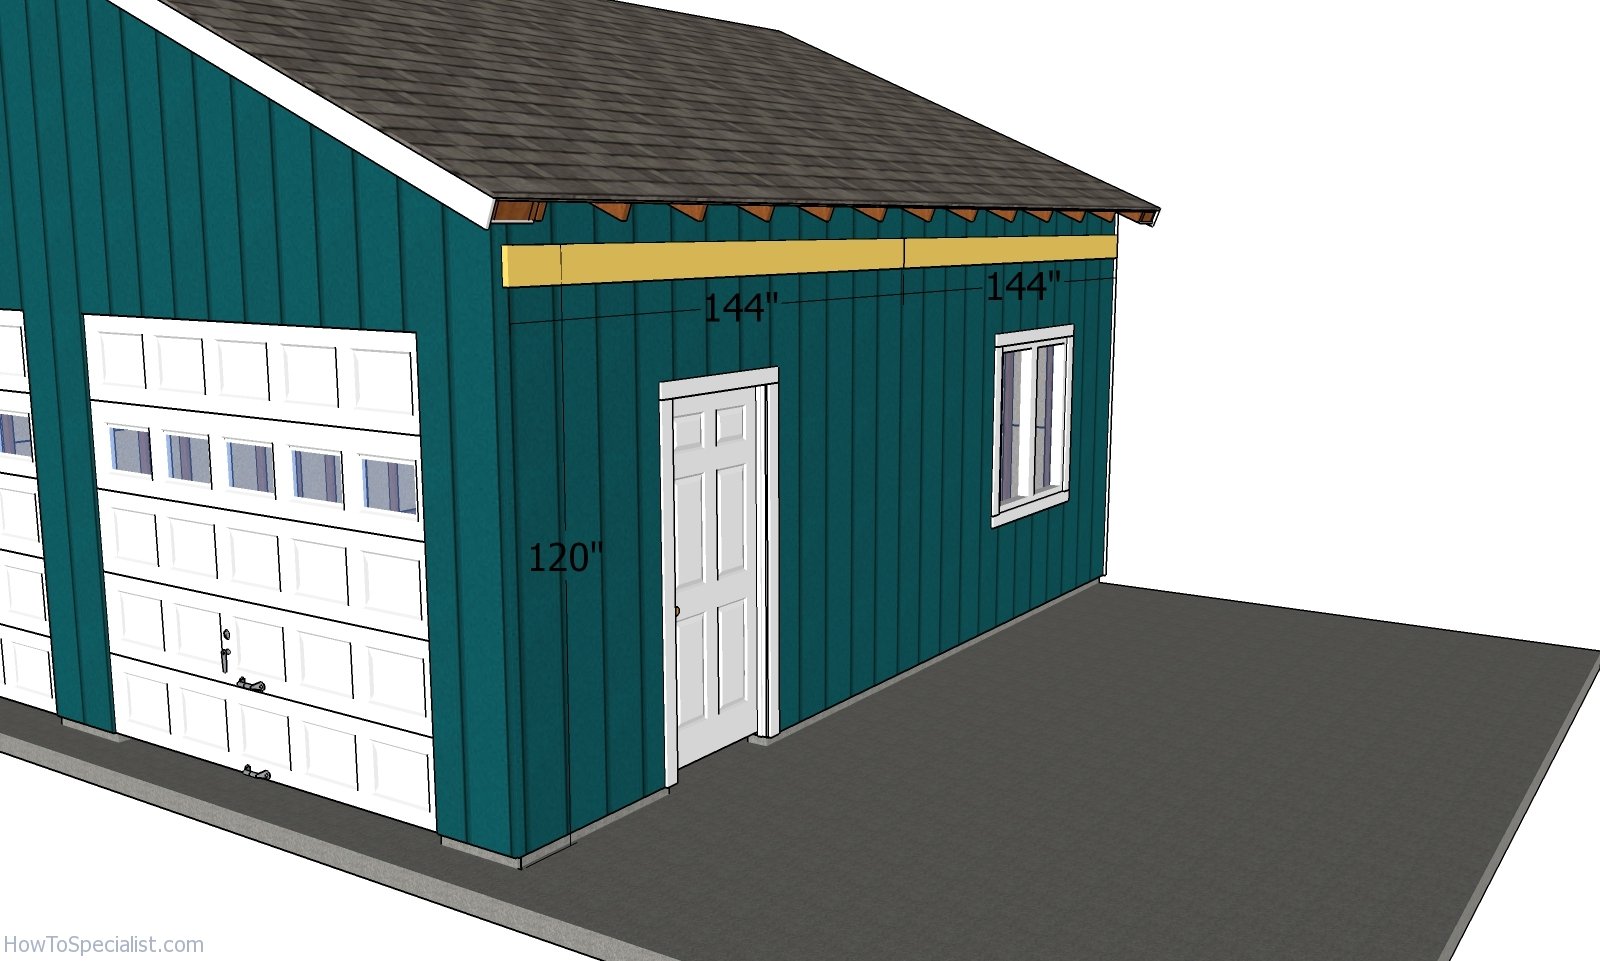
First of all, you need to build the posts for the attached carport using 6×6 lumber. Layout them using the info in the diagrams.
Setting the posts
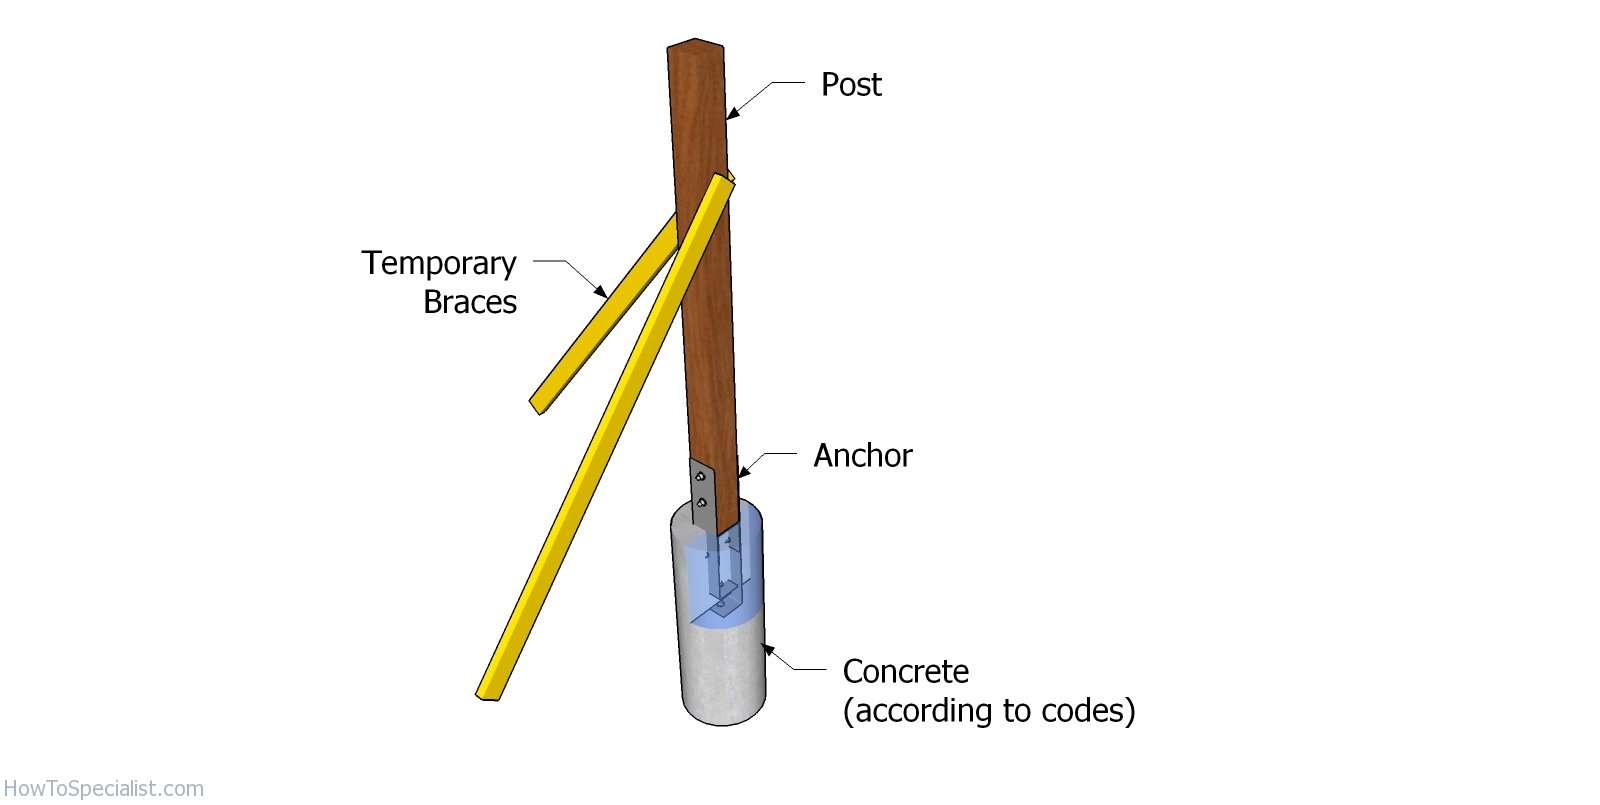
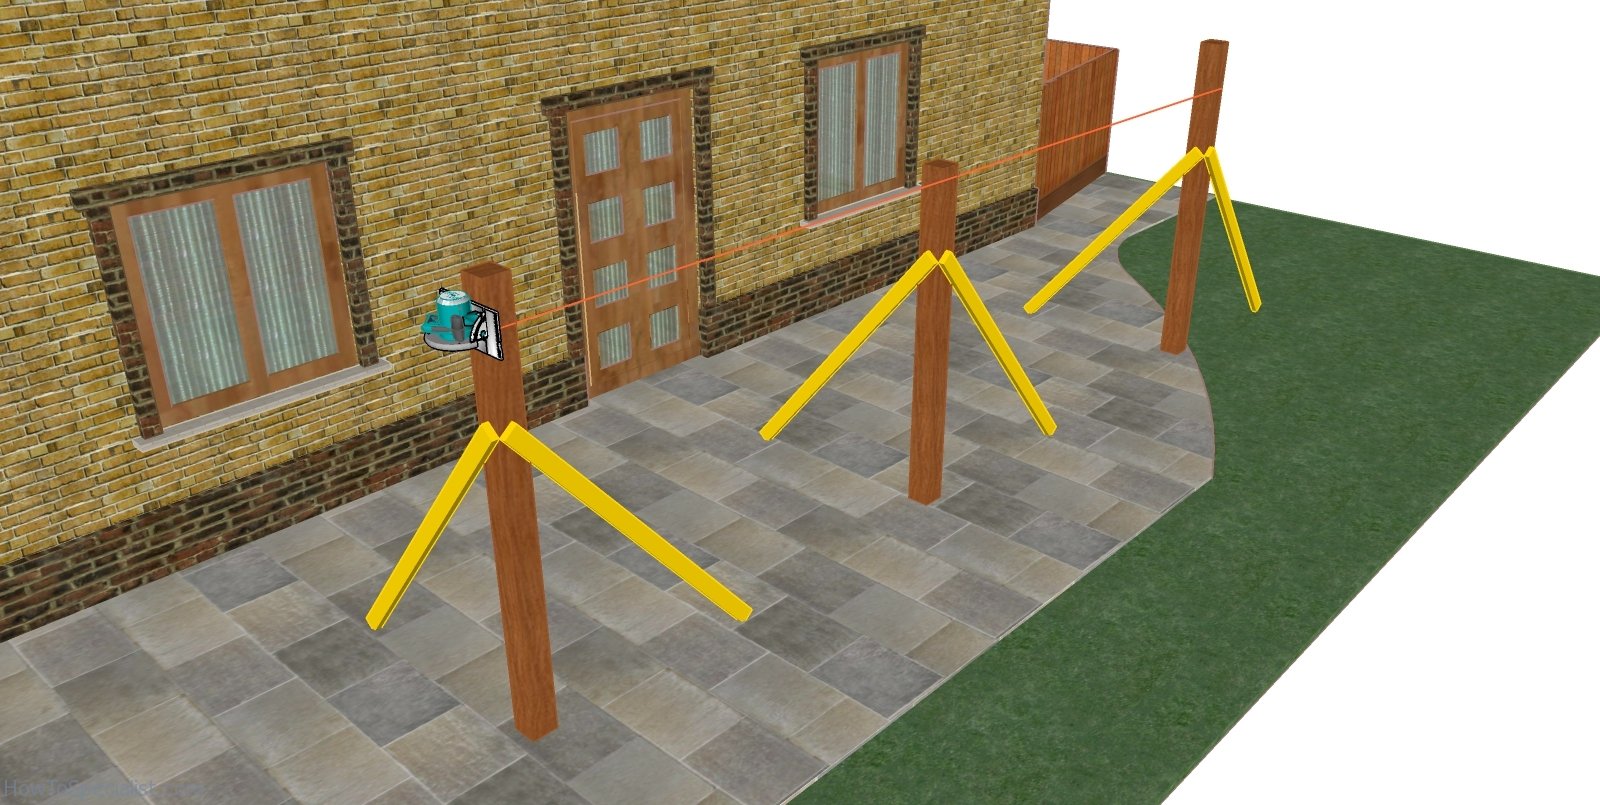
Dig 3′ deep holes and fit tube forms, after compacting a 2″ gravel layer on the bottom of the holes. Make sure the 4×4 anchors are perfectly aligned before filling the tube forms with concrete. Level the surface and let the concrete dry out for a few days. Use temporary braces to lock the posts into place, until you build the structure for the attached carport.
Cutting the top of the posts
In most cases, you won’t be able to have the top of the posts level from the very beginning. That is necessary to use a laser level and cut the top of the posts so they are perfectly horizontal one with another. Leave the braces in place until you add the rafters.
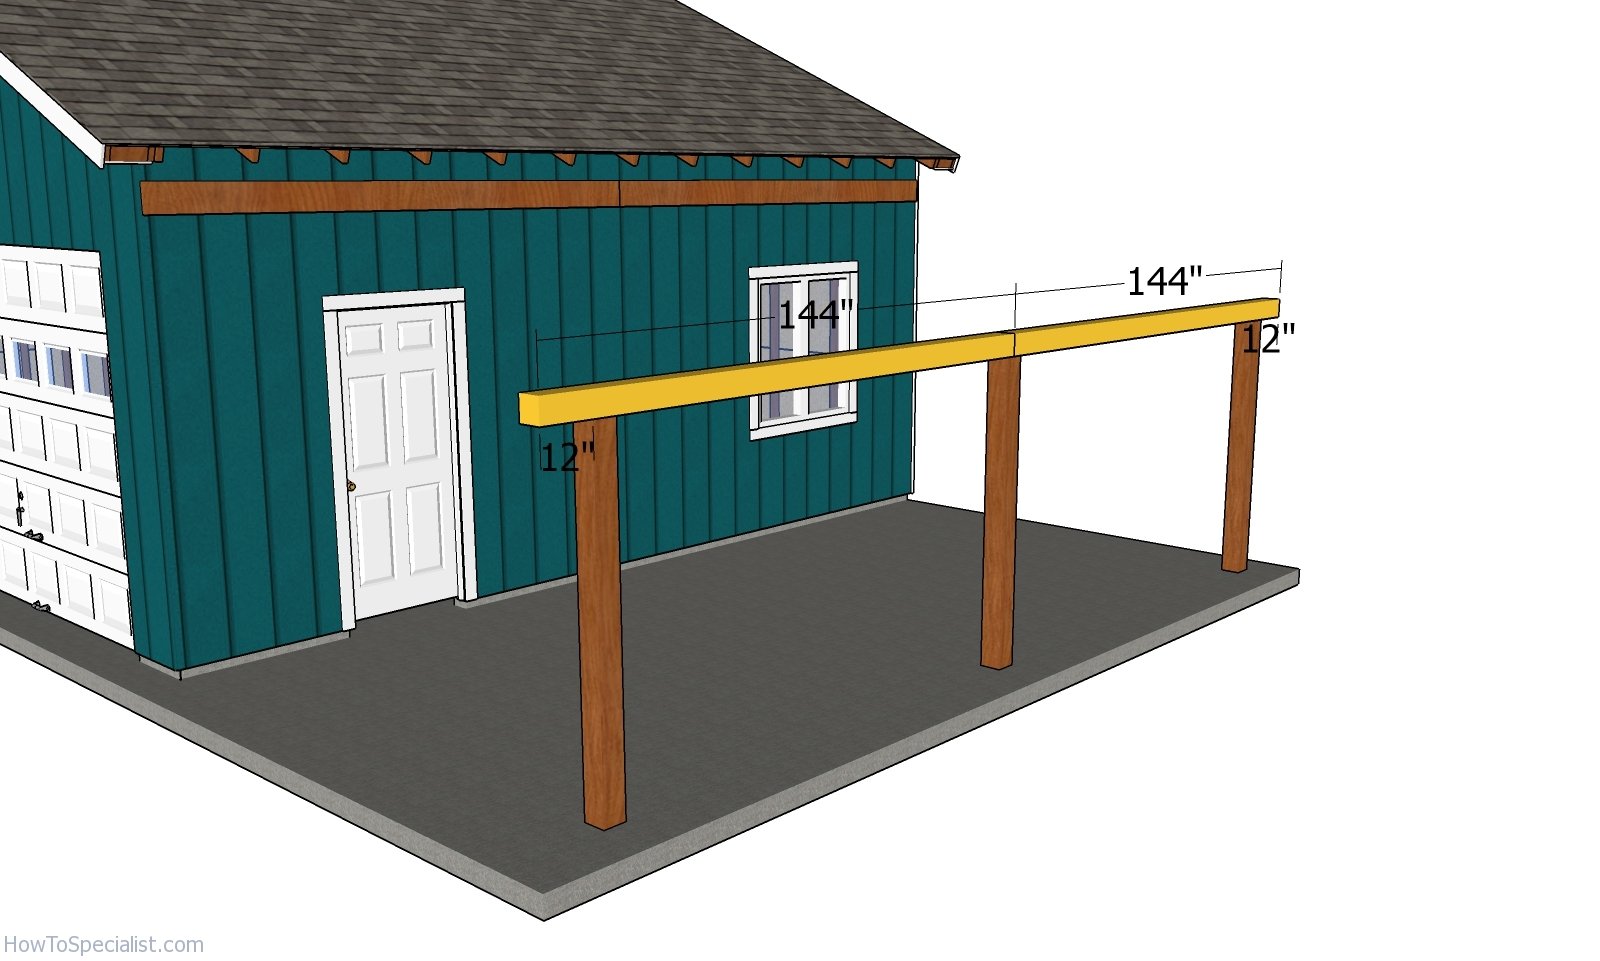
Fitting the top beams
Build the support beams out of 6×6 lumber. Fit them to the top of the posts. Use a spirit level to make sure the beams are horizontal. Notice the 12″ overhangs on the sides of the carport. Use post to beam connectors to lock the posts to the beam. Insert 2 1/2″ structural screws to lock the components together tightly.
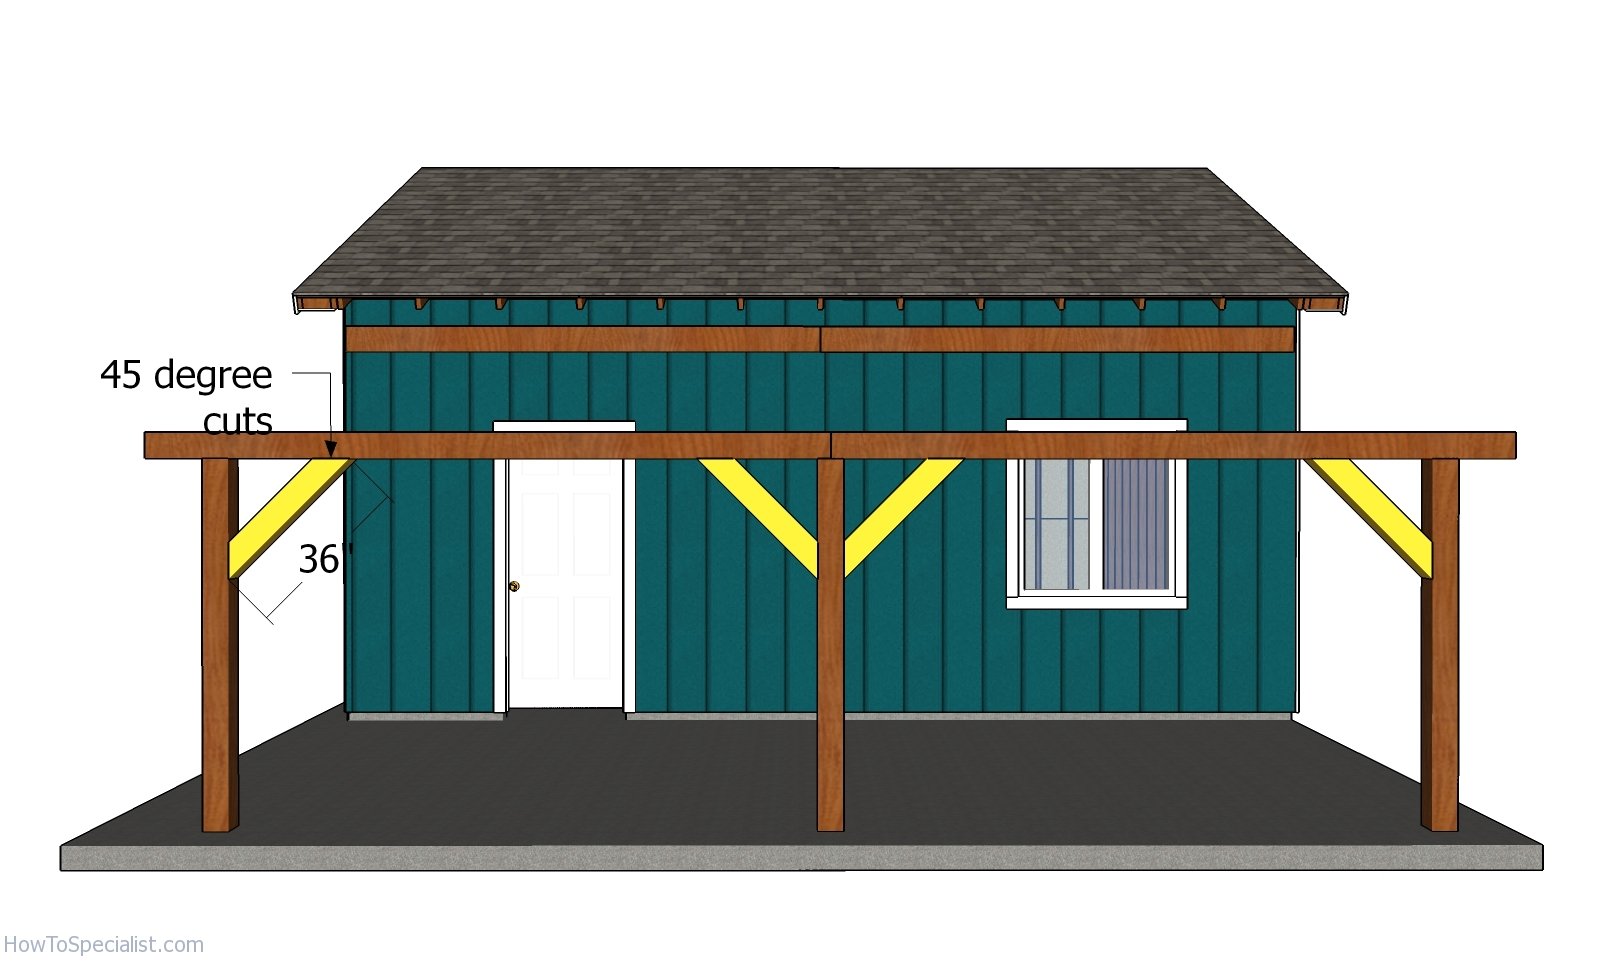
Fitting the braces
Use 6×6 lumber for the diagonals. Make 45 degree cuts to both ends of the braces. Check if the corners are square and add the braces to the frame. Drill pilot holes and insert 5 1/2″ screws to lock the braces into place tightly.
Fitting the support beams
Next, you need to attach the 2×8 support beams to the building. Take accurate measurements, as the support beams and the ledger boards need to be level. Level the beam with a spirit level, drill pilot holes and insert lag screws into the building to create a rigid bond. Remember that you need to read the local codes, so you use the right anchoring method. This also differs according to the type of the support wall (wood frame, concrete, bricks, etc.).
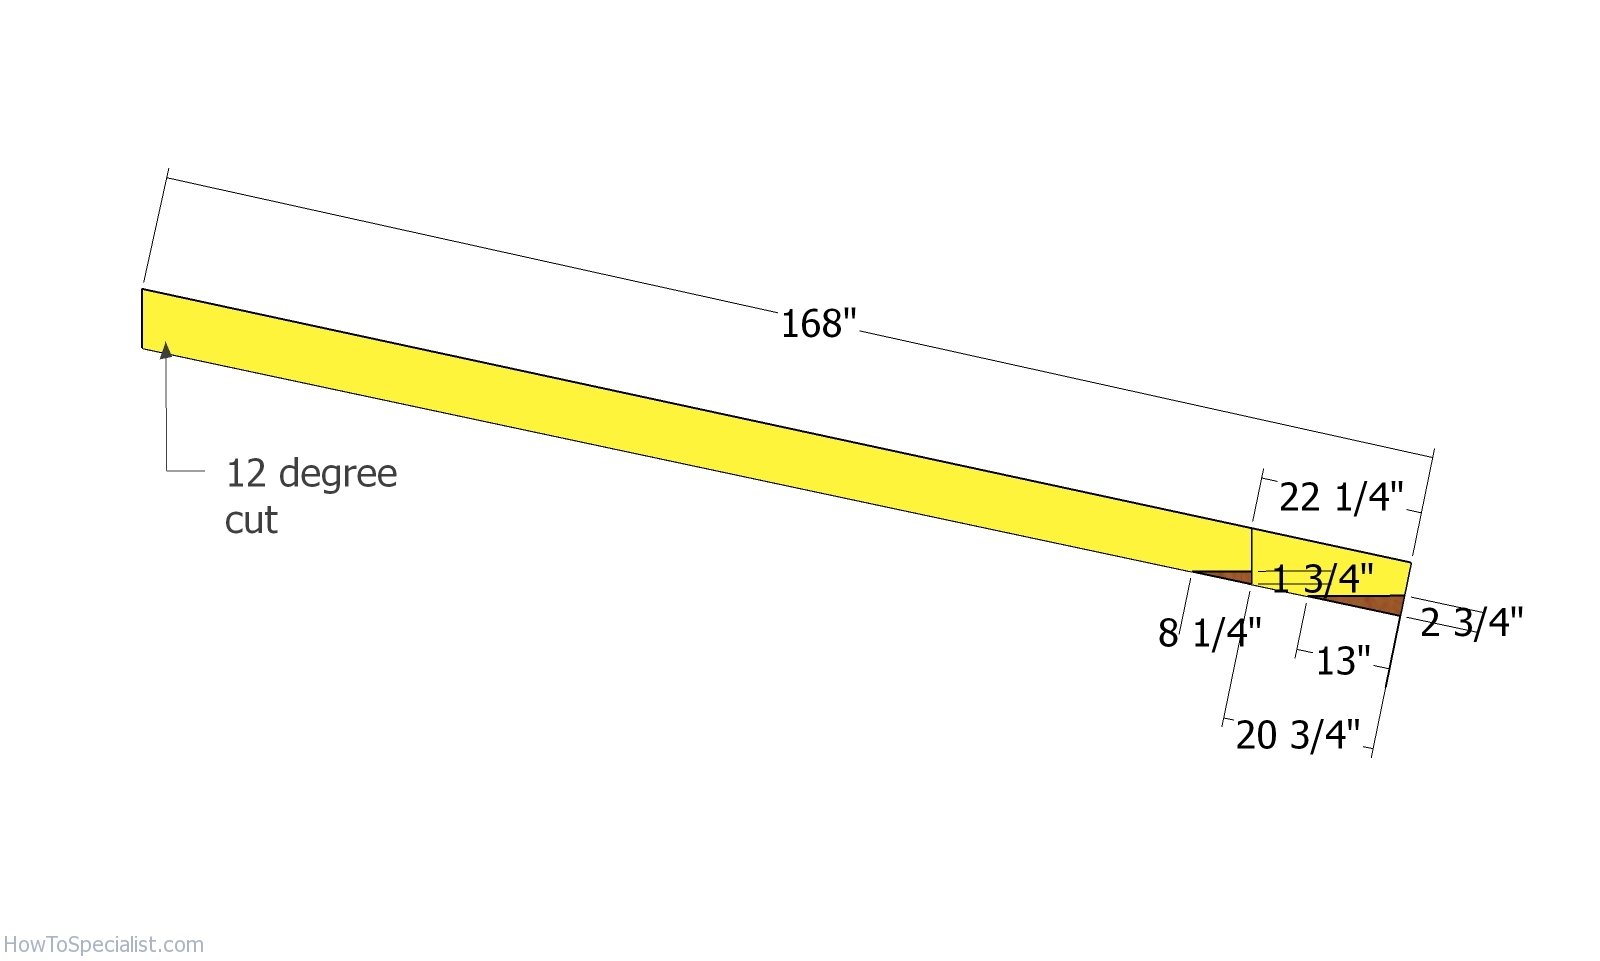
Rafters
Use 2×8 lumber for the rafters. Mark the cut lines to the rafters and use a circular saw to make the cuts, as shown in the diagram.

Fitting the rafters
Next, fit the rafters to the top of the carport. Place the rafters every 24″ on center. Use rafter ties to lock the rafters to the support beams. Drill pilot holes and insert 3 1/2″ screws to secure the rafters to the beams. In addition, I recommend you to use L strong ties and 1 1/2″ structural screws to lock the rafters to the ledger.
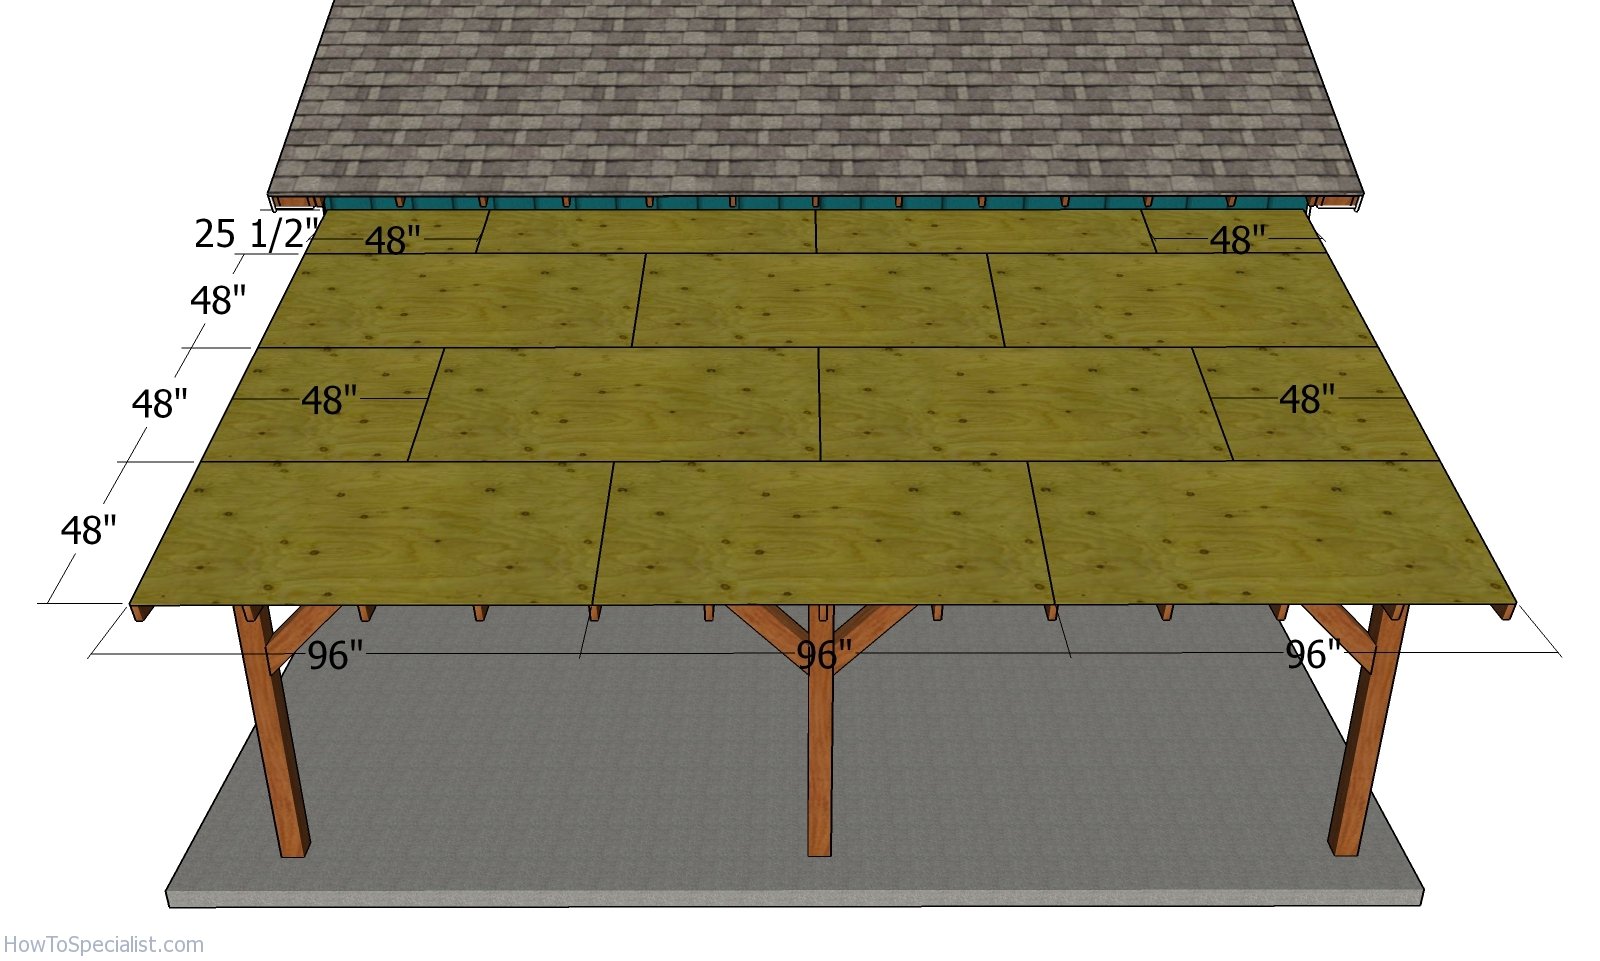
Roof sheets
Attach the 1/2″ plywood to the roof structure, starting from bottom left. Align the edges flush and insert 1 5/8″ screws, every 8″ along the framing. Leave no gaps between the sheets,
Side roof trims
Attach the 1×6 trims to the front of the shed. Use 2″ nails to lock the trims to the side rafters.
Front roof trims
Install the 1×6 trims to front of the carport. Use 2″ nails to secure the trims to the ends of the rafters. Align the edges flush.
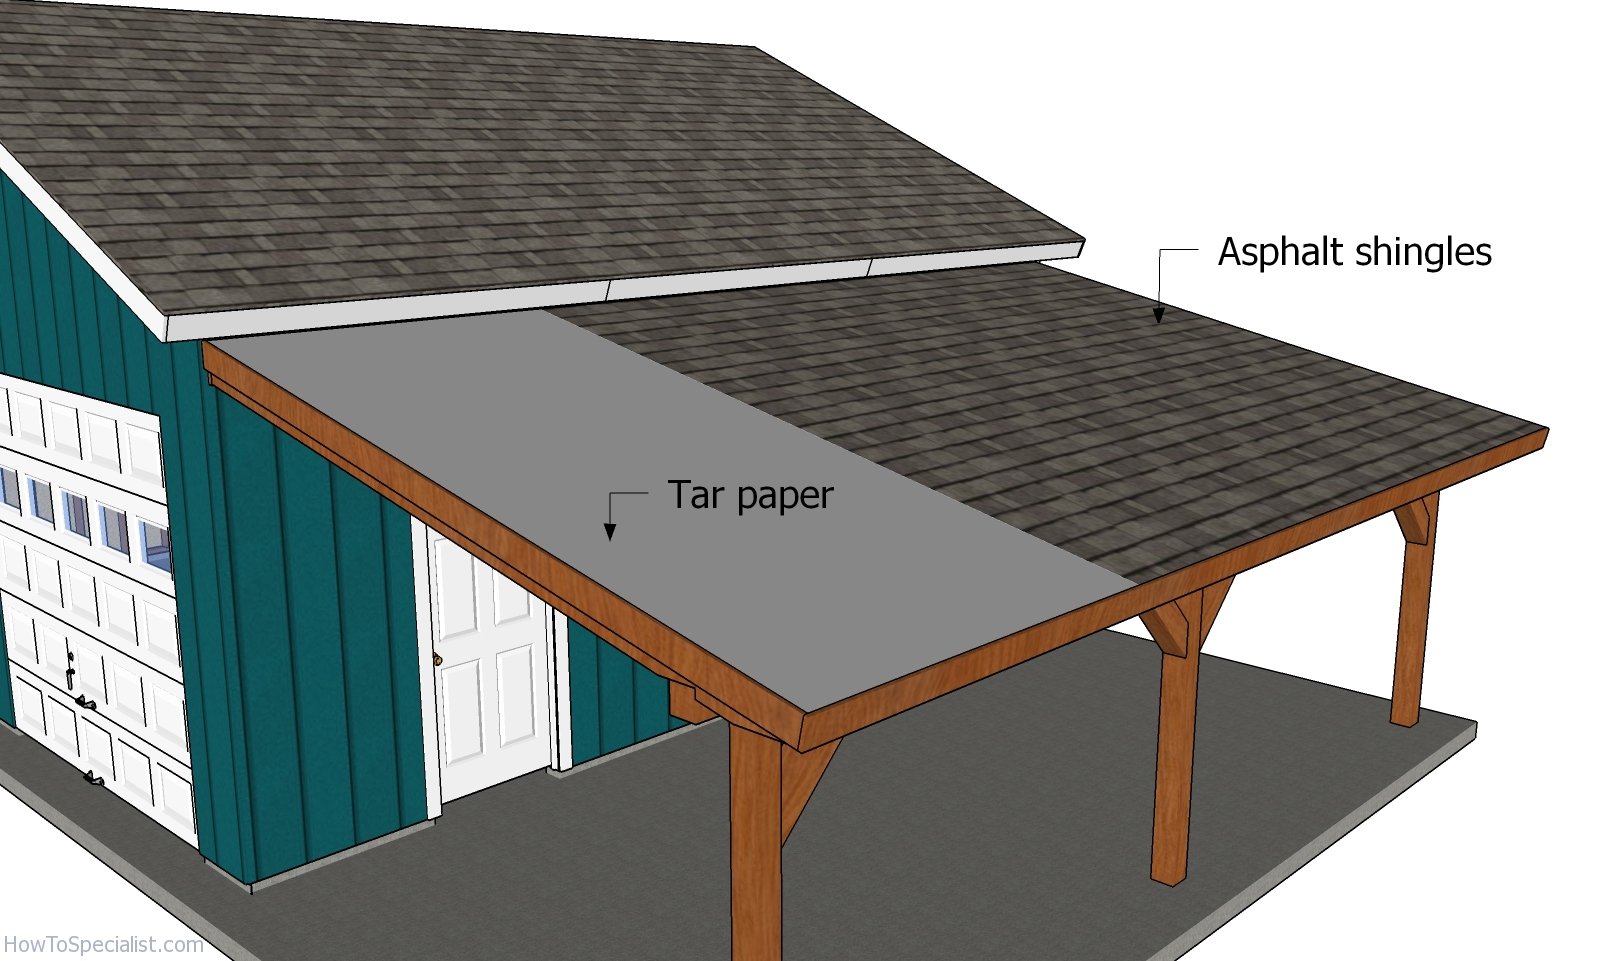
Fitting the roofing
Attach the tar paper to the top of the lean to carport. Align everything and staple them into place tightly. Install the drip edges to the sides and bottom of the carport.
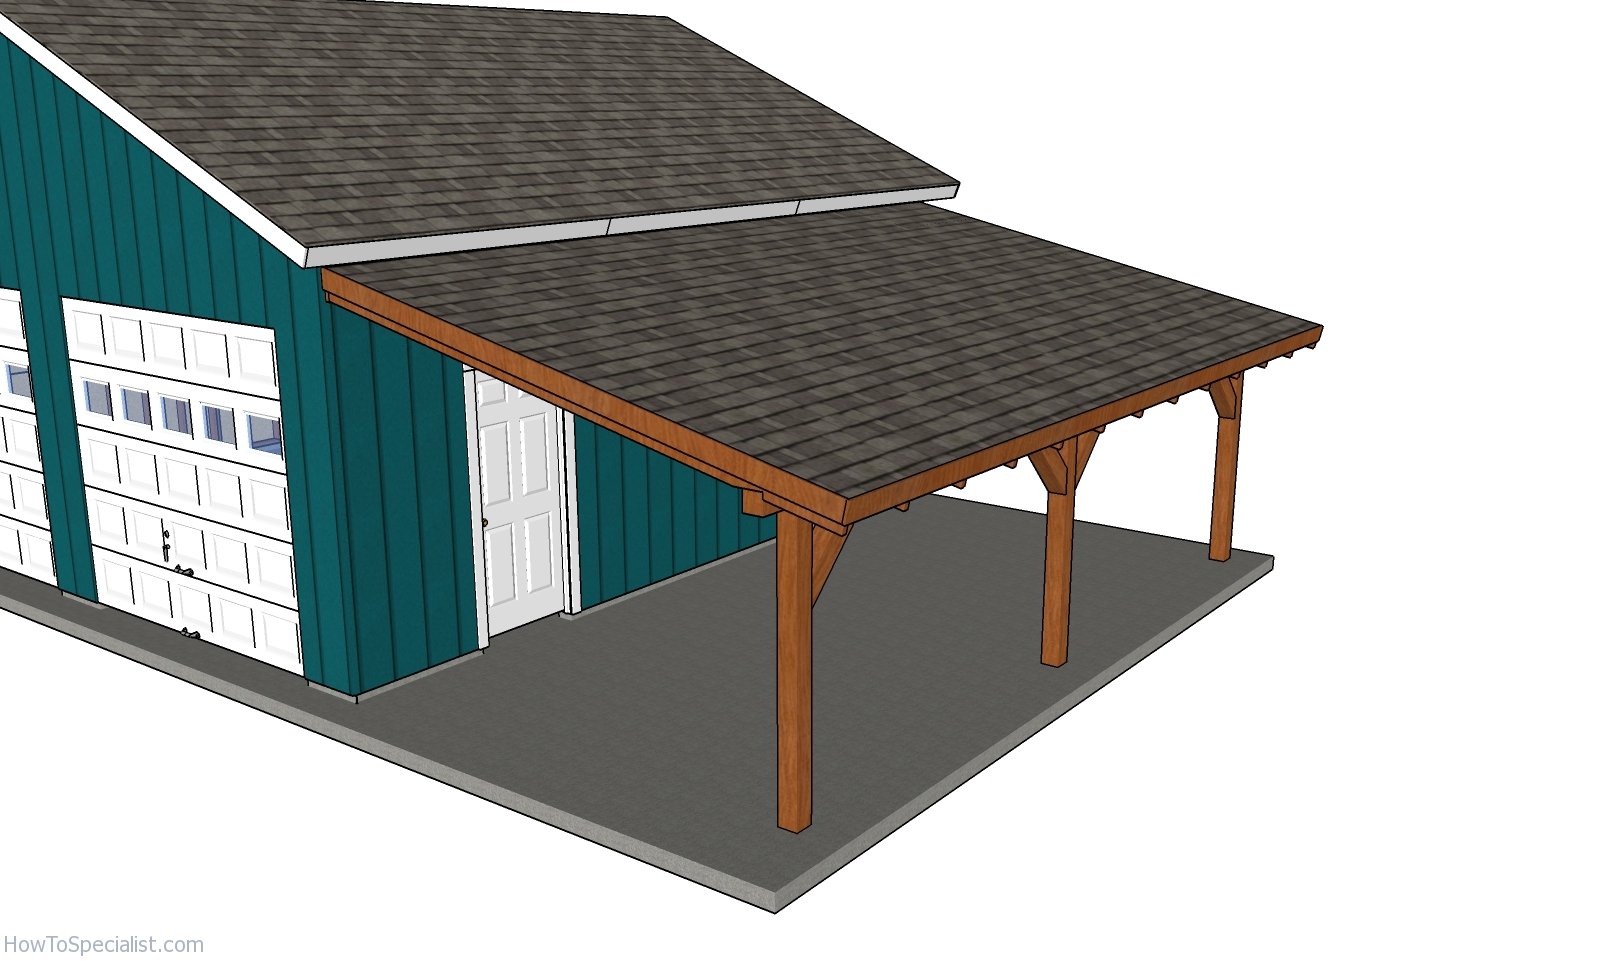
12×24 Attached Carport Plans
12×24 Attached Carport Plans – front view
This carport has a simple structure so you can build it with ease. Make sure you read the local codes and make any adjustments needed to comply with the weather conditions.
12×24 Attached Carport – side view
Last but not least, we recommend you to take care of the finishing touches. Fill the holes with wood filler and let it to dry out for several hours. Don’t forget to check out the rest of the carport plans, as there are several alternatives to choose from. If you are here, you might as well take a look over my 12×24 lean to carport plans.

Thank you for reading our project about how to build a 12×24 attached carport and we recommend you to check out the rest of the projects. Don’t forget to LIKE and SHARE our projects with your friends, by using the social media widgets. SUBSCRIBE if you want to be the first that gets our latest articles.
6 comments
Plans worked great. I build 16 X 40 lean to carport. I have a steel garage. I used the plans and added more support to the outside wall. We have snow here in MI.
Hi,
I want a 20 x 24 lean to carport. I Found your site and picked one out.
When I went to download it, all the pages have free, but when i got to the download page it has 4.99.
Is it free or 4.99?
It is free online. If you want to download the plans as a PDF, you need to pay.
Jack, I see your different plans, very impressive. I would like to purchase plans for a 10’ wide 24’ long lean to. It will be attached to the back of an existing Garage that’s 28 ft long with siding. With Shingled roof with enough pitch to just to drain water. Thanks, Don
Thank you for kindly sharing this.
What’s the max roof load and max wind resistance for this plan?