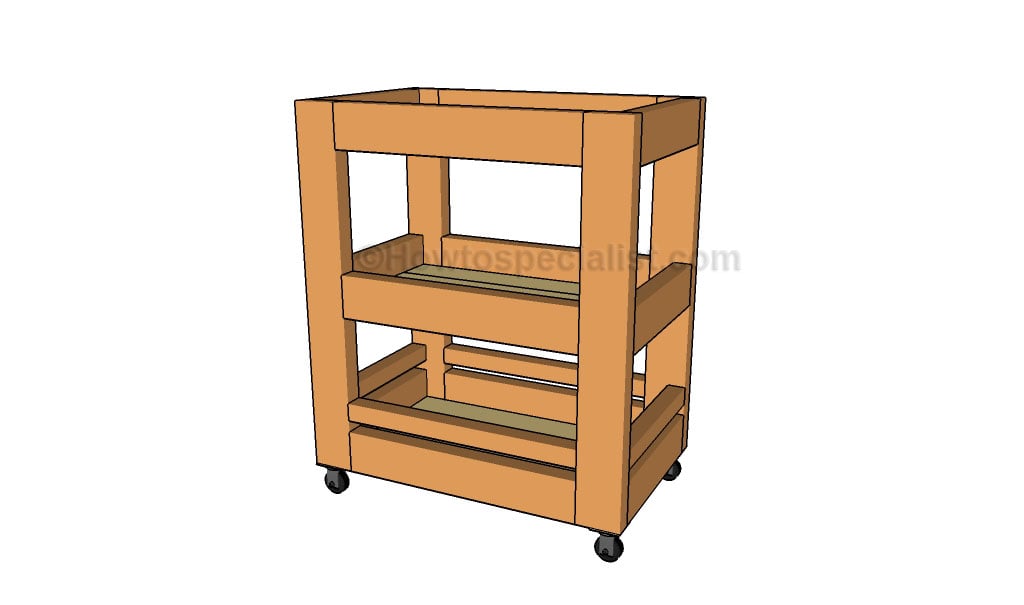
This step by step diy woodworking project is about kitchen cart plans. If you want to learn more about building a nice kitchen cart, we recommend you to pay attention to the instructions described in the article. There are many other kitchen projects to choose from, so make sure you take a look over the rest of the plans that are featured on our website.
Before starting the actual construction project, we recommend you to plan everything, as to save money and to keep the costs under control. Adjust the size and the design of the kitchen cart to suit your needs. In addition, we recommend you to invest in high-quality materials, such as pine, redwood or cedar, as they have a nice finish and are highly durable, especially in a humid environment.
If you don’t have a rich expertise in woodworking field, you should ask a friend to give you a hand with the project. There are many things that you could go wrong, so make sure you plan everything and invest in quality materials. Select the lumber with attention, making sure the components are perfectly straight and in a very good condition. Use a carpentry square to check if the corners are right-angled. See all my Premium Plans in the Shop.
Made from this plan
Kitchen Cart Plans

Building a kitchen cart
Materials
- A – 4 pieces of 2×4 lumber – 30″ long LEGS
- B – 6 pieces of 2×4 lumber – 20″ long, 6 pieces – 14″ long, 2 pieces of 2×2 lumber – 20″ long, 2 pieces – 14″ long FRAME
- C – 12 pieces of 1×4 lumber – 24″ long SHELVES
- D – 4 caster wheels – 2″ long WHEELS
- 3 pieces of 2×4 lumber – 10 ft
- 1 piece of 2×2 lumber – 6 ft
- 3 pieces of 1×4 lumber – 8 ft
- caster wheels
- 2 1/2″ screws
- 1 1/4″ screws
- glue, stain
- wood filler
Tools
- Safety gloves, glasses
- Miter saw, jigsaw
- Chalk line, tape measure, spirit level, carpentry pencil
- Drill machinery and drill bits
Tips
- Apply several coats of wood stain to the wooden components
- Fill the holes with wood filler and smooth the surface
Time
- One Day
Related
Building a kitchen cart
The first step of the woodworking project is to build the frame of the kitchen cart. Therefore, you need to build the frame of the kitchen cart by using 2×4 components. Drill pocket holes at both ends of the framing components and secure them to the legs with 2 1/2″ screws. Add waterproof glue to the joints in order to enhance the rigidity of the structure.
Building the floor of the cart is a straight-forward process, but you need to invest in high quality materials and to secure them to the frame tightly. Drill pocket holes at both ends of the slats and secure them to the frame with 1 1/4″ screws.
Add 2×2 rails to the bottom shelf, if you want to enhance the look of the kitchen cart. Drill pocket holes at both ends of the components, align them with great care and secure them to the structure with galvanized screws.
One of the last steps of the kitchen project is to attach the caster wheels to the bottom of the cart. Align the wheels with great care and secure them to the structure with galvanized screws.
Last but not least, we recommend you to take care of the finishing touches. Fill the holes with wood filler and let it to dry out for several hours. Afterwards, smooth the wooden surface with fine-grit sandpaper and vacuum the residues.
Thank you for reading our project about kitchen cart plans and we recommend you to check out the rest of the projects. Don’t forget to SHARE our projects with your friends and LIKE us, by using the social media widgets. SUBSCRIBE if you want to be the first that gets our latest articles.


