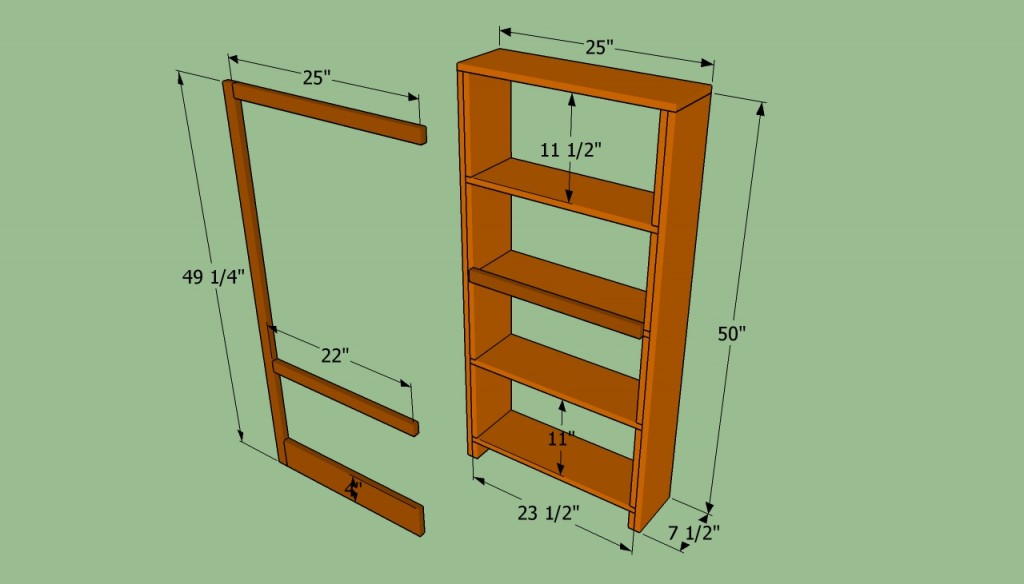
This step by step article is about how to build a bookcase. If you want to enhance the look of your living-room or you just need a proper storage space to deposit your books, building wooden shelves is a great idea. Nevertheless, there are many things you have to consider before beginning the actual project, such as the materials you are going to use or the design or the shape of the furniture. A bookcase with a traditional look requires a significant investment, as you need to use solid wood boards, but you could decrease the costs by using plywood that has a solid veneer.
Make a complete list with all the material needed for the project, as well as with their size, before going to the local lumberyard. Most of the yards have complex say that are able to cut the wood at the right size accurately, without damaging the edges. On the other hand, you could also use a table saw or a circular saw to get the job done, but the end result cannot math the quality provided by a professional machinery.
Align the components properly before locking them with wood screws or nails. Drill pilot holes, to prevent the lumber from splitting and add a good wood glue, to enhance the bond. Plumb the legs of the bookcase, using a hand level, before installing the backing and the bottom supports. In addition, we recommend you to make sure the shelves are horizontal and the corners perfectly square. See all my Premium Plans in the Shop.
Made from this plan
Materials
- 2 pieces of 1×8 lumber – 50″, 1 piece – 25″, 4 pieces – 23 1/2″, 6 pieces – 11″, 2 pieces – 2 1/2″, 2 pieces – 11 1/2″ FRAME
- 1 piece of 1×3 lumber – 22″ BACKING SUPPORT
- 2 pieces of 1×2 lumber – 49 1/4″, 2 pieces – 25″, 1 piece of 1×3 lumber – 25″ TRIMS
- 2 1/2” wood screws – SCREWS
- 1 1/4” finishing nails – SCREWS
- Wood glue
- 3 pieces of 1×8 lumber – 10 ft
- 2 pieces of 1×2 lumber – 10 ft
- 1 piece of 1×3 lumber – 6 ft
- 2 1/2″ screws
- 1 1/4″ screws
- glue, stain
- wood filler
Tools
- Safety gloves, glasses, Miter saw saw, jigsaw
- Chalk line, tape measure, spirit level, carpentry pencil
- Drill machinery and drill bits, Router, 1/4” round bit
- Pocket hole jig
Tips
- Pre-drill holes in the wooden components, before driving in the screws
- Add glue to the components, before locking them together with nails or screws
Time
- One weekend
Related
Building bookshelves on the wall
When building a bookcase you have a large variety of options, starting with the materials you could use up to its design and shape. A simple bookcase with a traditional design requires a significant investment, as solid wood boards are pretty expensive, but they will last for decades if are properly built.
How to build a bookcase wall
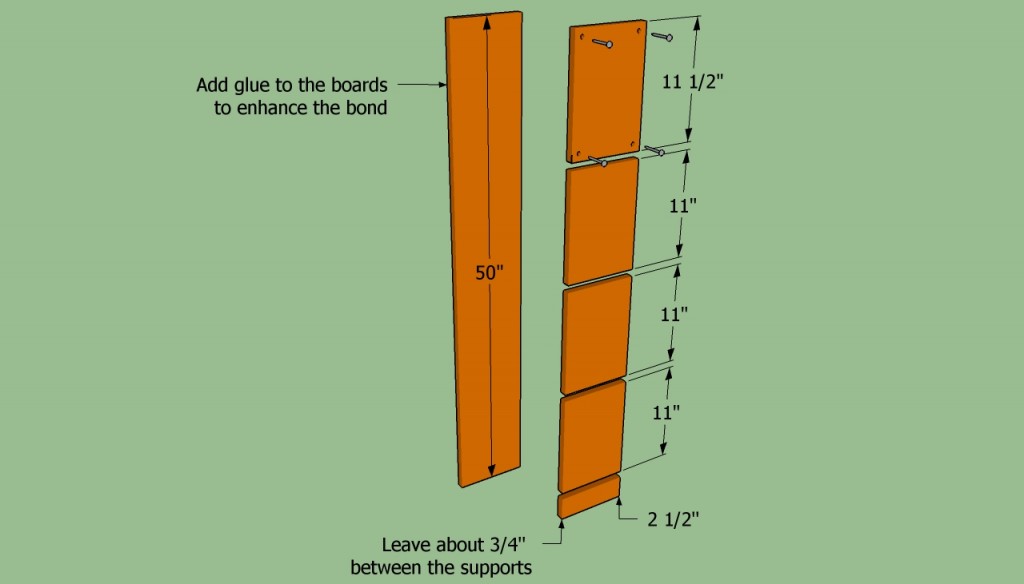
Attaching the supports
Firstly, build the side legs of the bookcase. Therefore you could either use 4′-long boards without cutting them, or adjust 5′-long boards to 50”. Make sure the cuts are performed properly, without damaging the edges.
Attach the support to the legs, using glue and several 1 1/4” finishing nails. Place a piece of 1×8 lumber between the supports, otherwise the shelves might not fit into place properly.
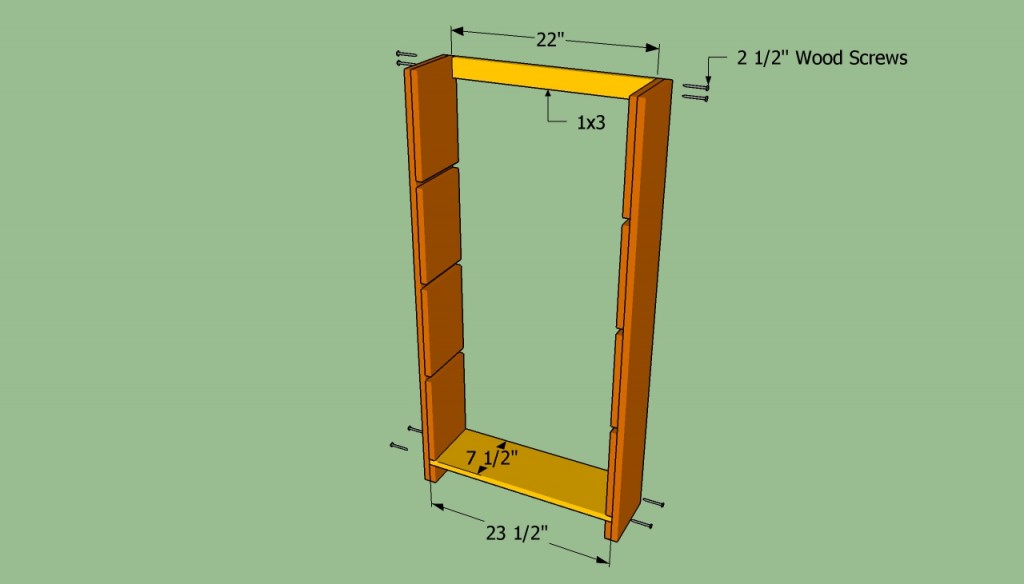
Securing the legs together
Let the wood glue to dry out properly, before continuing the project. Afterwards, join the two sides of the bookcase together, by installing the backing support and the bottom support. As you can see in the image, the backing support should be anchored with several 2 1/2” wood screws.
Drill pilot holes in the legs, before inserting the wood screws. In addition, countersink the head of the screws, in order to obtain a neat look.
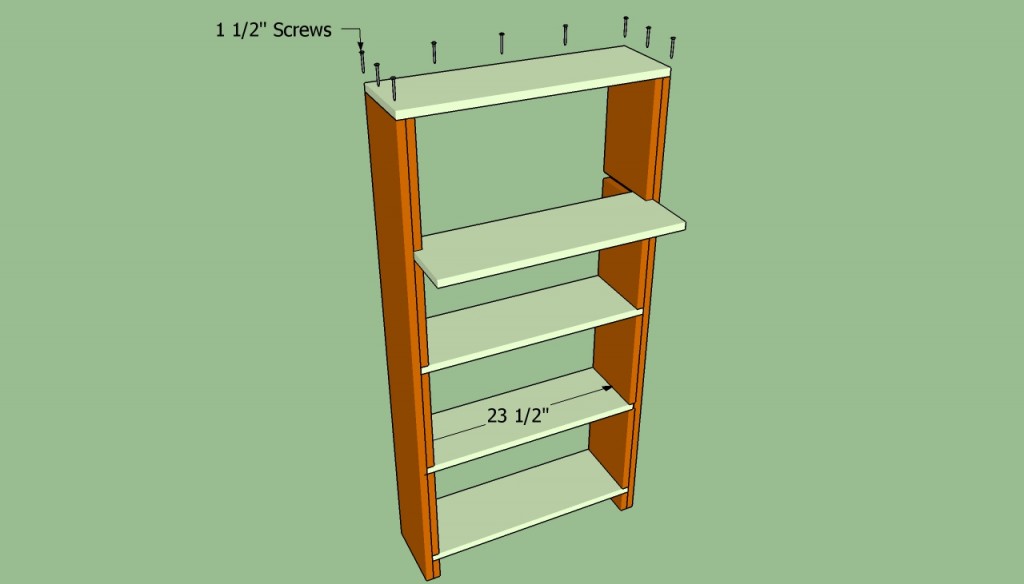
Building the bookshelves
The next step of the project is to install the top of the diy bookcase, as well as to fit the wooden shelves into place. Place the furniture on a level surface and check if it’s plumb with a hand level. In addition, make sure the corners are right-angled, using a carpentry square.
Attaching the trims
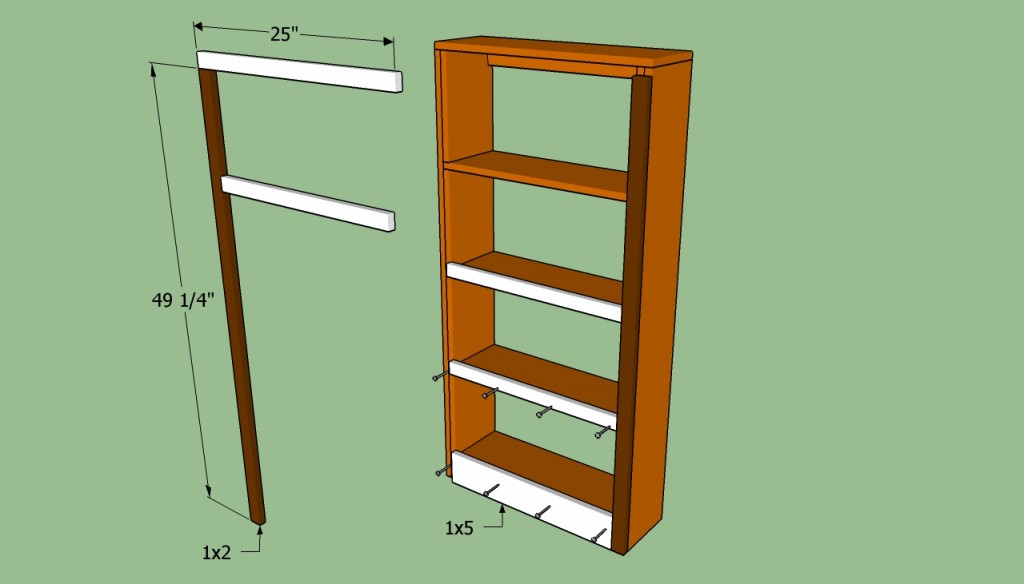
Let the wood glue to dry out properly, after removing the excess with a dry cloth. Afterwards, attach the front trims, in order to conceal the edges of the bookcase legs. We recommend you to build the trims from 1×2 lumber and to secure them into place, using 1 1/4” finishing nails.
Securing the bookcase to the wall
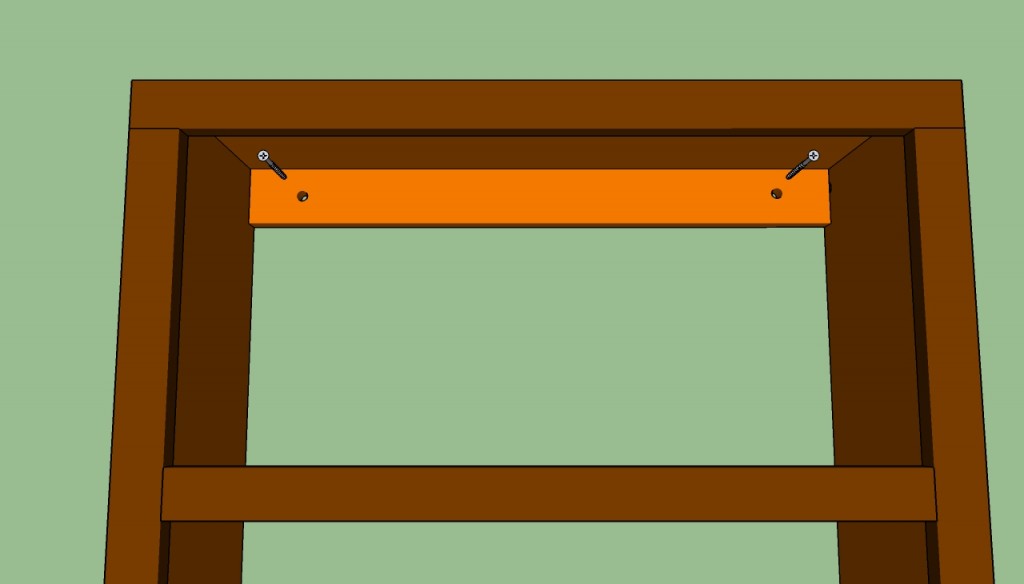
After building the bookcase, you need to keep it in place by driving several 2 1/2” wood screws trough the backing support in a wall stud. Therefore, first you have to drill pilot holes in the wooden support and countersink the head of the screws.
How to build a bookcase wall
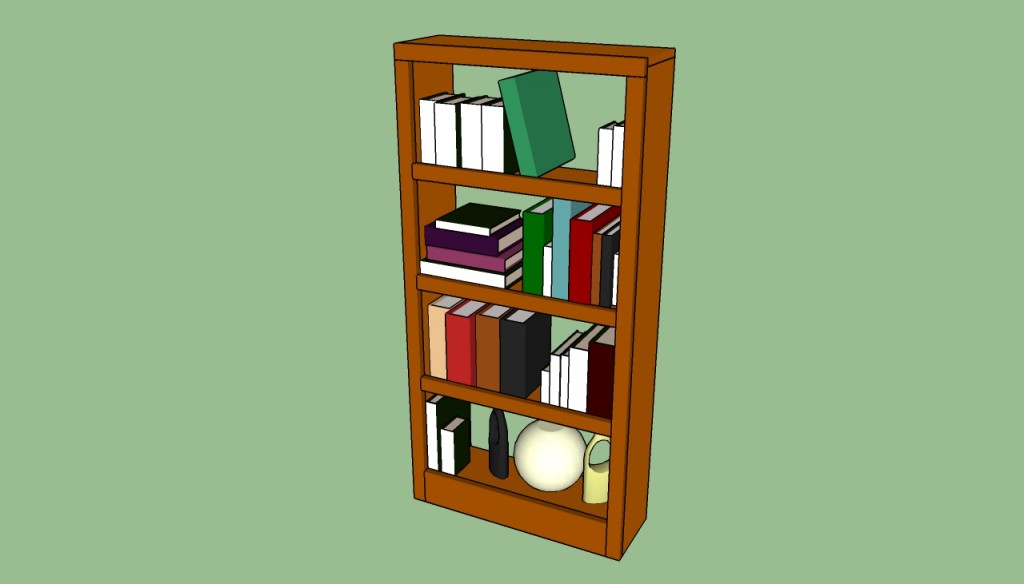
Last but not least, you have to take care of the finishing touches. Therefore, you need to fill the head of the screws with wood putty and let the compound dry out for several hours. Sand the surface properly, using 120-grit sandpaper.
Thank you for reading our article about how to build a bookcase wall and we recommend you to check out the rest of our projects. Don’t forget to LIKE and SHARE our articles with your friends, by using the social media widgets.

