Step by step article about how to build a garden trellis. In order to build the simple trellis and to attach it to the house wall, rip pieces of 2×2 cedar from wooden boards. Afterwards, you should use arrange the components in a nice grid, making sure they are perfectly square. Check out the rest of my plans and tutorials for more building inspiration.
Last but not least, you should place spacers to the back of the trellis, to leave enough space for the vines to grow and climb. In order to get the job done in a professional manner, you have to secure the trellis to the wall, using galvanized screws. Plumb the trellis with a spirit level, if you want to get a professional result. See all my Premium Plans in the Shop.
Made from this plan
In order to build a garden trellis, you need the following:
Materials
- 6 pieces of 2×2 lumber – 8 ft, 2 pieces – 117″, 9 pieces – 84″ SLATS
- 1 piece of 1×2 trellis – 8 ft SPACERS
- 2-3” screws – DECKING SCREWS
- 5” screws – SCREWS
- wood stain – VARNISH
- 15 pieces of 2×2 lumber – 8 ft
- 2 pieces of 2×2 lumber – 10 ft
- 1 piece of 1×2 trellis – 8 ft
- 2 1/2″ screws
- glue, stain
- wood filler
Tools
- Safety gloves, glasses, Miter saw, jig saw
- Chalk line, tape measure, spirit level, carpentry pencil
- Drill machinery and drill bits
- Router and 1/4 bit
Tips
- Smooth the edges of the wooden boards, with a router
- Pre-drill holes in the wooden components, before driving in the screws
- Countersink the head of the screws
- Don’t use lumber that is likely to crack or shrink
- Don’t over-tighten the screws to prevent the wood from splitting
Time
- One day
Related
How to build a garden trellis
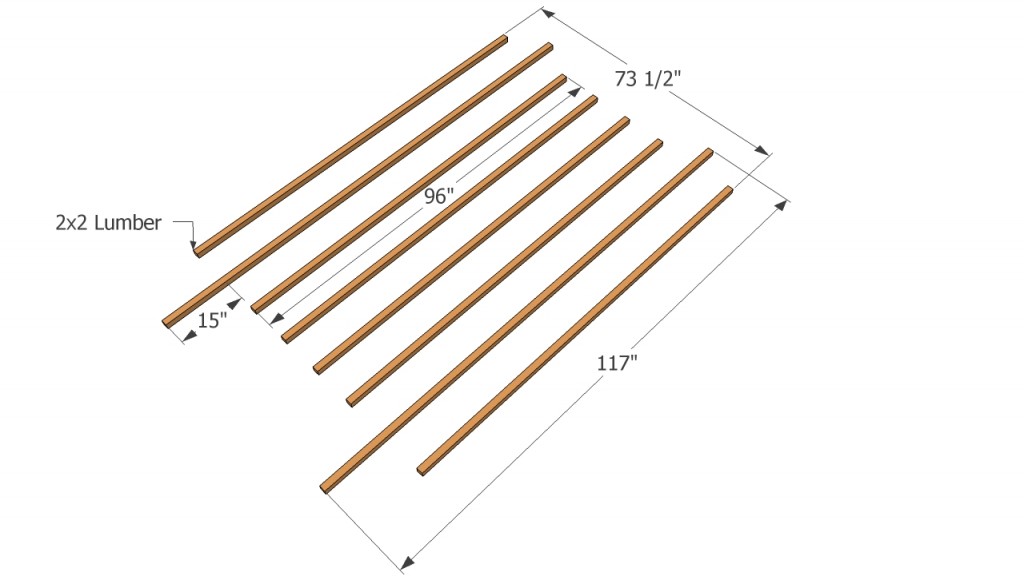
Building a garden trellis
The first step of the project is to build the first layer of 2×2 slats, equally spaces. As you can see in the image, two slats are longer, as compared to the others, as they will be the legs of the trellis. Adjust the size of the trellis, according to your needs.
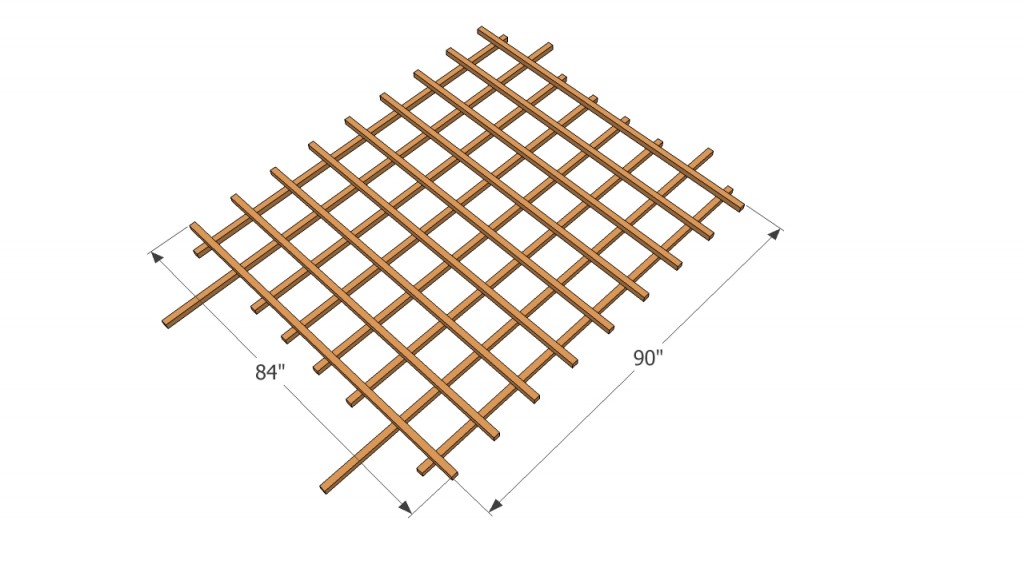
Attaching the cross slats
Afterwards, you have to install the cross slats, making sure the corners are square. Use a framing square to make sure the corners are right-angled. Work with great care and attention, if you want to obtain a professional result.
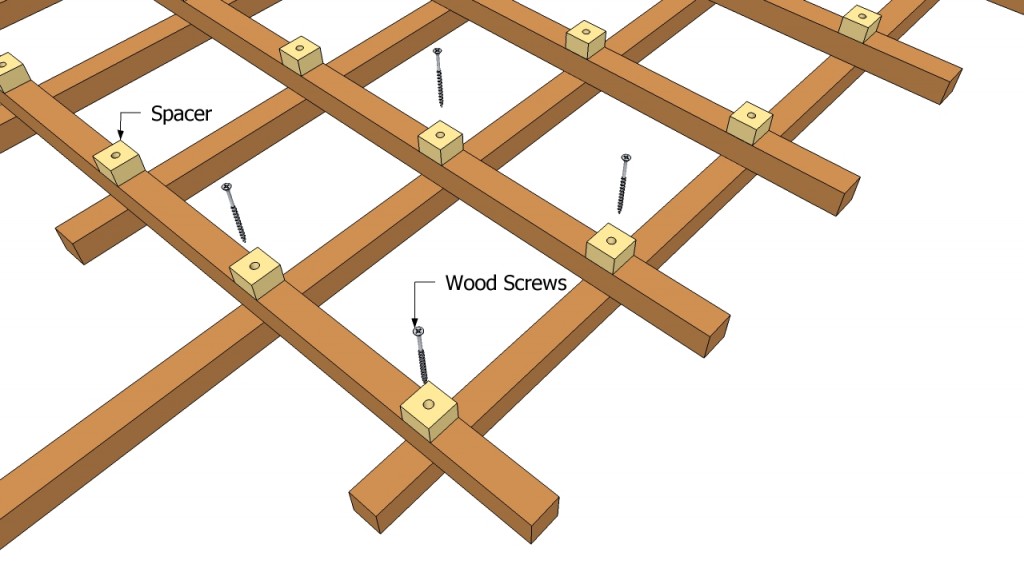
Installing the spacers
In order to secure the slats together, you should drive in 3” galvanized screws. Nevertheless, you should leave enough space for the plants between the trellis and the wall. The spacers will leave enough room for the vines to climb.
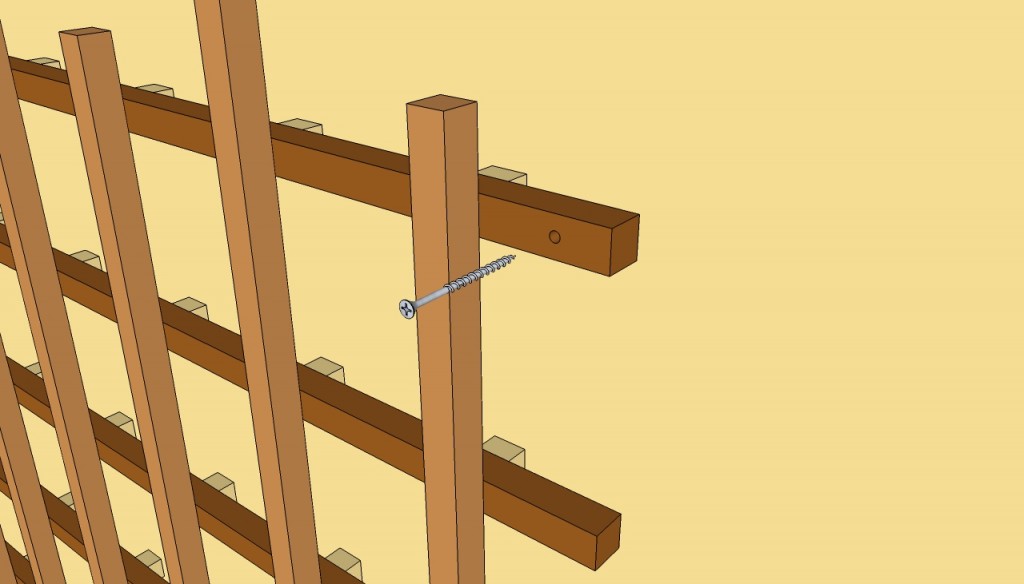
Attaching the trellis to the wall
The next step is to lock the trellis into place. Therefore, drill several pilot holes trough the wooden slats and insert the screws, using a screwdriver. Plumb the trellis with a spirit level, before locking in into place.
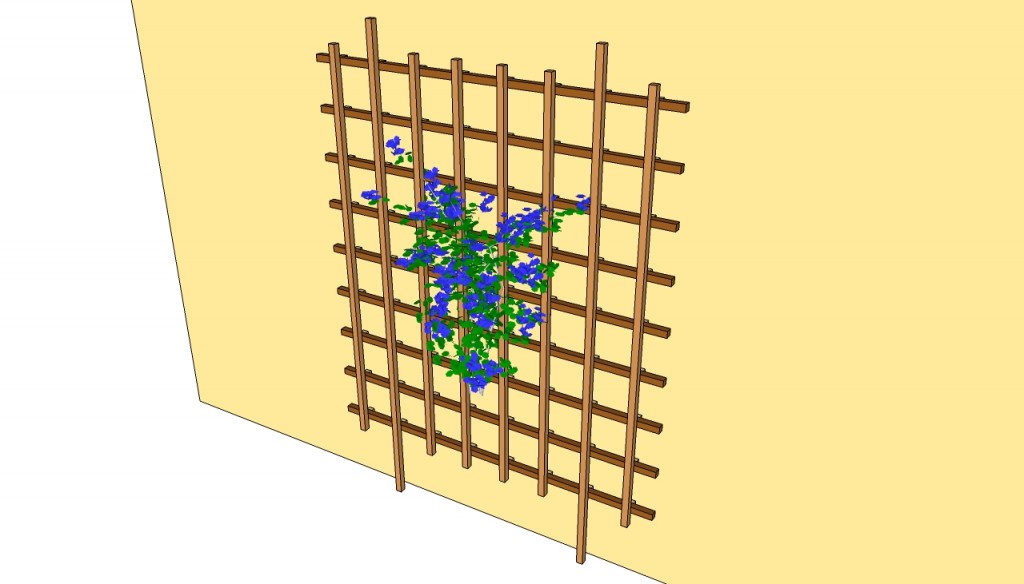
How to build a garden trellis
A nice wall trellis would enhance the look of your house, as the plants transforms any wall in a romantic corner. Adjust the shape and size of the trellis, to fit your needs.
Thank you for reading our article about how to build a garden trellis. Don’t forget to share our articles with your friends, by using the social media widgets.
