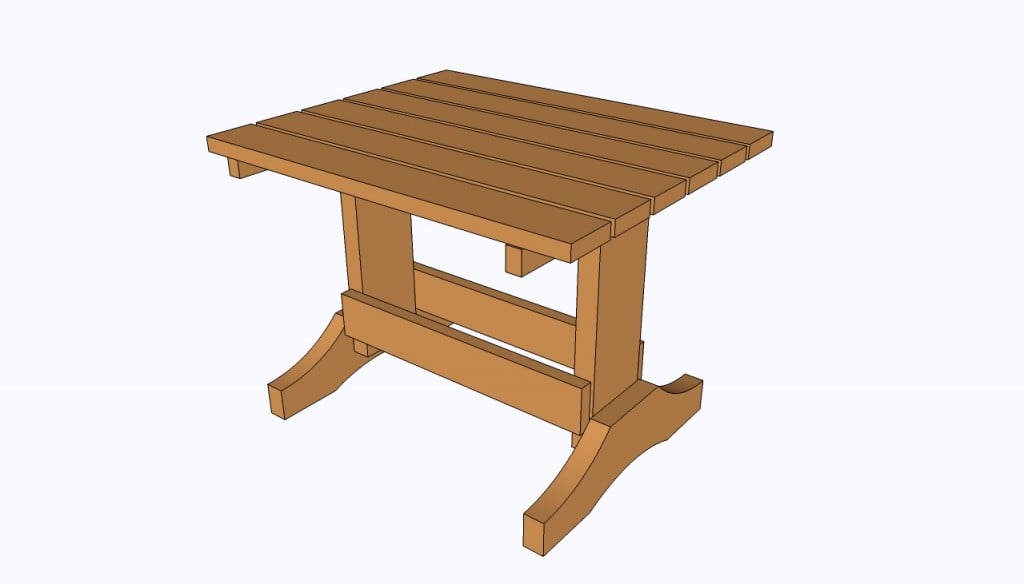
This diy article is about free small table plans. Building a small table is a fun woodworking project, as you have the opportunity to use several woodworking techniques and save some a significant amount of money. Taking into account that we speak of a small-sized table you can get the job done even with scrap lumber, provided it’s a good condition. In this article, we show you the steps you have to follow in order to build a basic picnic table, along with the tools and material required to obtain a professional result.
The materials used for this project are an essential part, therefore you should choose quality solid wood. Therefore, check the lumber with great care, making sure the boards are perfectly straight and don’t have any visible flaws. If you plan to use it as a patio or deck table, we recommend you to buy solid wood designed for outdoor use: cedar, redwood or pressure-treated lumber.
Cut the wooden components with great care, making sure their ends are perfectly straight and accurate. Therefore, we recommend you to use a jigsaw for the curved cuts and a miter saw for the straight cuts. Nevertheless, use a proper blade, otherwise you might not obtain a neat result. Measure every component twice before performing the cuts, to ensure they fit perfectly. You could add wood glue on the components, before driving in the screws, to enhance the bond.
Made from this plan
In order to build a small table, you needs the following:
Materials
- 4” carriage bolts
- 2 1/2” wood screws
- 2×6 boards – for the legs
- 1×4 boards – for the braces
- 2×4 slats – to build the top of the table
- wood glue – optional
Tools
- Safety gloves, glasses
- Miter saw saw, jigsaw
- Chalk line, tape measure, spirit level, carpentry pencil
- Drill machinery and drill bits
- Router, 1/4” round bit
Tips
- Pre-drill holes in the wooden components, before driving in the screws
- Smooth the edges of the components, by using a router
Time
- One day
Small table plans free
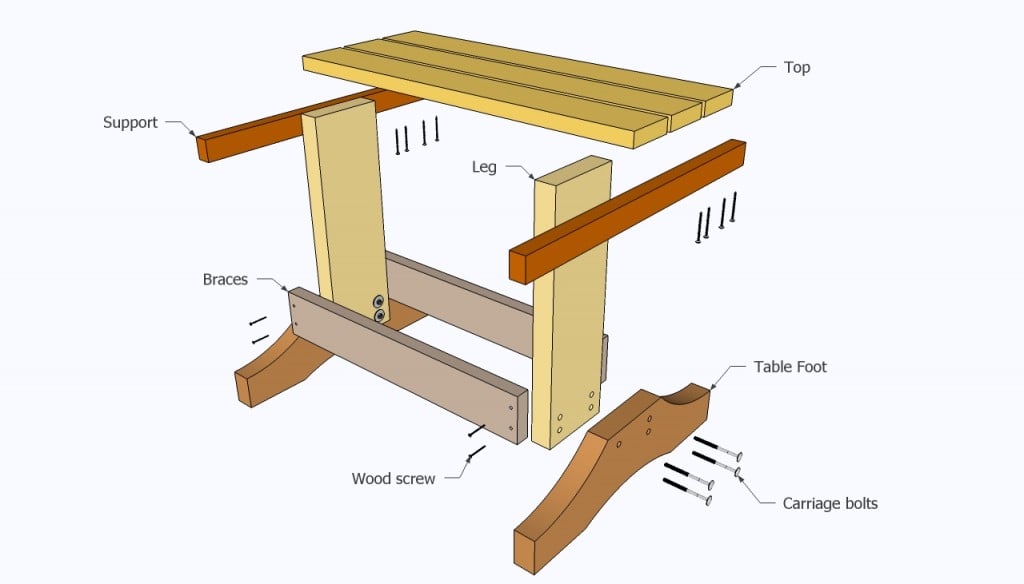
Building a small table is simple, if you use the right plans, techniques and materials. As you can see in the image, you should build several wooden components and lock them together with several screws.
As in the case of any woodworking project, you should take accurate measurements and cut the lumber with proper tools, having a sharp blade (miter saw, jigsaw, handsaw).
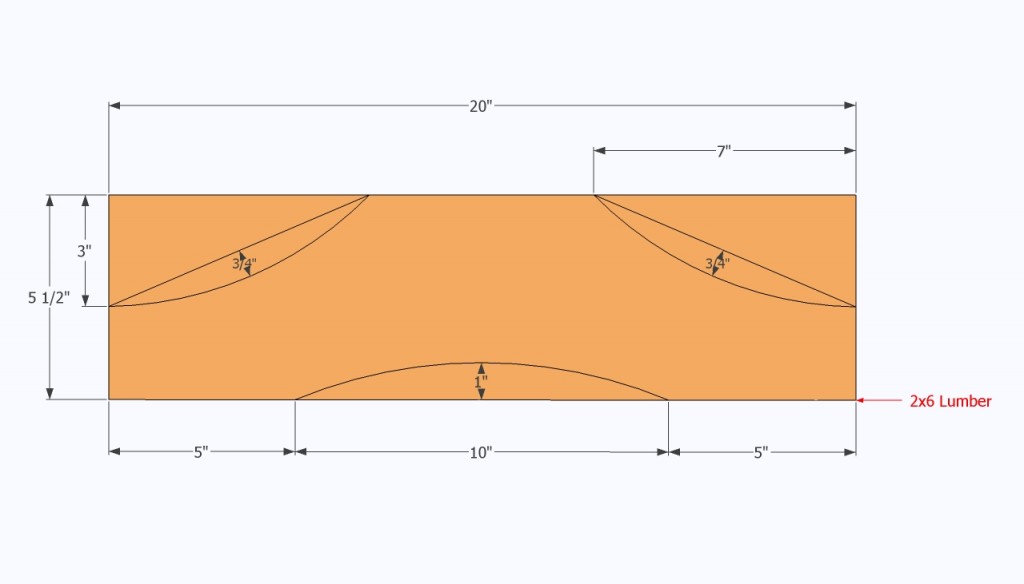
The first step of the project is to build the feet of the small table. Therefore, use 2×6 lumber and cut it out, using our free plans. In order to draw the cut lines, you have to use a pencil, a framing square and a round object. Use anything that has a nice curvy shape, starting with a bucket up to a plate.
Next, continue the project by building the legs of the table and attaching them to the wooden feet. You can use both 1×6 or 2×6 lumber, according to weight it has to support and to its location. Drill holes trough the components and insert carriage bolts.
Nevertheless, if you want to obtain a neat look and hide the head of the bolts, insert 2-3” wood screws trough the interior faces of the legs.
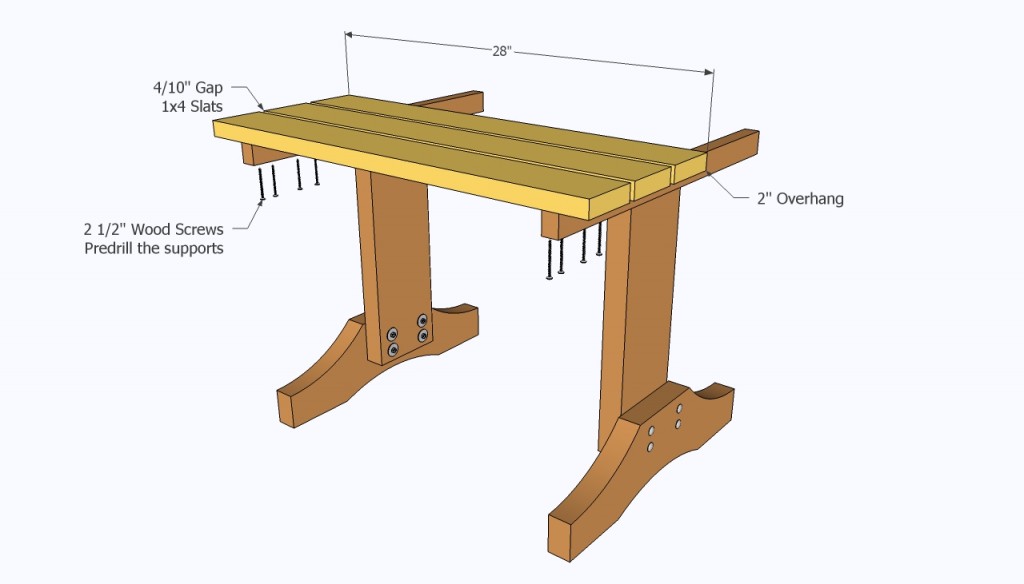
Afterwards, build the wooden support and lock them into position with 3 screws on each side. Build the supports of the table top from 1×2 lumber and level them properly, before inserting the screws.
The next step of the project is to build the top of the small table. Therefore, use 2×4 slats and install them to the supports. Place the slats equally spaced (leave 4/10” between the boards) and align them at both ends, before driving in the screws trough the wooden support.
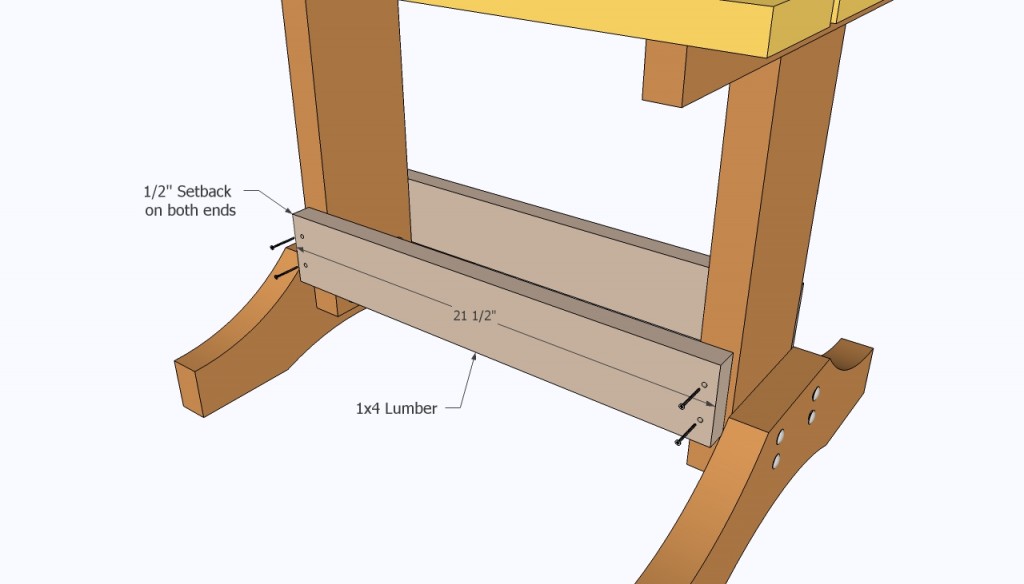
After installing the top of the small picnic table, you need to reinforce it with several 1×4 braces. These wooden components will keep the legs locked together and will increase the rigidity of the table. Setback the braces 1/2” at both ends.
Work with great care and attention, making sure you plumb the braces at both ends. In addition, drill pilot holes before driving in the wood screws, to avoid wood from splitting.
After you have built the components of the table, round their edges with a router and 1/4” bit. In this manner, the exposed edges would have a nice look. Sand the components with medium-grit sandpaper and apply several coats of protective paint over the whole surface.
Thank you for reading our article about free small table plans and we recommend you to check out the rest of our projects. Don’t forget to share our plans with your friends, by using the social media widgets.

