This DIY tiki bar project is designed to bring that relaxed, vacation-at-home feeling straight into your backyard, without complicated joinery or expensive materials. Stay tuned because I will show you how to build a tiki bar, the easy way. Built mostly from standard lumber and finished with a lightweight bamboo roof, the structure balances rustic character with real stability, so it feels solid when people lean on it and practical when used outdoors. The proportions are intentionally compact, making it ideal for gardens, patios, or lawn areas where you want a focal point without committing to a permanent structure.
The design focuses on clean, repeatable cuts and straightforward assembly, which makes it approachable even if you’re not an advanced woodworker. A sturdy frame forms the core of the bar, while vertical front slats add texture and a handmade look inspired by classic tiki and beach bars. The raised roof, supported by solid posts and diagonal bracing, creates shade and visual height while keeping the overall build light and airy.
What makes this project especially versatile is how easy it is to customize. You can extend the width, add shelves, install hooks or lighting, or even make the roof removable for storage during winter. Whether you’re hosting summer parties, setting up a themed corner for family gatherings, or building a standout piece for a rental or resort-style backyard, this tiki bar is a practical weekend build that delivers both function and atmosphere. This project is based on these plans.
Step 1: Building the bar

Cutting-the-parts
Begin the tiki bar project by cutting all the parts for the tiki bar. Use your workbench and a miter saw to cut everything precise and quick. If you are looking for a simple workbench project, you can find my full tutorial HERE.
Assembling-the-frames
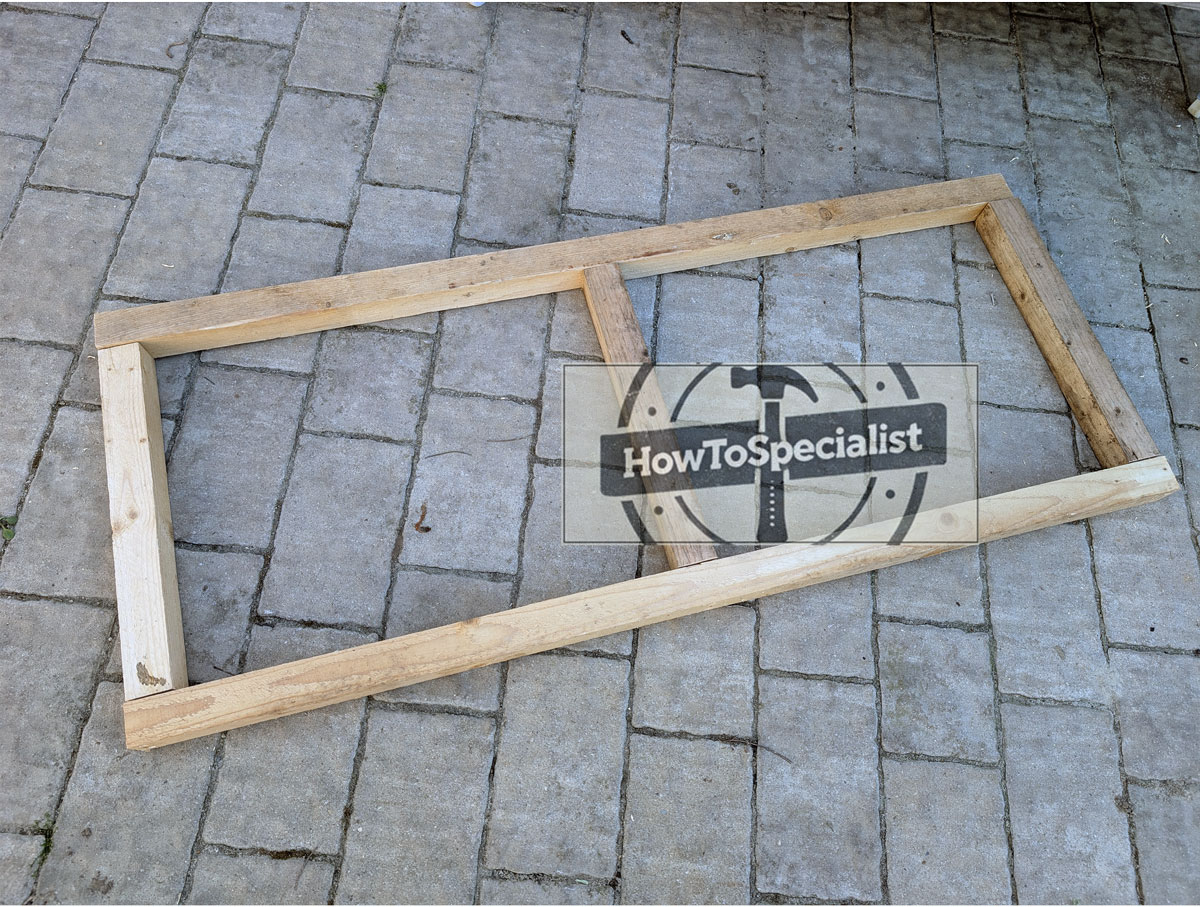
Assemble the two frames by laying all the components on a flat, level surface and lining up the edges so everything sits flush. Take a moment to square up the corners before fastening, as this step sets the foundation for a straight and sturdy build. You can use pocket holes with 2 1/2″ screws for a clean look, or drill pilot holes through the perimeter boards and secure the shorter pieces with 3 1/2″ screws.
Whichever method you choose, use at least two screws at every joint to keep the frame rigid and true. A thin bead of wood glue at each connection adds extra strength and helps eliminate movement over time. Taking the time to build these frames accurately will make the rest of the tiki bar come together faster and with far fewer adjustments later on.
Sides-for-the-tiki-bar
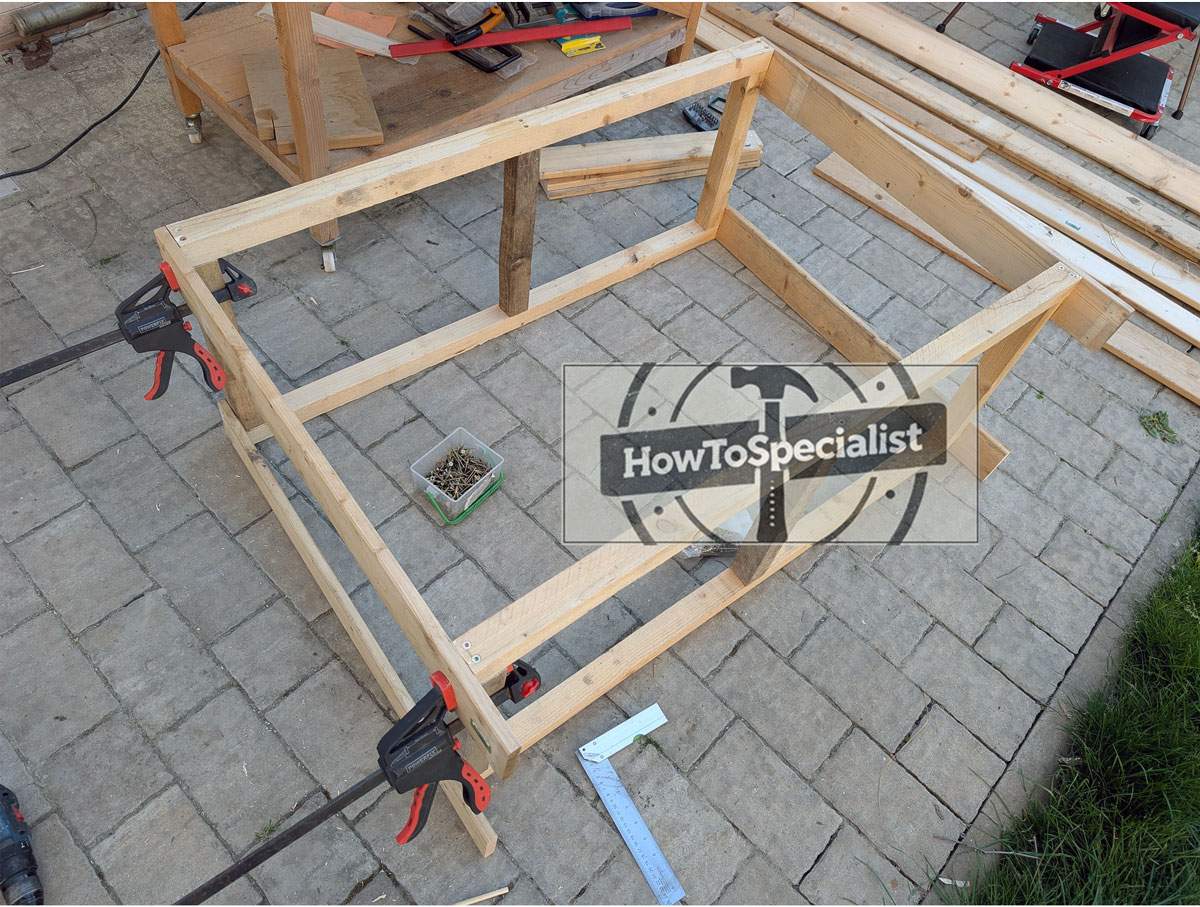
Once both frames are assembled, bring them together by installing the vertical slats that form the front of the bar. Start by positioning the slats evenly, aligning them flush at the top and bottom, then use clamps to hold everything tight while you work. Taking a few extra minutes to check spacing and alignment here will give the bar a much cleaner, more professional look.
Pre-drill pilot holes through each slat to prevent splitting, then secure them to the frames with 1 5/8″ screws. Work from one side to the other, keeping the spacing consistent as you go. As the slats go on, you’ll notice the structure becoming noticeably stiffer, locking the two frames together into a solid, unified bar.
Step 2: Building the tiki bar roof

Fitting-the-roof-frame
Continue installing the remaining slats across the front of the bar, working your way from one side to the other. You can leave small, even gaps between them for a lighter, more relaxed look, or set the slats tight against each other for a more solid, enclosed appearance. Both options work well, so this is a good moment to step back and choose the style that best fits your space.
Whichever layout you go with, keep the slats aligned and secure each one properly to the frame. Consistent spacing and straight lines make a big visual difference and give the bar that clean, well-built finish that stands out once everything is in place.
Tabletop-for-tiki-bar
Secure the slats to the tabletop frame, making sure they sit tight and flush before fastening them in place. For a more dynamic and laid-back look, cut the boards to slightly different lengths so the top edge isn’t perfectly uniform. This small detail adds movement and character, and it immediately breaks away from a standard, boxy appearance.
Varying the lengths is a simple trick, but it works especially well on a tiki bar, where a relaxed, handmade feel is part of the charm. Keep the cuts intentional rather than random, and double-check that each slat is firmly attached so the surface stays solid while still delivering that casual, tropical vibe.
Roof-structure
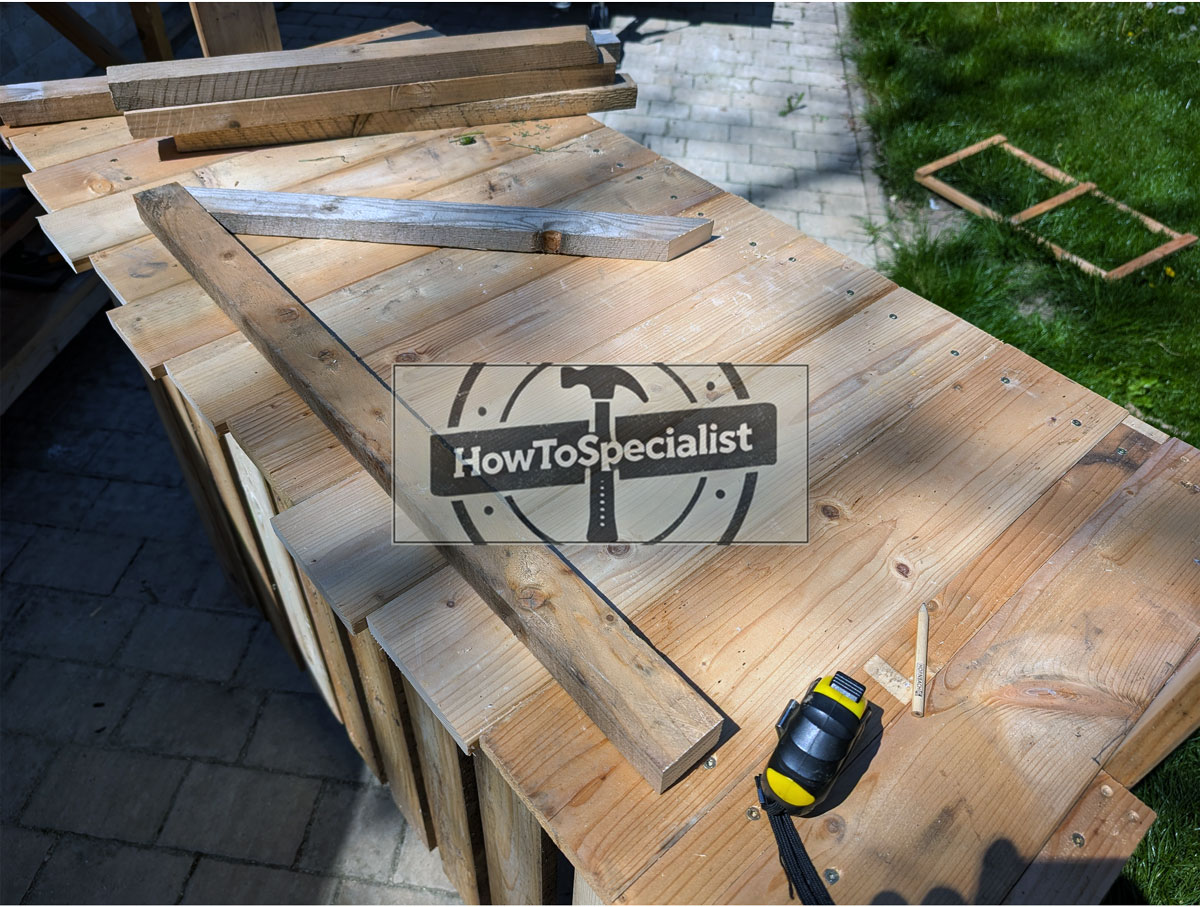
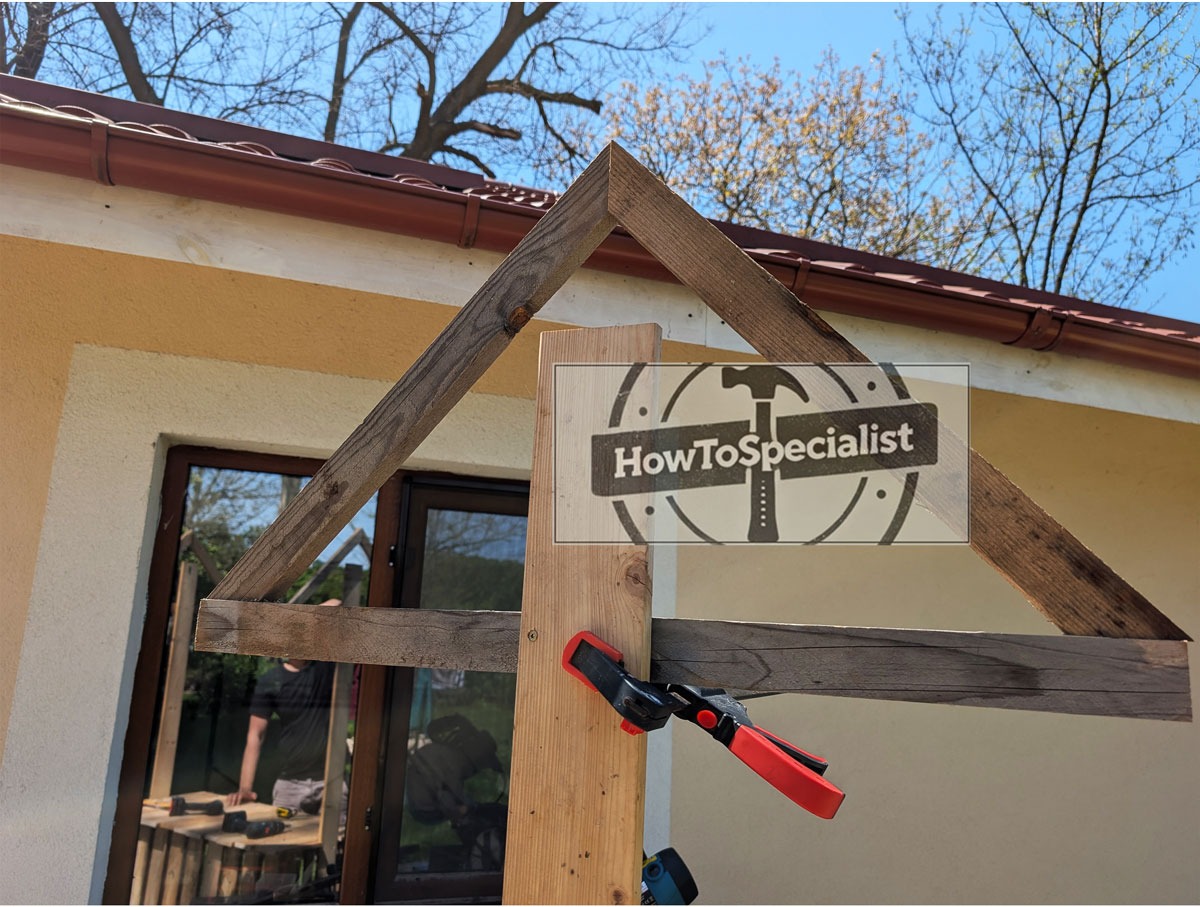
The side trusses for the bar are straightforward to build, as they’re simply made from two wooden triangles. Assemble them on a flat surface, keeping the joints tight and the angles consistent so both sides match. Once assembled, position the trusses on the side stakes and secure them firmly in place.
These simple triangular frames do a great job of shaping the roof while adding rigidity to the structure. Once they’re attached, the overall form of the tiki bar really starts to come together, making it clear how the roof will sit and how the bar will look once finished.

Fitting-the-roofing
I added two purlins on each side of the gable roof to give proper support to the bamboo privacy screen. These run parallel to the ridge and create a solid nailing surface, making it much easier to secure the bamboo evenly.
This small addition makes a big difference in both strength and appearance. The purlins keep the bamboo from sagging over time and help the roof maintain a clean, consistent shape, especially once it’s exposed to sun, wind, and rain.
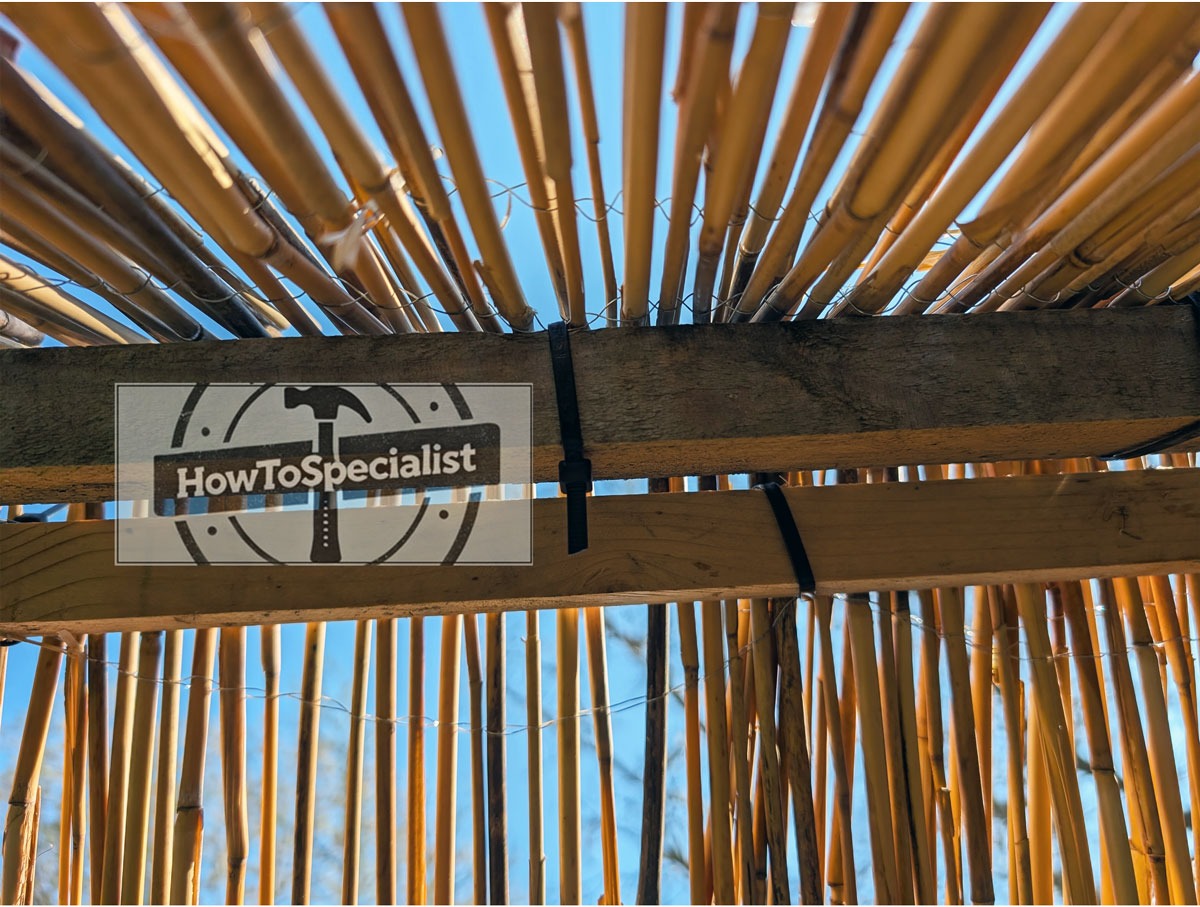
Roofing
I used simple zip ties to secure the privacy screens to the roof structure, keeping the installation quick and straightforward. A pair of pliers helped pull everything tight and trim or adjust the screen to fit exactly where it needed to sit.
There’s no need to overcomplicate this step. This is a tiki bar, after all, and a slightly rough, handmade look fits the theme perfectly. The rustic finish is part of the charm, and sometimes the simplest solutions are the ones that work best.
Step 3: Finishing touches

Sanding-the-bar
Once the construction is complete, the finishing touches are what truly elevate the tiki bar from a simple structure to a polished outdoor feature. Start by sanding all visible and touchable surfaces, paying special attention to the countertop edge and any areas where arms and hands will rest.
A slightly rounded edge makes a big difference in comfort. For outdoor durability, apply an exterior stain or paint to the frame, and protect the countertop with decking oil or a few coats of spar urethane. This not only enhances the wood grain but also helps the bar withstand sun, moisture, and frequent use.
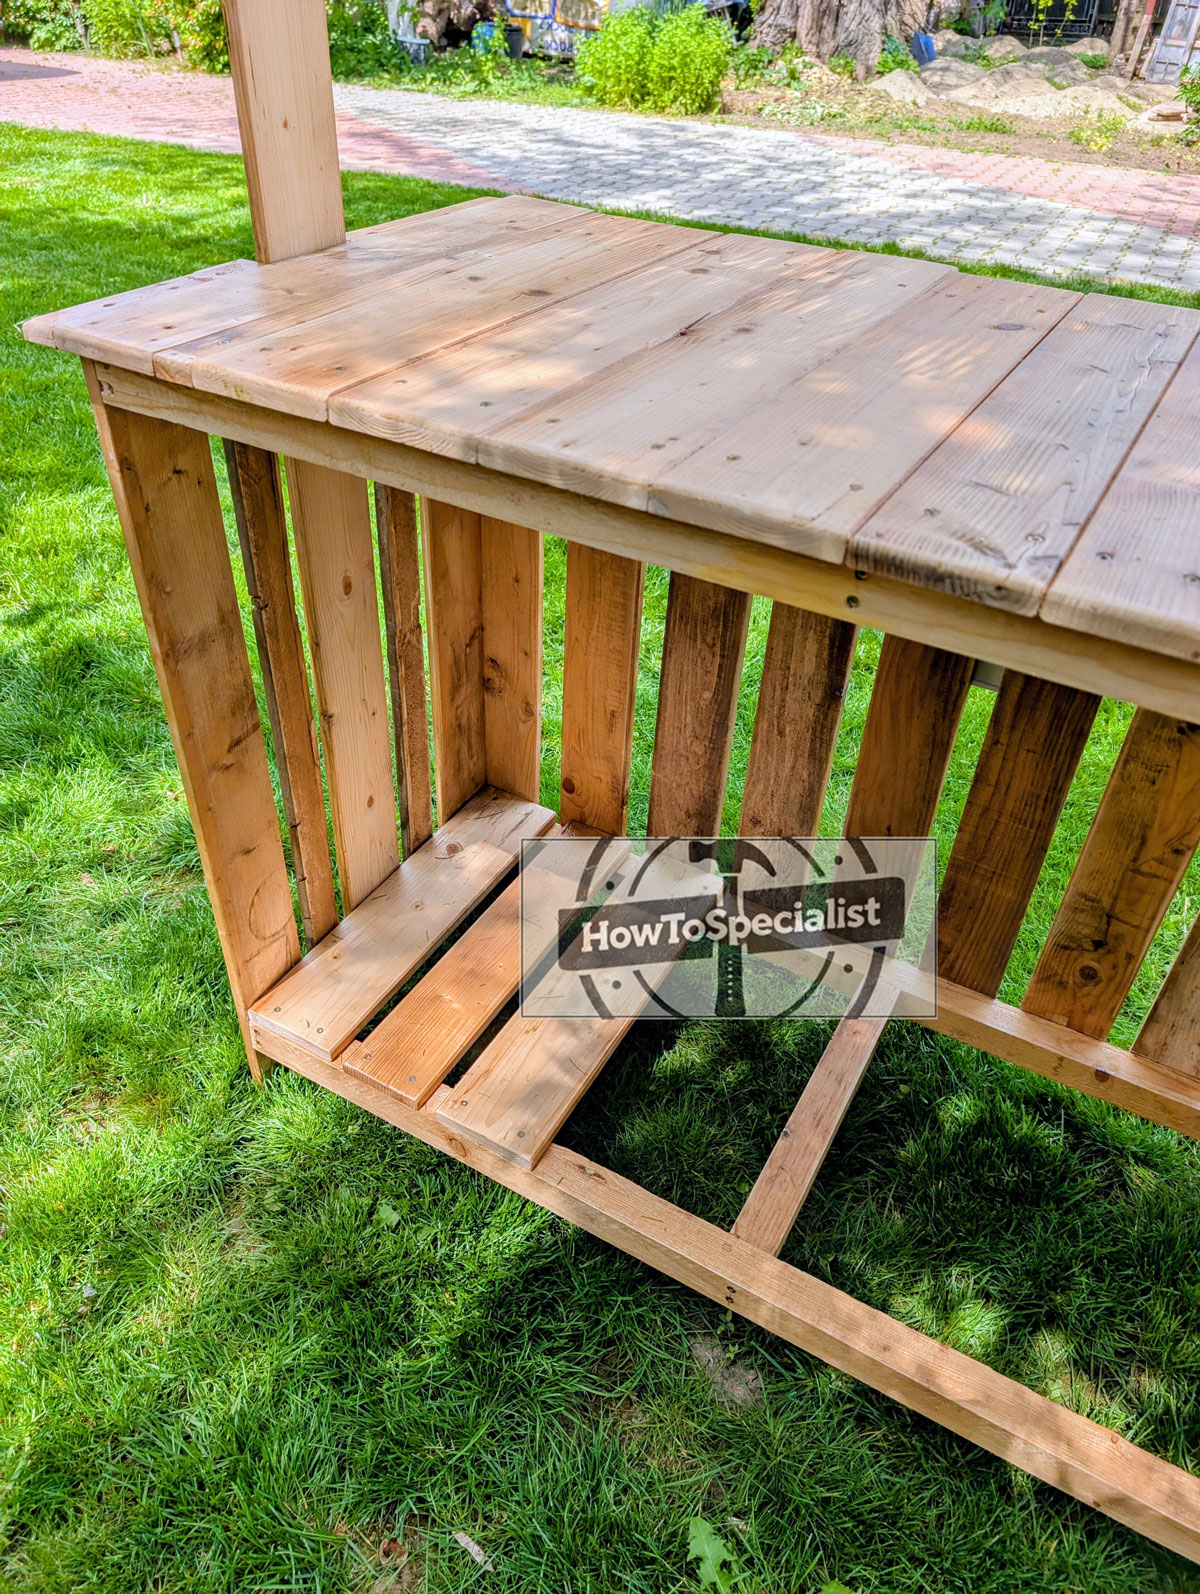
Lower-shelf—tiki-bar
I also added a small shelf underneath the bar, and it quickly became one of my favorite features. It’s the perfect spot for an ice bucket, keeping drinks cold and within easy reach while still leaving the countertop clear for serving.
The shelf is simple to build but adds a lot of function, especially when the bar is in use. It keeps everything organized and off the ground, and it fits right in with the practical, no-wasted-space approach that works so well for an outdoor tiki bar setup.
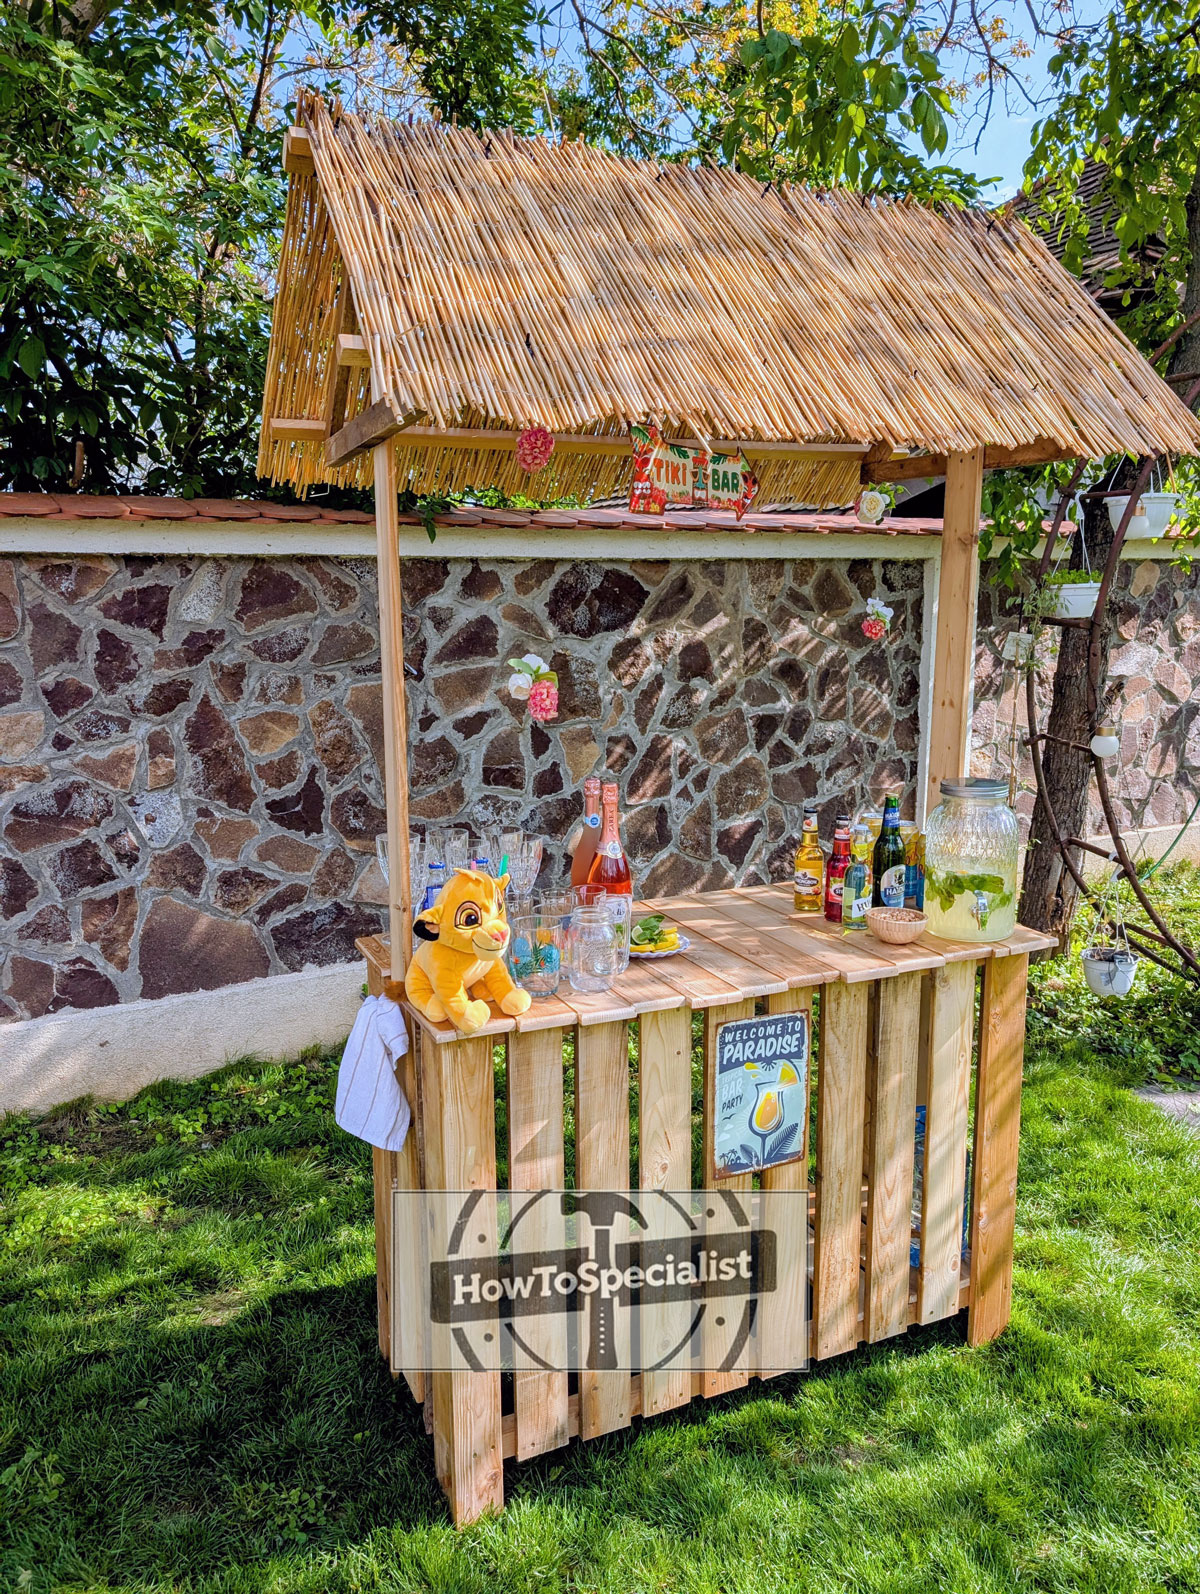
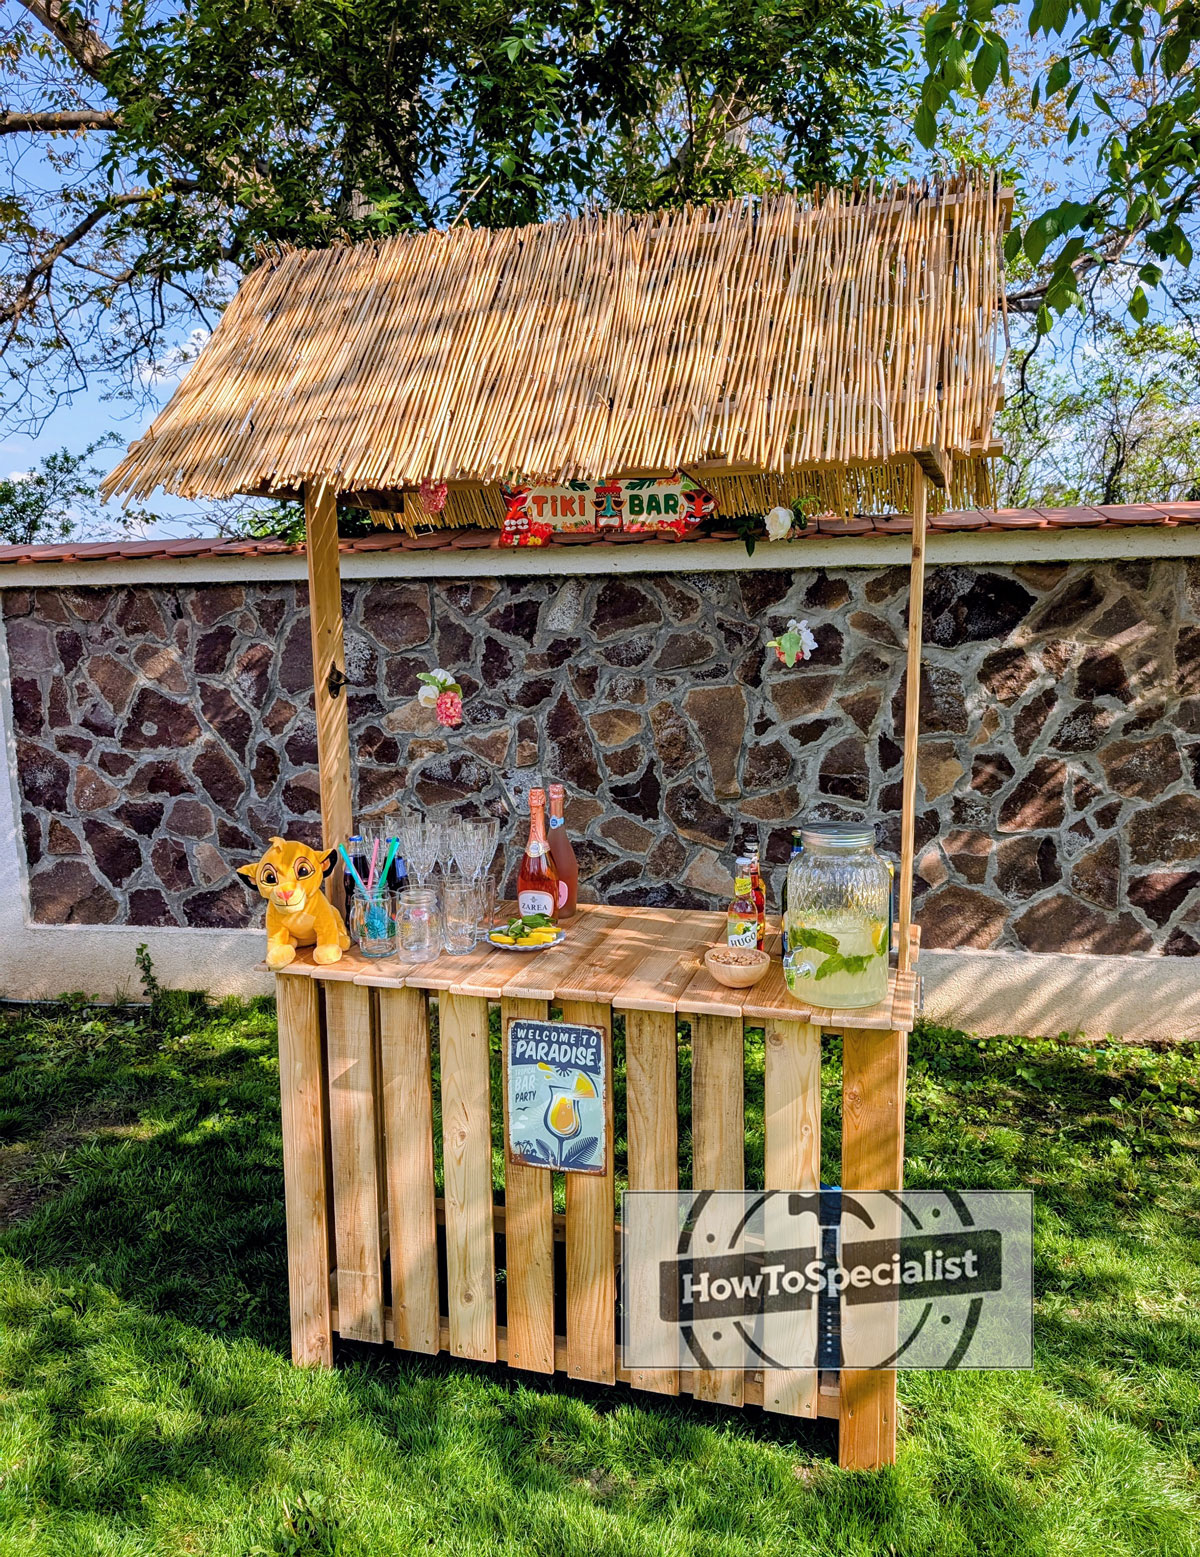
DIY-tiki-bar
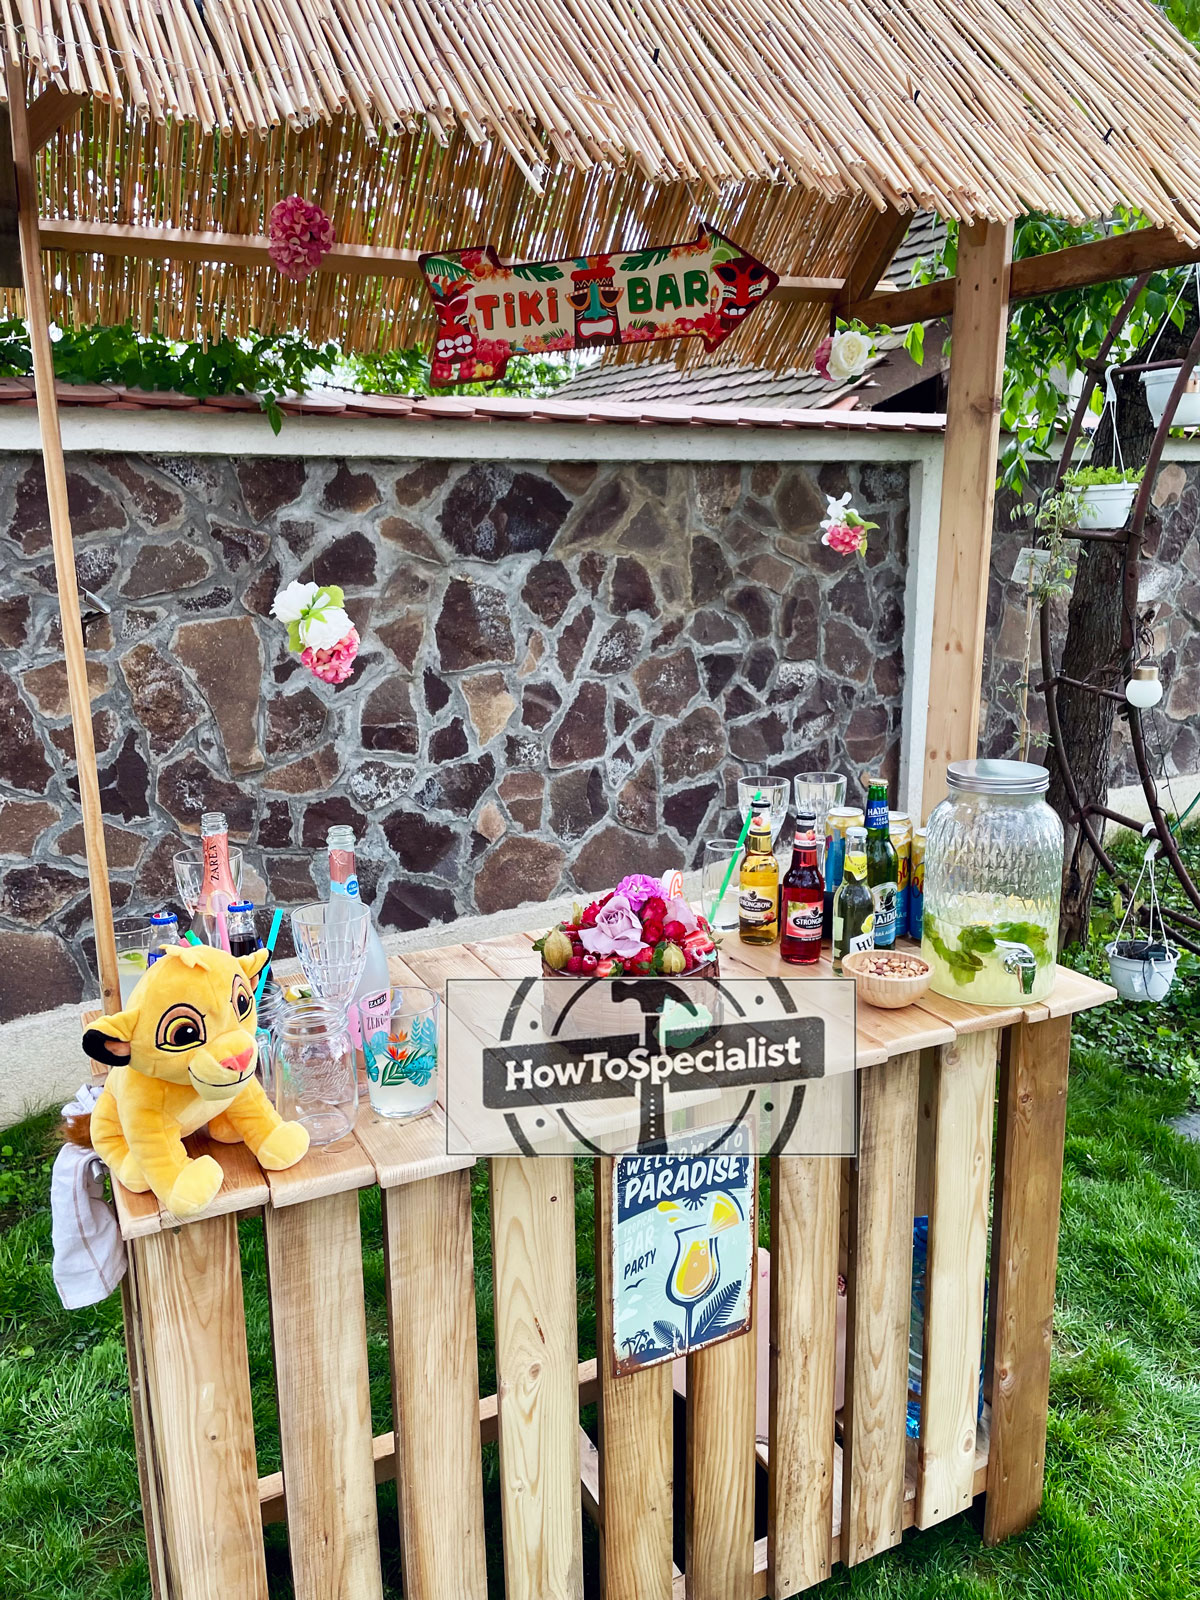
The final details are where personality comes in. Add small decor elements like a tiki sign, tropical flowers, or simple rope accents to reinforce the theme without overloading the design. Practical upgrades such as hooks for tools or towels, a bottle rail on the back, or subtle LED lighting under the roof instantly increase usability, especially in the evening. Keep accessories lightweight and removable so the structure stays easy to maintain, and you’ll end up with a tiki bar that looks great, functions well, and holds up season after season.
Tiki-bar-plans
With the tiki bar fully assembled and finished, a little regular maintenance will keep it looking good and performing well for years. At the start and end of each season, check all screws and structural connections, especially around the roof posts and diagonal braces, and tighten anything that has loosened from temperature changes or use. Clean the countertop periodically with mild soap and water, and reapply decking oil or exterior finish as needed to protect the wood from UV exposure and moisture. Keeping the base slightly off the ground and free of standing water will also greatly extend the life of the structure.
DIY-Bar-Tiki—wooden-project
The bamboo or reed roof benefits from simple care as well. Remove leaves and debris so moisture doesn’t get trapped, and inspect fasteners after strong winds. If the bamboo begins to fade or dry out, that’s normal and part of the natural look, but replacing the roof covering every few seasons is quick and inexpensive. Avoid sealing it with heavy coatings, as airflow is important for preventing mold and premature deterioration.

Beyond maintenance, this tiki bar is easy to adapt as your needs change. You can add a back panel for wind protection, install a small bar rail for stools, or integrate solar or low-voltage lighting for evening use. For colder months, consider removable side panels or a detachable roof so the bar can be stored or reconfigured. Whether you keep it simple or keep upgrading over time, the structure is flexible enough to grow with your space and your ideas.