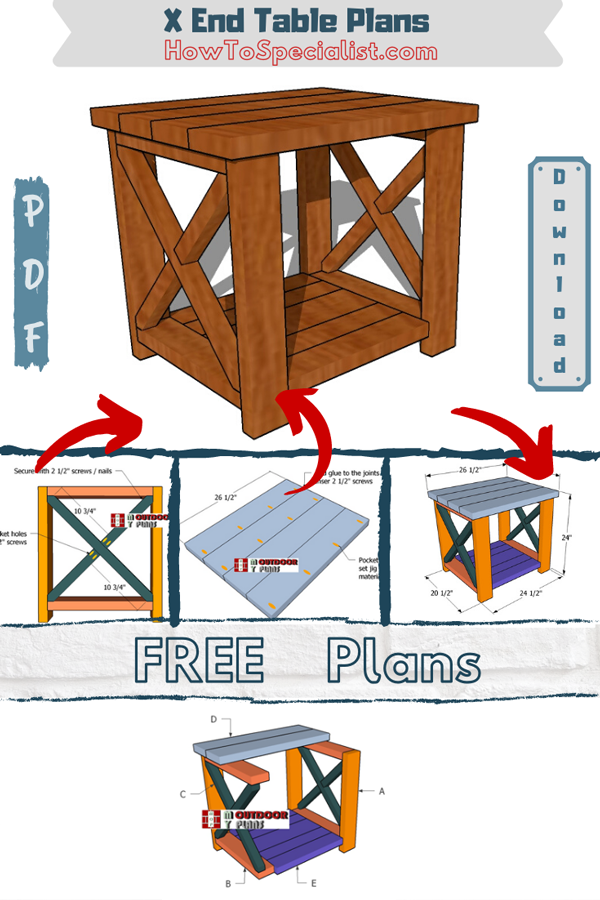
This step by step woodworking project is about X end table plans. I have designed this beautiful and easy to make side table with a farmhouse style, so you can add character to your living room. This project requires basic tools and materials and you can build it one weekend, at most. See my other DIY projects HERE. PDF downloadable plans with premium features in the Store.
This X end table is a fantastic project that combines both functionality and rustic charm, perfect for adding a touch of farmhouse style to your living room. The cross-brace design not only adds visual interest but also ensures the table is sturdy and durable. Whether you’re using it to hold your favorite books, a cozy lamp, or a cup of coffee, this end table will be a beautiful and practical addition to your home decor.
We recommend you to invest in the best materials you could afford. Therefore, you should buy weather-resistant lumber, such as pine or cedar. Always take accurate measurements before adjusting the size of the components at the proper size. Drill pilot holes trough the components before inserting the wood screws, to prevent the wood from splitting. This a guest post from MyOutdoorPlans.com. Thank you for their contribution.
Made from this plan
It’s that easy to build an end table!
Building a farmhouse end table
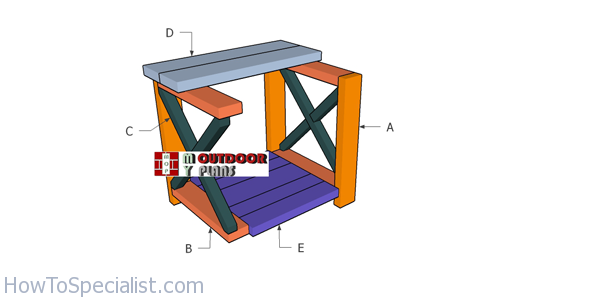
Building-an-end-table
Cut and Shopping Lists
A – 4 pieces of 2×4 lumber – 22 ½” long LEGS
B – 4 pieces of 2×4 lumber – 17 ½” long SUPPORTS
C – 2 pieces of 2×2 lumber – 24 ¾” long, 4 pieces – 11 ½” long X TRIMS
D – 4 pieces of 2×6 lumber – 26 ½” long TABLETOP
E -4 pieces of 2×4 lumber – 17 ½” long, 1 piece of 2×6 lumber – 17 ½” long FLOOR
Tools
- Safety gloves, glasses
- Miter saw, Pocket hole jig
- Chalk line, tape measure, spirit level, carpentry pencil
- Drill machinery and drill bits
Time
- One Weekend
How to build a farmhouse end table
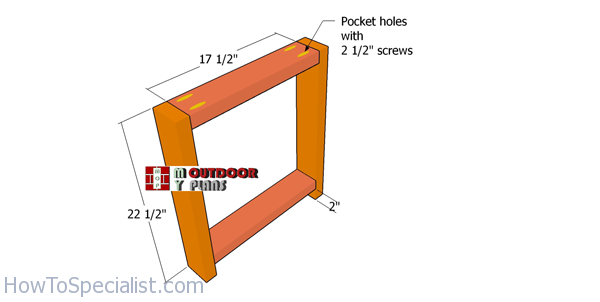
Assembling-the-frames-for-the-table
The first step of the project is to build the side frames for the table. Therefore, cut all components from 2×4 lumber. Drill pocket holes at both ends of the horizontal components. Align the edges flush and make sure the corners are square. Insert 2 1/2″ screws to assemble the frames.
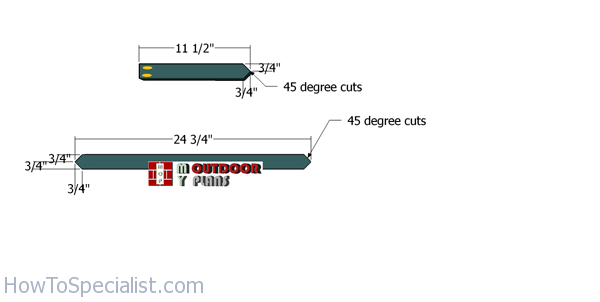
Trims
Next, we need to cut the trims for the X shapes. Use a miter saw to make the double 45 degree cuts to the 2x2s, as shown in the diagram. Drill pocket holes at the straight end of the trims.
Fitting-the-X-trim
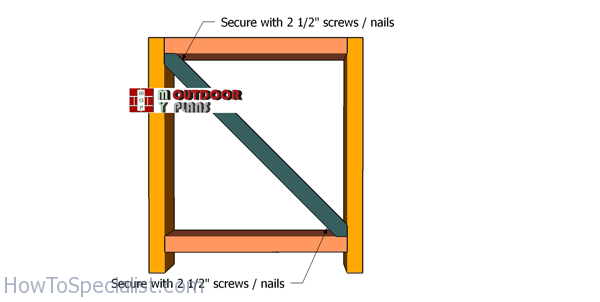
Fit the trims to the side frames, as shown in the diagram. Align the edges flush, drill pilot holes and insert 2 1/2″ screws to secure them to the frames. Alternatively, you can use a nail gun to get the job done quickly.
Assembling-the-sides
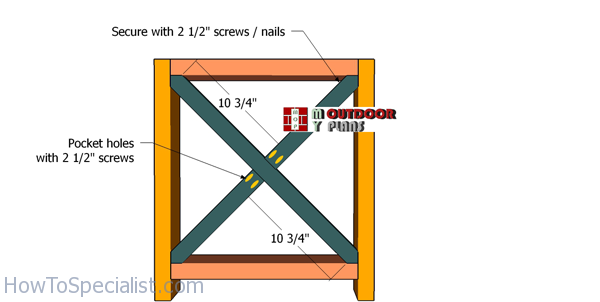
Center the rest of the trims into place and secure them with 2 1/2″ screws to the mail trim. Also secure them to the main frames with 2 1/2″ screws / nails.
Assembling the small table
Fitting-the-bottom-shelf
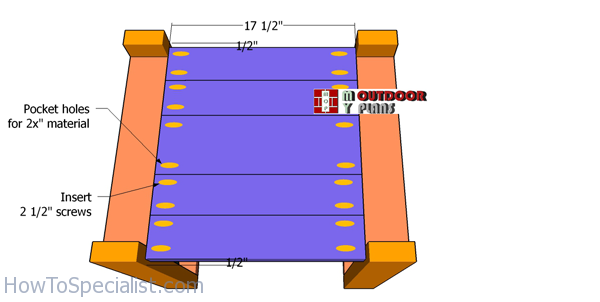
Continue the project by attaching the boards to the bottom of the end table. Drill pocket holes at both ends of the boards and insert 2 1/2″ screws to lock them to the side frames. Add glue to the joints and leave no gaps between the components.
Assembling-the-tabletop
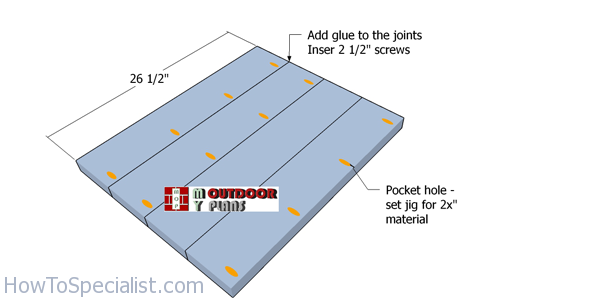
Next, we need to assemble the tabletop for the end table. Drill pockets holes as described in the diagram. . Add glue to the joints and insert 2 1/2″ screws to lock the panel together. Align the edges and leave no gaps between the components.
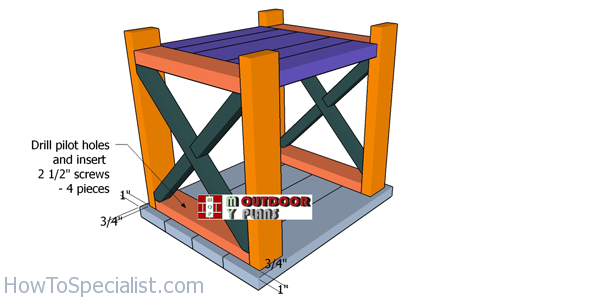
Fitting-the-tabletop
Center the frame of the table to the tabletop, making sure the pocket holes will not be visible once the table is assembled. Drill pilot holes through the side frames and insert 2 1/2″ screws into the tabletop.
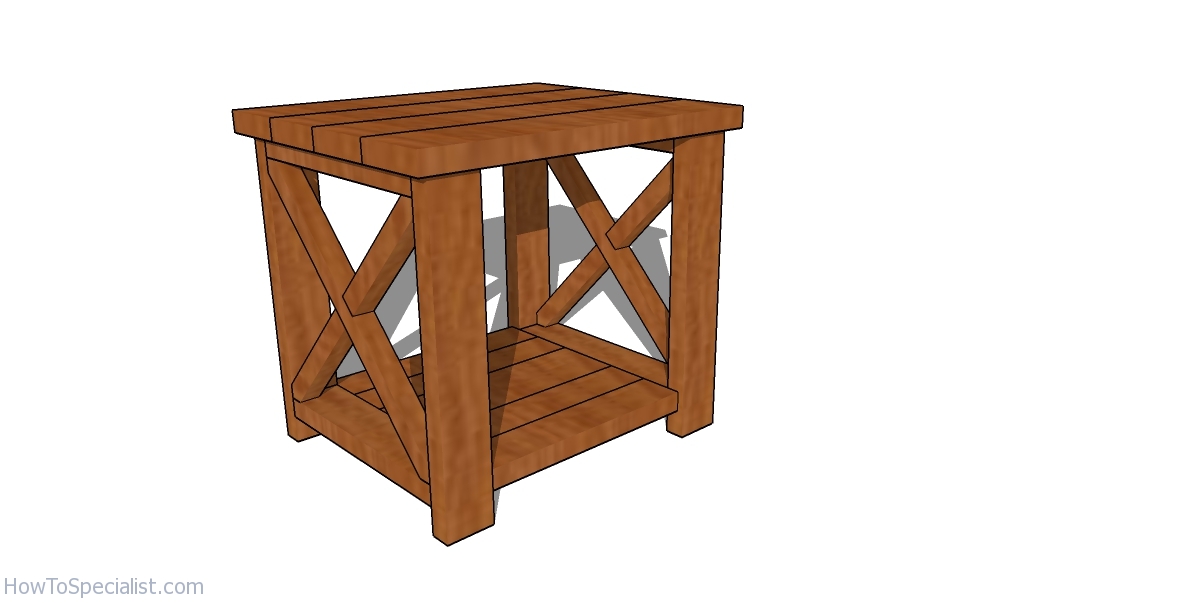
X End Table Plans
Fill the holes with wood putty and then let it dry for a few hours. Meanwhile you can round-over the edges with a router. Smooth the surface with 120-220 grit sandpaper and apply a few coats of paint / stain to enhance the look of the project.
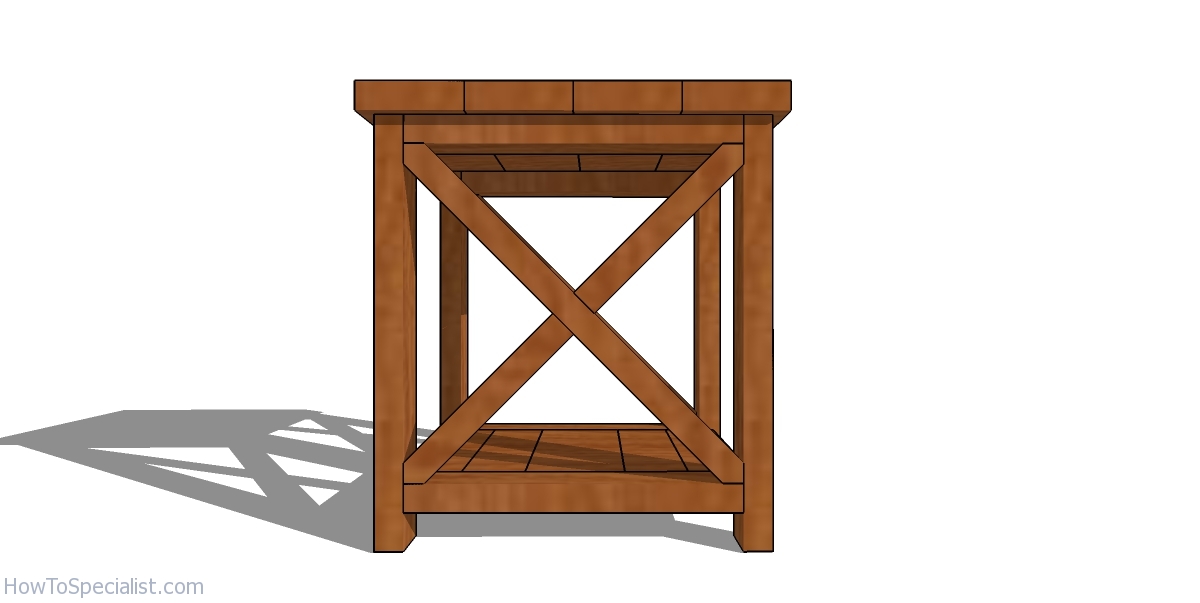
X End Table Plans side view
You can see the rest of my Premium Plans HERE. If you like my project, don’t forget to SHARE it on Facebook and Pinterest. This is a wonderful end table that you can build with materials you find at any DIY store, on a low budget. This X-shape sides table is a nice complement to your living room
If you want to download the plans. just click on the GET PDF PLANS button bellow.
Thank you for reading our project about X end table plans and I recommend you to check out the rest of the projects. Don’t forget to LIKE and SHARE our projects with your friends, by using the social media widgets. SUBSCRIBE to be the first that gets our latest projects.

