This article is about how to build a garden stone path. In this project I show you how we built a super simple 24 ft garden path using natural stone. The process is simple, we removed the vegetation level first and then installed concrete edge borders to trace the garden path. Next, we filled the path with screed and we leveled it thoroughly before installing the natural stone. Last but not least, we filled the gaps between the stones with concrete and removed the excess with a brush.
It is important to know that there is no right way to lay the flag stone, because they don’t have a regular shape. Turn the stones around until you find the right one that fits the puzzle. In addition, there are lots of types of stone to choose from, starting with color up to texture. In my case, my garden stone path was a lot cheaper to make than using block pavers, for example, but it took a lot more time. See all my Premium Plans HERE.
Made from this plan
Garden Stone Path – Video!
Materials
- cement, sand, gravel
- flexible electrical tubing
- stone
- edge borders
Tools
- Concrete mixer
- Angle grinder
- Hammer Drill
- Drill / Screwdriver
- Hammer, Tape measure, Safety glasses
- Trowel, Trowel
- Wheelbarrow
- Buckets
- Shovel, Shovel
Time
- 2-3 days
How to Build a Garden Stone Path
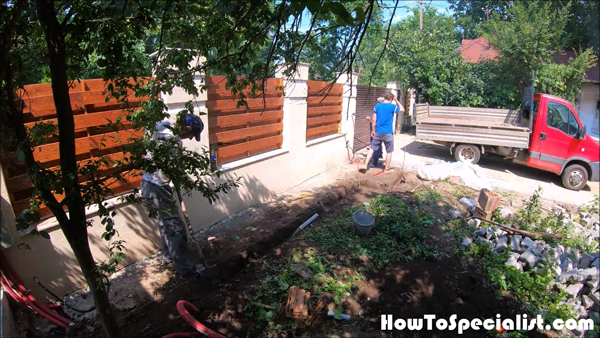
Digging-the-ground-for-the-edge-borders
First of all, you need to need to layout the garden path. Use string and a few stakes to trace the outline of the path. Use a shovel to dig a small trench for the concrete edge borders. You can skip this step, but installing the edging will make your work a lot easier. Use a level to check the depth of the trench.
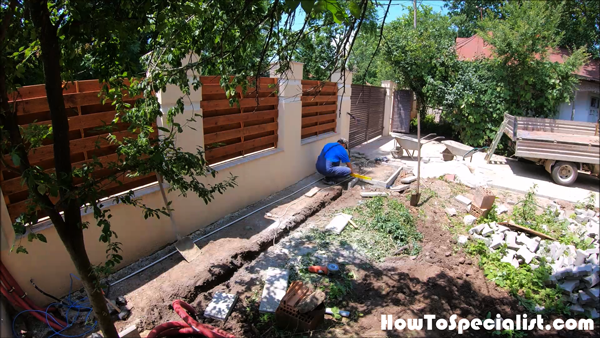
Fitting-the-edge-borders
Start installing the edge borders one by one. Use a spirit level to check if the borders are aligned properly and set them into place with concrete.
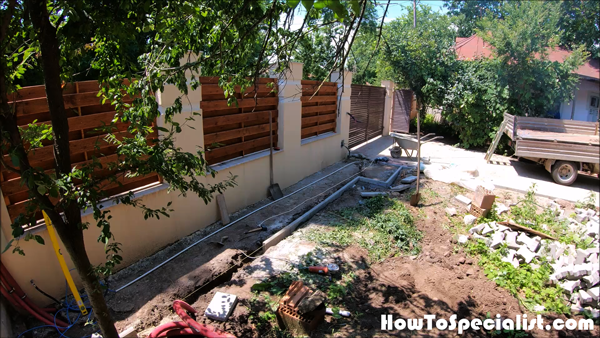
Fitting-the-edge-borders—flagstone-path
Install the rest of the borders following the guide string. Leave no gaps between the edge borders.
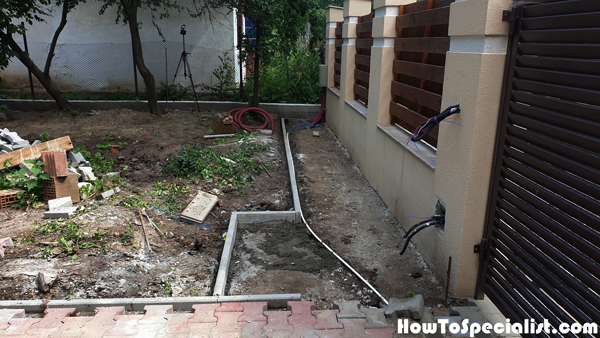
Fitting-the-edge-borders
Install all the wiring under the garden path, if necessary. This is a great way to hide wires that go along the path.
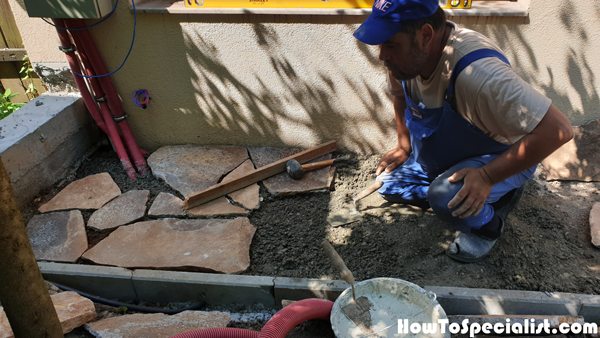
Installing-the-flag-stones-to-the-garden-path
Start installing the flag stone, one by one. There is no right way to install the stones, but you need to make sure the gaps between them are as small as possible. Therefore, you need to turn the stones and find a perfect match… as in a puzzle.
Pour screed between the edge borders and then level it with a straight edges, making sure the stone will be flush with the top of the edges. Use a rubber mallet to set the stones into place and a spirit level to make sure everything is aligned properly.
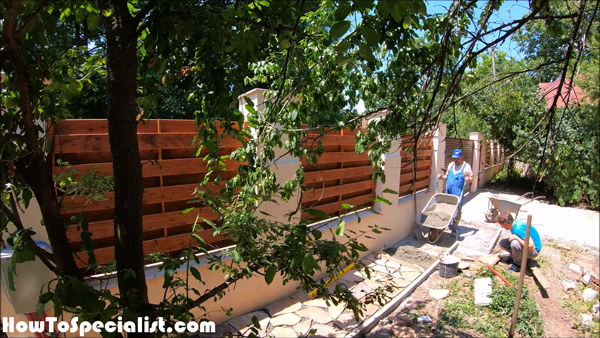
Fitting-the-concrete-support-for-the-flag-stone
Lay more screed on the path and then use a straight edge to level the surface.
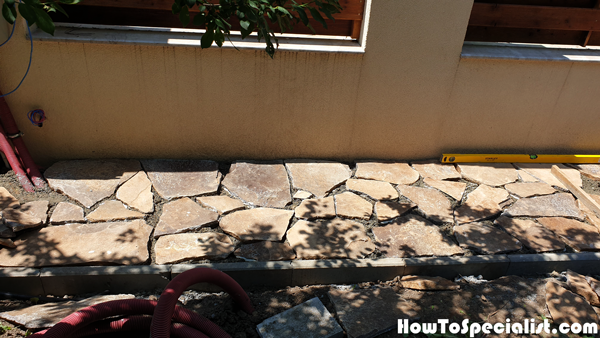
Installing-the-flag-stone-to-the-garden-path
The stone installed starts to look beautiful even if there is a long way to the finished garden path.

Laying-all-the-flag-stone-to-the-garden-path
Install the rest of the stone using the same techniques described above.
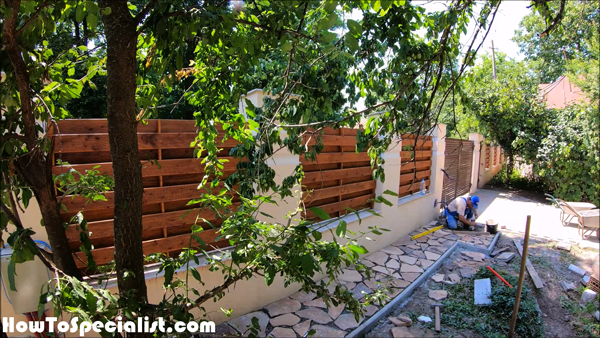
Laying-the-stones-to-the-garden-path
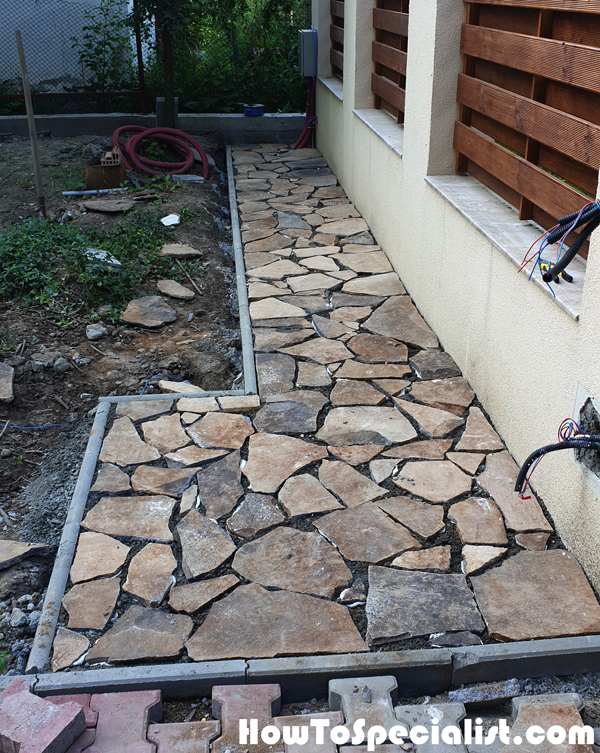
Building-a-path-stone-for-the-garden
I love the look of natural stone, even if the gaps aren’t filled yet with concrete. The unique patterns that you can create are really impressive.

Filling-the-gaps-between-the-flag-stones
Fill the gaps with a mix of sand and cement. Use a trowel to fill the gaps evenly. We will clean the excess later.
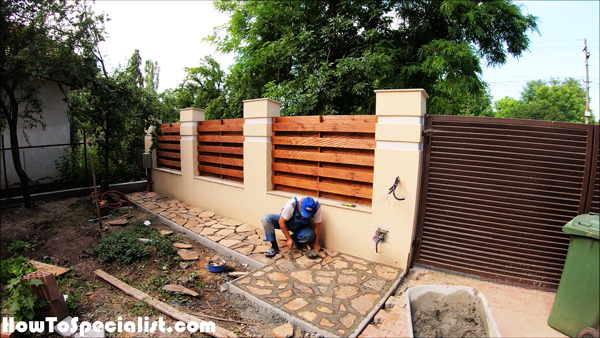
Filling-the-flagstone—garden-path
Fill the rest of the gaps slowly, making sure you don’t leave any spots left.
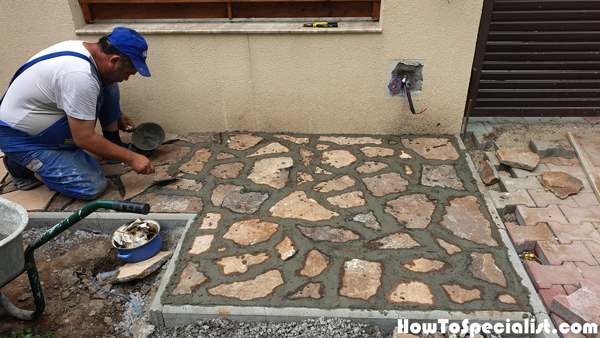
Filling-the-gaps-between-the-flag-stones
As you can see in the image, this is a time consuming job, but well worth it. Filling the gaps between the stone changes the look of the path dramatically.
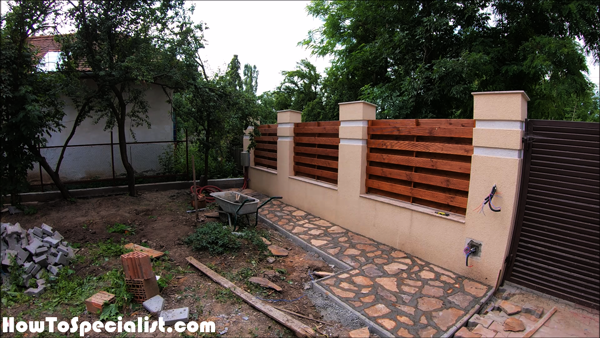
Garden-path—filling-the-gaps
Let the concrete to dry out for a few hours.
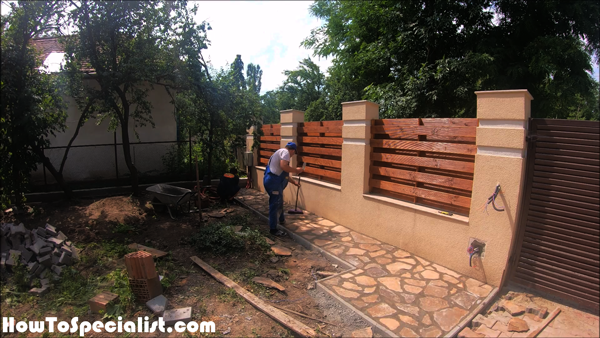
Remove-the-excess-between-the-flag-stones
Next, brush off the excess one stone at a time. You can use a brush as well for better results.
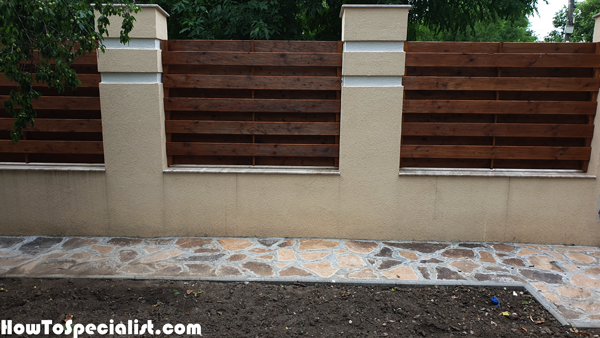
Building-a-garden-path
After a few days you can use water to clean everything off.
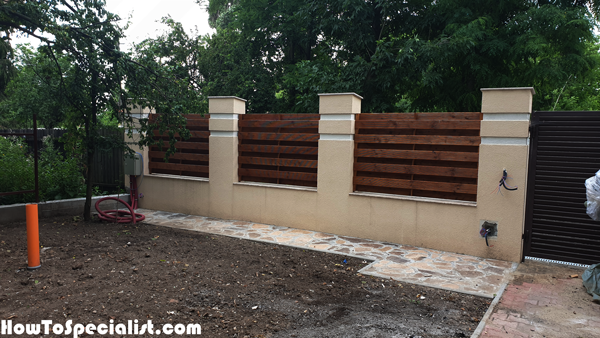
How-to-make-a-garden-path
This was a super fun project that took 2 days to complete. Making a garden path is a slow process because there are so many details you need to take into account. However, the end result is well worth it!
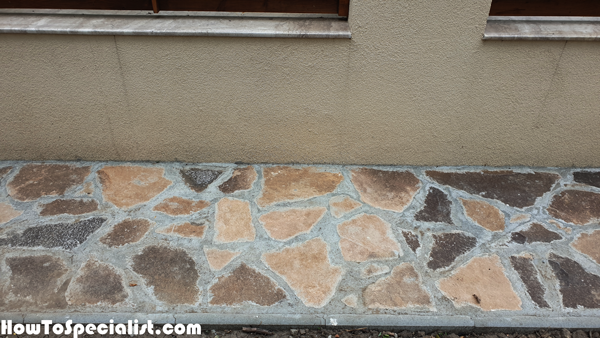
How-to-build-a-garden-path
If you enjoyed this project make sure you share it with your friend! That helps a lot and I will be able to share more free tutorials! If you like my projects make sure you take a look over the full list HERE.
My best tips on building a stone pathway:
stone pathway is a beautiful and durable addition to any garden or yard. It not only enhances the landscape but also provides a practical solution for high-traffic areas. Whether you want a winding path through your garden or a direct route to your front door, here are my best tips for building a stone pathway that will stand the test of time.
1. Plan and Design Your Pathway
- Determine the Purpose: Think about how the pathway will be used. Is it for aesthetics, practical use, or both? Decide where you want the path to start and end, and how wide it should be. A typical garden path is around 2-3 feet wide, but adjust according to your needs.
- Choose a Path Layout: A straight path is practical for direct routes, while a curved or winding path adds more visual interest to a garden or yard. Lay out the path with a garden hose or spray paint to get a sense of the shape and flow.
- Pick Your Stones: Choose stones that fit the style of your garden. Flagstone, bluestone, and slate are popular for pathways. Make sure the stones are durable and non-slippery, especially if the pathway will be used in wet conditions.
2. Gather Materials and Tools
- Stone: Select flat, durable stones that are large enough to form a stable walking surface. Flagstone is a common choice, but you can also use cobblestones or stepping stones.
- Gravel and Sand: You’ll need gravel or crushed stone for the base, and sharp sand for leveling the stones.
- Edging Material: To keep the pathway looking tidy, consider installing edging made from metal, plastic, or natural stone.
- Tools: You’ll need a shovel, rake, wheelbarrow, mallet, level, measuring tape, and possibly a plate compactor if you’re working with a large area.
3. Prepare the Ground
- Mark the Path: Use stakes and string or spray paint to mark the outline of the pathway. This will give you a clear guide to follow while digging.
- Excavate the Pathway Area: Dig out the area to a depth of about 4-6 inches. If the path will handle heavy foot traffic, consider digging a bit deeper to create a more substantial base.
- Check for Slope: Ensure the path has a slight slope (about 1/4 inch per foot) for drainage. This will help avoid water pooling on the stones during rainy weather.
4. Lay the Gravel Base
- Spread Gravel or Crushed Stone: Pour a 2-3 inch layer of crushed stone or gravel into the excavated area. This provides a solid base that improves drainage and prevents the stones from shifting over time.
- Compact the Base: Use a tamper or plate compactor to compact the gravel base, ensuring it’s level and firm. A solid base is key to preventing the stones from settling unevenly.
- Check the Depth: Make sure the base layer is compacted evenly, and the total depth of the pathway (including the base, sand, and stone) matches the surrounding ground level.
5. Add a Layer of Sand
- Spread the Sand Evenly: On top of the compacted gravel, add a 1-2 inch layer of sharp sand. The sand helps you level the stones and gives them something to settle into.
- Screed the Sand: Use a long board to screed the sand evenly. Make sure it’s smooth and level across the entire path. You can create slight slopes for better water runoff, especially on longer pathways.
6. Lay the Stones
- Position the Stones: Begin laying the stones, starting at one end of the pathway. Space them evenly, allowing enough room for foot traffic but keeping the stones close enough to create a continuous path.
- Level Each Stone: Use a level to ensure that each stone sits flat and stable. If a stone is too high, remove some sand from underneath. If it’s too low, add a bit more sand.
- Tamp the Stones Down: Once a stone is in place, use a rubber mallet to gently tamp it down, ensuring it’s secure and level. Make sure each stone is stable enough to handle weight without shifting.
7. Fill the Gaps Between Stones
- Use Sand or Gravel: Once the stones are set, fill the gaps between them with sand, gravel, or small decorative stones. For a more natural look, you can plant low-growing ground cover between the stones.
- Sweep the Filler Material: Use a broom to sweep the filler material into the gaps between the stones. Continue sweeping and adding material until the gaps are fully filled.
- Mist the Surface: Lightly mist the surface with water to help the filler material settle. Add more filler if needed after misting.
8. Install Edging (Optional)
- Add Edging for Stability: Edging helps keep the pathway stones in place and prevents the filler material from spilling out. Use metal, plastic, or stone edging, depending on your desired look.
- Secure the Edging: Install the edging along the sides of the path and secure it with spikes or stakes to ensure it stays in place.
9. Maintain the Pathway
- Regular Sweeping: Keep the pathway clear of debris and leaves by sweeping regularly. This will help prevent moss or weeds from growing between the stones.
- Replenish Sand or Gravel: Over time, the filler material between the stones may settle or wash away. Check the gaps periodically and add more sand or gravel as needed to keep the stones secure.
- Weed Control: If weeds or grass start to grow between the stones, use a natural weed killer or hand-pull them to maintain the path’s clean look.
Building a stone pathway is a rewarding project that adds both beauty and function to your outdoor space. By following these tips and paying attention to the details like proper base preparation and leveling, you’ll create a pathway that’s not only attractive but also long-lasting. Whether for practical use or garden aesthetics, your new stone pathway will enhance your landscape for years to come.
Thank you for taking a look over my article on how to make a stone path. Make sure you share this project with your friends if you like it and please take a look over the rest of my projects, because I have tons of plans and ideas to choose from. See all my projects HERE.

1 comment
What is the name of the edge border and where can I get it?
Thank you