This step by step diy woodworking project is about 3 car carport plans. If you want to protect your vehicles from rain, snow and strong winds, you should take a look over my free plans. This structure has a gable roof and it can store up to 3 cars. There are many storage projects featured on our site, so don’t be afraid to browse through the rest of the woodworking plans.
Before starting the actual construction project, we recommend you to plan everything, as to save money and to keep the costs under control. Adjust the size and the design of the wooden carport to suit your needs. In addition, we recommend you to invest in high-quality materials, such as pine, redwood or cedar, as they have a nice finish and are highly durable, especially in a humid environment. See all my Premium Plans in the Shop.
Made from this plan
Triple Carport Plans
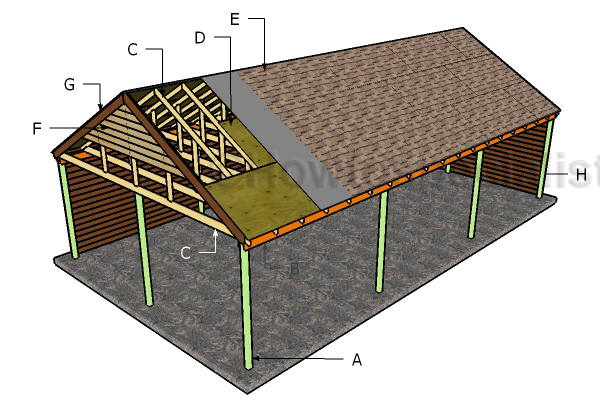
building-a-3-car-carport
Materials
- A – 10 pieces of 4×4 lumber – 11-12′ long POSTS
- B – 4 pieces of 2×6 lumber – 432″ long SUPPORTS BEAMS
- 10 pieces of 4×4 lumber – 12′
- 4 piece of of 2×6 lumber – 32′
- 2 pieces of 1/2″ plywood – 4’x8′
- tube form, post anchor
- 20 pieces 7″ carriage bolts
- 500 pieces of 2 1/2″ screws
- 500 pieces of 1 5/8″ screws
- rafter ties
- wood glue, stain/paint
- wood filler
Tools
- Safety gloves, glasses
- Miter saw, jigsaw
- Chalk line, tape measure, spirit level, carpentry pencil
- Drill machinery and drill bits
Tips
- Use a good miter saw to make the angle cuts
- Drill pilot holes before inserting the screws
Time
- One Week
Related
How to build a carport for 3 cars
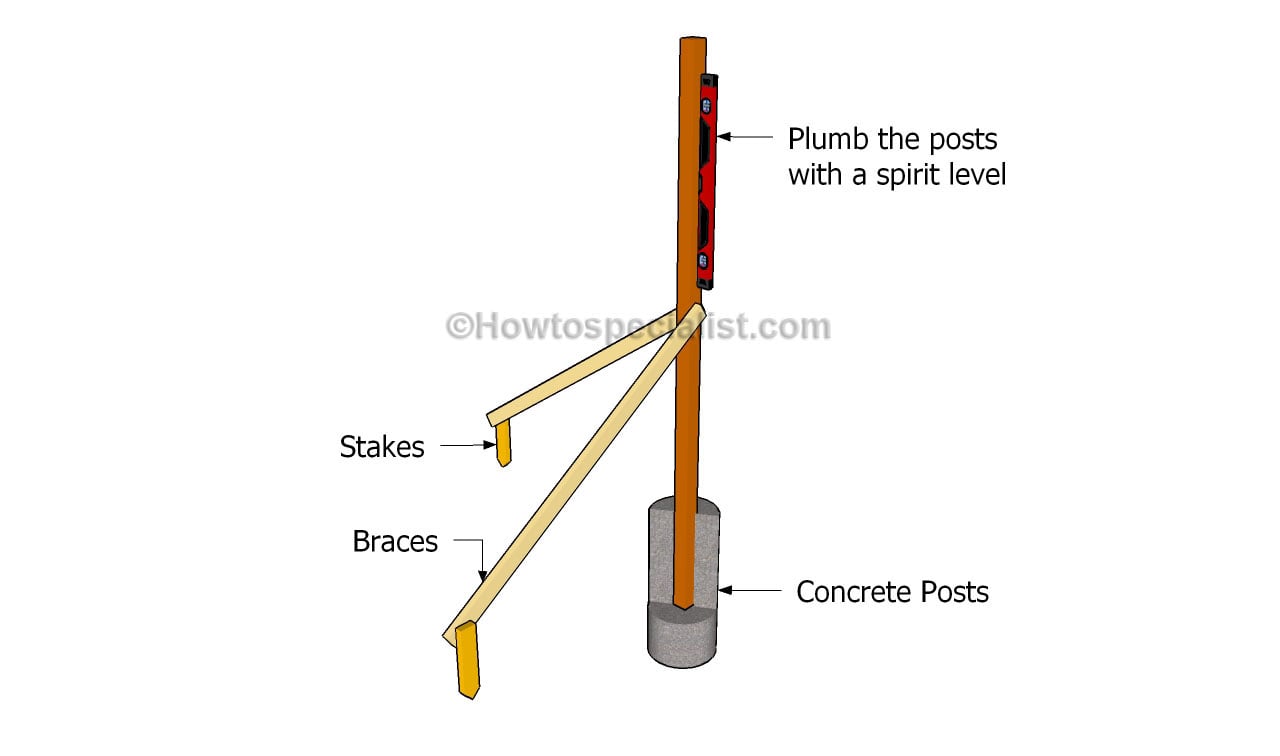
First of all, you need to decide how you will secure the 4×4 wooden posts into place. Fitting the posts in concrete will give you the best rigidity of the frame of the carport. However, you have other solutions, as well, such as pouring concrete footings and using post anchors.
Irrespective of your choice, I really recommend you to read the local building codes and to dig holes under the frost line (at least 2′). Use tube forms and temporarily braces to lock the posts into place tightly for a few days until the concrete dries out.

Fitting-the-posts
Lay out the posts for the carport using string and batten boards. Apply the well known 3-4-5 rule to the corners, so you check if they are perfectly right angled. In addition, you need to measure the diagonals and make adjustments until they are perfectly equal.
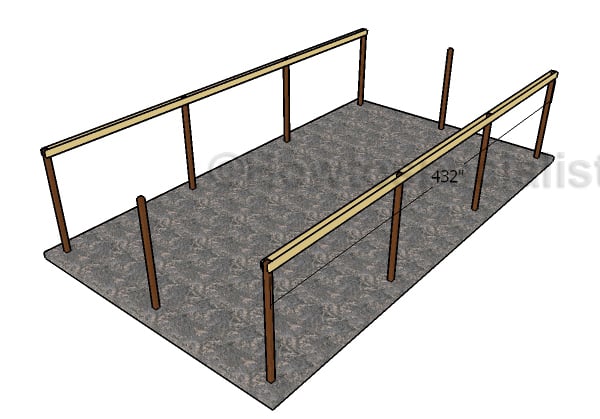
Fitting-the-support-beams
Fit the 2×6 or 2×8 support beams to the front and back posts. Use a spirit level to check if the support beams are perfectly horizontal. Clamp the beams to the posts, drill pilot holes and then insert two or three 7″ carriage bolts for each joint.
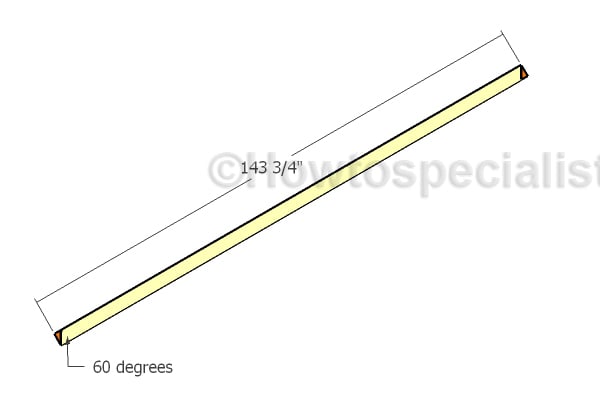
Building-the-rafters
Build the rafters for the triple carport from 2×4 lumber. If you live in an area with strong winds or heavy snow, you should consider use 2×6 lumber.
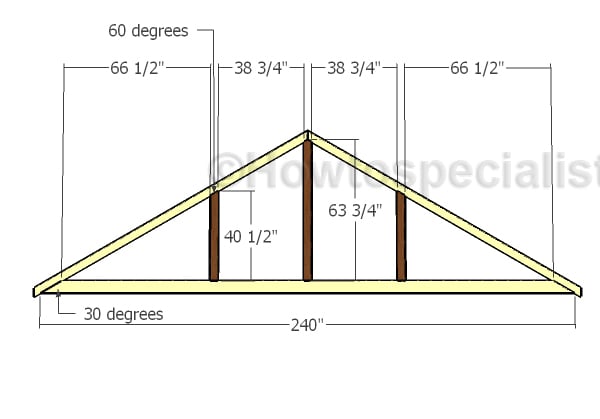
Assembling-the-trusses
Build the bottom rafters and the supports for the trusses. Take accurate measurements and then align all the components on a level surface.
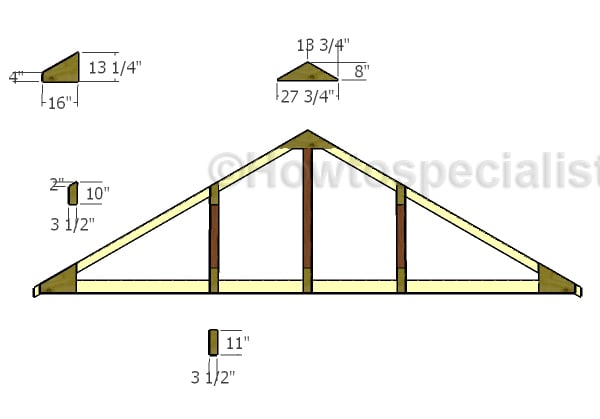
Fitting-the-gussets
Use 1/2″ plywood for the joints, as gussets. Place the gussets over the joints and then insert 1 5/8″ screws to lock everything tightly.
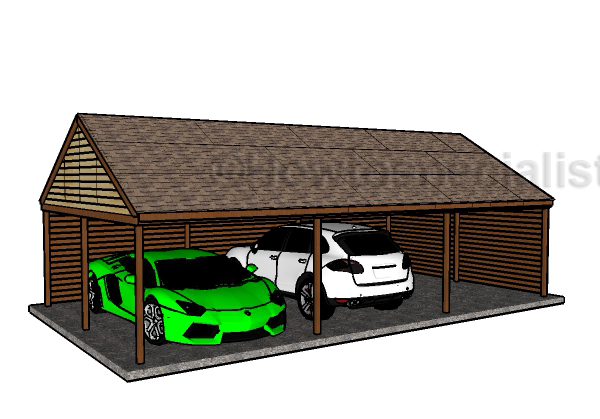
3-car-carport-plans-hts
Last but not least, I recommend you to take care of the finishing touches. Fill the holes with wood filler and let it to dry out for several hours. Check out the rest of the outdoor projects, to see more ways to improve the look of your garden.
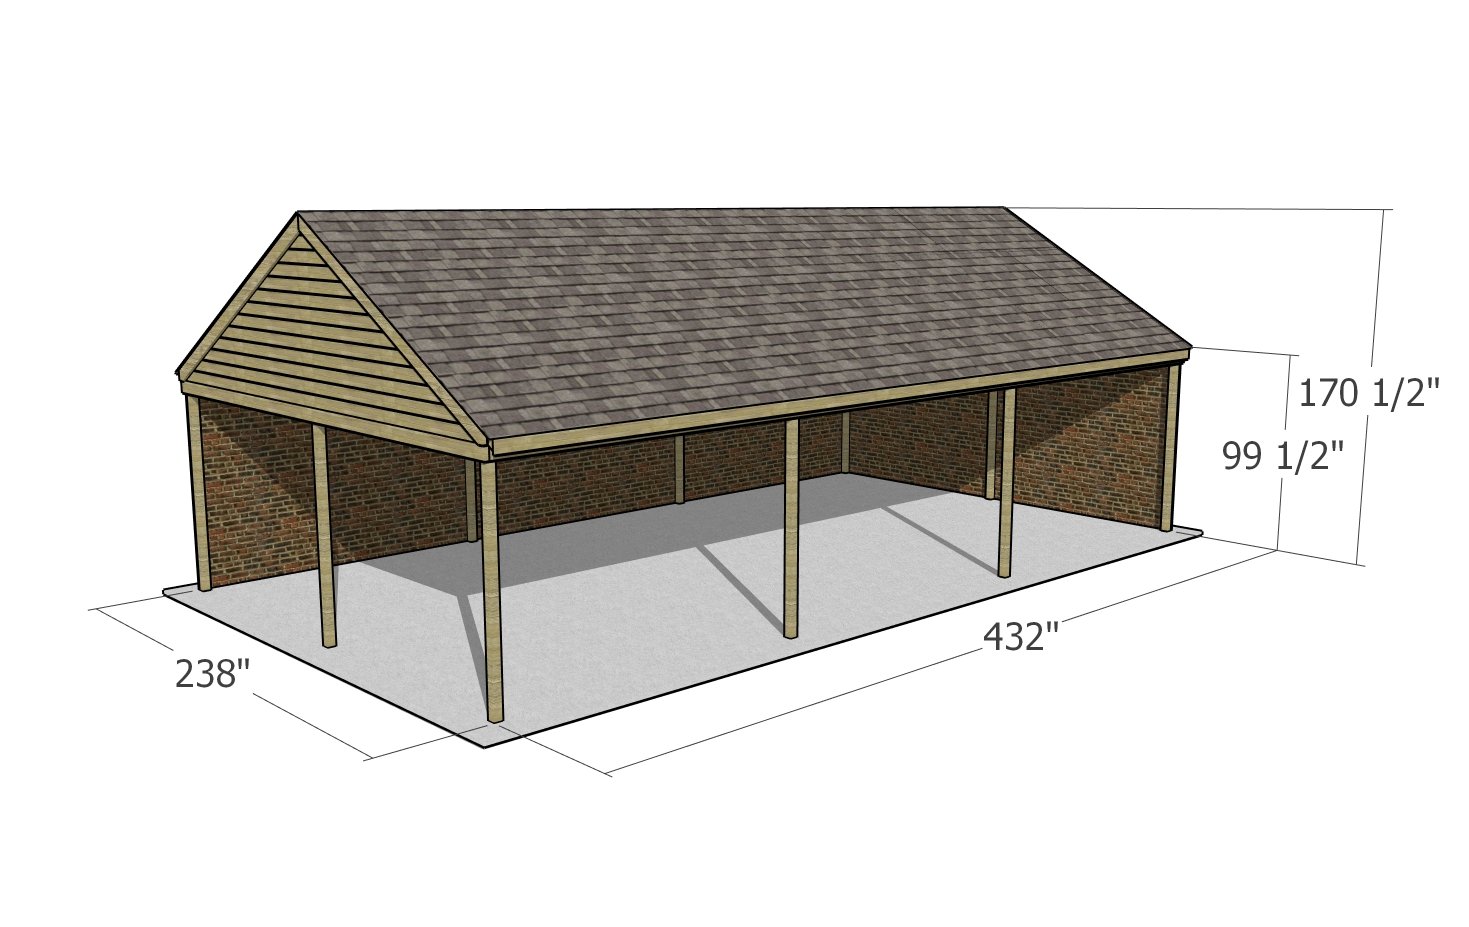
Triple carport plans
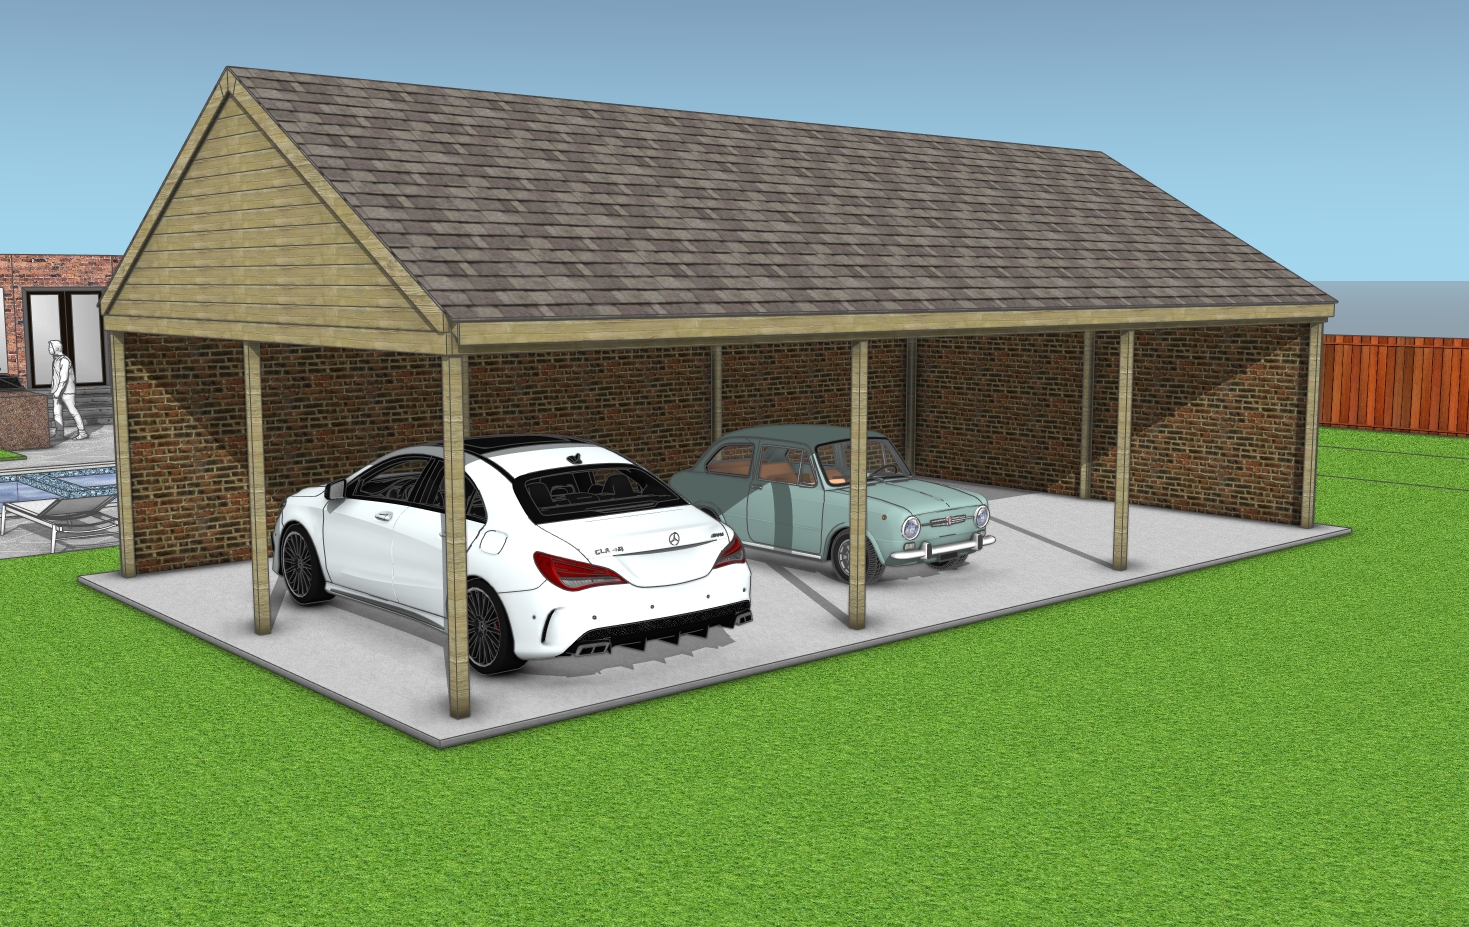
Triple carport – diy wood plans
In addition, don’t forget to take a look over PART 2 of the project, so you learn how to build the gable roof for the carport.
Thank you for reading our project about 3 car carport plans and we recommend you to check out the rest of the projects. Don’t forget to share our projects with your friends and LIKE us, by using the social media widgets. SUBSCRIBE if you want to be the first that gets our latest articles and to help us create more free plans.
<< Previous | Next >>

