This step by step woodworking project is about how to build a folding sawbuck. If you are like me, you probably want to easy your work when cutting the firewood. However, if you have a limited space in your workshop building a sawbuck takes its toll. In this project I show you how I built a simple folding sawbuck from weather resistant lumber.
We recommend you to invest in the best materials you could afford. Therefore, you should buy weather-resistant lumber, such as pressure-treated lumber, pine or cedar. Always take accurate measurements before adjusting the size of the components at the proper size. Drill pilot holes trough the components before inserting the wood screws, to prevent the wood from splitting.
Made from this plan
It’s that easy to build a folding sawbuck!
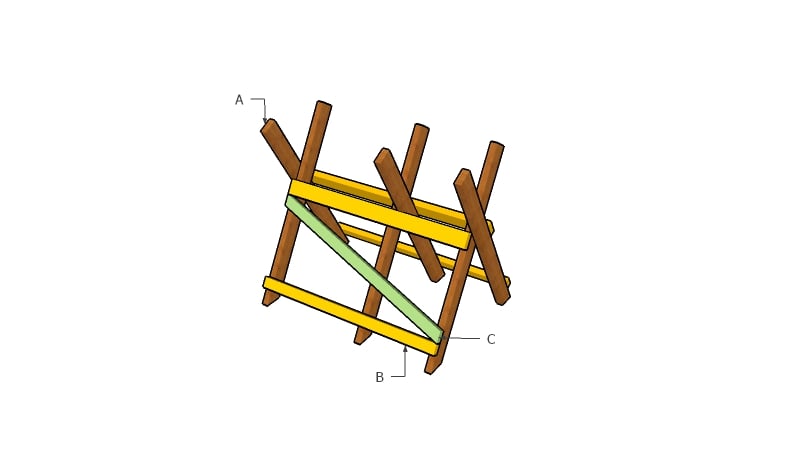
Building a sawbuck
Materials
- A – 6 pieces of 2×4 lumber – 48″ long LEGS
- B – 2 piece of 2×4 lumber – 48″ long, 2 pieces of 2×3 lumber – 48″ long BRACES
- C – 2 pieces of 2×3 lumber – 49″ long BRACES
- 4 pieces of 2×4 lumber – 8 ft
- 2 pieces of 2×3 lumber – 8 ft
- 2 1/2″ screws
- 3 pieces of 3 1/2″ carriage bolts
Tools
- Safety gloves, glasses
- Miter saw, jigsaw
- Chalk line, tape measure, spirit level, carpentry pencil
- Drill machinery and drill bits
Tips
- Adjust the size of the beam to suit your needs
Time
- One Weekend
DIY Sawbuck plans
Building the legs
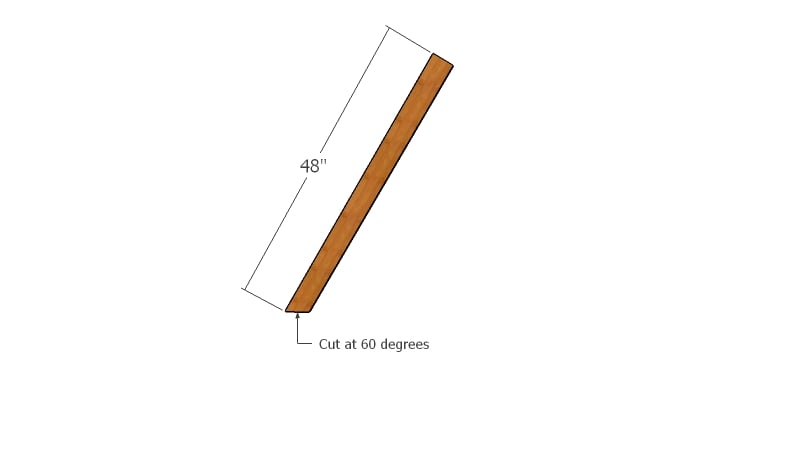
The first step of the project is to build the legs for the sawbuck. Use 2×4 lumber and cut one end of the beams at 60 degrees. Smooth the edges with sandpaper.
Drilling the pilot holes for joints
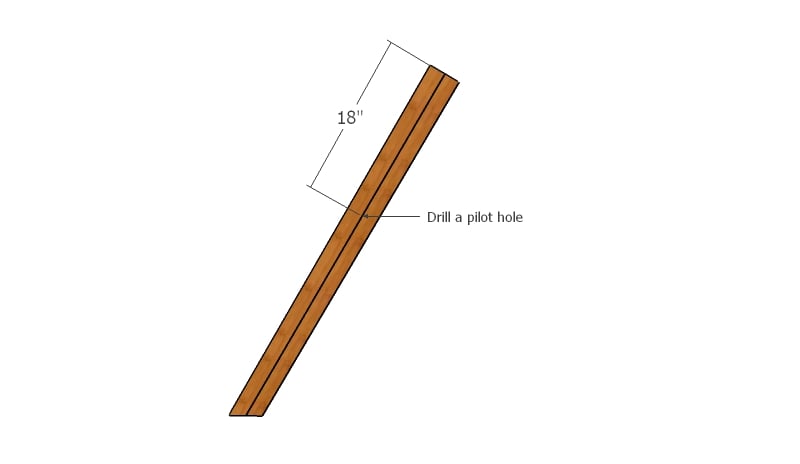
Measure the location for the bolt, so that the sawbuck can fold easily.
Fitting the braces
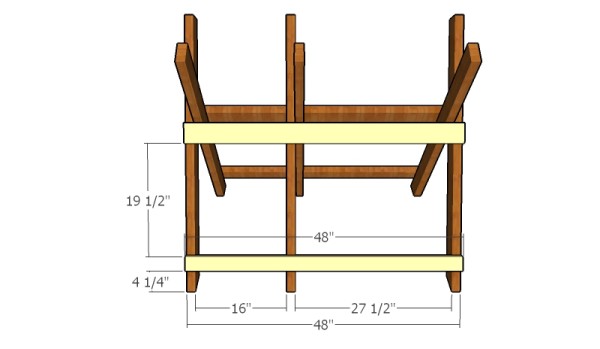
Use 2×4 lumber for the top supports and 2×3 lumber for the bottom braces.
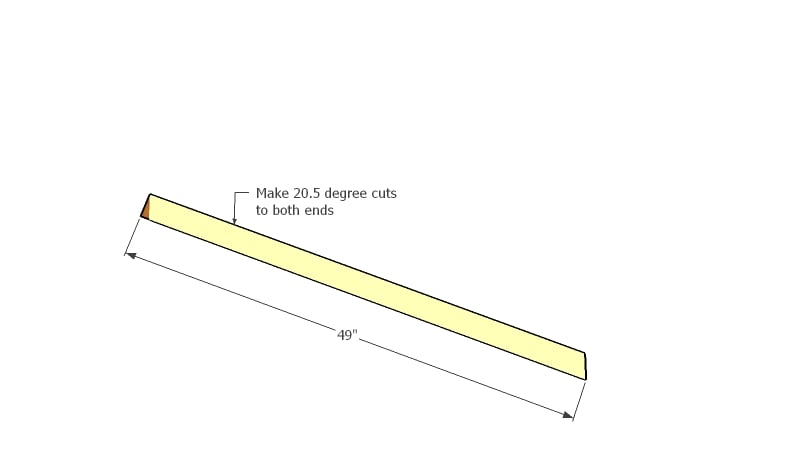
Building the diagonal braces
Build the diagonal braces from 2×3 lumber. Cut both ends of the braces to get a professional result. Make 20.5 degree cuts to both ends of the braces.
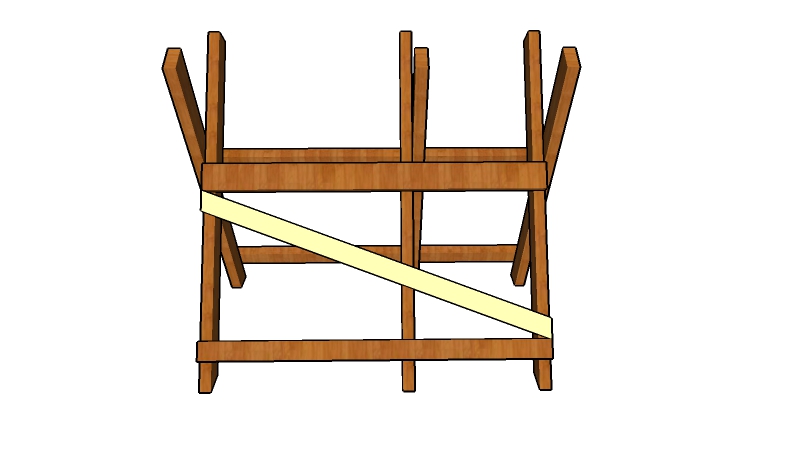
Diagonal brace
Fit the diagonal brace to the sawbuck and lock it into place with 2 1/2″ screws, after drilling pilot holes
How to build a folding sawbuck

Sawbuck Legs
First of all, I cut the legs for the sawbuck. I used 2x3s instead of 2x4s, as I already had them in my shop. If you are going to do heavy cutting on the sawbuck, I recommend you to stick with the 2x4s, as they provide more support.
I used the miter saw to cut the ends of the legs at 60 degrees (30 degree cut).

Drilling the pilot holes
Then, I measured 30″ along the legs and marked the center. I used my drill to make a pilot hole for the 3 1/2″ bolts. Make sure the drill bit is slightly larger than the bolt, so that the legs can swing easily.

Bolts
For each joint you will need a 3 1/2″ bolt, washers and a nut.

Fitting the bolts
Fit the bolt to the legs, as shown in the diagram and place a washer to the joint. The washer will create a gap between the legs, so they can swing easily.

Assembling-the-legs
Fit the other leg, fit the washer and tighten the nut.

X-Legs
This is a good time to test the joint and see if the legs fold easily. I repeated the process for the rest of the two supports.

Assembling the sawbuck
Next, I cut the top brace from 2×4 lumber and attached it to the legs using 2 1/2″ screws. I drilled pilot holes to prevent the wood from splitting. Use a spirit level to plumb the legs and to see if the brace is horizontal.

Fitting the middle legs
I attached the other support to the saw buck. The project is starting to take shape nicely. It is essential to align the component properly, otherwise the sawbuck won’t fold easily.

Fitting the bottom brace
I used 2x3s for the bottom braces. I measure the distance between the legs, so I can get consistent gaps.

Fitting the supports on the opposite side
I attached the brace to the opposite side of the sawbuck. Now the project is all about patience and accuracy. So measure everything twice before attaching the components into place.

More braces
The bottom brace is attached now to the other side, as well.

Fitting the diagonal braces
I folded the sawbuck so I can make sure the diagonal brace won’t twist the joints. I fitted the 2×3 brace loosely and then secured it into place with 2 1/2″ screws, after drilling pilot holes.

Diagonal Braces
I attached the diagonal brace to the opposite side of the sawbuck to enhance the rigidity of the structure.

How to build a folding sawbuck
I used a saw to cut off the excess material from the diagonal braces. Next, I sanded the components with 80 grit sandpaper, followed by 120 grit sandpaper. Make sure you tie the bottom of the legs together with string, so that the sides are locked together when cutting wood.
Thank you for reading our project about how to build a sawbuck and we recommend you to check out the rest of the projects. Don’t forget to LIKE and SHARE our projects with your friends, by using the social media widgets. SUBSCRIBE to be the first that gets our latest projects.

2 comments
Some errors in the guide-
1st need 4” bolts, not 3.5” to allow nuts to fully thread on
2nd- the way it’s laid out, one side should have shorter braces- would have been nice to know prior to cutting- since it’s not possible to get 2 49” diagonal braces from an 8’ board- but would have worked fine if the correct dimensions had been listed.
As it was- an extra trip to the hardware store & the need to re-do the last part of the project and needing to re cut & resize it smaller to get everything to work.
Hi, thanks for taking the time to share your ideas, plan and explanation.
Following yours made it much easier to customise the sawbuck to my measurements. It’s really sturdy.
I bought the nuts and bolts according to the thickness wood I had on hand.
If anything, I might make the opening wider next time so I can cut more logs each go…. I only made it today and haven’t had a chance to use it yet.
Once again,
Thank you