This step by step diy project is about tomato cage plans. If you want to build a learn more about building a beautiful tomato cage, pay attention to this project. Follow the instructions and pay attention to the diagrams and build the structure, even if you are a beginner when it comes to woodworking. Take a look over the rest of the projects, to see more alternatives and design ideas.
If you have grown tomatoes before, you are probably aware of how hard is to keep the plants from laying on the ground. Supporting the tomato plants is very important, as the wind and rain will make them flop over in the absence of a proper cage. Adjust the size of the cages to suit your needs but make sure the structure is rigid.
There are a few tips that you should take into account, if you want to get a professional result. Therefore, take accurate measurements and use professional tools when making the cuts or when drilling pilot holes. Align the components at both ends and add waterproof glue to the joints, if you want to create a rigid structure. Choose the location with great care, as the plants has to receive at least 8 hours of light every day.
Made from this plan
Tomato cage plans
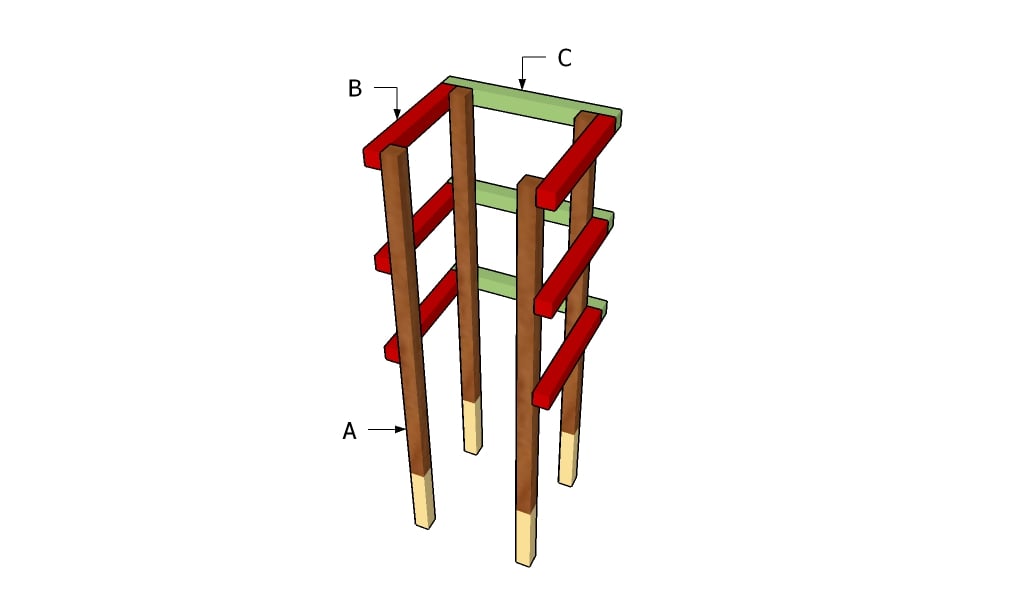
Building a tomato cage
Materials
- A – 4 pieces of 2×2 lumber – 44″ long LEGS
- B – 6 pieces of 2×2 lumber – 13″ long SUPPORTS
- C – 6 pieces of 2×2 lumber – 16″ long SUPPORTS
- 4 pieces of 2×2 lumber – 8 ft
- 30 pieces of 2 1/2″ screws
Tools
- Safety gloves, glasses
- Miter saw, jigsaw
- Chalk line, tape measure, spirit level, carpentry pencil
- Drill machinery and drill bits
Tips
- Use a good miter saw to make the cuts
- Drill pilot holes before inserting the screws
Time
- One Week
Related
How to build a tomato cage
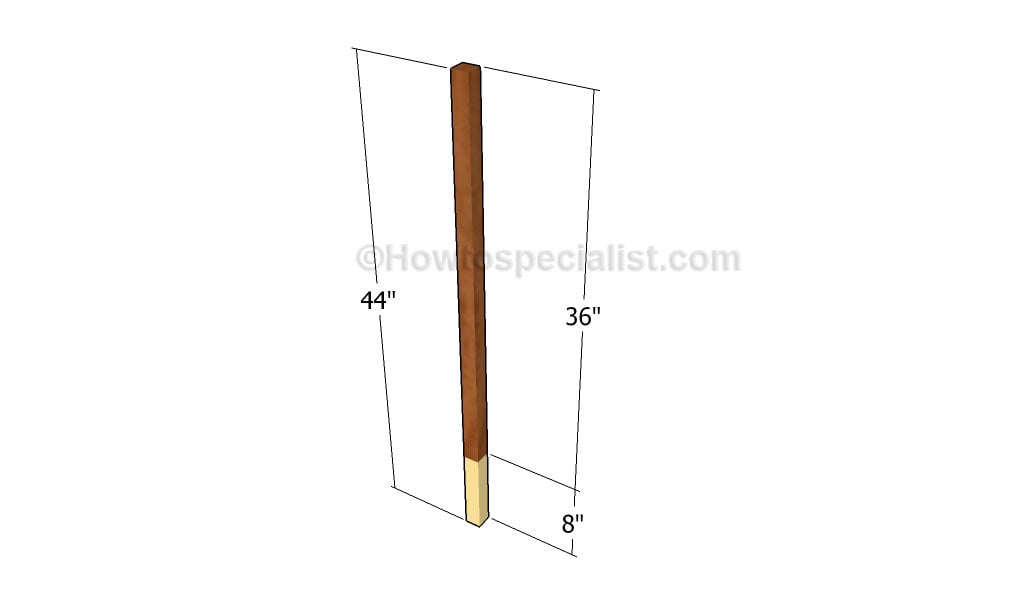
Building the legs
The first step of the project is to build the legs for the tomato cage. As you can easily notice in the diagram, we recommend you to use 2×2 lumber. In order to lock the cage into place, you will need to insert it 8″ into the ground.
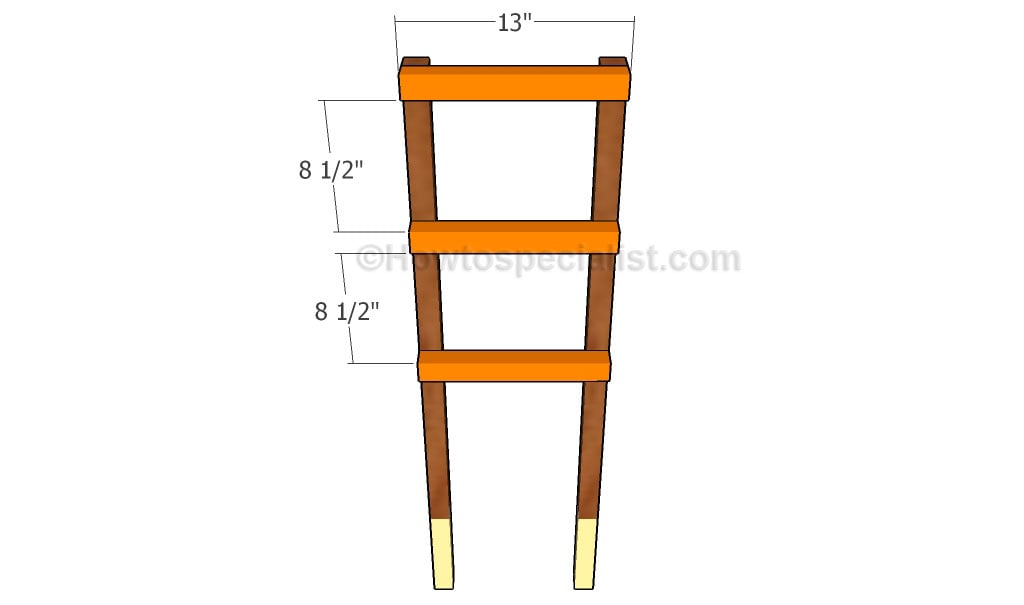
Building the sides
Continue the project by attaching the side supports to the legs. As you can easily notice in the diagram, we recommend you to build the components out of 2×2 lumber. Lay the components on a level surface, place the supports equally spaced and drill pilot holes. Insert 2 1/2″ screws to create a rigid bond between the components.
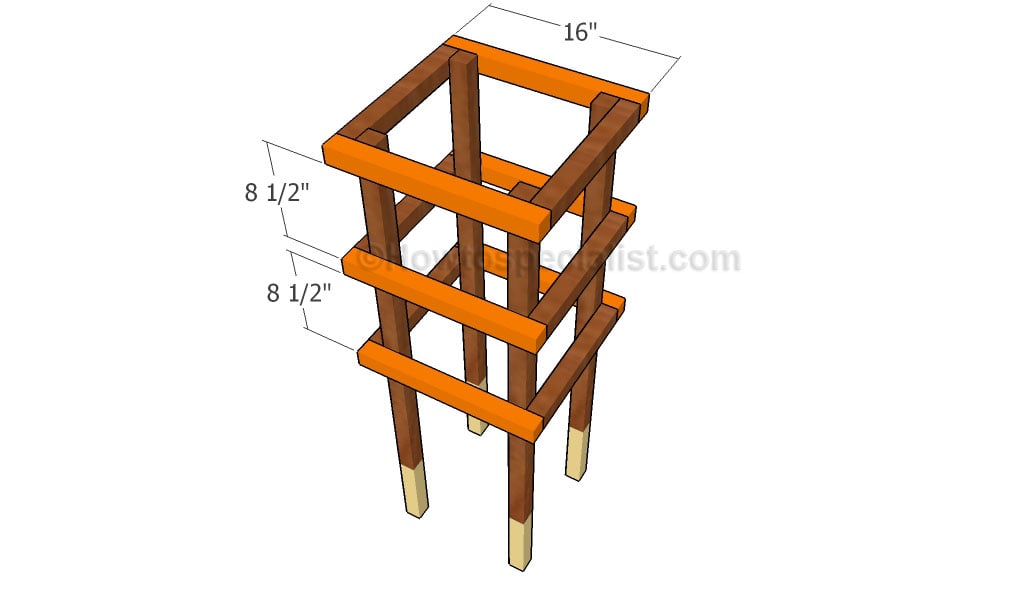
Assembling the tomato cage
Continue the project by fitting the supports to the other sides of the tomato cage. Cut the components at the right size and drill pilot holes at both ends. Align the components with great care and insert 2 1/2″ screws. Make sure there are no gaps between the components.
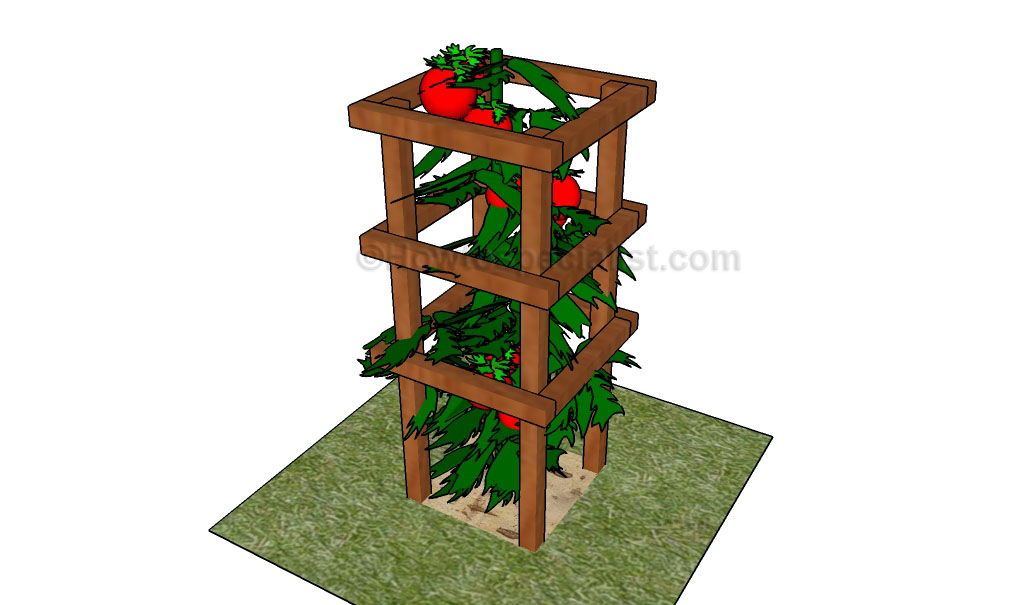
Tomato cage plans
Last but not least, we recommend you to take care of the finishing touches. In order to get a professional result, fill the holes and the gaps with wood filler and let it dry out for a few hours. Check if there are protruding screws and fix this issue, if necessary.
Thank you for reading our project about tomato cage plans and we recommend you to check out the rest of the projects. Don’t forget to SHARE and LIKE our projects with your friends, by using the social media widgets, if you want to help us keep adding free woodworking plans.
