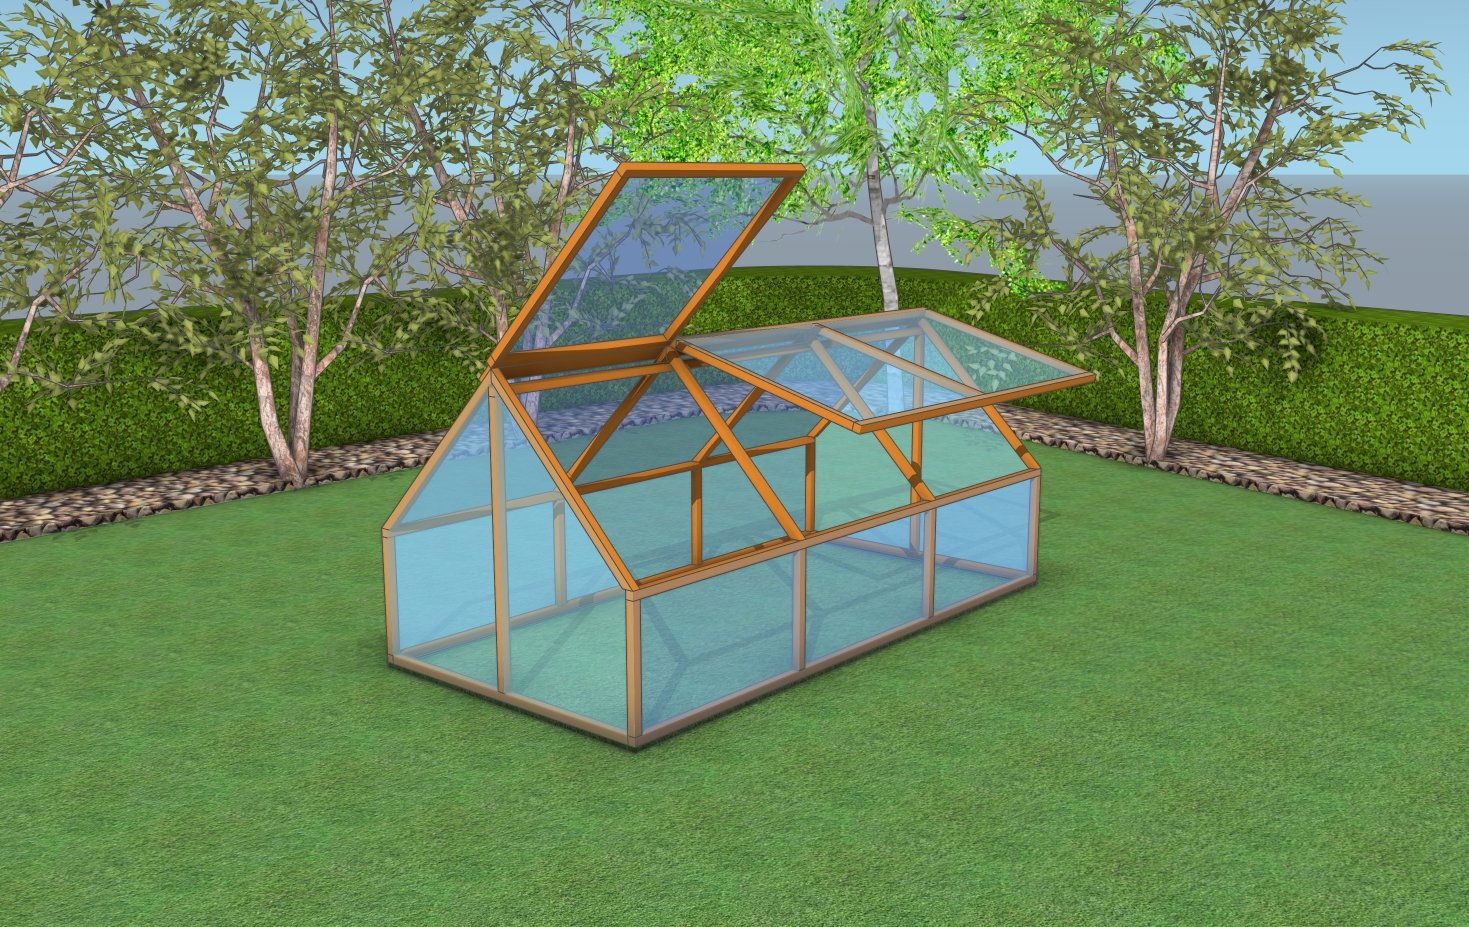
This step by step diy project is about diy greenhouse plans. This article features plans for a small greenhouse with two large vents placed on one side of the structure. Plan everything form the very beginning, including the size and the orientation of the greenhouse. Pay attention to the instructions provided in this article and adjust the size and shape of the greenhouse to your needs.
There are a few things that you should take into account before starting the construction project. Therefore, first of all you need to choose a proper location for the greenhouse. Most of the plans require at least 6 hours of full sunlight each day, so make sure the greenhouse will be southern-oriented. If the soil isn’t good enough for the plans you want to grow, you could build a small raised garden bed.
On the other hand, we recommend you to use quality and weather-resistant lumber, if you want to use the greenhouse for many years in a row. Although using quality lumber will most likely increase the total costs, the investment will pay off on the long run. Always align the components at both ends and drill pilot holes before inserting the galvanized screws, to prevent the woof from splitting. See all my Premium Plans in the Shop.
Made from this plan
Diy greenhouse plans

Building a small greenhouse
Materials
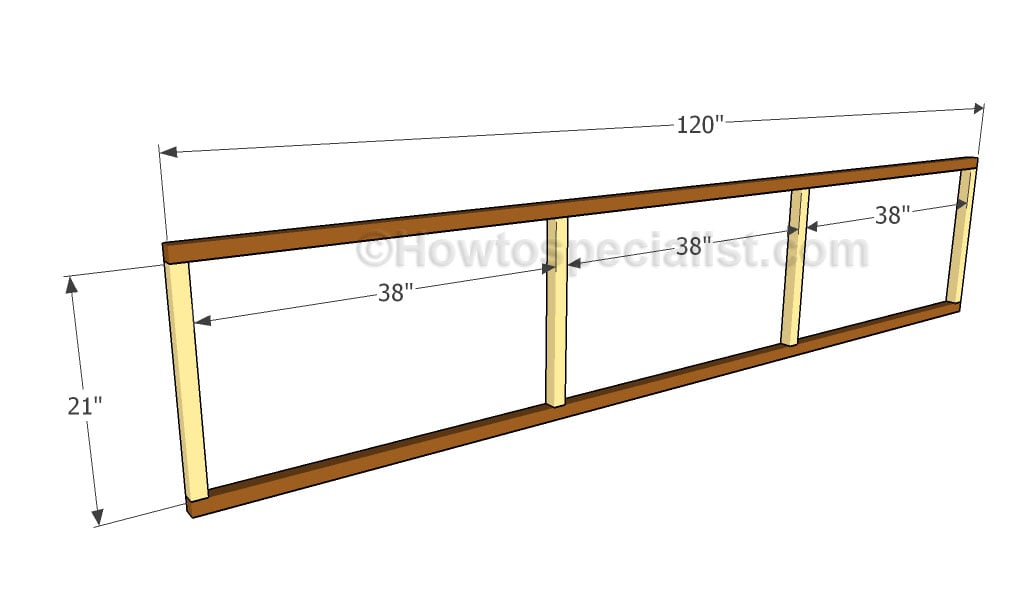
- A – 2 pieces of 2×2 lumber – 120″ long, 4 pieces – 21″ long 2xSIDE WALL
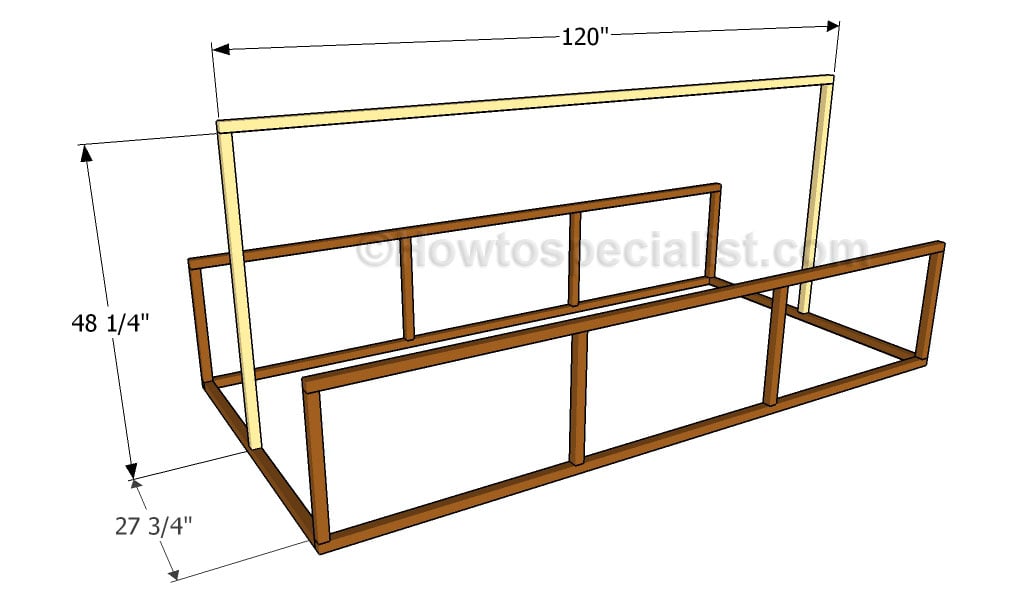
- B – 2 pieces of 2×2 lumber – 57″ long, 2 pieces – 48 1/4″ long, 1 piece – 120″ long TOP RIDGE
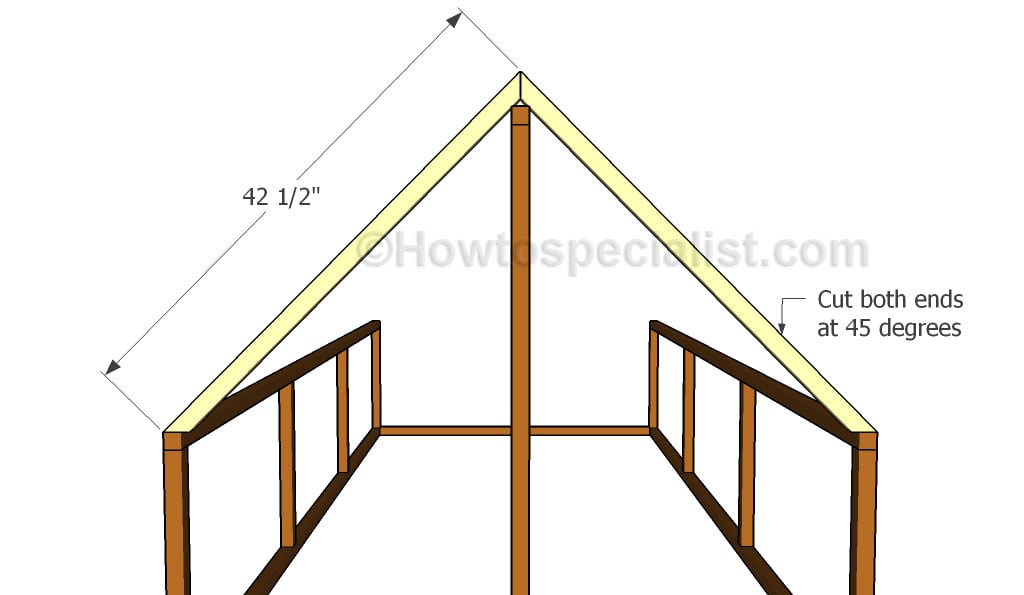
- C – 8 pieces of 2×2 – 42 1/2″ long, 1 piece of 1×3 lumber – 120″ RAFTERS
- D – 5 pieces of 2×2 – 39 1/2″ long, 2 pieces – 40 1/4″ long, 2 pieces – 79 3/4″ long VENTS
- 7 pieces of 2×2 lumber – 10 ft
- 10 pieces of 2×2 lumber – 8 ft
- 1 piece of 1×3 lumber – 10 ft
- greenhouse film
- hinges
- vent opener
- 2 1/2″ screws
- 1 1/4″ screws
- glue, stain
- wood filler
Tools
- Safety gloves, glasses, Miter saw, jigsaw
- Chalk line, tape measure, spirit level, carpentry pencil
- Drill machinery and drill bits
Tips
- Build a loft to increase the storage space
- Secure the walls temporarily with braces
Time
- One Week
Related
Building a small greenhouse
Building the sides
The first step of the garden project is to build the sides of the greenhouse. Build the components out of 2×2 lumber after taking accurate measurements. Drill pilot holes through the plates and insert 3 1/2″ screws into the studs to create a rigid structure. Align the components with great care, as to make sure the edges are flush. Place the studs equally-spaced and check if the corners are right-angled.
Building the frame of the greenhouse
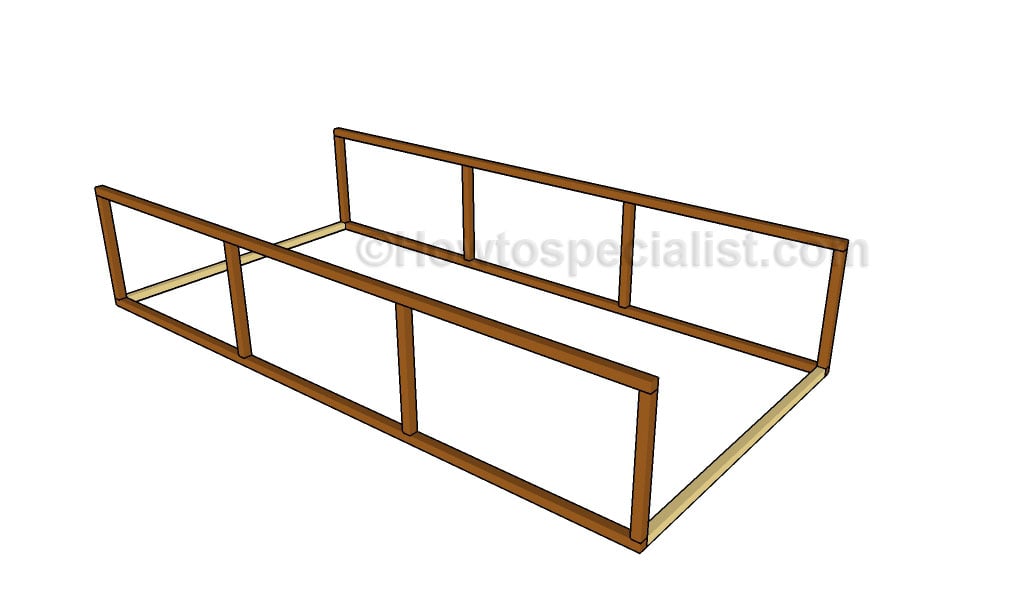
Continue the project by fitting the bottom plates to the front and back of the greenhouse. Drill pilot holes through the sides of the greenhouse and insert 2 1/2″ screws into the plates. Leave no gaps between the components and make sure the corners are right-angled.
Fitting the top ridge
Next, you need to install the top ridge to the backyard greenhouse. Build the supports and the top ridge out of 2×2 lumber. Secure the supports to the middle of the bottom plates. Use a spirit level to make sure the supports are plumb and the top plate is perfectly horizontal.
Building the rafters
Building the rafters is a straight-forward process, but you need to pay attention to a few things, in order to get a professional result. Cut both ends of the rafters at 45 degrees and attach them to the structure of the greenhouse, as described in the diagram. Drill pilot holes through the rafters and secure them into place using 2 1/2″ screws. Leave no gaps between the components.
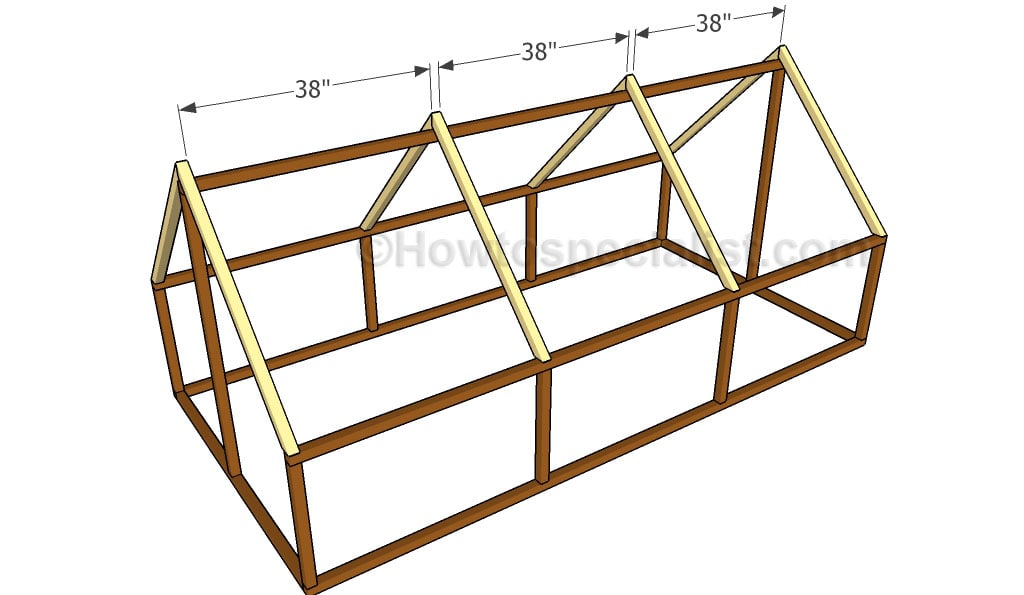
Fitting the rafters
Fit the rafters equally-spaced, if you want to get a professional support. You can also adjust the distance between the rafters to suit your needs.
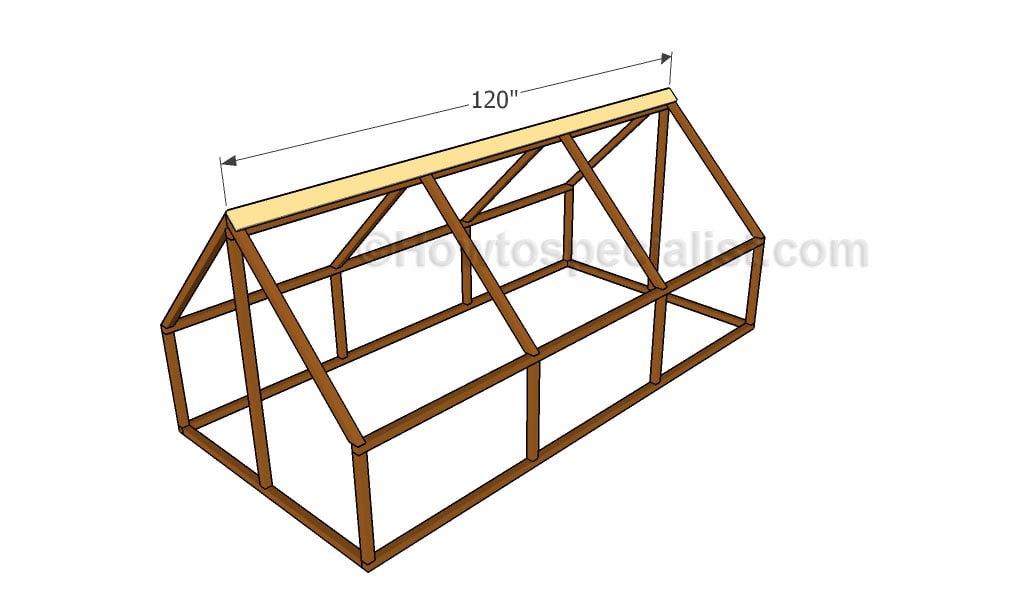
Fitting the roof support
Install a 1×4 slat to the top of the roof, as to support the window vents. Align the slat to the top edges of the rafters and secure them into place using 1 1/4″ screws.
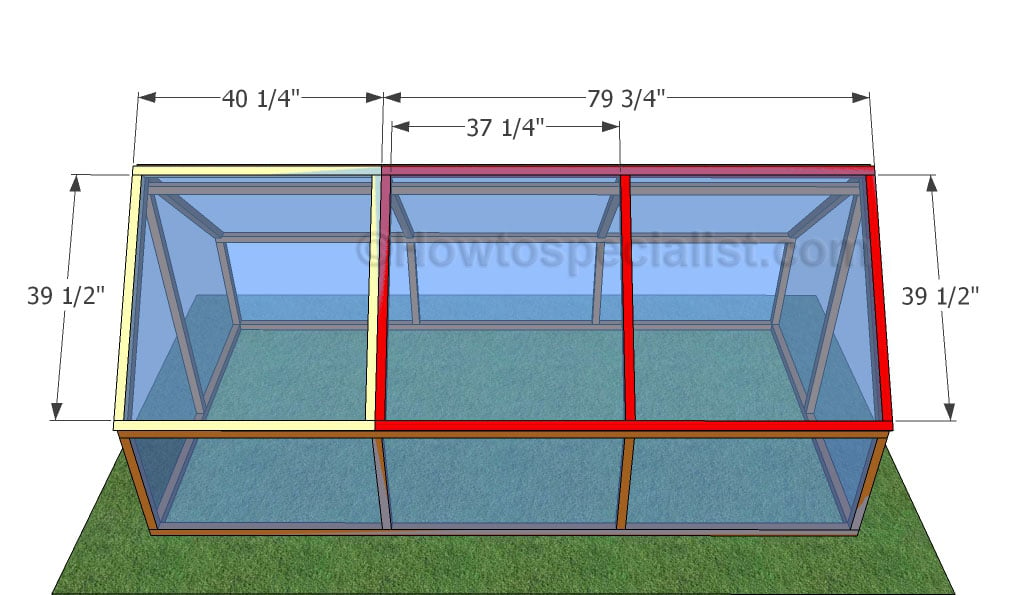
Fitting the greenhouse vents
Build the frame of the vents out of 2×2 lumber, making sure the corners are perfectly square. Leave no gaps between the components and secure the vents to the support slat using metal hinges. You could automatize the vents so they open whenever is necessary.
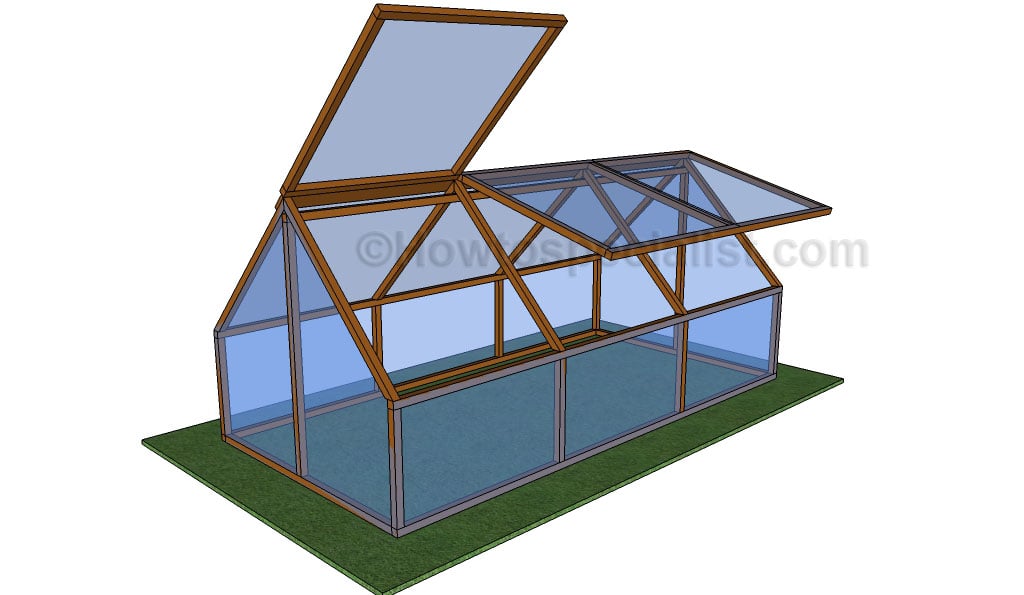
Diy greenhouse plans
Last but not least, we recommend you to take care of the finishing touches. In order to get a professional result, fill the holes and the gaps with wood filler and let it dry out for a few hours. Check if there are protruding screws and fix the issue if necessary. Cover the structure with translucent polyethylene film / polycarbonate sheets and lock it into place with strips of wood, over the greenhouse framing.
How to build a cold frame greenhouse
Thank you for reading our project about diy greenhouse plans and we recommend you to check out the rest of the projects. Don’t forget to share our projects with your friends, by using the social media widgets. LIKE us on Facebook to be the first that gets our latest updates and to help us create more free plans.
