This article is about how to finish polystyrene sheet insulation. After you have installed the polystyrene insulation layer, you have to give it a nice appearance, so we have to prepare putty and finish the surface in a professional manner. In addition, we will use fiberglass reinforcing net to make sure the finish will last for many years. This operation is not as difficult as installing the polystyrene sheets, but it requires a lot more attention to details, in order to make sure you do a proper job.
In addition, in this article we show you how to prepare putty and how to apply it in two coats over the reinforcement net. Moreover, we will install corner beads, as to protect the edges of the insulation sheets. When applying the finishing coat, you must make sure that the outside temperature isn’t greater that 80 ºF/26 ºC, or least the surface doesn’t come in direct contact with the sunlight, otherwise the mud will dry out too quickly.
It is important to spread evenly a nice bed of mud on the polystyrene surface. Make sure the coat of putty is not very thick, as otherwise you won’t be able to level it accurately. Use a good reinforcement net, as to give extra-strength to the finishing coat. Moreover, by using the fiberglass mesh, the finish won’t crack and will protect the wall from minor impacts. Make sure the surface is uniform, before spreading the special putty. See all my Premium Plans in the Shop.
Made from this plan
In order to install polystyrene boards insulation, you need the following:
Materials
- Fiberglass reinforcement net
- Putty mix for polystyrene
- Corner bead
Tools
- Safety gloves, safety glasses
- Float, trowel, large brush, bucket
- Utility knife, drill mixer
- Measuring tape, pencil, T-square
- Ladder
Tips
- Apply at leasr two coats of putty to get a nice finish
- Make sure the first layer of putty dries, before you apply the final coat
Time
- You can apply the first coat of putty, on a surface of 500 sq ft /100 sq m in under 6 hours of work
- It will take under 3 hours of work, to apply the second coat of polystyrene mud on 500 sq ft /100 sq m
Preparing finishing putty for polystyrene
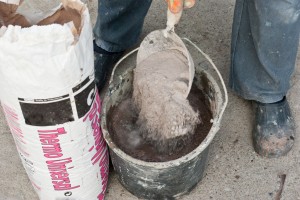
In order to finish the polystyrene sheets properly, you have to prepare the special mud. Consequently, we suggest you to use a bucket and to fill one third of it with water. Next pour the mix over the water, and leave it for 10 minutes to soak water. You can mix the compounds manually, by using a trowel, or you can get the job done much quicker, by using a drill mixer.
Smart tip: The water will activate the additives in the mix. Read the instructions labeled on the product, before preparing the compound.
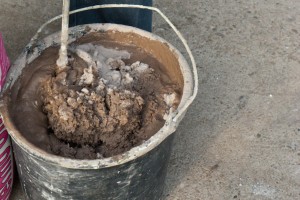
Use a drill mixer to ease the job of blending the compounds. You should mix them until you obtain material with the consistency of cream.
Smart tip: Mix the compounds thoroughly, as to avoid forming lumps. In order to get a proper mud, you should mix it for several minutes.
Applying the first coat of putty over the fiberglass net
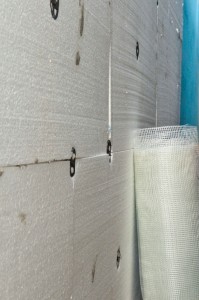
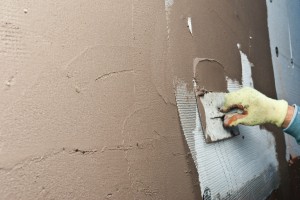
Next, we have to install the fiberglass reinforcement net over the polystyrene insulation. We should start from the bottom of the wall, and have to unfold the roll horizontally until we meet the edge. Next, we have to cut the fiberglass net using a cutter/utility knife, paying attention to make a straight cut.
Next, we have to lock it into position using several nails, making sure the fiberglass net is level. This aspect is essential, otherwise the reinforcement net will make bad-looking folds.
Smart tip: Before applying the mud over the polystyrene, you must check again if the polystyrene boards are fixed properly and if the dowel heads are aligned with the surface.
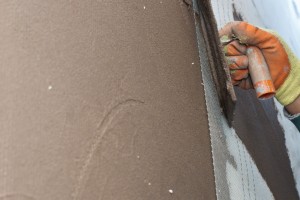
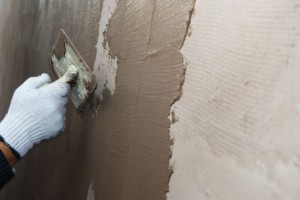
Use a large trowel to apply the mud over the polystyrene insulation. Make sure you spread the mud evenly on the reinforcement net, in a thin coat. In addition, when applying the putty, you have to verify attentively the surface, as to prevent the fiberglass mash from making folds. Use semi-circular moves to spread the compound to the wall.
Smart tip: Apply a small volume of putt, and spread it as much as you can, as to give it a nice appearance.
After you finish applying the mud over the reinforcement net placed at the bottom of the wall, we have to install fiberglass mash over the rest of the surface. Consequently, start from the left side of the wall, and unfold the roll of fiberglass net, this time vertically.
Smart tip: The fiberglass strips should overlap at least 2-3”/5-8 cm, as to give strength to the finish coat. Pay attention to this aspect, as it is essential for a quality work.
Continue finishing the polystyrene insulation, using the same techniques discussed above. Moreover, make sure you spread the putty over the wall in a thin layer.
You should apply putty on the polystyrene sheets, by moving the large trowel in all directions, as to spread the coat as evenly as possible. Before unfolding another piece of reinforcement fiberglass net, you should make sure you have applied the coat properly on the current area.
If the surface you have to finish is quite large, you have to use a folding ladder, as to be able to apply putty over inaccessible areas.
Consequently, when using the ladder, you must make sure the base surface is plane and the ladder is in good condition. In addition, you have to understand the way you have to use the combination ladder, in safety conditions.
Smart tip: We suggest you to ask a friend to assist you, as it is hard to apply the putty and to lift the heavy bucket in the same time. However, if you suffer from acrophobia (fear of height), you should hire a qualified professional, as they have experience in working in all sorts of conditions.
Installing the fiberglass corner bead
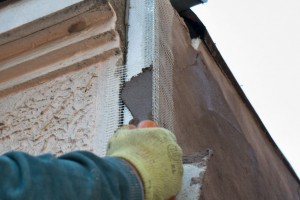
Another aspect regarding finishing the polystyrene sheets, regards the installation of corner beads. As you can probably imagine, the polystyrene corners are very vulnerable to impacts, without the corner bead. That is why, you have to measure the length of the corners, and then purchase the corner beads.
Smart tip: If the edge length is greater than the corner bead, you have to cut a piece to the needed dimension, using a sharp utility knife.
The installation technique is straight forward: position them over the edge of the polystyrene insulation and apply putty on the side mashes, by using a trowel.
Make sure the corner edge is perfectly straight and perfectly aligned, as to give a neat look to your home. The coat covering the corner bead should be as thin as the other layer you have applied. In addition, make sure the surface is evenly finished as to give it a professional look.
Applying the second coat of putty over the polystyrene insulation
After you have covered the whole surface with putty, you have to wait a couple of days (according to the outside temperature), until the coat has dried out. Do not apply the second coat of mud while the surface is drying, as you will damage the finish for good.
Smart tip: The second coat of putty has to be applied in the same manner as the first one: the mud should be spread evenly as much as possible and cover all the irregularities.
How to finish polystyrene insulation
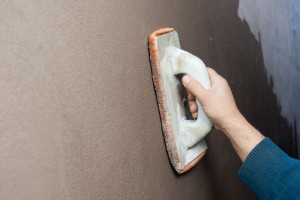
After you have covered around 50 ft2/5 m2 with the second coat, it is time to give it the final finish, by using a float, but first we have to make sure the coat is still moist.
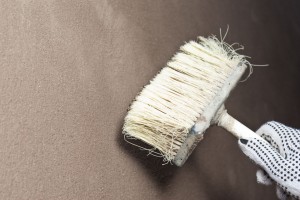
If the outside temperature is very high (more than 80 ºF/ 26 ºC) you have to sprinkle water over the second coat of putty, by using a large clean brush. That is why you have to apply the second coat of putty only over small areas, to have time to finish it with the float.
After you have made sure the putty coat is moist, you can begin the final operation: finishing the surface using a float. Consequently, hold firmly the handle and finish the second coat with circular movements.
If you have applied the two layers of putty in a proper manner, this job should be a piece of cake for any diy-er. As a personal observation, the thicker the coat of mud, the harder the finishing operation, so pay attention to all steps, as to get the job done appropriately.
Work with patience, and in safe conditions, as you can easily hurt yourself, if you do not pay attention to safety regulations. In addition study the local codes, before beginning the project. After you have passed these preliminary stages, you have to make a detailed plan of the needed materials.
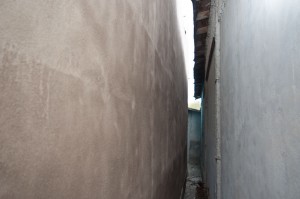
Smart tip: In the image, you can see the finish of the space board insulation, starting to dry out. Nevertheless, the polystyrene sheet insulation will be protected from rain or snow, and will last for many years to come.
Nevertheless, after the whole surface has dried out, our job isn’t finished yet. In order to give it a nice appearance and to protect it better, we have to apply paint: either exterior paint or decorative paint.
We will talk more about painting the finish polystyrene insulation in a future article. In that project, we will also show you how to choose the right materials and tools needed for that operations, and how to get the job done properly.
Smart tip: Installing and finishing polystyrene sheet insulation is not a spectacular project, but we can assure you can feel the difference both during cold winter night and in you pocket, when you will pay reduced energy bills.
Thank you for reading our article on how to finish polystyrene sheet insulation and we recommend you to check the rest of our insulation projects. Please share our projects with your friends, by using the social media widgets.
EXPLORE MORE IDEAS:

