This article is about how to build a formwork for the foundation of a house, a garage or other constructions, but you can also use these techniques to pour large spans of concrete, such as patios or decks. Building a formwork for concrete is not a complex job, but you have to work patiently and with great care, otherwise you won’t be able to pour concrete in a professional manner. There is a strong misconception, that anything that cannot be seen is unimportant. Nothing can be more false and we will show you in this step by step diy guide, how important is to build a proper formwork for a concrete foundation. Consequently, you have to follow our guidelines and to use only the best materials and tools, especially if you are unexperienced. In addition we recommend you to hire a qualified professional, because this is one of the things we cannot play with.
Building the foundation of your house is essential for its durability so make sure you hire a qualified engineer to determine the amount of the rebars you have to use, and the depth of your foundation. You have to find these details in the foundation plans, so make sure you observe them, otherwise you risk getting a serious fine or building an unsafe house. Nevertheless, the first stage of building a concrete foundation, is to learn how to dig a foundation.
In order to build a rigid form, you have to use 2×10 wooden boards and to secure them with 2×4 braces. We can assure you from our experience, that doing a poor job will influence directly the quality and durability of your foundation, therefore follow our tips to get the job done in a professional manner. The concrete will exert a great force towards the wooden form, therefore you have to secure it with strong braces. In addition, make sure there are no visible gaps between the wooden boards, as the concrete juice might leak through them.
Building the form for your house foundation is an ideal opportunity to install the polystyrene sheet insulation. Therefore, study the local codes and choose the sheets which satisfy both your needs and comply with the local code. Use a handsaw to cut the sheets, whenever you need to adjust their dimensions. Work with great care and follow the house plans, if you want to obtain a professional result.
Made from this plan
In order to build formwork for foundation, you need the following:
Materials
- 1×4 wood boards for building the formworks
- 2×4 wood stakes to lock into position the formwork for concrete
- 2×4 lumber for securing the forms
- nails/wood screws to fasten the formwork
- polystyrene sheets to insulate the foundation (optional)
Tools
- safety gloves, glasses
- measuring tape, carpentry pencil, l-square
- circular saw/jigsaw to build the formwork
- hammer
Tips
- use boots, as not to get your cloths and skin dirty with concrete
- clean thoroughly your tools after you have finished the project
- wear protective glasses and gloves, to avoid possible injuries
Time
- few hours up to a day, according to the surface of your foundation and the number of workers
My best tips for building a foundation formwork:
Formwork is essential for shaping and supporting a concrete foundation while it sets. A well-built form ensures that the concrete takes the right shape and stays structurally sound during the curing process. Here are my best tips for building foundation formwork that will make your project a success.
1. Choose the Right Materials
Formwork can be built from several types of materials, but wood and plywood are the most common for DIY projects. Here’s what you’ll need:
- 2×4 or 2×6 boards for the main framework.
- Plywood (typically 3/4 inch thick) for the panels.
- Nails or screws to fasten the boards together.
- Steel stakes or wooden stakes to support the formwork.
- Bracing material to reinforce the formwork and keep it from bowing under the weight of the concrete.
For larger, more professional jobs, you may use steel forms or prefabricated panels, but wood is usually easier to work with for smaller DIY projects.
2. Plan the Layout and Dimensions
Before you start building, measure and mark out the dimensions of your foundation. Use stakes and string to outline the perimeter. Double-check your measurements, as mistakes here can lead to uneven or misaligned foundations.
Make sure the foundation is square and level by measuring diagonally from corner to corner (the distances should be equal). This helps ensure your formwork is properly aligned and will hold the shape of your foundation correctly.
3. Build the Formwork in Sections
It’s easier to build formwork in manageable sections rather than trying to construct it all in one go. Here’s how to approach it:
- Assemble 2×4 or 2×6 boards into frames for each side of the foundation.
- Attach plywood panels to these frames to form the walls of the formwork.
- Make sure the height of the form matches the desired depth of the foundation.
If your foundation is particularly large, build bracing structures to add stability and ensure the form holds its shape.
4. Use Stakes for Support
To keep the formwork in place during the concrete pour, you’ll need to drive stakes into the ground at regular intervals around the perimeter:
- Place the stakes every 3-4 feet along the outside of the form.
- For deeper foundations, add more stakes to prevent the form from bowing out under the pressure of the concrete.
After the stakes are in place, use nails or screws to fasten the formwork securely to the stakes. Make sure the form is tight and doesn’t shift when pressure is applied.
5. Reinforce the Formwork
The weight of wet concrete can cause the formwork to bulge, so reinforcing it is crucial:
- Add cross bracing or diagonal braces along the outside of the formwork to keep the walls stable.
- If you’re pouring a deep foundation, use internal supports to prevent the form from flexing inward.
- Place extra reinforcement at the corners of the formwork, as these areas are more prone to stress.
6. Check for Level and Alignment
Before pouring concrete, make sure your formwork is level and properly aligned:
- Use a spirit level to check the top edges of the form for levelness.
- Double-check the dimensions to ensure the form is square and true to your original measurements.
Any misalignment here will result in a crooked or uneven foundation, so it’s worth taking the time to get it right.
7. Apply a Release Agent
To make it easier to remove the formwork after the concrete sets, apply a form release agent (or vegetable oil as a DIY option) to the inside surfaces of the form. This will help prevent the concrete from sticking to the wood and ensure a cleaner finish once the form is removed.
8. Leave Openings for Utilities
If your foundation will need access points for plumbing, electrical conduits, or drainage, make sure to leave openings in the formwork. You can do this by placing pieces of PVC pipe or sleeves through the form at the designated spots. These will prevent the concrete from sealing off access points for utilities.
9. Secure the Formwork Before Pouring
Once the formwork is built and aligned, do a final check to ensure everything is secure. Tighten any loose nails or screws and make sure the bracing and stakes are firmly in place:
- It’s a good idea to walk around the perimeter and give the form a gentle push to check for stability.
- Ensure all corners and joints are well-reinforced, as these are common weak points.
10. Remove the Formwork Carefully
After the concrete has been poured and allowed to cure (usually 24-48 hours for initial curing), it’s time to remove the formwork:
- Start by removing the stakes and bracing, then gently pull away the plywood panels.
- Use caution during this step to avoid damaging the edges of the concrete foundation.
- If any concrete has seeped through gaps in the formwork, chip it off with a chisel for a clean finish.
Bonus Tip: Reuse Your Formwork If you plan to reuse the formwork for other projects, take care when removing it and store the panels and boards in a dry area. This can save you time and money on future jobs.
Installing the rebar structure in foundation
The first step of this project is to install the rebar structure in the foundation trenches. Nevertheless, there are cases in which you might not install such a complex rebar structure (in the case of light constructions, large spans of concrete).
Smart tip: first you have to connect all rebar beams together above the foundation trenches. Consequently, use 2×4 lumber every 2′ over the trenches, to make sure they will support the weight of the rebar structure.
After you have connected properly the rebar beams, you have to set the whole structure on the bottom of the foundation. Consequently, you have to pull out all the 2×4 boards (on which sits the rebar structure), one by one, until the reinforcing structure falls in the foundation.
Smart tip: check one more time if the connections between the rebar structure are made properly, otherwise the foundation won’t support the weight of the house.
In this image, you can see a close-up with a rebar structure joint. You should notice that the joint is rigid and secured properly with wire. Make sure the reinforcing beams are aligned properly, as the walls will be build exactly over them. If the reinforcing beams aren’t done properly, the walls of your house won’t be supported properly.
Smart tip: during the construction of your foundation, the process must be supervised by a qualified professional in this field.
After you made sure the reinforcing structure is made properly and aligned according to foundation plans, you have to build the formwork as to be able to pour in concrete.
Smart tip: the formwork must be built in a professional manner, as it will have to support huge forces while you pour in concrete.
Building the formwork for a concrete foundation
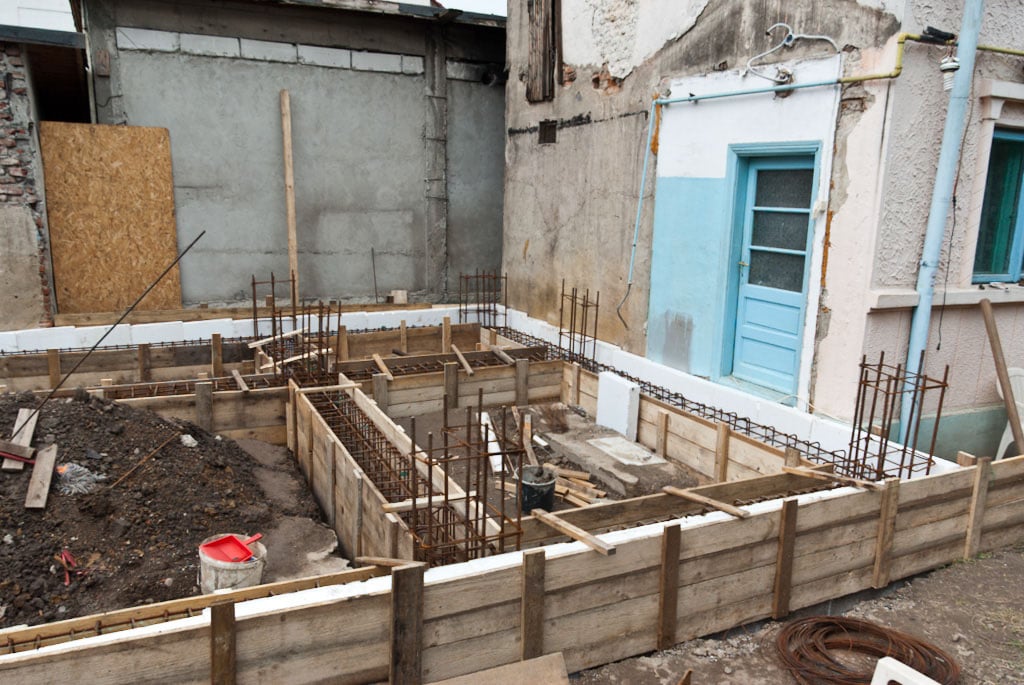
In order to build the formwork for the foundation, you have to use qualitative 2×10 wooden boards and 2×4 posts. Consequently, you have to read the foundation plans, to see the height of the foundation elevation from the ground. Next you have to build the formwork panels, as you can see in the image.
Smart tip: when fastening the 2×4 pegs, you should use a l-square to make sure they plumb. The plugs must be fastened every 2′, by using nails.
In order to secure the formwork, you have to install braces over the pegs. Consequently, at one end you should fasten the braces to the pegs, with screws/nails, while at the other end you have to fit it into ground for at least 1’/30 cm.
Smart tip: when installing the formwork, you have to use a spirit level, as to make sure its is plumb. In addition, if you have to connect more formwork panels together, you have to use string lines, to make sure they are aligned.
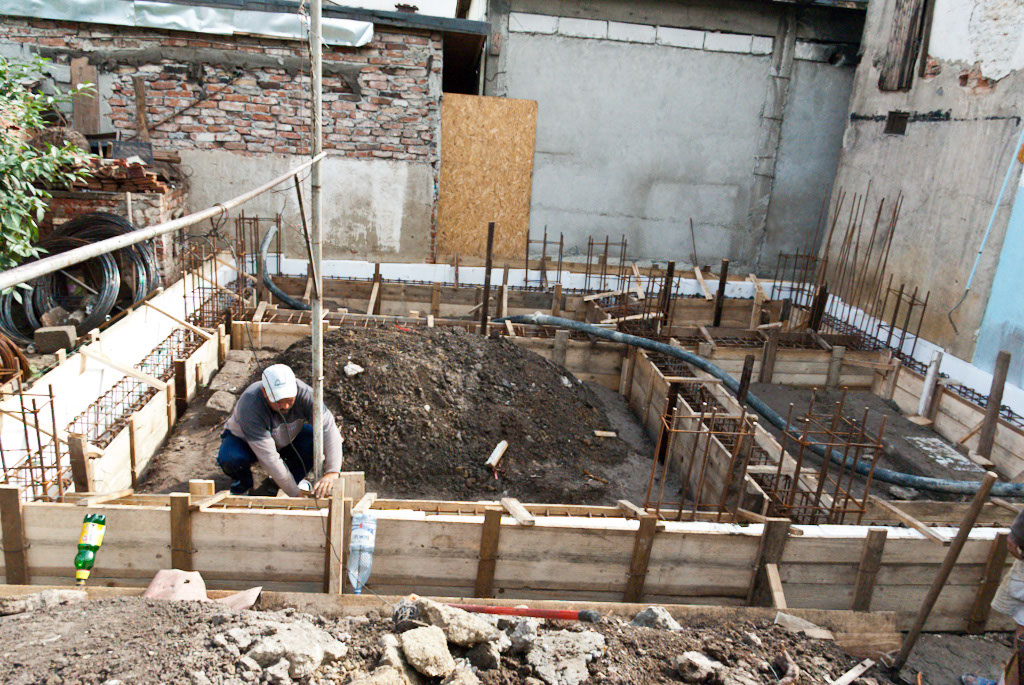
Next, after you have installed the formwork, you should verify if it is rigid and secured properly with braces. In addition, you could fasten the interior formwork to the exterior formwork, by installing 2×4 lumber every 2′, as you can see in the image.
Smart tip: for a proper isolation of the foundation, you could install polystyrene sheets (4”/10 cm thick) along the exterior perimeter of the trenches. In this way, during winters, the inside temperature wont drop due to a cold flooring.
In this image you can see a close-up with the formwork, as well with the reinforcing bars. You should be able to notice that the rebar beams are aligned properly, and that the formork is plumb and rigid, due to the braces and pegs we have previously installed.
Building a form for a foundation is a very serious project, so you have to be supervised by a qualified professional. In addition, remember that you have to comply with the local codes and construction regulation, otherwise you expose yourself to a great danger.
Remember that our article has only an informative purpose, to make you familiarized with the process of building formwork for a concrete foundation. We don’t assume any responsibility for your actions nor we claim that this is the way things should be done. On the contrary, we only show you the way we work in some cases.
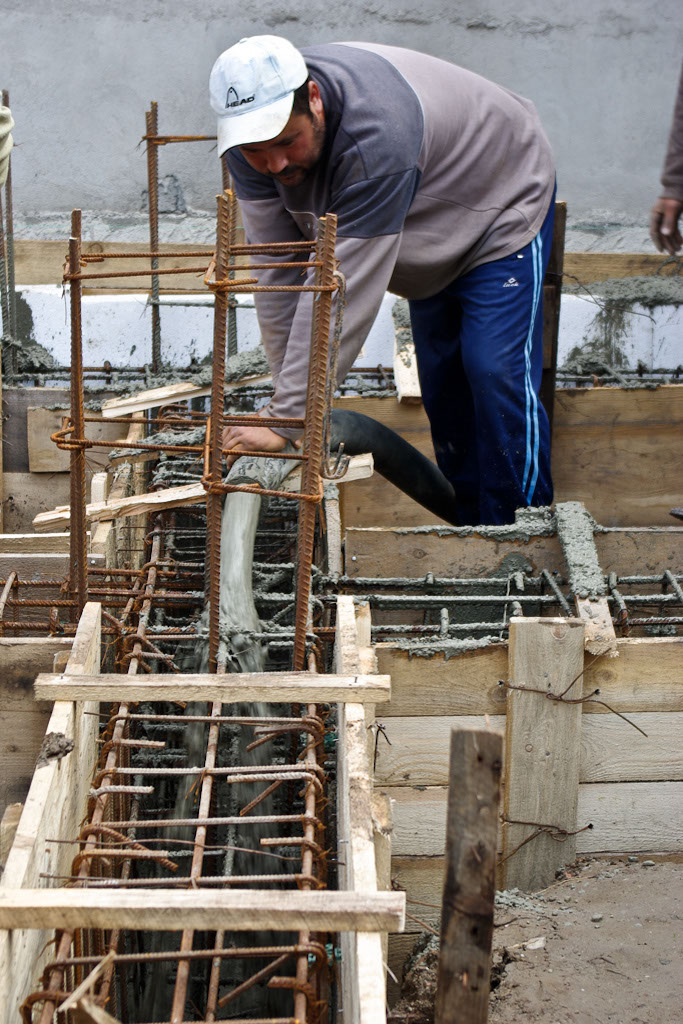
After you have checked the rigidity of the foundation formwork and made sure it is aligned and plumb, you have to pour in concrete . You could pour in concrete in many ways: you can prepare it by using a power mixer and transport it with a wheelbarrow, you could pour it in directly from the concrete truck or you can use a pomp and 4” hoses.
If the location is inaccessible for the concrete truck, as to pour the concrete directly, you also have to rent a pomp for concrete. Afterwards, you should several hoses to the pomp, to have access to the formwork. After you have poured concrete in the foundation, you have to use a concrete vibrator, to make sure there are no air pockets left. In most of the cases, the company which delivers the concrete will also give you a concrete vibrator, but there are situations when you have to rent the tool.
Learn more about how to pour a concrete foundation.
By following these tips, you’ll be able to build sturdy and accurate foundation formwork that ensures a strong, stable foundation for your project. Whether you’re working on a small shed or a larger building, properly built formwork is key to a successful concrete pour.
Thank you for reading our article on how to build a formwork for a concrete foundation, and we recommend you to share our project with your friends using the social media widgets.
Related projects:


