[dropcap]1.[/dropcap] Firstly, you have to decide where you are going to build the drywall ceiling arch. According to the location, you should buy the needed materials: if you are going to build it in an area with vapor and moisture, the best choice is anti-moisture drywall boards. On the other hand, if the conditions in the chosen room are normal, you can go for regular drywall boards.
[dropcap]2.[/dropcap] Secondly, you have to draw an ellipse, as to guide you when you are building the ceiling arch. Although at first glance, it might look like a minor and easy task, the reality will make you change your mind. Consequently, you have to study attentively this aspect, as to decide the exact shape you are going for, and then to mark its projection on the ceiling.
[dropcap]3.[/dropcap] Thirdly, you have to decide on what type of frame you want to build. On one hand, you can go for wood studs: they are cheap, come in a large variety of dimensions and are very resistant over time. On the other hand, there is the alternative of using metal studs: they are very light, can be cut and used in any shape, are resistant and easy to install.
Materials
- Drywall
- Drywall screws
- Metal tracks and studs
Tools
- Safety gloves, safety glasses
- Electric screwdriver
- Utility knife, measuring tape
- Framing square, pencil, T-square
- Ladder
Tips
- Be careful when manipulating the drywall panels, as they are heavy
- If you can afford, buy or rent a drywall jack
- When installing the screws you should make sure you do not insert them to deep in the drywall, as thy might damage the panels
Framing metal studs
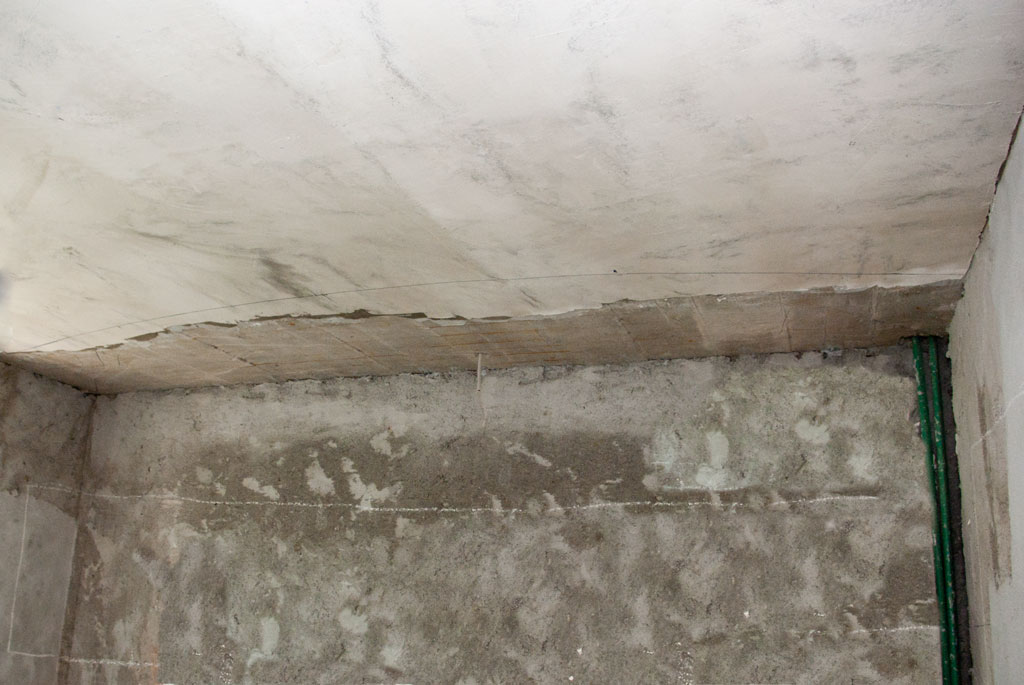
Contour of the drywall ceiling arch
This is the room in which we will be building the drywall ceiling arch. It might look a little rusty to you, but this is because we have decide to install the ceiling arch before we finish the future kitchen.
As we have already said, the first step is to define a contour of the drywall ceiling arch. Make sure you make the mark visible, as it will guide you when you install the metal stud frame. If you aren’t able to draw a perfect ellipse from the very first attempt, you have to try again until you are satisfied by the result.
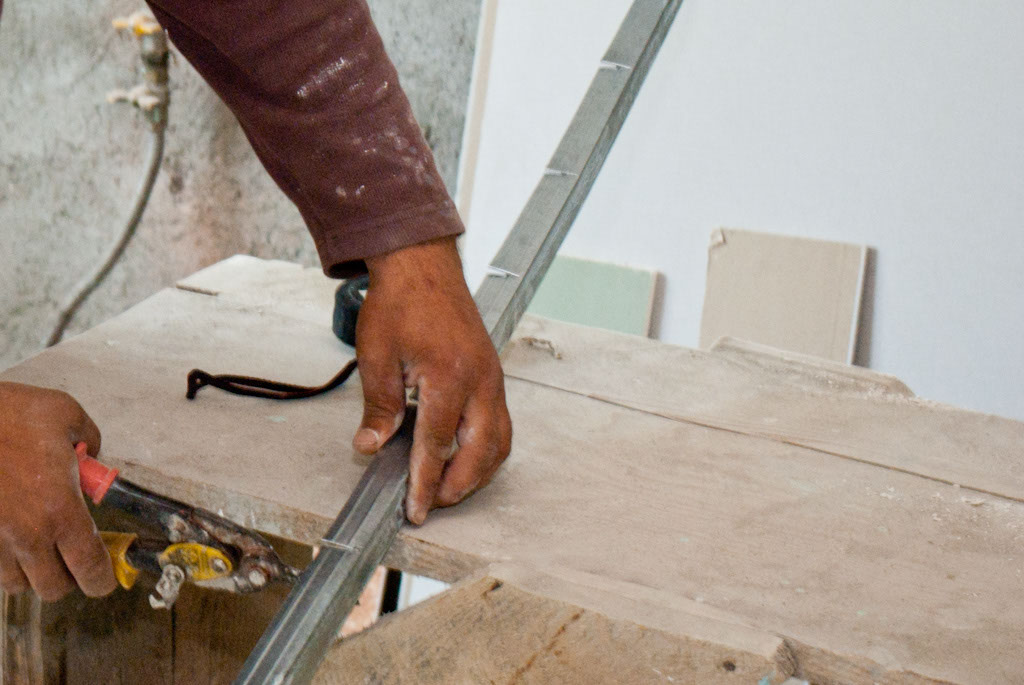
Cutting the metal studs to curve it
Cut the metal track every 7”/15 cm as shown in the image, using aviation snips. This cuts will make possible to curve the metal track and to make it take the shape you want. Remember that the shape of the contour will pay a decisive role on the success of this project.
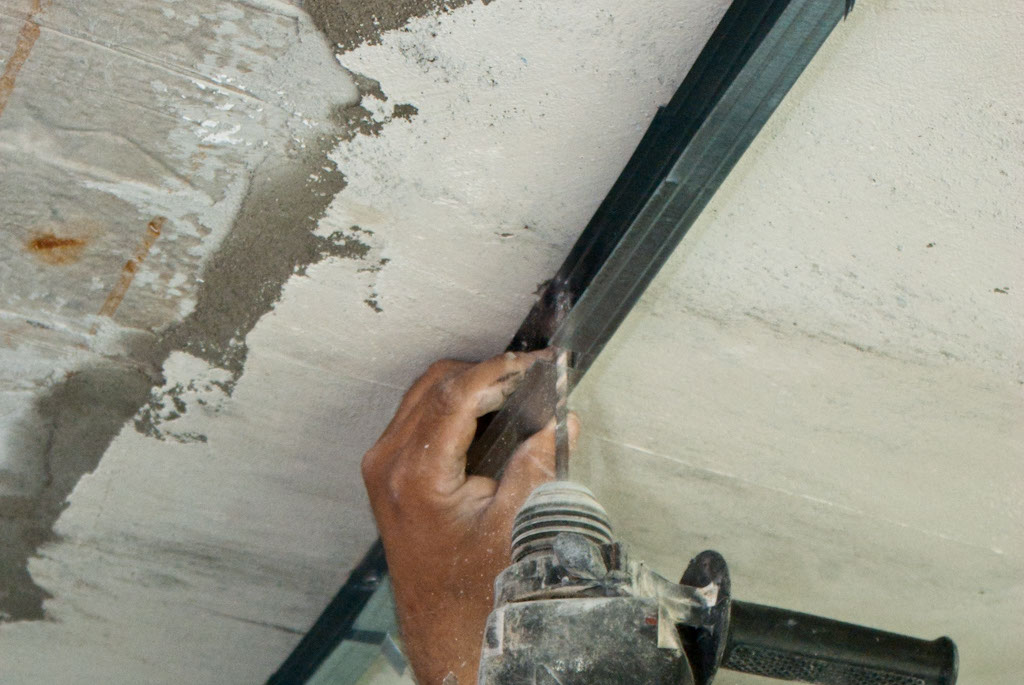
Fixing the metal studs with screws
We fixed the metal track in to position by using screws. In our case the ceiling was made of concrete, so we had to pre-drill several holes, insert dowels and afterwards to screw the metal track using screws.
Nevertheless, if you want to build a drywall arch on a wood studs ceiling, you have to identify first the location of the studs, and then to fasten with screws the metal track to them.
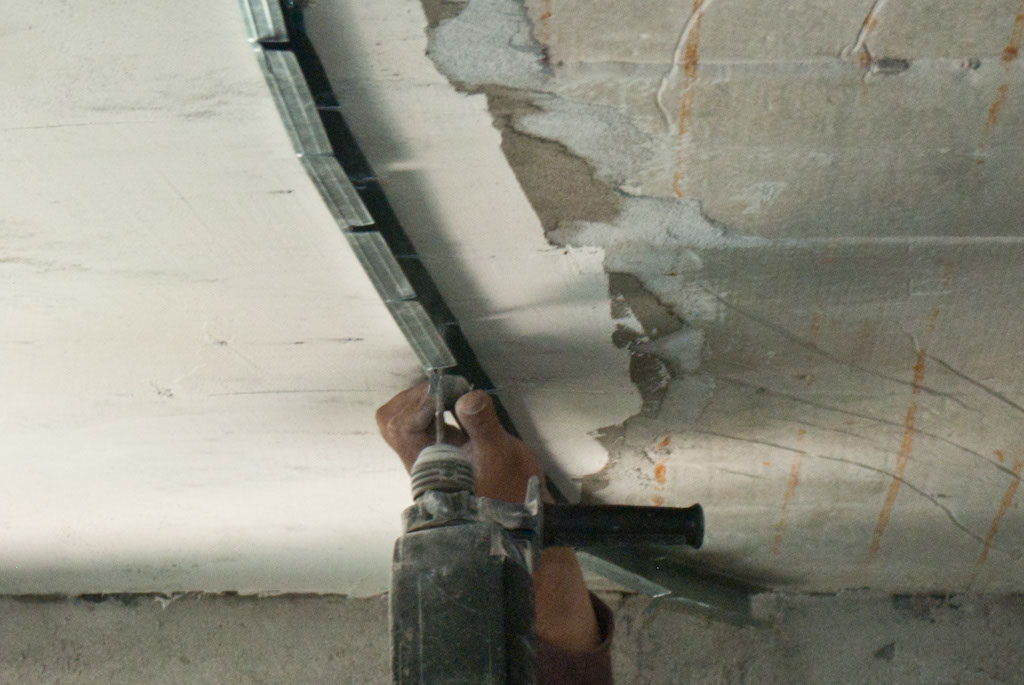
Fixing the metal studs to the ceiling with screws
In oder to be able to drill, or to drive in the screws through the side skirt of the metal track, you have to cut a 1”/2.5 cm wide rectangular every 7”/15 cm. Remember that it is best to perform this operation from the very beginning, before installing the metal track to the ceiling.
Continue the process, until you have finished installing the metal track along the marked ellipse.
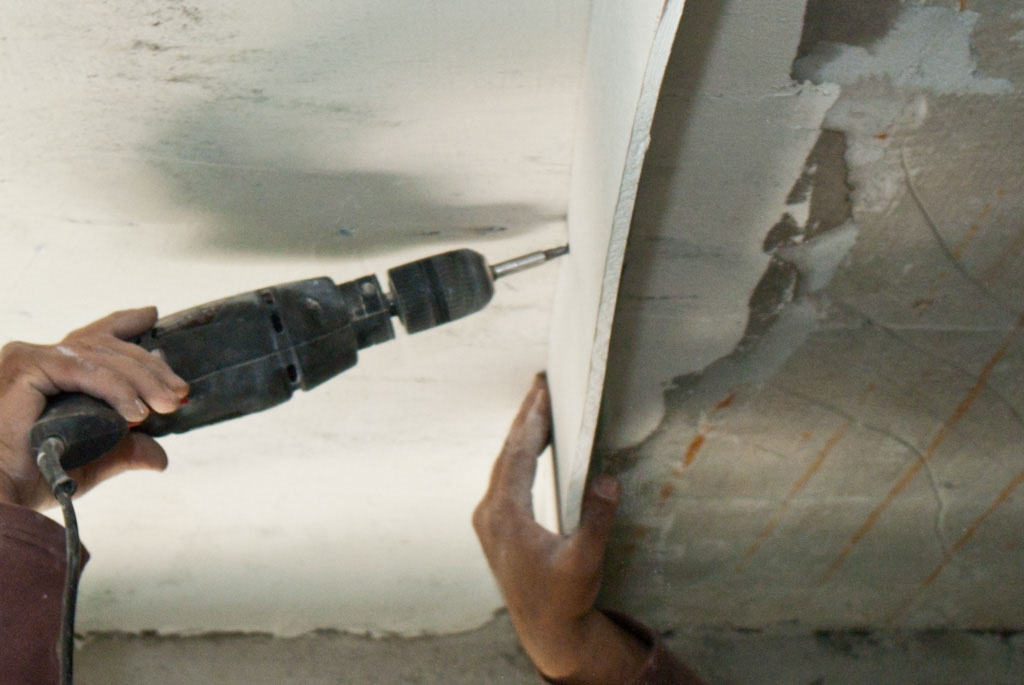
Fixing the drywall arch to the frame
Next, you have to cut a drywall boards to the dimension you want and fix it to the metal track. In or case we wanted to build a simple and clean ceiling arch, so we cut a 7”/15 cm wide drywall board.
Nevertheless, you can bring the drywall ceiling arch even lower, if you have enough space in the room, as to still feel comfortable.
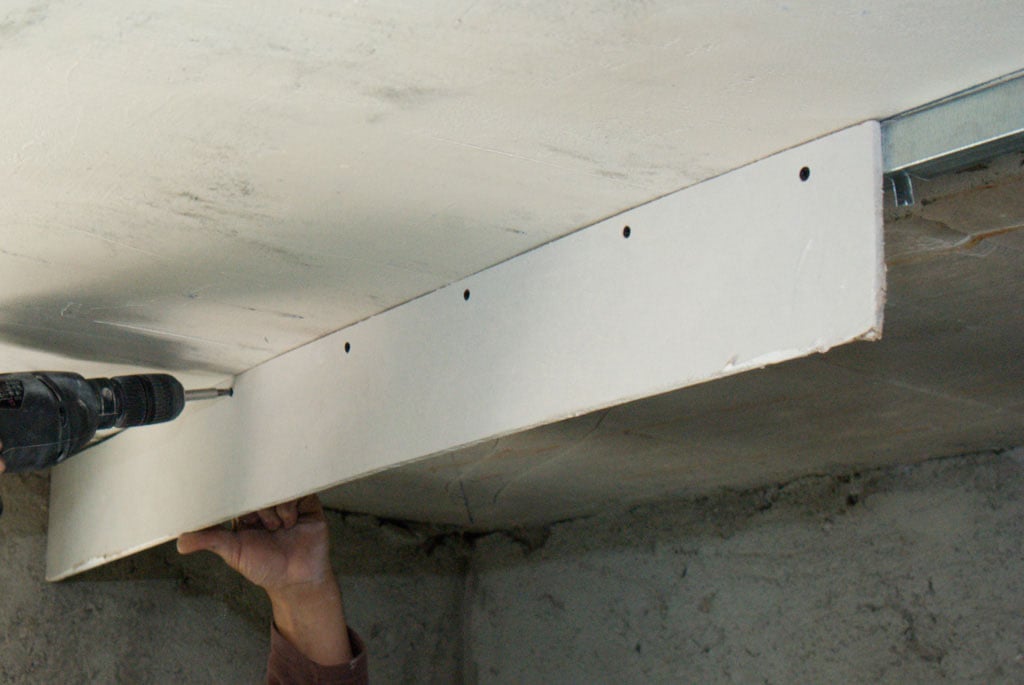
Fastening the drywall arch to the metal stud frame
Afterwards, continue fixing the drywall with screws, using an electric screwdriver. If you install 1/2” drywall, then you should use 1-1/4″ drywall screws, as if you are installing 5/8” drywall, then a better option would be 6 x 1-5/8″ screws.
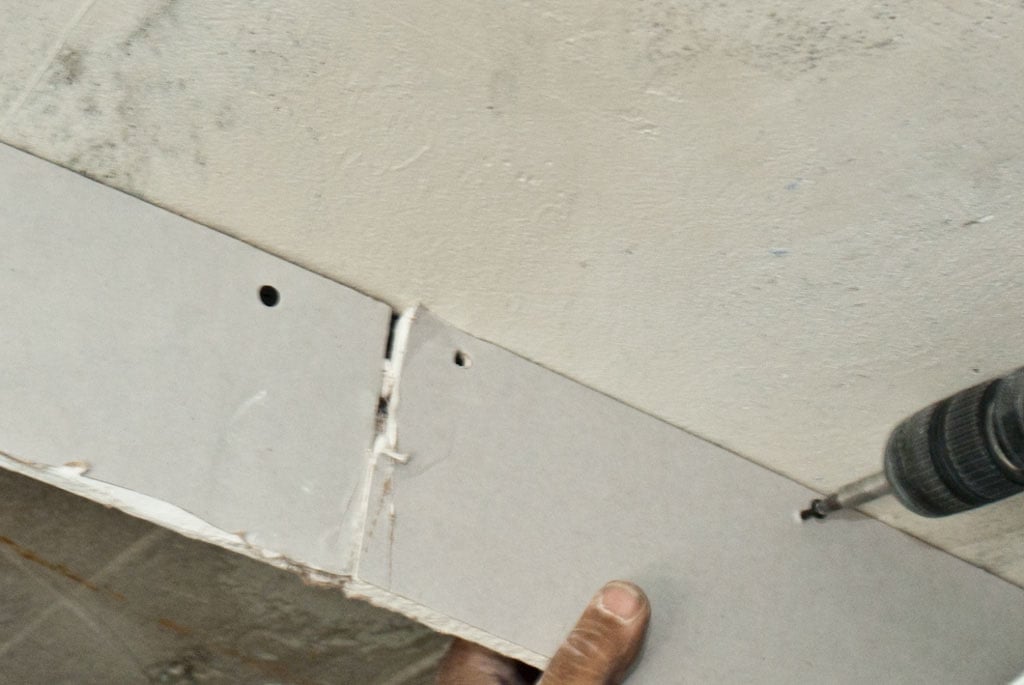
Drywall ceiling arch joint
When fixing the next board, make sure they are aligned and more importantly do not leave any space between them. The screws must be well inserted in the drywall, as their heads must be exactly level on the drywall surface. Otherwise, you will have to work more when finishing the drywall ceiling arch.

Building the drywall ceiling arch
Continue installing the drywall boards until you finish the front of the drywall ceiling arch. Make sure the drywall is well fixed on the metal tracks, otherwise in time the drywall ceiling arch will get an unpleasant shape.
In addition, the drywall boards edges must be cut in a professional manner, otherwise you will have to work hard when finishing the arch. Consequently, if you paying attention to details will pay off in the following steps.
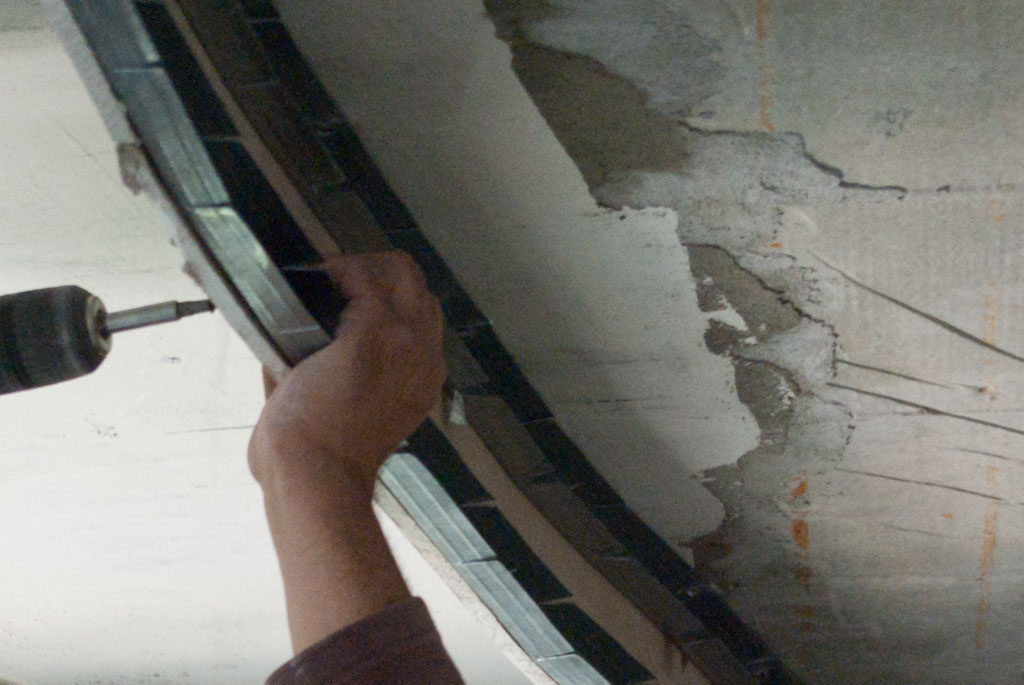
Building the metal stud frame
The metal stud frame is much more complex than you can imagine at first glance, so we have to install a second metal track on the lower edge of the ceiling arch. In order to bend the metal track you have to cut it using aviation snips.
Fix the metal track as you did in the previous steps. Use special screws and an electric screwdriver, to save time and to perform a quality operation.
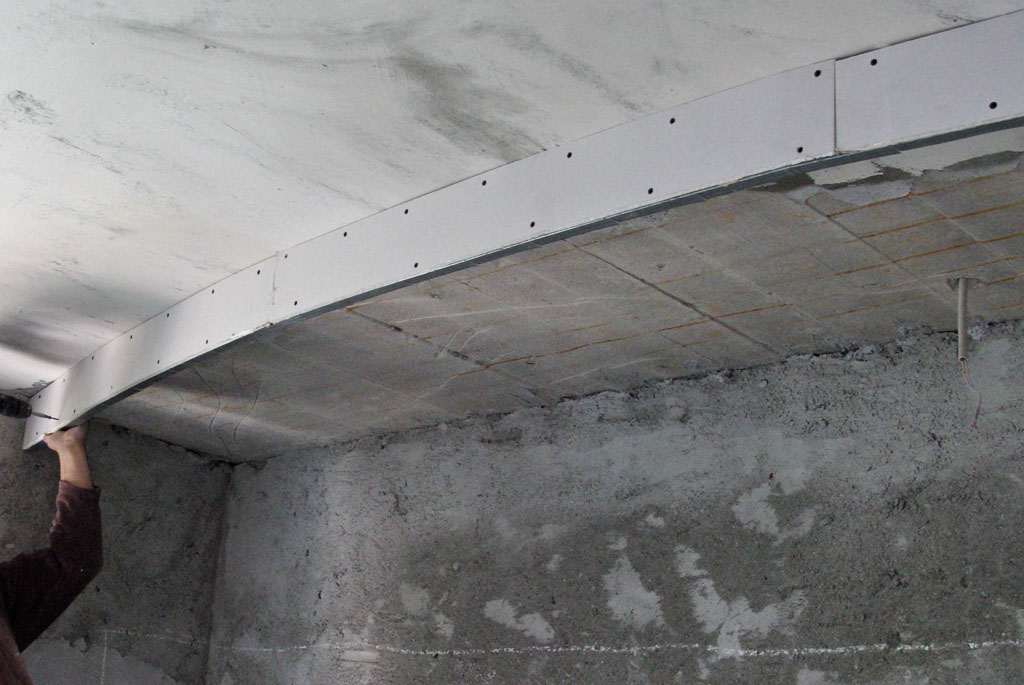
Fixing drywall arch with screws
You can see the operation from a different perspective. Use safety gloves as to make sure you avoid injuring yourself in the sharp edges of the metal tracks. Drive in screws every 7”/15 cm, as to make sure the structure its rigid and resistant over time.
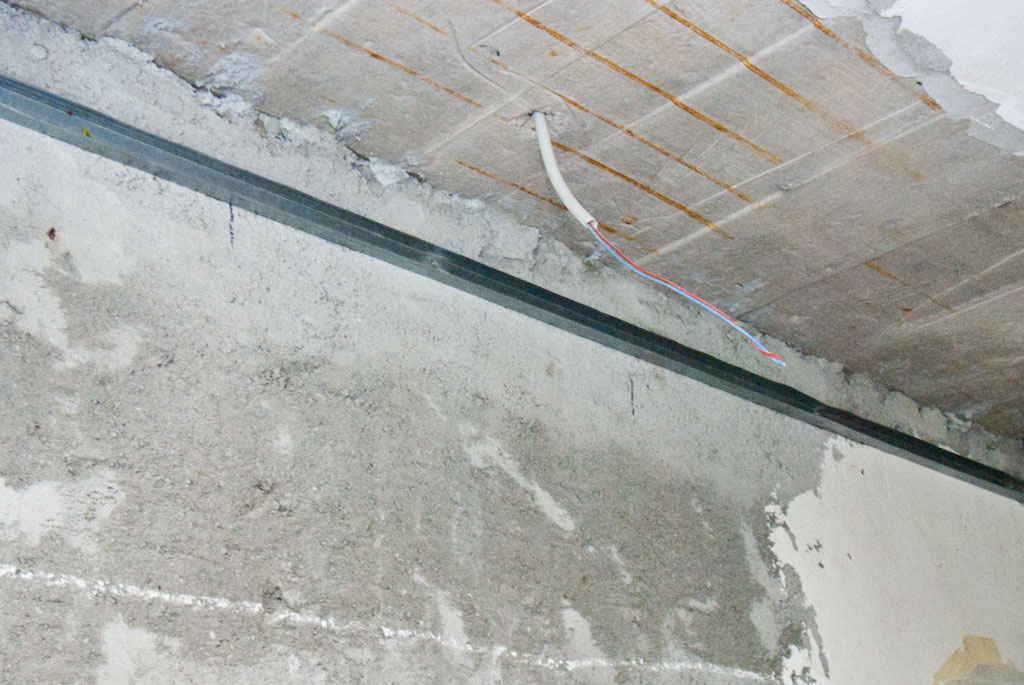
Installing metal stud to wall
Next, we continued building the frame for the drywall ceiling arch by installing a metal track on the opposite wall. Before installing the metal track make sure it is parallel with the lower metal track you have installed previously.
In addition, use a laser level or a spirit level to make sure the metal track is perfectly straight from one end to the other. Pay attention to these details as they influence the accuracy of the project.
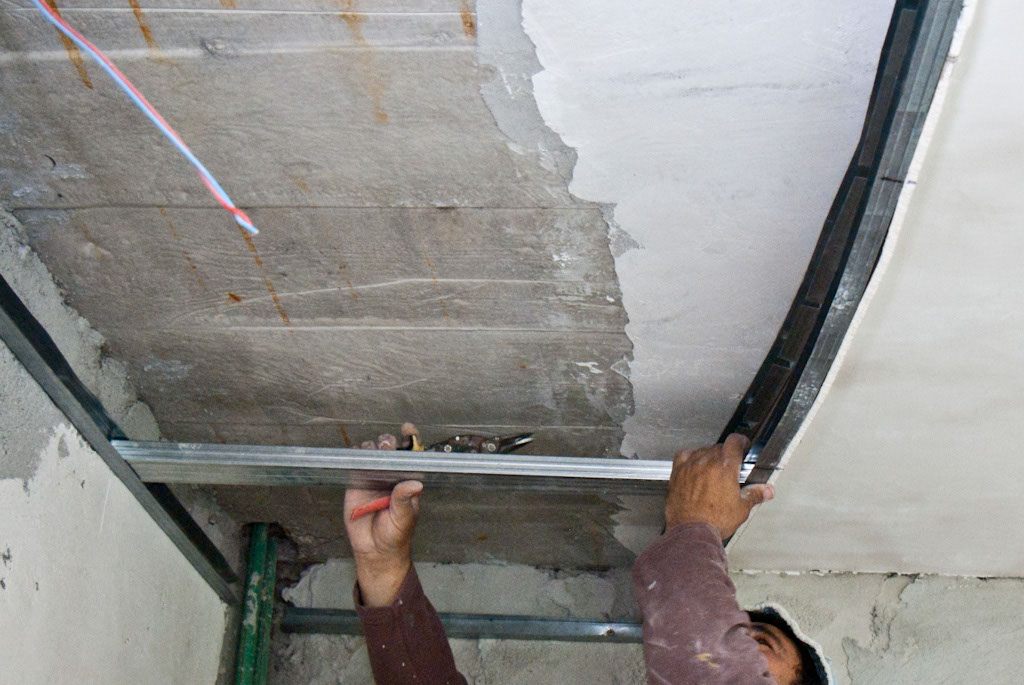
Building metal stud arch frame
The metal frame has to be reinforced by installing metal studs which links the two metal tracks. The distance between the metal studs has to be somewhere around 20”/50 cm, but in the same time you have to take into account the length of your drywall boards, as the joint between two drywall boards has to be exactly on a metal stud, as to be able to screw both of them on it.
Consequently, pay attention to these aspects before installing the metal studs.
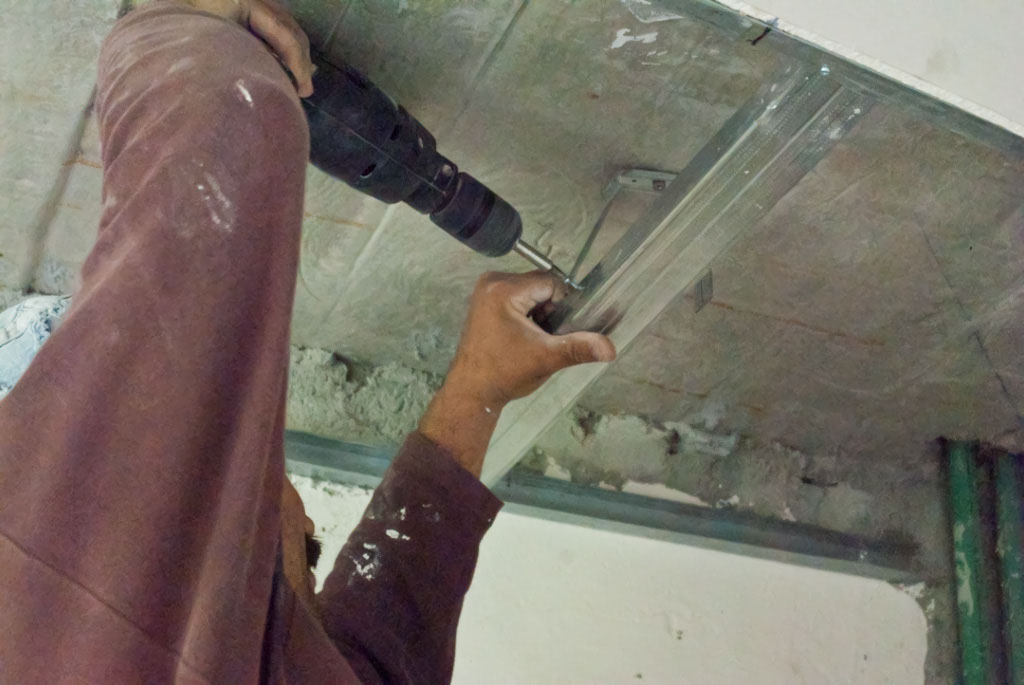
Anchoring the metal stud with brackets
In addition, for a better rigidity of the metal stud frame, we fixed metal brackets in the ceiling, and then fixed the metal studs to them, in screws.
If the ceiling arch width is around 25”/60 cm, you only need to install a metal bracket for each metal stud, otherwise you should consider installing at least two metal brackets on each metal stud.
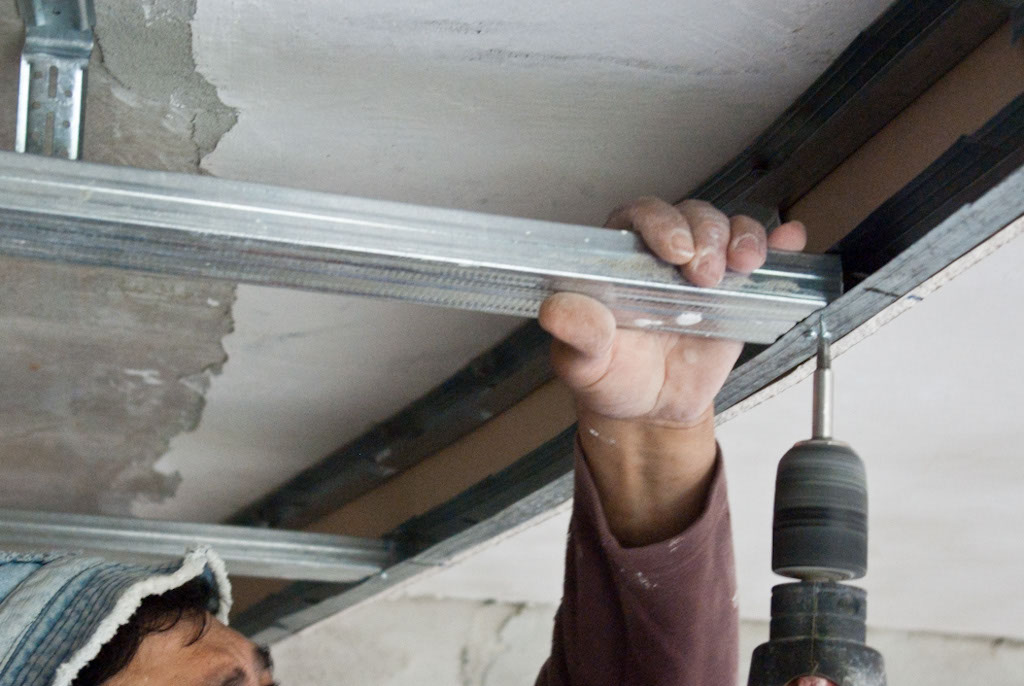
Installing ceiling arch metal stud frame
The metal studs must be fixed thoroughly at both ends in the metal track. Use an electric screwdriver and screws designed for the metal tracks. Make sure the metal studs are perpendicular on one wall, and parallel with the side walls. In this manner you will find easy installing the drywall planks, without having to adjust them.
Installing sheetrock boards on metal stud ceiling
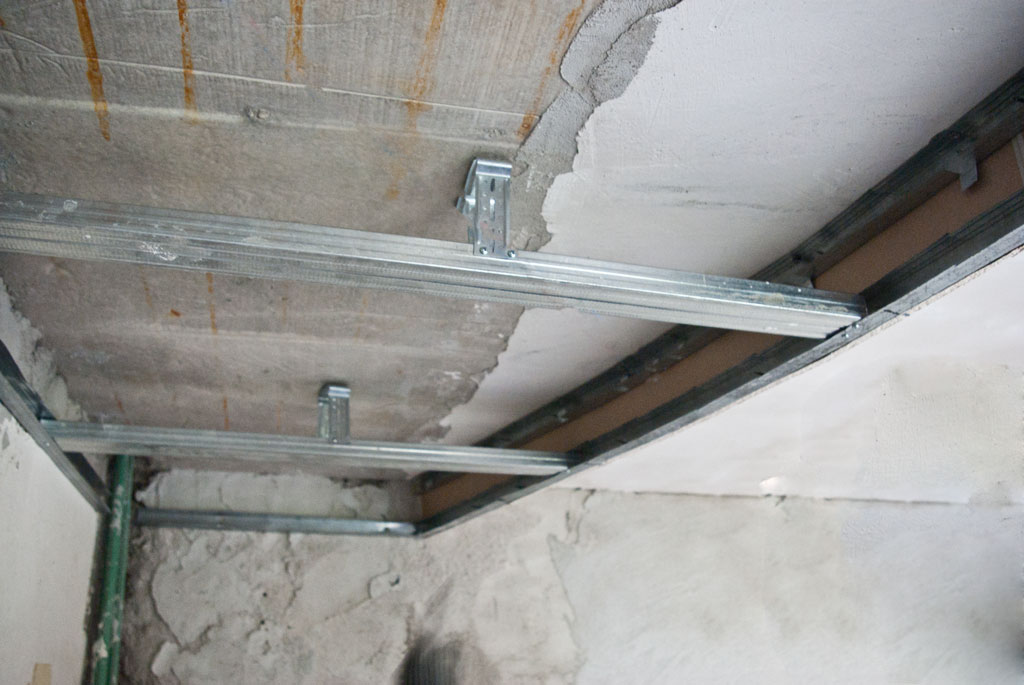
Ceiling arch metal stud frame
Continue installing the metal studs until you have reached the opposite corner. You can make an idea on how the ceiling frame should look, by taking an eye on this image.
You should notice that the metal studs are parallel, fixed in brackets and at both ends in the metal tracks.
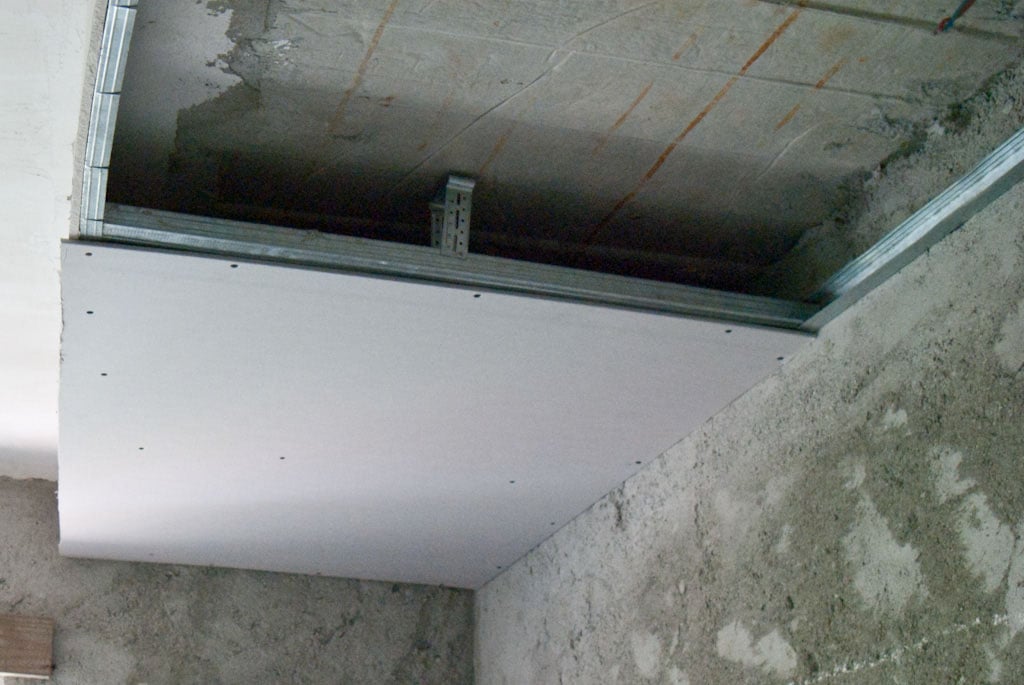
Fixing the drywall boards on the metal stud frame
After you have double checked the metal structure of the ceiling arch, you can continue to the next step: installing the drywall boards.
Before fixing the first board with screws, you should cut it according to the curve of the arch, otherwise it will be very difficult to perform a decent cut standing suspended on a ladder.
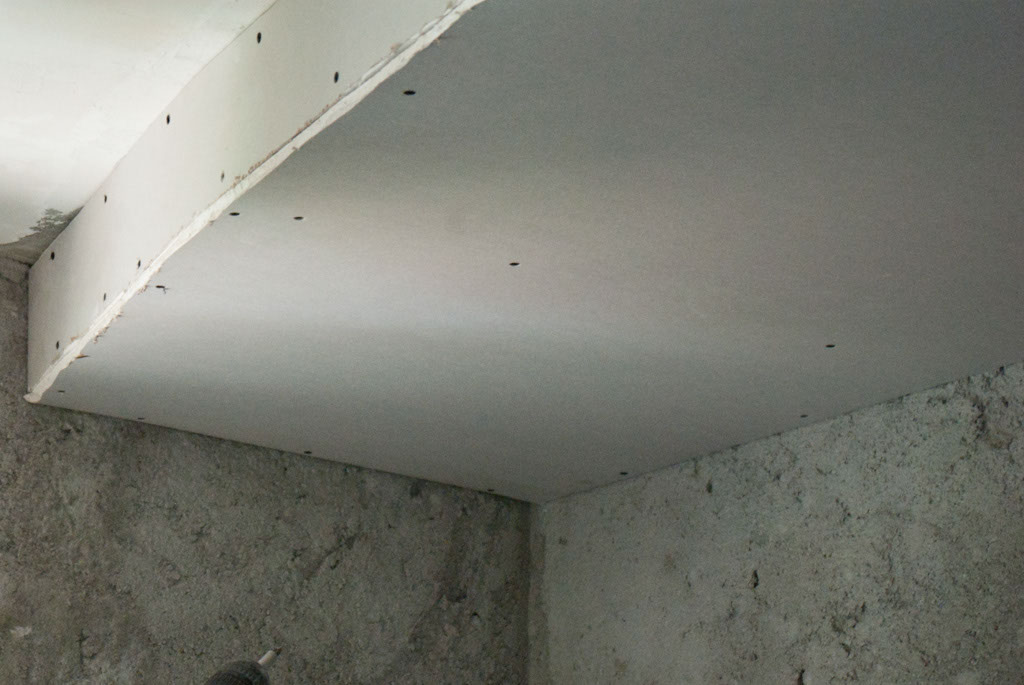
Fastening the drywall boards to the metal stud frame
You should drive in screws on all metal tracks and studs every 7”/15 cm, as to make sure the drywall board is fixed into position.
Nevertheless, if the drywall is not perfectly cut according to the curve of the arch, do not worry as you can repair the issue with drywall mud and fiberglass net, just make sure there are only slightly unaligned.
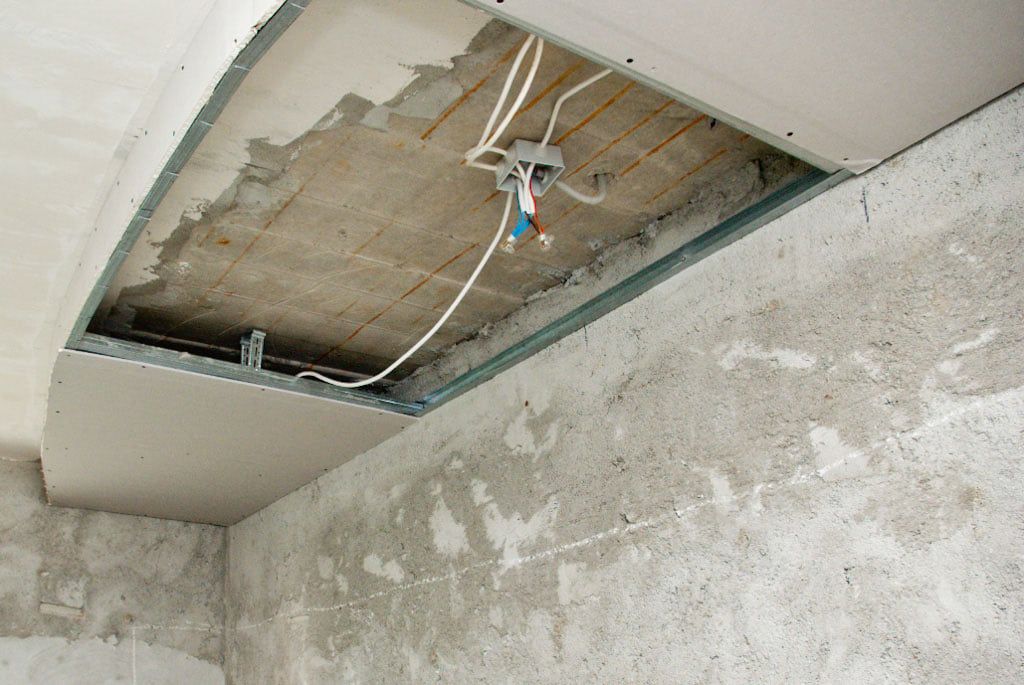
Installing electrical wires in the drywall ceiling
Before you install the last drywall board, you have to make sure you have solved any possible issue related to the light fixtures. In our case we wanted to install spot lights, so we installed the required electrical wires and marked the locations where to insert the spot lights.
This a perfect opportunity to check the drywall ceiling arch, in search of any forgotten tools or other unwanted residues.
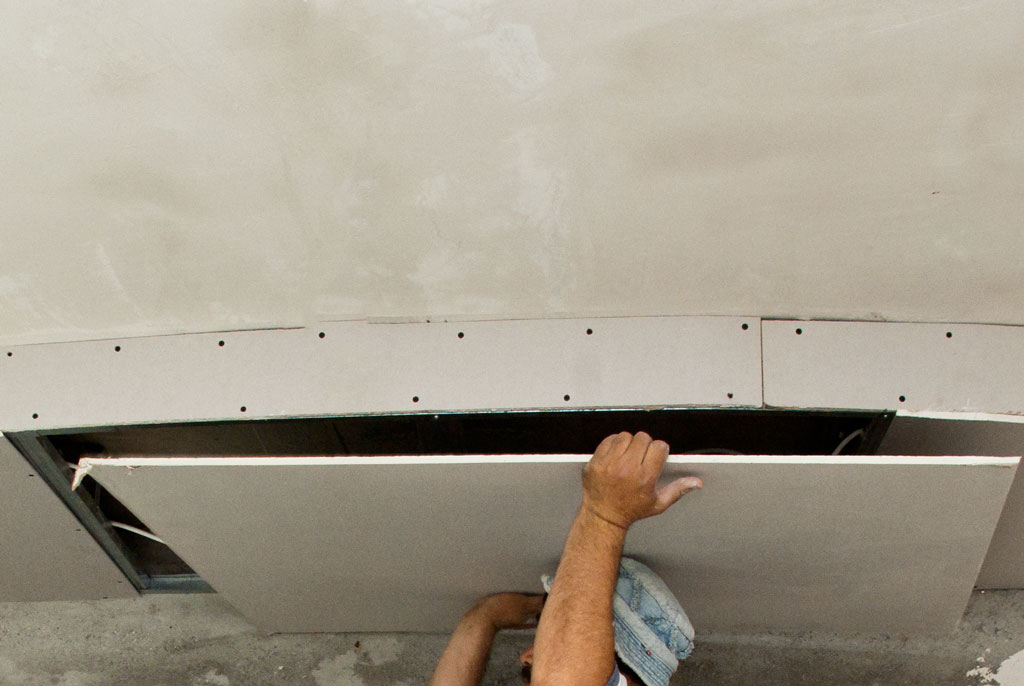
Fixing the last drywall board on the ceiling arch
Next, use a measuring tape to find out the distance between the metal studs. Cut a drywall board to that specific dimensions, and them cut it to fit the curve of the ceiling arch. If you cannot lift by yourself the drywall board, just ask a friend to help you. Fix the last board in screws along all edges, every 7”/15 cm.
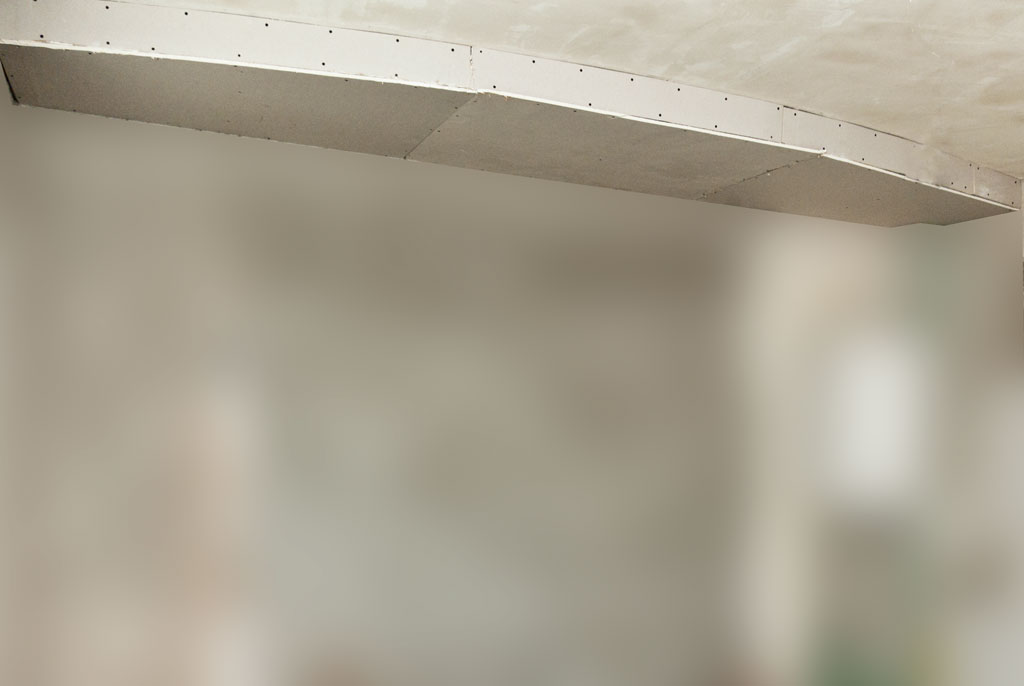
The drywall ceiling arch
After you have finished installing the last board of drywall on the metal stud frame, it should look similar to the one in the image. The last step of the project is to make sure that all edges of the drywall boards are clean and aligned. If you find small irregularities, you have to repair them, by using an utility knife.
Thank you for reading our article on how to build a drywall ceiling arch on a metal stud frame, and we also recommend you to check out the rest of our drywall projects. Please share our projects with your friends by using the social media widgets.
