This step by step project is about how to build a storage bench. If you want to build a rustic bench with a small storage capacity, you should pay attention to this project. You could adjust the size of the bench as to fit your needs, but we recommend you to use the same woodworking techniques to get the job done easily. Align all the components at both ends, before inserting the screws into the components.
Getting the job done by yourself could reduce the total expenditures. In addition, building something with your own hands is very rewarding and a nice weekend experience. Nevertheless, there are a few aspects you have to consider, when building the storage bench. First of all, we recommend you to purchase quality lumber (redwood, cedar or pine) and check if the boards are in a good condition. Moreover, work on a sturdy surface and check the corners for squareness, after each step.
Remember that you should always pre-drill the components, otherwise the wood might split. In addition, add a good wood glue to the joints of the bench, in order to enhance the bond of the components. Work with great acre and attention, if you want to make a durable storage bench with a neat appearance, from the very first attempt. See all my Premium Plans in the Shop.
Made from this plan
In order to make a storage bench, you needs the following:
Materials
- 8 pieces of 1×4 lumber – 20″ long, 4 pieces – 46 1/2″ long, 10 pieces – 10″ long, 4 pieces – 21″ long LEGS AND FRAME
- 2 pieces of 3/8″ plywood – 17″x21″ long, 2 pieces – 17″x44 1/4″ long PANELS
- 2 pieces of 1×1 lumber – 44 1/4″ long, 13 pieces of 1×4 lumber – 20 1/4″ long FLOOR
- 3 pieces of 1×2 lumber – 43″ long, 13 pieces of 1×4 lumber – 24″ long LID
- 12 pieces of 1×4 lumber – 8 ft
- 1 piece of 1×2 lumber – 12 ft
- 1 piece of 1×1 lumber – 8 ft
- 1 piece of 3/8″ plywood – 4’x8′
- 2 1/2″ screws
- 1 1/4″ screws
- glue, stain
- wood filler
Tools
- Safety gloves, glasses, Miter saw, jigsaw
- Chalk line, tape measure, spirit level, carpentry pencil
- Drill machinery and drill bits
Tips
- Pre-drill holes in the wooden components, before driving in the screws
- Smooth the exposed edges, by using a router with a 1/4” bit
Time
- One day
Related
Building a storage bench seat
Building a simple storage bench seat is a straight forward job, if you use the right tools and techniques. As you probably imagine, you can choose from many designs, so you should make sure the plans fit your needs and tastes.
How to build a storage bench
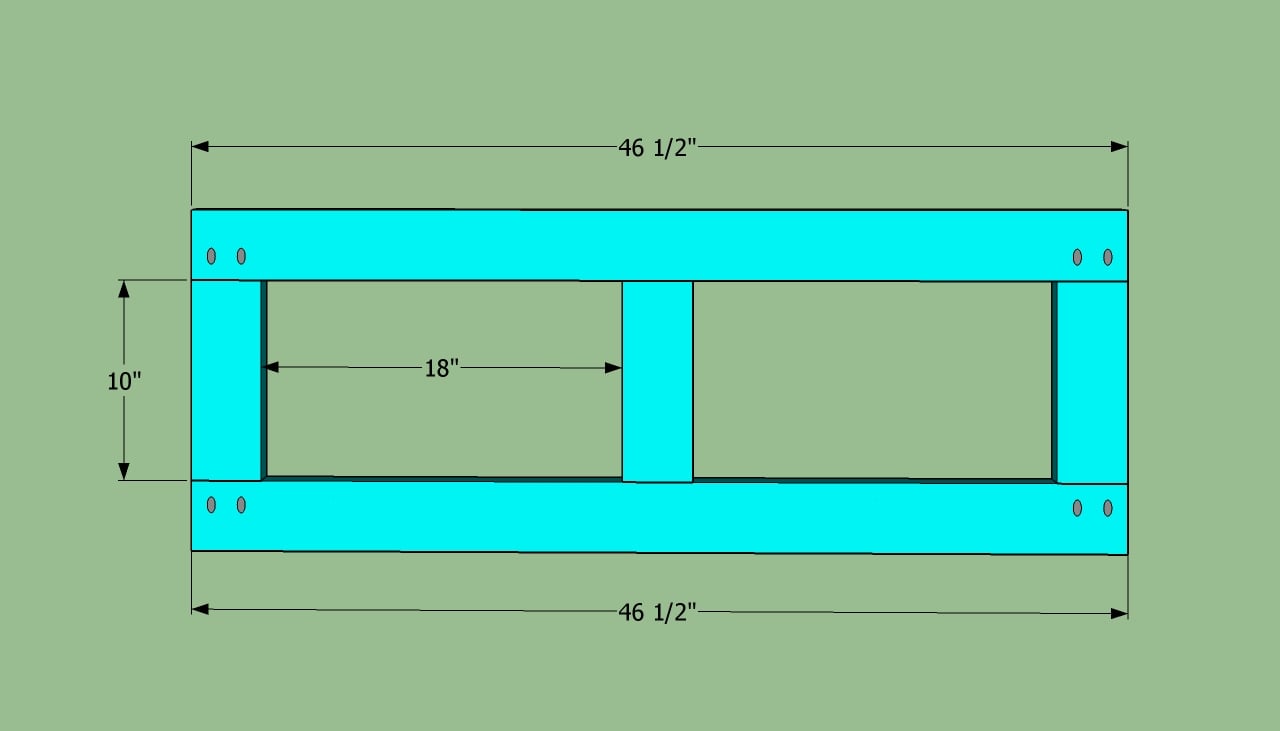
Front frame of the bench
The first step of the project is build the front and back faces of the bench. As to get the job done quickly and in a professional manner, cut the 1×4 slats with a miter saw and to lock them together with 2” pocket holes.
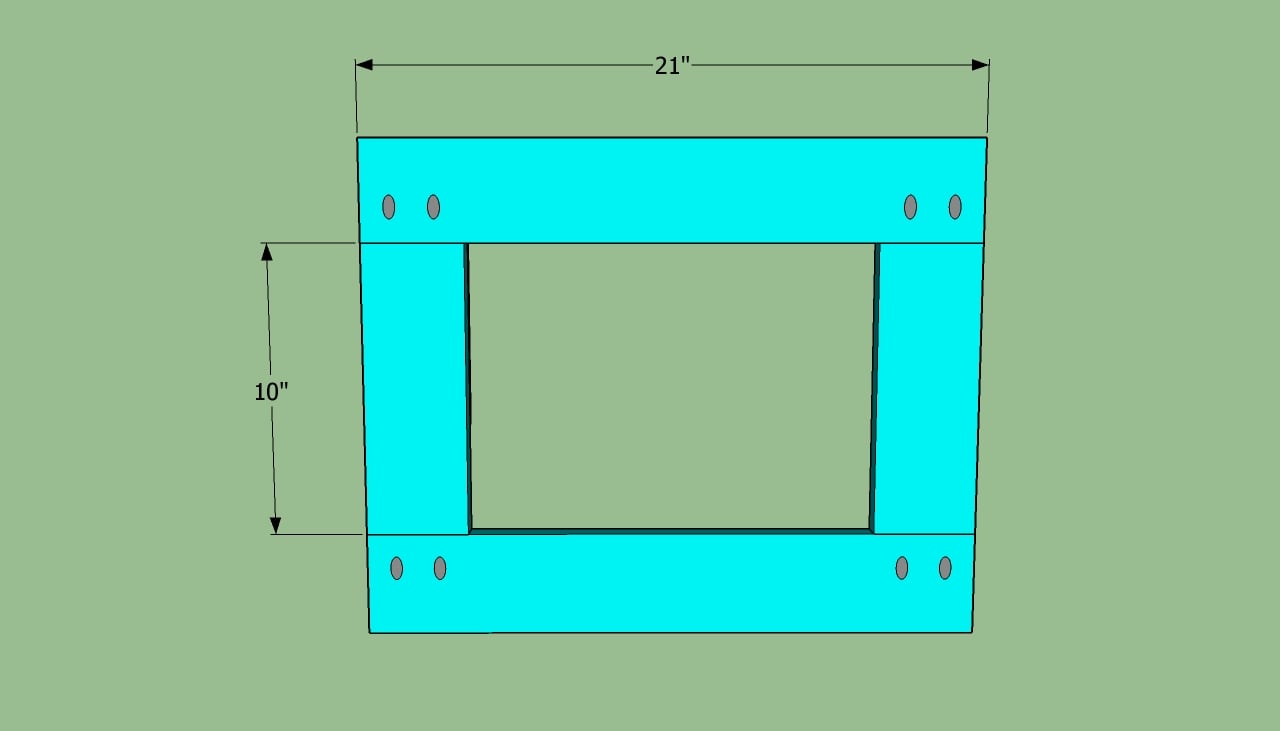
Side bench frame plans
Next, you have to assemble the side walls of the storage bench, using the same carpentry techniques described above. Add wood glue to enhance the bond of the joints. Clamp the components to a workbench, when drilling the pilot holes.
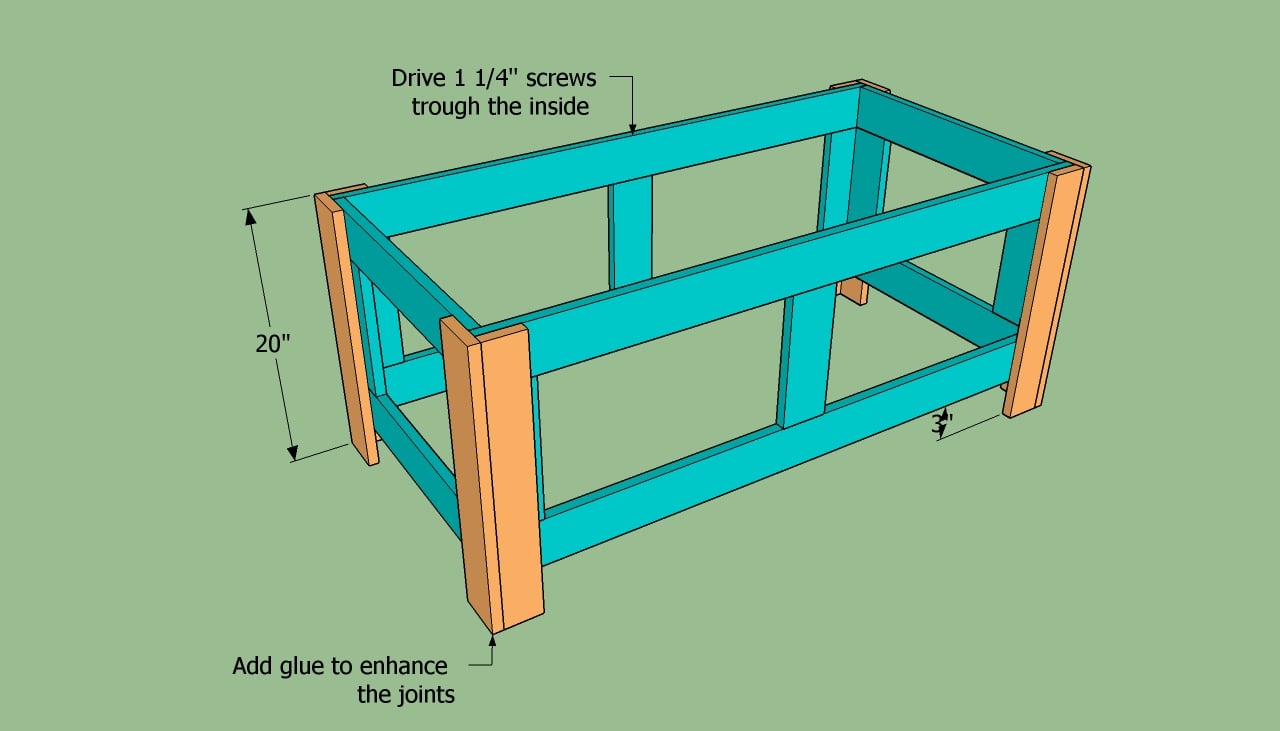
Installing the legs
The next step of the project is attach the corner legs to the frame of the bench and to lock them into place with screws. Align the components with great care before driving in the screws. First, build the L-shaped legs before attaching them to the frame.
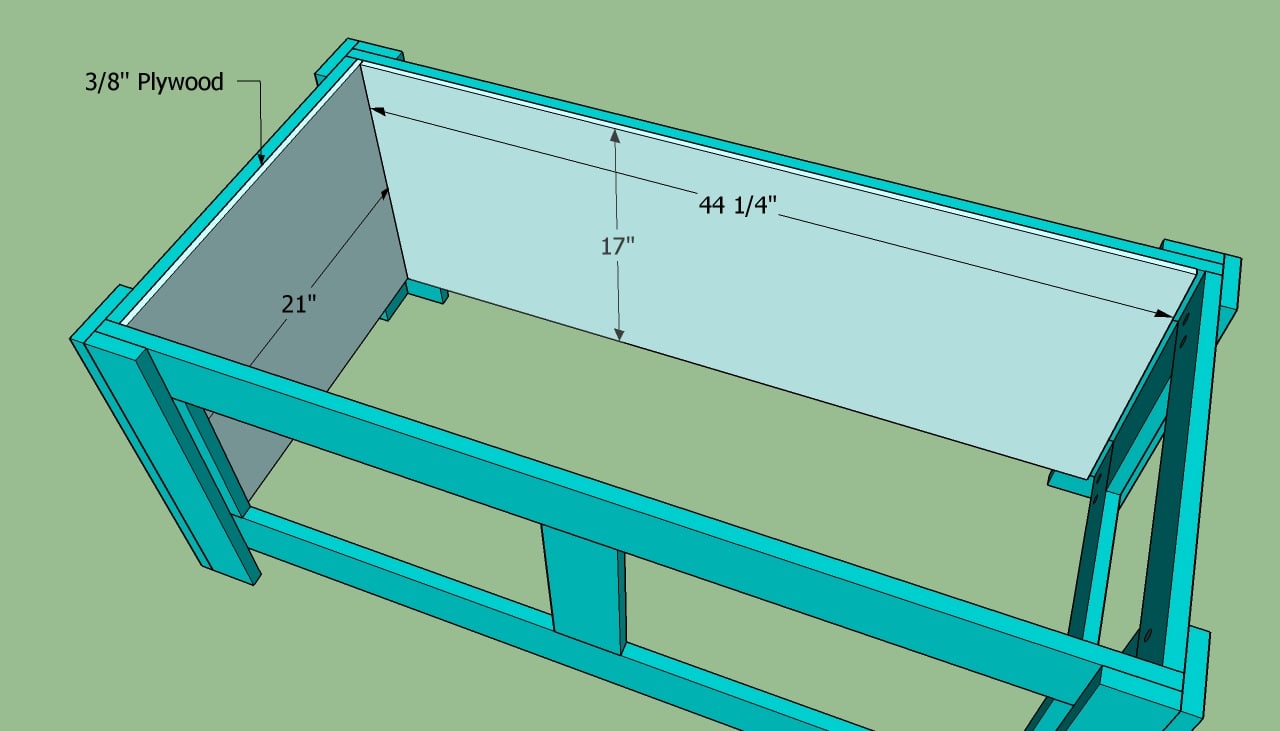
Installing the interior walls
Afterwards, you should install the interior walls of the bench. In order to get the job done, you have to build the panels from 3/8” plywood. Mark the cut lines on the plywood sheet and use a circular saw with a sharp blade to make the cuts. Sand the cut edges with a sand-block.
Building the floor of the storage bench
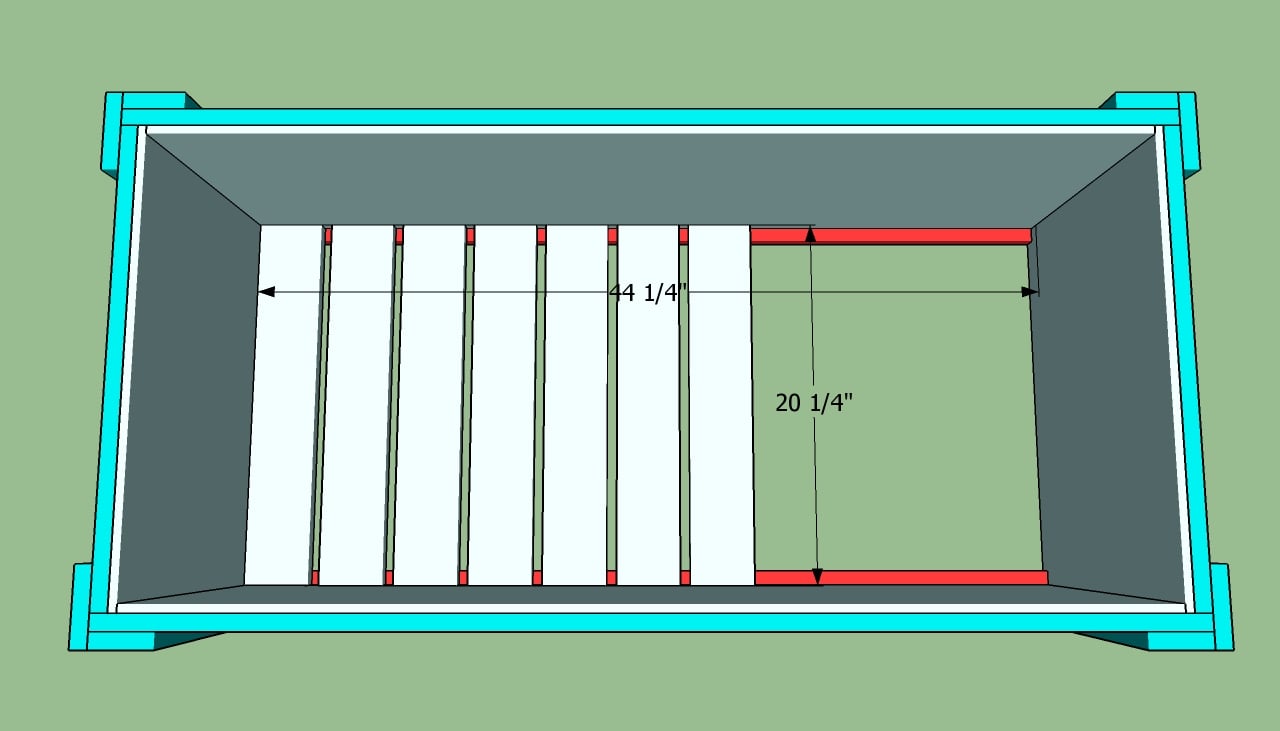
Install 1×1 wooden cleats to the sides of the storage bench, before fitting the bottom slats. Drill pilot holes trough the cleats, before inserting the 1 1/2” into the wooden frame. Afterwards, cut the slats to the right size (20 1/4”) and attach them to the supports.
Drill pilot holes at both ends of the slats and secure them into place with 2” nails. Place slats every 1/2” and countersink the head of the screws.
Building the top of the storage bench
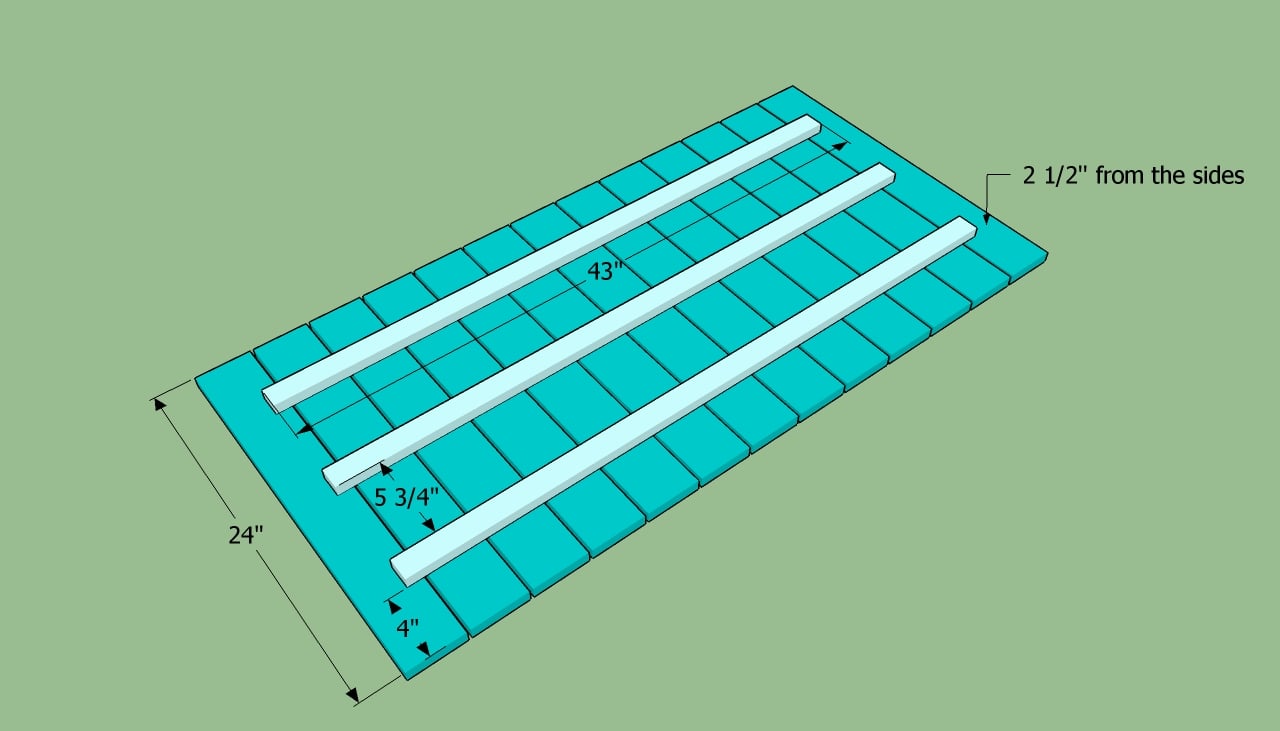
Building the seat of the storage bench can be done in several ways, either from 1×4 lumber or 3/4” plywood. Lay the slats on a level surface and secure them with several supports. Place a wood block between the slats, as to make sure you obtain consistent gaps.
Securing the top with the hinges
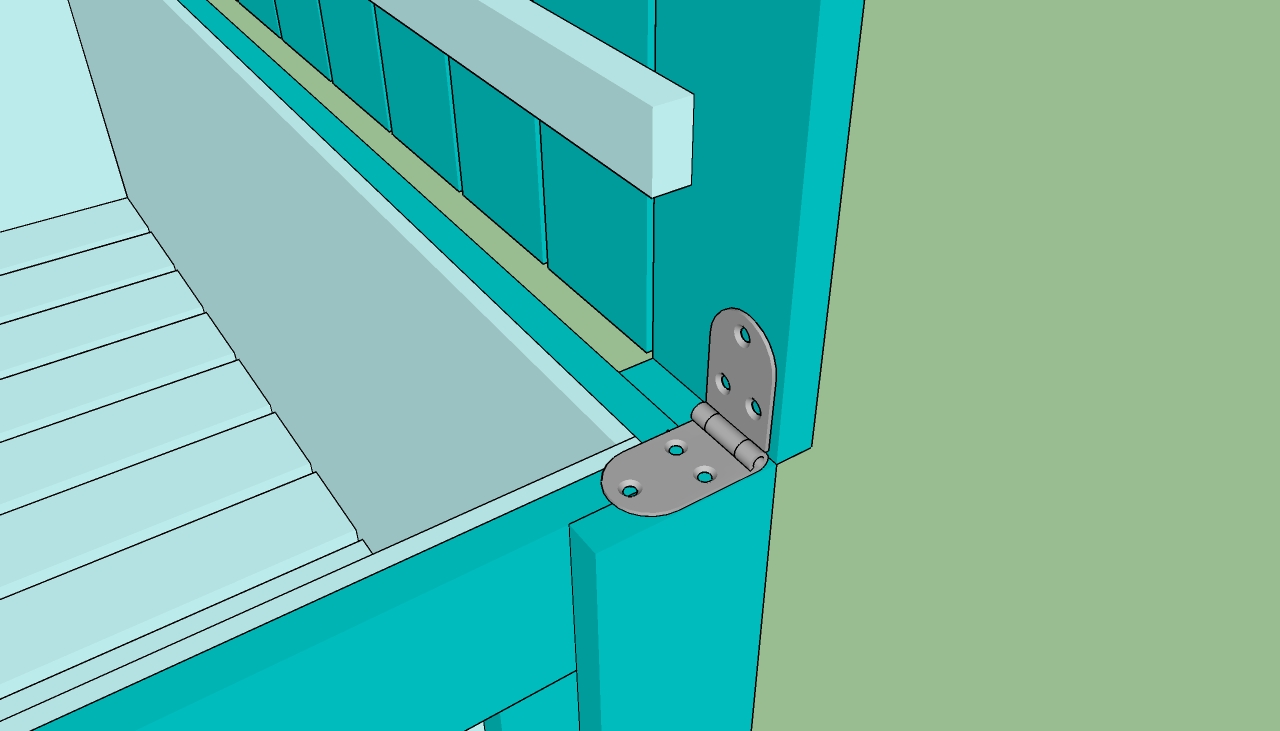
Attach the top lid to the storage bench, and secure it to frame with hinges and wood screws. Place the hinges to the top of the frame and check if they are flush with edges. Work with great care and attention, if you want to obtain a professional result.
How to build a storage bench
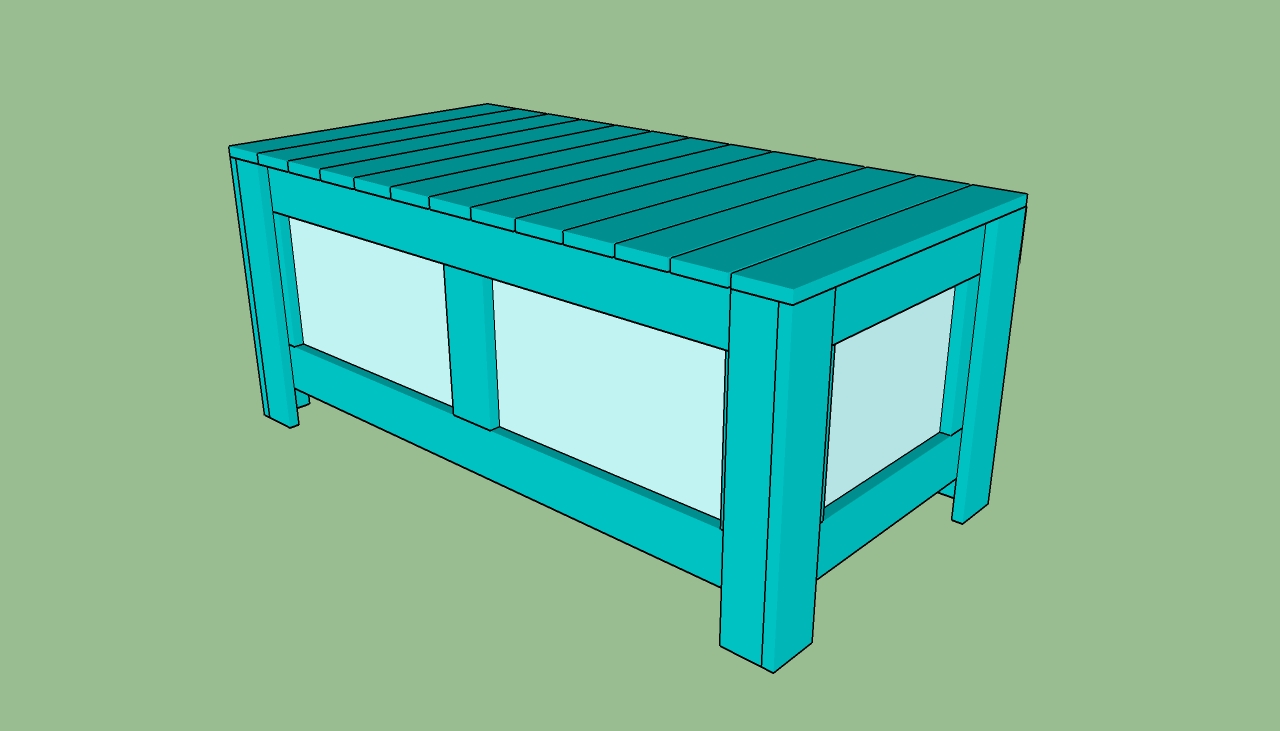
Last but not least, you have to take care of the finishing touches. Therefore, fill the holes with a good wood filler and let the compound to dry out for several hours. Afterwards, sand the surface along the wood grain, using 120-grit sandpaper.
Thank you for reading our article about how to build a storage bench and we recommend you to check out the rest of our projects. Don’t forget to LIKE and SHARE our articles with your friends, if you have found them useful. SUBSCRIBE to be the first that gets our latest updates.

