This article is about outdoor barbeque plans. Building a brick barbeque in your backyard is a dream for any family, but in most of the cases it never becomes a pleasant reality due to the high costs involved by the construction. As a general rule, the qualified labor required by this project represents up to 50% of the total costs, therefore if you choose to undertake the construction by yourself you will decrease the costs to a decent level (300 – 500 dollars). The only issue left is to find barbeque plans that suit our tastes and needs. In this article, we will show you how to build a traditional brick barbeque and the main techniques you have to master, to get the job done in a professional manner.
First of all, you have to place the outdoor bbq in a proper location,far away from inflammable substances and items. In addition, we highly recommend you to get accustomed with your local building codes before starting the project, otherwise the inspectors might not allow the construction. In most of the cases, you have to leave 10-15′ from the fence to the brick barbeque and from other constructions.
Choosing the best design of the barbeque is mainly a matter of taste, therefore you have to decide from the very beginning what satisfies your needs and fits into your budget. If you do the project by yourself, you will save a significant amount of money, therefore we recommend you to invest in quality materials (the bbq will look better and will last longer). Visit your local diy stores and choose the best offer in terms of quality and price. If you don’t have the required skills, you should either hire a team of qualified professionals or simply buy a barbeque kit.
Made from this plan
Materials
- Bricks and refractory bricks (for the barbecue)
- Concrete blocks (for the base walls)
- Concrete (foundation and countertop)
- Rebars for the reinforcing structure
- Refractory cement
Tools
- Safety gloves, glasses
- Wet saw (to cut the bricks)
- Hammer, spirit level, carpentry pencil
- Concrete mixer
Tips
- Read carefully our other articles related to outdoor construction
- Place the wood fired pizza oven far away from inflammable substances or constructions
- Work with attention, otherwise the construction won’t have the desired look.
Time
- Two weekends
Outdoor barbeque base plans
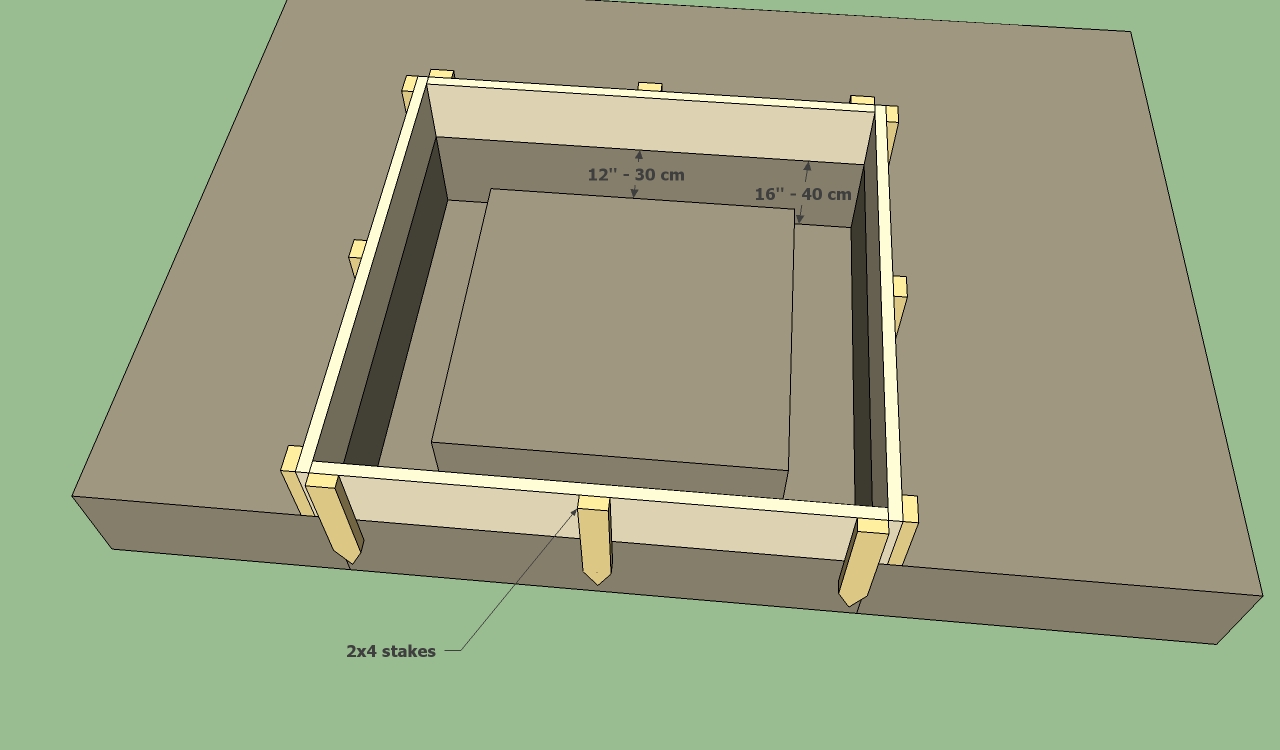
Bbq foundation plans
Step 1: Lay out the foundation of the brick oven. That is why, you need to use batter boards and string to lay to foundation in a professional manner. We recommend you to use the 3-4-5 rule to make sure the corners of the foundation are right angled.
Next, use a shovel to dig the trenches. The depth of the foundation varies according to the soil structure, but in most of the cases 1 – 1 1/2′ should be enough to support the barbeque.
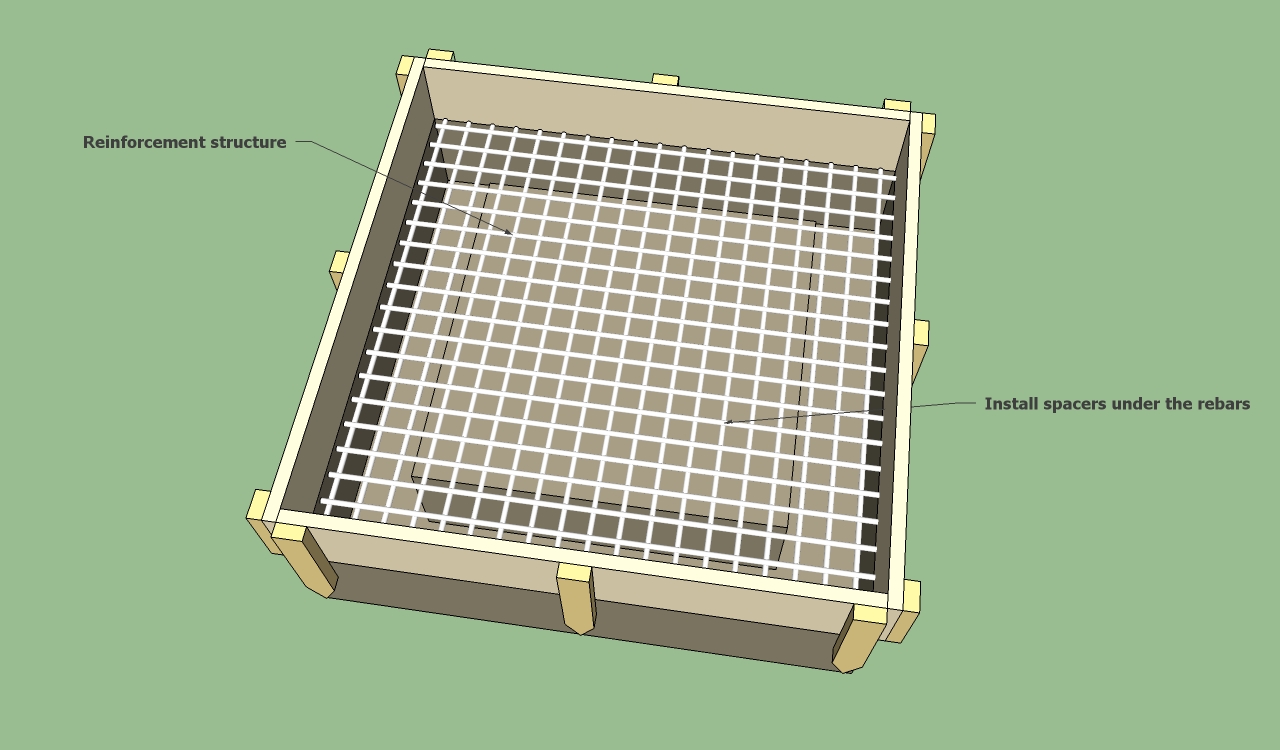
Brick bbq foundation plans
Step 3: Build the form and install the reinforcing structure. Use 2×6 wooden boards to build the form along the trenches, as in the image. Secure the boards by using 2×4 stakes, every 2′.
Next, use re-bars to build a net, tie them together with wire and install it into the form. The reinforcing structure will help the concrete be more rigid and support the weight of the bricks and of the concrete countertop.
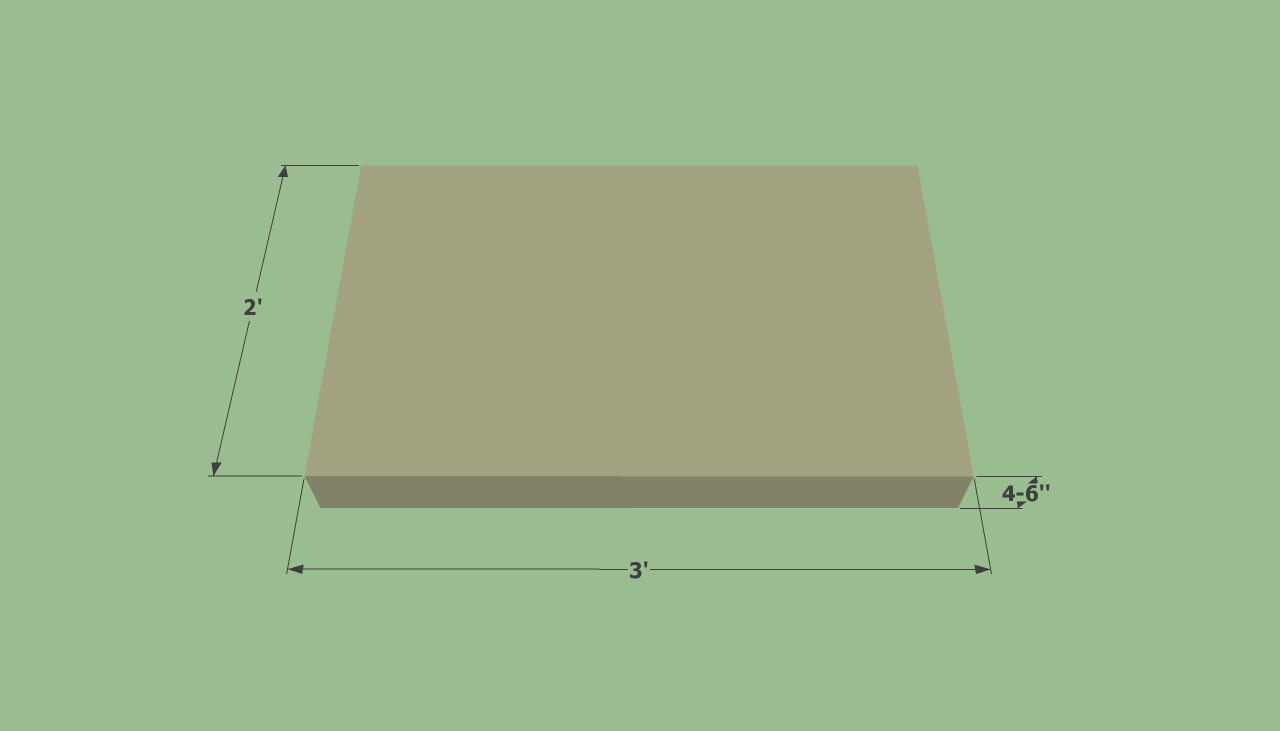
Outdoor barbque foundation
Step 3: Pour concrete in the form and level the foundation with a straight edge. Use a power mixer to blend thoroughly 2 parts cement, 3 parts sand, 4 parts gravel and water.
Next, use a straight edge and pull it along the form, using zig-zag moves. If necessary pour more concrete and level it again. If the formwork is level, the foundation will also be perfectly horizontal. Let the concrete dry out for several days.
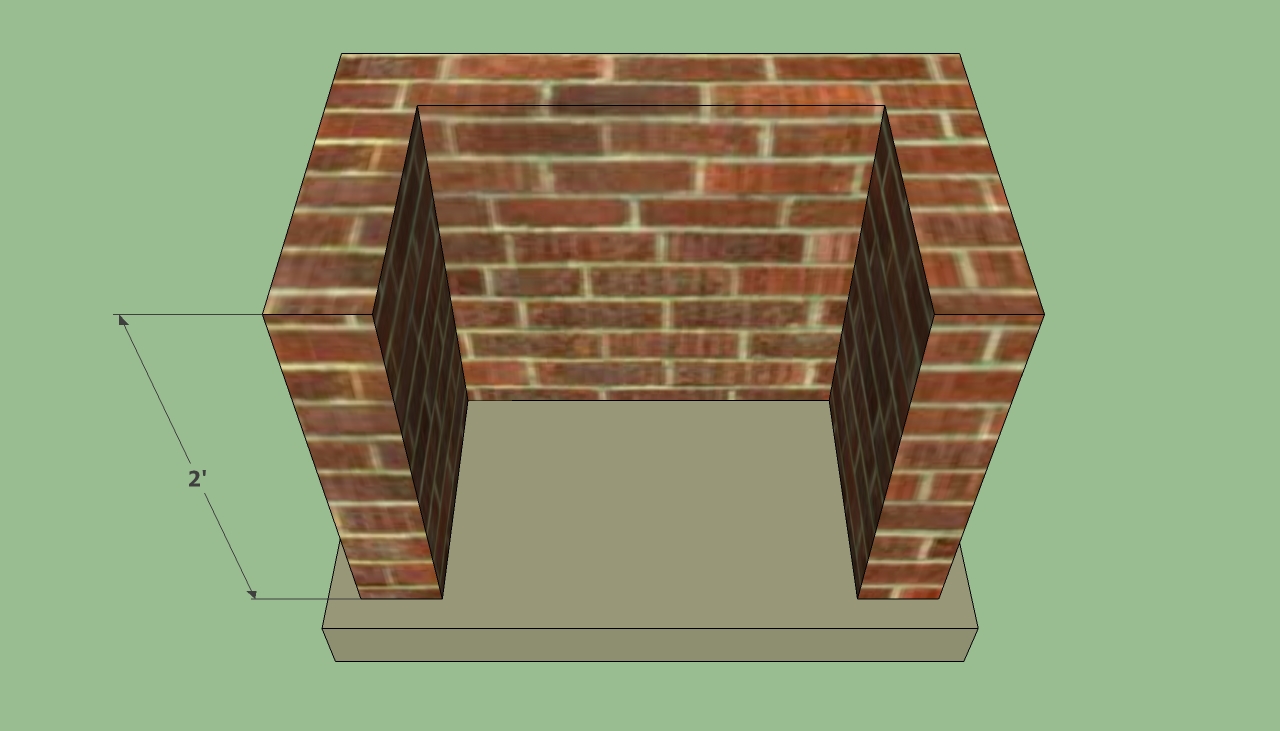
Outdoor barbeque base
Step 4: Build the base walls of the outdoor barbeque. Use regular bricks and lay them on the foundation, as in the image. In order to glue the bricks properly, you have to mix 3 parts of cement with 5 parts of fine sand until you obtain a compound with the consistancy of cream.
Lay a brick at the beginning and end of the row and tie a string to guide you when laying the rest of the bricks. Use a trowel to spread the mortar on the bricks and a sponge to clean the excess material.
Step 5: Build the form for the countertop of the brick barbeque. In order to get the job done properly, we recommend you to use four 4×4 posts and place them on the foundation of the bbq.
The length of the posts should be equal to the height of the walls minus 4” (we will place on top of them two 2×4 wooden boards and another row of 2×4 boards). Use a spirit level to make sure the posts are perfectly plumb.
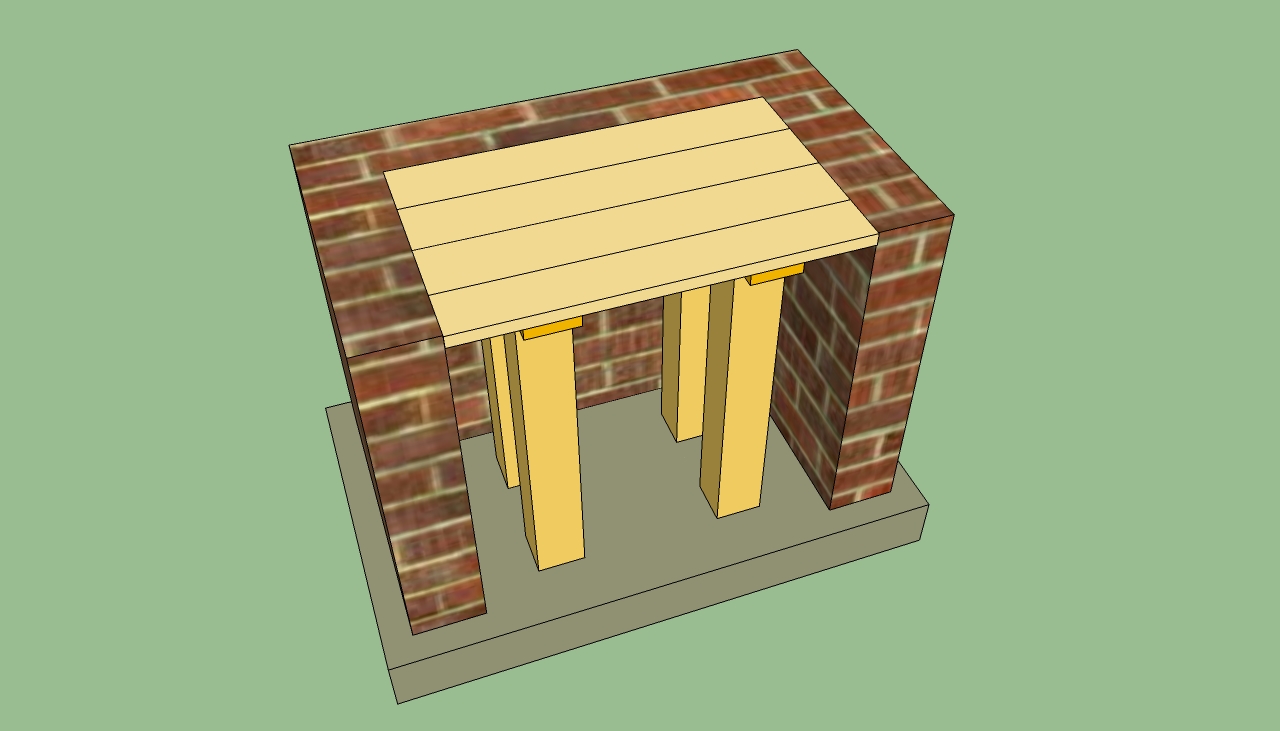
Brick brbeque countertop plans
Place the 2×4 wooden boards on top of the posts, as in the image. We recommend you to select the wooden boards with great care, otherwise the concrete might slip through the cracks created between them.
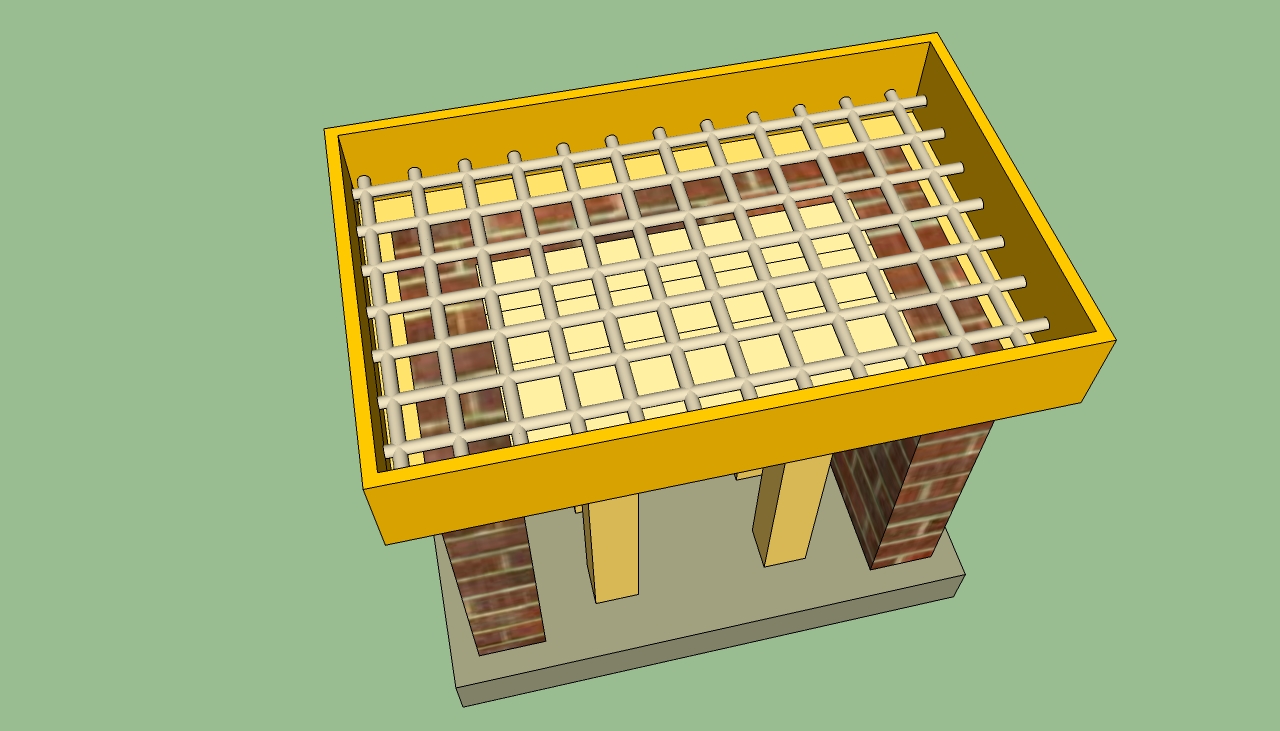
Barbeque countertop reinforcing net
Step 6: Build the reinforcing structure for the concrete countertop. Use rebars to make a dense net, as in the image (place the rebars every 3”), and tie them together with construction wire.
Next, place the reinforcing structure into the form and install spacers to lift it about 2”. Mix concrete and pour it about 4” in the form. Level the concrete using a straight edge.
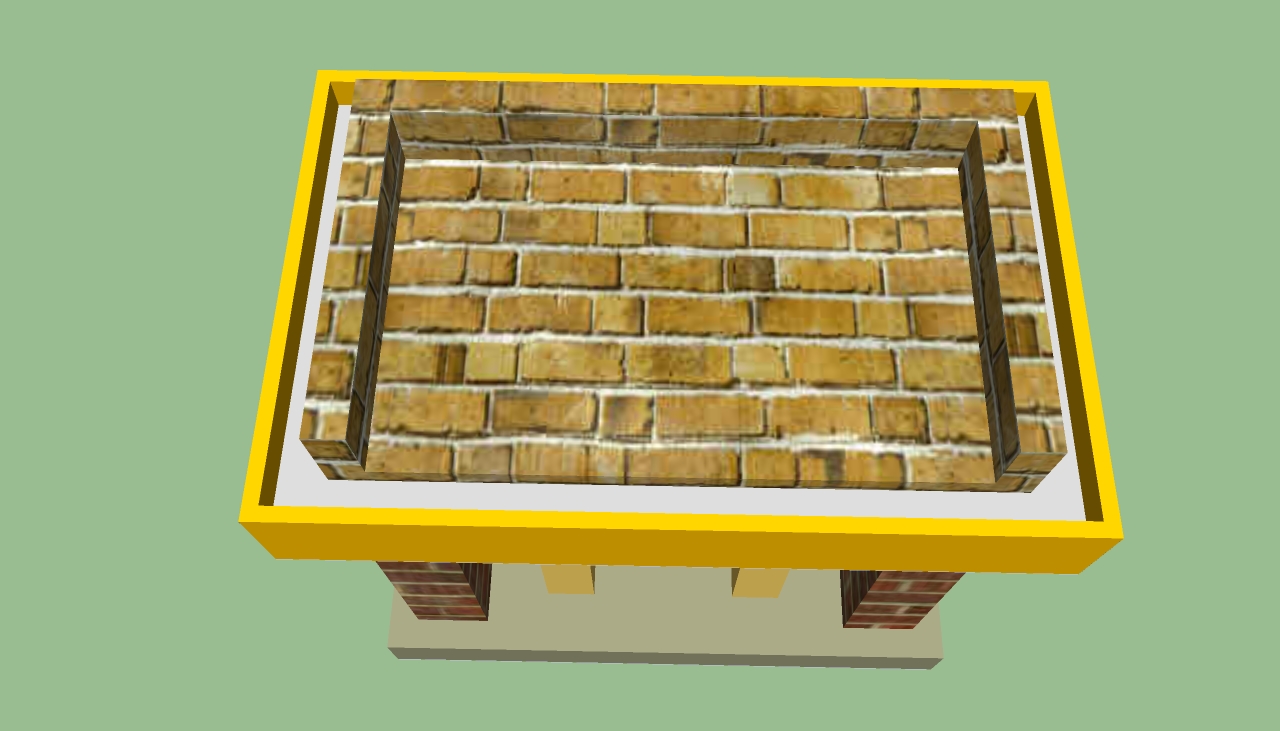
Outdoor barbeque floor
Step 7: Build the floor of the outdoor barbeque, using refractory bricks. Work with great care to make sure the floor is perfectly horizontal. We recommend you to use a mix of clay and sand to glue the bricks together, as a cement based mortar won’t resist the high temperatures developed by the burning woods.
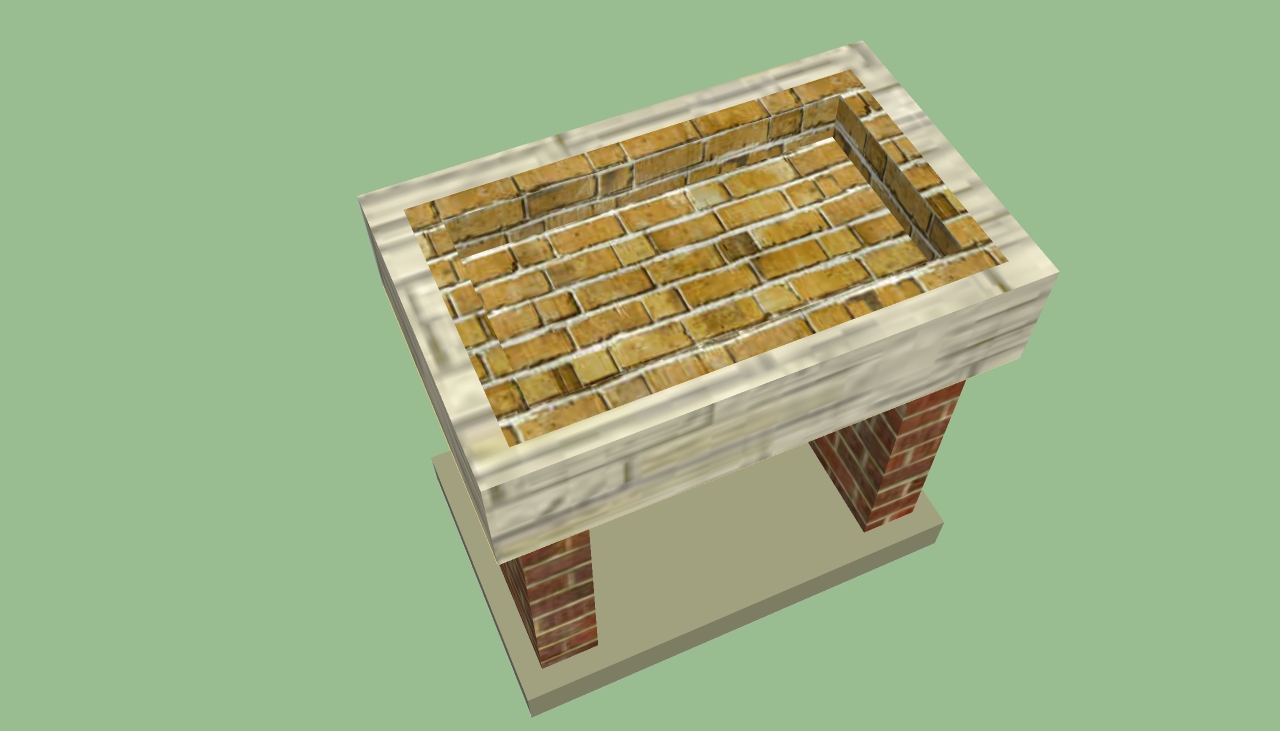
Outdoor barbeque plans
Fill the rest of the form with concrete, level it with a straight edge and let it dry for several days. Next, you should install granite, marble or flagstone over the concrete, as in the image. Fill the joints between the flag stone with colored mortar and clean the excess of the stone by using a damp sponge.
Outdoor barbeque plans
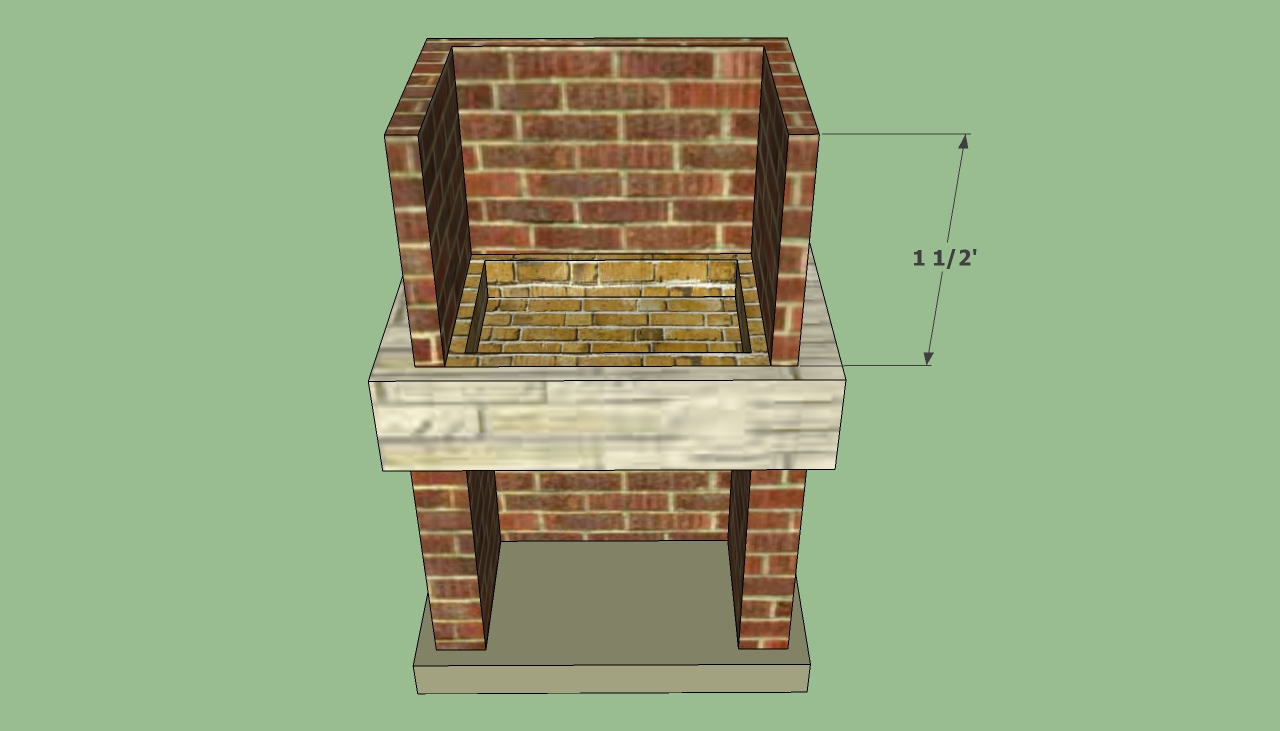
Building outdoor barbeque plans
Step 8: Build the walls of the outdoor barbeque, using our free plans. In order to lay the bricks in a professional manner, we recommend you to place a brick at the beginning and another at the end of the row and tie a string to their exterior. Next, place the rest of the bricks, using a spirit level to make sure the wall is both plumb and horizontal.
You can place the bricks either on stretcher (you need more bricks) or on shiner (you first have to cut them on half longitudinally, but you will save material).
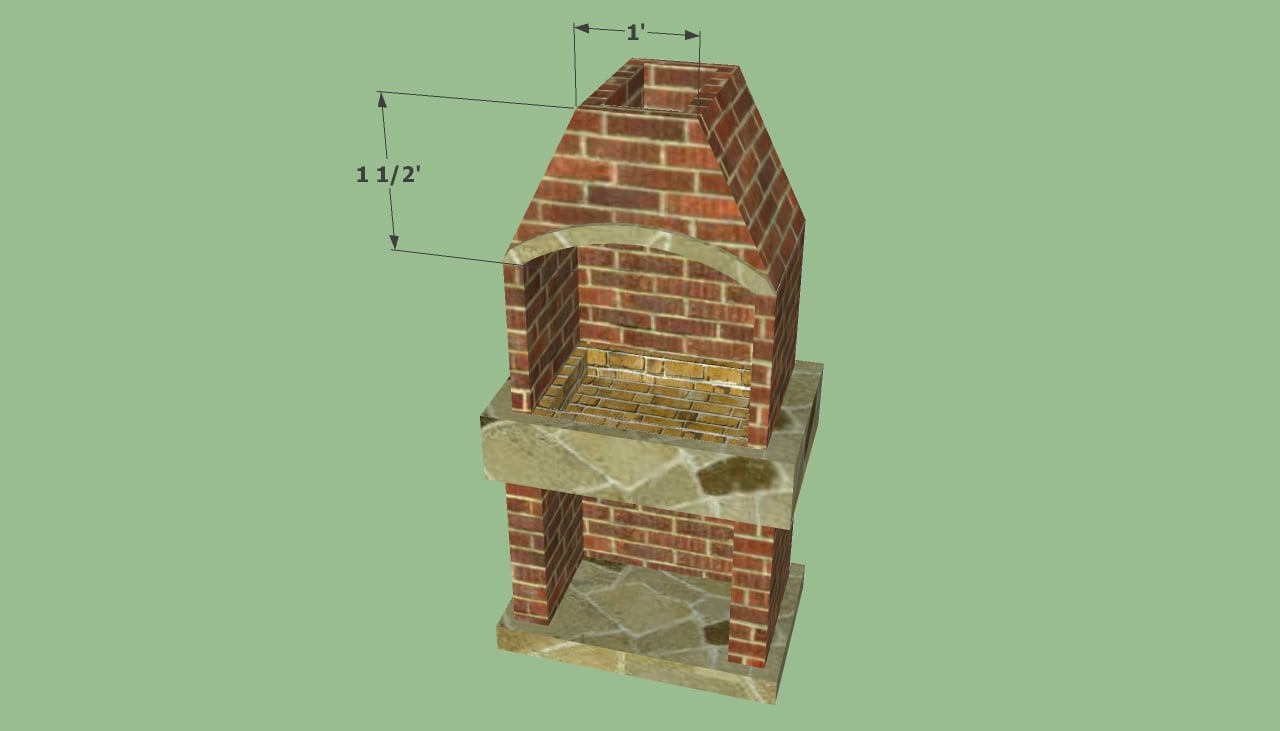
Build outdoor barbeque
Step 9: Build the base of the chimney using bricks. First you have to place a lintel above the entrance of the outdoor barbeque (use a stone lintel or pour a concrete lintel).
You need to use a wet saw to cut the brick, if you want to get the same shape as in the image. As a brick saw could be a little expensive for your budget, therefore you should rent it for a day.
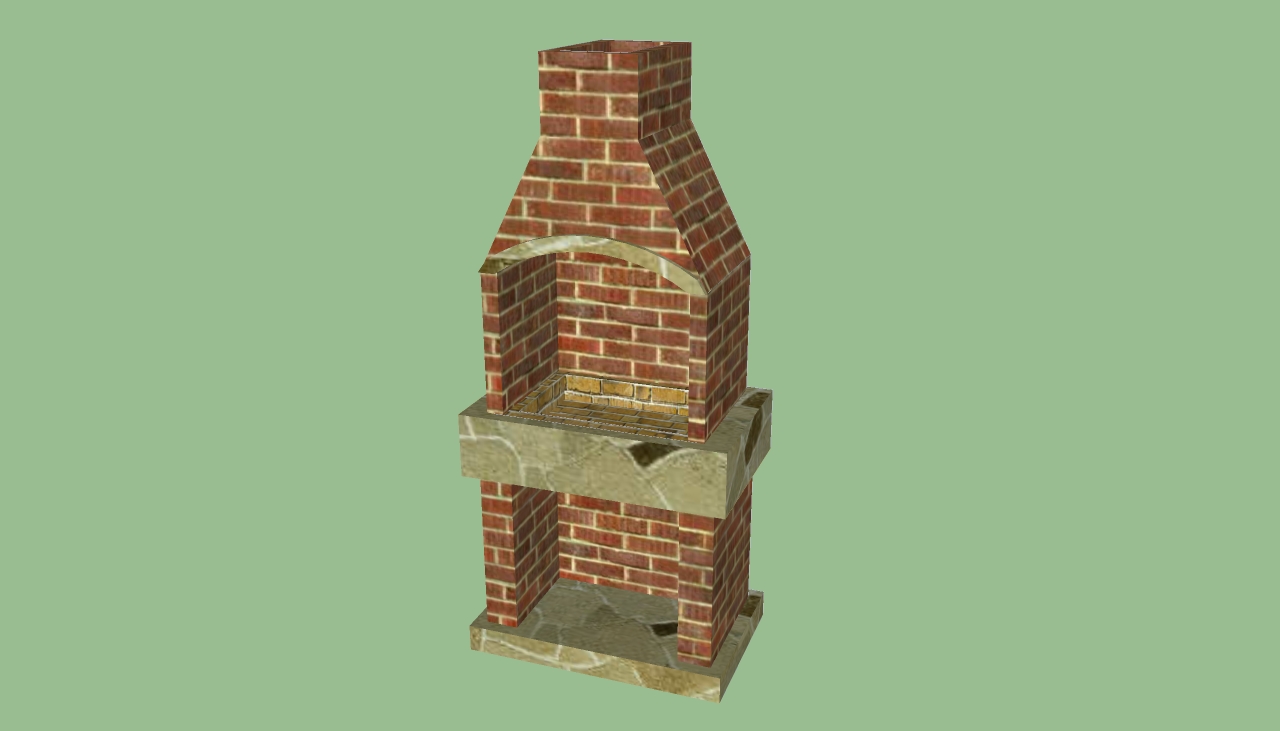
Outdoor bbq plans
Step 10: Build the rest of the chimney, by laying bricks and gluing them with cement based mortar. Work with great care and clean the excess mortar with a damp sponge.
We strongly recommend you to use a spirit level every time you lay a new brick, to make sure the chimney is perfectly plumb. If you follow our step by step guidelines and use our plans, you will build an outdoor barbeque like a pro.
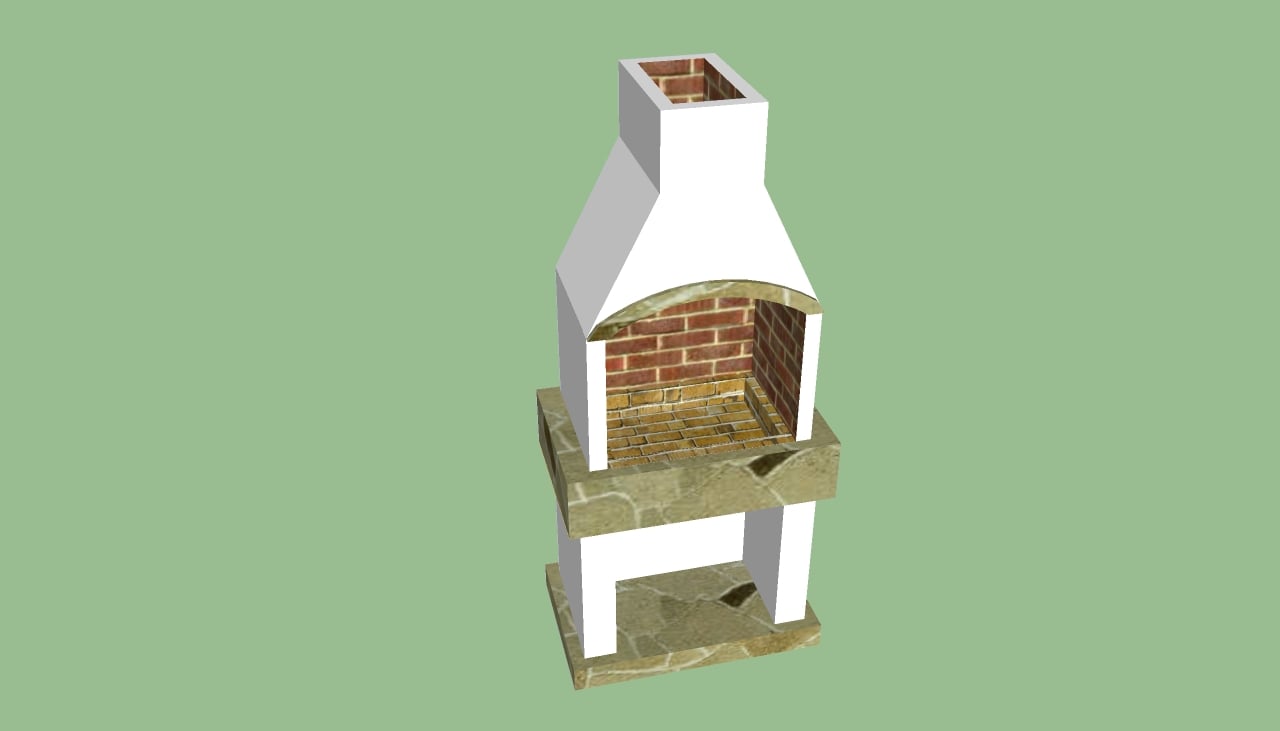
Outdoor brick barbeque plans
Let the cement mortar dry out for several days before making the first fire in it, otherwise the whole structure might even collapse. If you want to add a nice touch to your brick bbq, you could apply several coats of white cement render.
In addition, you should cover the concrete foundation and countertop with stone, making sure it matches the color of the cement coat and of the bricks.
My best tips on building a brick bbq:
Building a brick BBQ is a fantastic way to create a permanent, sturdy outdoor cooking station that adds style and functionality to your backyard. Whether you’re a weekend griller or a seasoned BBQ enthusiast, a brick BBQ can be tailored to your needs and provide years of use. Here are my best tips for building a brick BBQ.
1. Choose the Right Location
Selecting the right spot for your brick BBQ is essential for both convenience and safety:
- Flat, level ground: Ensure the area is stable and free of any slopes or soft ground.
- Good ventilation: Choose an open space with plenty of airflow to help smoke dissipate and avoid having the BBQ too close to your home or trees.
- Accessibility: Place the BBQ near your patio or outdoor dining area for easy use, but far enough away to avoid smoke blowing into seating areas.
Check local building codes or homeowner association rules before starting to ensure compliance.
2. Gather the Right Materials
You’ll need a few basic materials and tools to get started:
- Fire bricks for the BBQ interior (heat-resistant and durable)
- Regular bricks for the exterior (decorative and durable)
- Cement or mortar for bonding bricks together
- Grill grate (purchase one or have a custom grate made)
- Trowel
- Level
- Measuring tape
- Shovel or post hole digger
- Concrete mix (for the foundation)
3. Build a Solid Foundation
A strong foundation is critical for the stability of your BBQ:
- Start by marking out the area where you’ll build your BBQ. Dig down about 4-6 inches to create a solid base.
- Pour a concrete foundation that’s slightly larger than the BBQ itself. This helps ensure stability, especially on uneven or soft ground.
- Smooth the surface and allow the concrete to cure for at least 24 hours.
Make sure the foundation is level to prevent any issues when laying bricks.
4. Lay the First Layer of Bricks
Once the foundation is dry, it’s time to start building the BBQ:
- Mix your mortar according to the manufacturer’s instructions and apply a thin layer onto the foundation.
- Begin by laying the first row of bricks, creating the basic outline of your BBQ. Make sure the bricks are evenly spaced, using a trowel to apply mortar between each one.
- Use a spirit level to ensure the bricks are perfectly level and straight.
This first layer serves as the base for the rest of the structure, so take your time to ensure it’s laid correctly.
5. Build Up the Walls
Continue building up the brick walls of your BBQ:
- Apply mortar between each layer of bricks and use the trowel to smooth out any excess.
- As you build, check each layer with a spirit level to ensure it remains level and straight.
- If you’re creating a dual-level BBQ (for grilling and firewood storage), leave an opening or space between the lower bricks for storage.
You can make the BBQ as tall as you like, but a common height for the cooking surface is about 30-36 inches.
6. Install Fire Bricks for the Cooking Area
The interior of the BBQ, where the grilling will take place, should be lined with fire bricks for added heat resistance:
- Lay a row of fire bricks on the inside of the BBQ walls, especially around the grill area.
- Use heat-resistant mortar to attach the fire bricks to the inside of the brick walls.
Fire bricks help prevent cracking and withstand the high temperatures from the charcoal or wood.
7. Create a Support for the Grill Grate
To support the grill grate, you’ll need to create ledges for it to rest on:
- Leave gaps in the brickwork where you want to position the grill grate. Typically, these gaps are built into the sidewalls at about halfway up the structure.
- Alternatively, you can insert metal brackets into the mortar joints to hold the grill grate securely.
If you want multiple grilling levels, consider leaving several sets of gaps or installing adjustable supports.
8. Install the Grill Grate
Once the main structure is complete and the mortar has dried, place the grill grate on the supports:
- The grill grate should fit snugly within the BBQ structure and rest securely on the ledges or brackets.
- Ensure the grate is level and can be easily removed or adjusted when needed.
9. Finish the Top Layer
To complete the look of your brick BBQ, you can add a decorative cap layer or slab on the top of the walls:
- Use a smooth, flat stone or concrete slab to cover the top of the BBQ structure, which provides a clean, polished finish and can double as a small prep area.
- Attach the top layer using mortar and make sure it’s securely in place.
10. Allow the Structure to Set
Once the BBQ is built, let the mortar cure for at least 48 hours before using it:
- Keep the structure covered with plastic sheeting to protect it from rain or extreme temperatures while the mortar sets.
- After the curing period, check the structure for any loose bricks or mortar that needs patching before you start cooking.
11. Optional: Add a Chimney or Ventilation
If you plan on doing a lot of smoking or slow cooking, consider adding a chimney or ventilation to help control airflow and smoke:
- Install a small metal or brick chimney at the back of the BBQ to allow smoke to escape easily.
- You can also create vent holes in the side walls to allow for better airflow, helping the fire burn more efficiently.
Bonus Tip: Add Side Tables or Counter Space For added functionality, consider building side tables or adding a counter space next to your brick BBQ. You can extend the brick structure or add a separate prep area made from concrete, stone, or wood.
By following these steps, you’ll be able to build a sturdy and stylish brick BBQ that’s perfect for outdoor gatherings. With a bit of planning and attention to detail, your DIY BBQ will provide years of delicious grilling and become a centerpiece in your backyard.
Thank you for reading our article about outdoor barbeque plans and we recommend you to check out the rest of our outdoor projects. Don’t forget to share our projects with your friends, by using the social media widgets.


2 comments
Thankyou for posting this. The design is something what we are looking to build. Do you have step by step photos for building chimney fo this outdoor BBQ?
No. This is all there is for this project.