This step by step diy project is about how to build a daybed. If you want to create an unique relaxation area, either in your living room or outside, you should consider building a basic daybed. This project features 4×4 notched legs and a rigid frame. All the joints are rigid due to the unique design and also provide an exquisite appearance to your project. Don’t forget that you could adjust the size and design of the daybed, according to your needs.
There are several aspects you should take into account before starting the woodworking project, especially if you want to get a professional result. First of all, you need to use quality materials, such as pine, redwood or cedar, according to your tastes and budget. When choosing the wooden component, check if the slats are perfectly straight and if they are in a good visual condition.
Always align the components at the both ends before locking them together tightly. Drill pilot holes trough the components and countersink the head of the screws, before driving in the galvanized screws. Use a table or a circular saw to make several parallel cuts inside the marked area. Use a chisel to clean the recess and a sanding block to smooth the surface. Last but not least, fill the holes with wood putty and even out the surface with medium-grit sandpaper. See all my Premium Plans in the Shop.
Made from this plan
In order to build a daybed, you need to use the following:
Materials
- A – 2 pieces of 4×4 lumber – 27 1/4″, 2 pieces of 4×4 lumber – 30″ LEGS
- B – 2 pieces of 2×4 lumber – 83″, 2 pieces of 2×4 – 42″, 3 pieces – 42″ FRAME
- C – 11 pieces of 1×4 lumber – 80″ SLATS
- D – 6 pieces of 1×4 lumber – 44 1/4″, 4 pieces of 1×4 lumber – 87″ SIDES
- E – 2 pieces of 1×4 lumber – 38″, 1 piece of 1×4 lumber – 87″ TRIMS
- 1 piece of 4×4 lumber – 10 ft
- 5 pieces of 2×4 lumber – 8 ft
- 20 pieces of 1×4 lumber – 8 ft
- twin XL mattress
- 1 1/4″ screws
- 2 1/2″ screws
- 1 1/4″ brad nails
- glue, stain
Tools
- Safety gloves, glasses
- Miter saw, jigsaw
- Chalk line, tape measure, spirit level, carpentry pencil
- Drill machinery and drill bits
Tips
- Apply several coats of wood stain to the wooden components
- Fill the holes with wood filler and smooth the surface
- Fit 1×4 trims to add character to your woodworking project
Time
- One Day
Related
Building a daybed
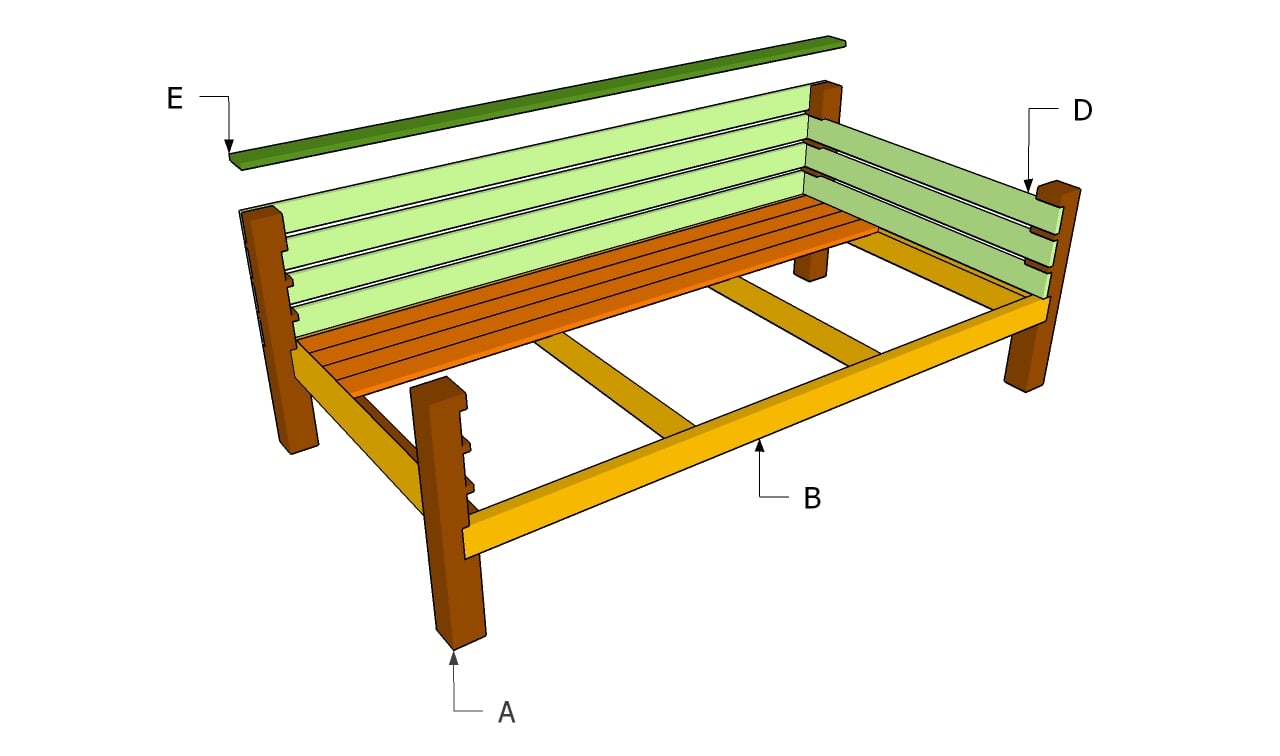
Building a daybed
How to build a day bed

Legs – Front view
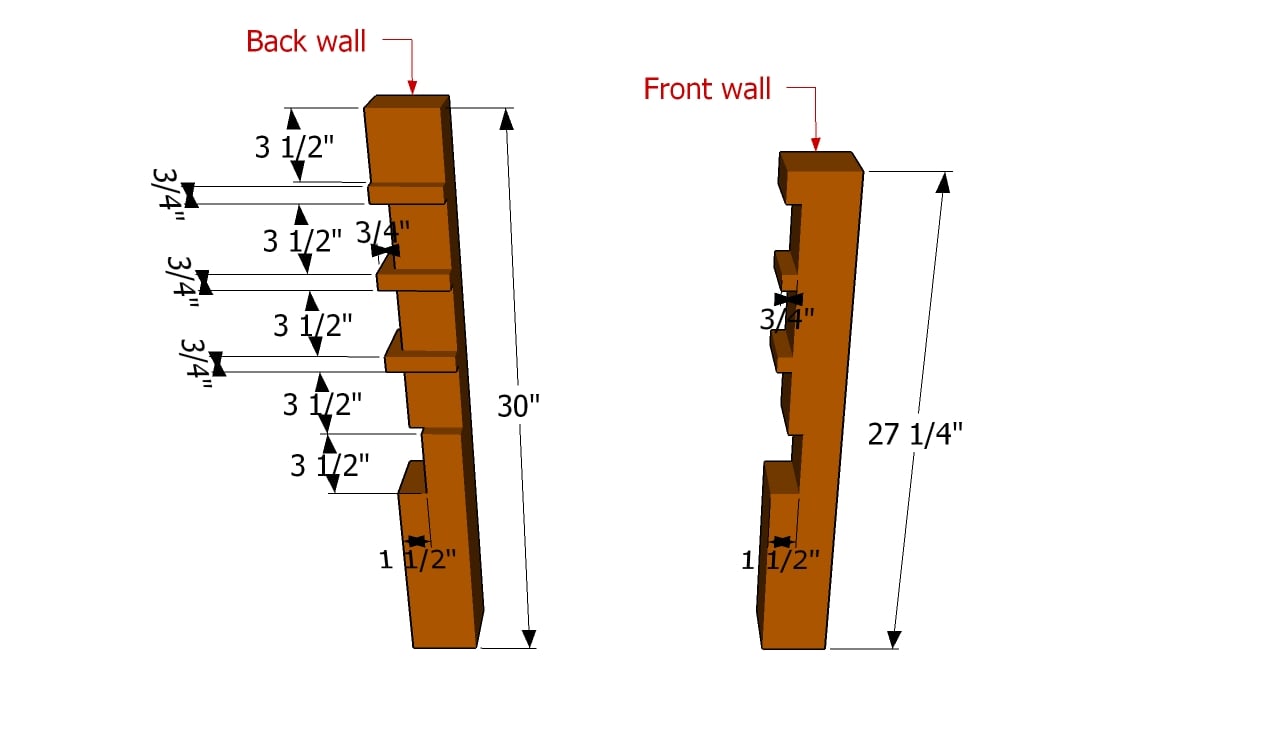
The first step of the project is to build the legs of the day bed. As you can see in the image, you need to cut out several notches inside the back and front posts. In order to make the notches, you can use a circular saw or a miter saw.
Irrespective of the case, set the blade of the saw at the right size and make several parallel cuts. Clean the recess with a chisel and smooth the surface with medium-grit sandpaper.
Legs – Back view
Continue the project by cutting the rest of the notches inside the legs. As you can see in the image, you should make additional cuts only in the back legs. Use a saw to make parallel cuts inside the marked area.
Work with great attention and with good judgement, if you want to get a professional result. It is essential to get an even surface otherwise the slats won’t fit into place or the daybed won’t have a neat appearance.

Building the frame of the daybed
Continue the woodworking project by building the frame and installing it into place. As you can see in the image, you need to build the frame out of 2×4 lumber. Assemble the frame with 2 1/2″ wood screws and check if the corners are right-angled.
Fit the frame to the wooden legs and drive in 2 1/2″ screws, after drilling pilot holes. Place 2×3 cleats inside the frame, about 3/4″ below the top edges. Use a spirit level to align the slats.
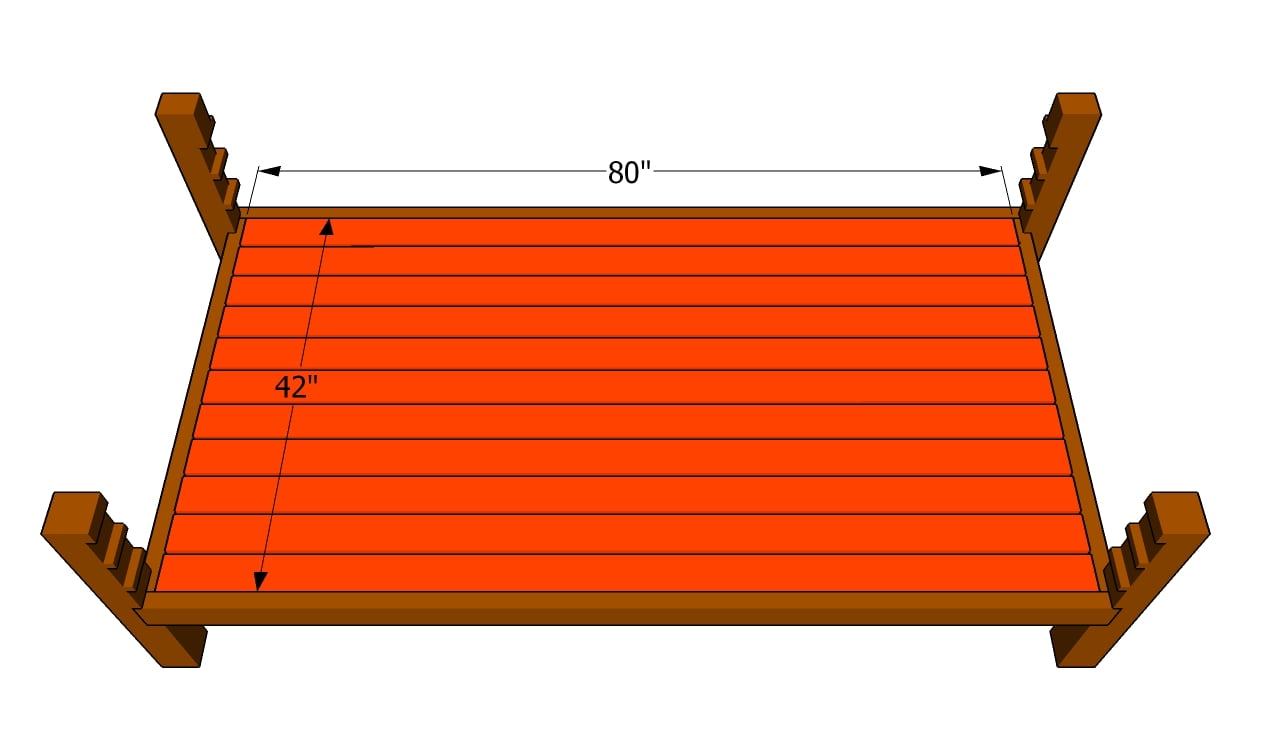
Installing the slats
The next step of the project is to install 1×4 slats to the frame of the daybed. Cut the slats at the right size and fit them inside the bed frame. Place the slats equally spaced, drill pilot holes and insert 1 1/4″ galvanized screws.

Fitting the side slats
Fit 1×4 slats inside the notches and secure them to the posts with 1 1/4″ finishing nails or screws. Make sure you align the slats at both ends and you add wood glue to reinforce the joints.
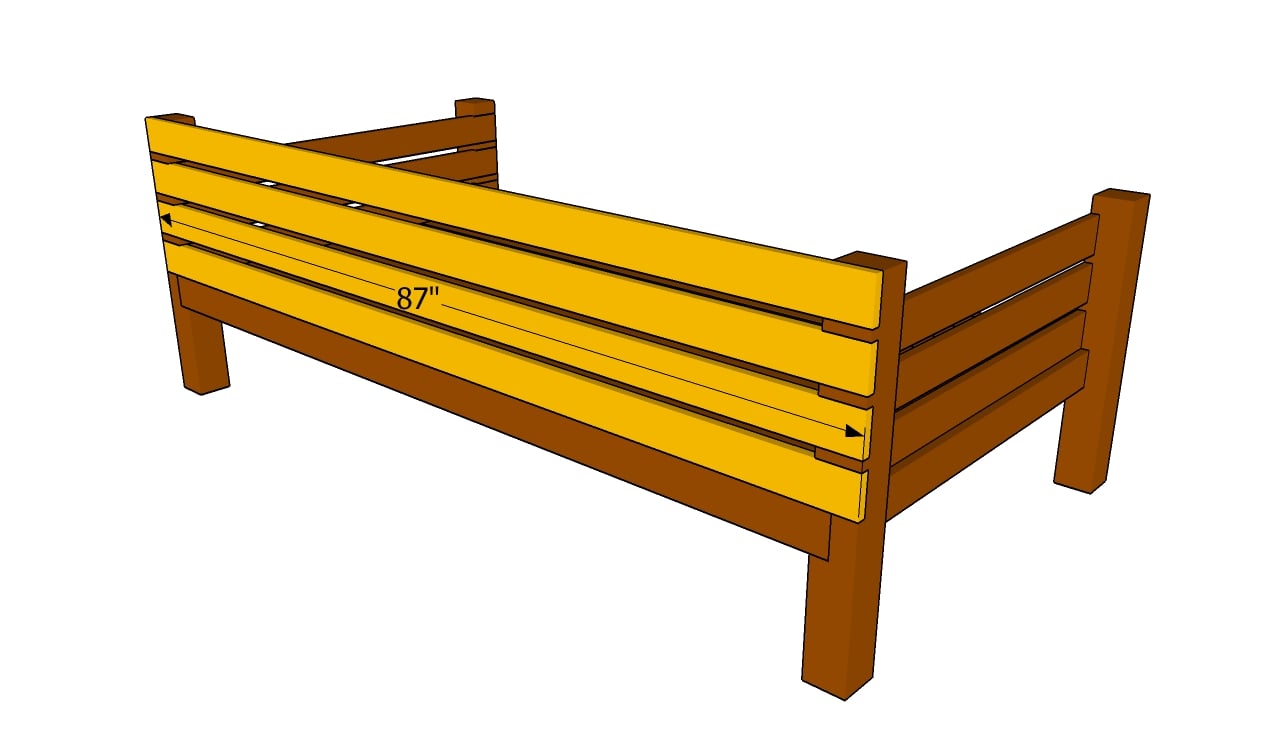
Installing the back rest
Cut 1×4 slats at 87″ and fit them to the back of the daybed. Work with attention, in order to prevent costly mistakes. Drill pilot holes and countersink the head of the screws, before inserting the wood screws.
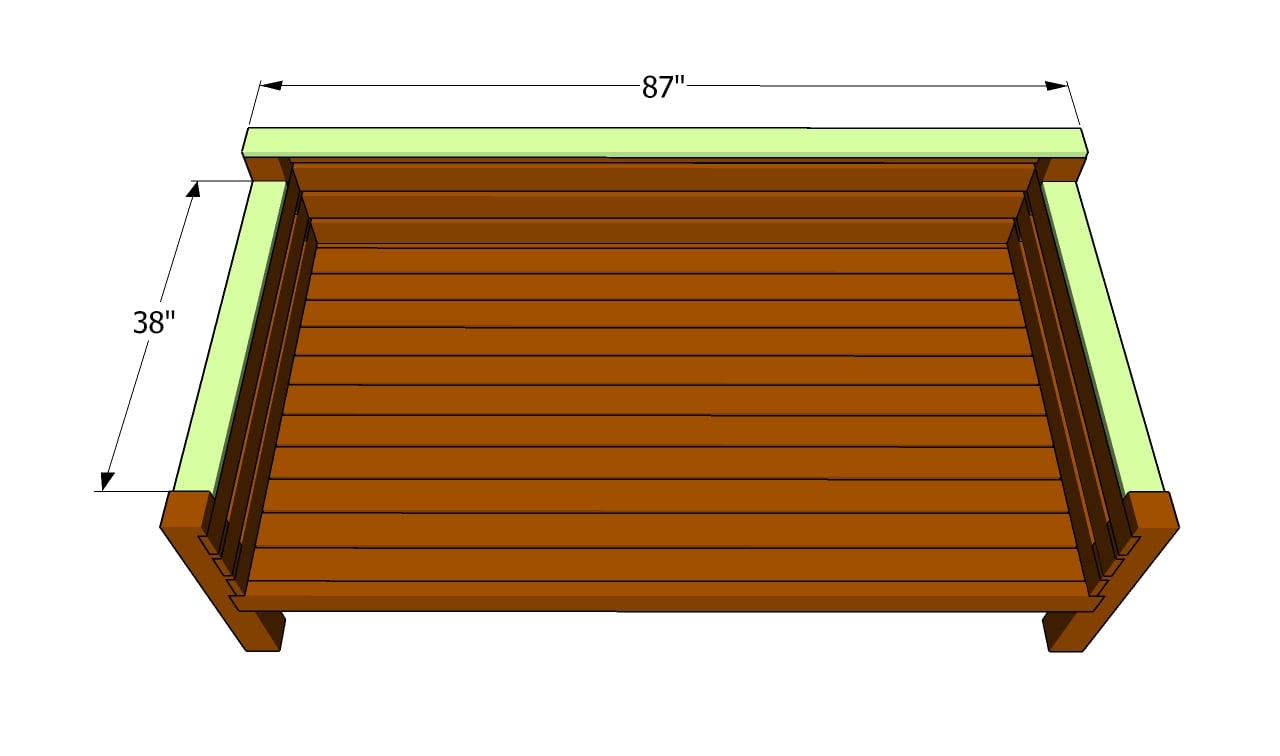
Fitting the trims
In order to enhance the look of the daybed, you should add 1×4 trims to the top of the components. Cut the slats at the right size and secure them into place with pocket hole screws.
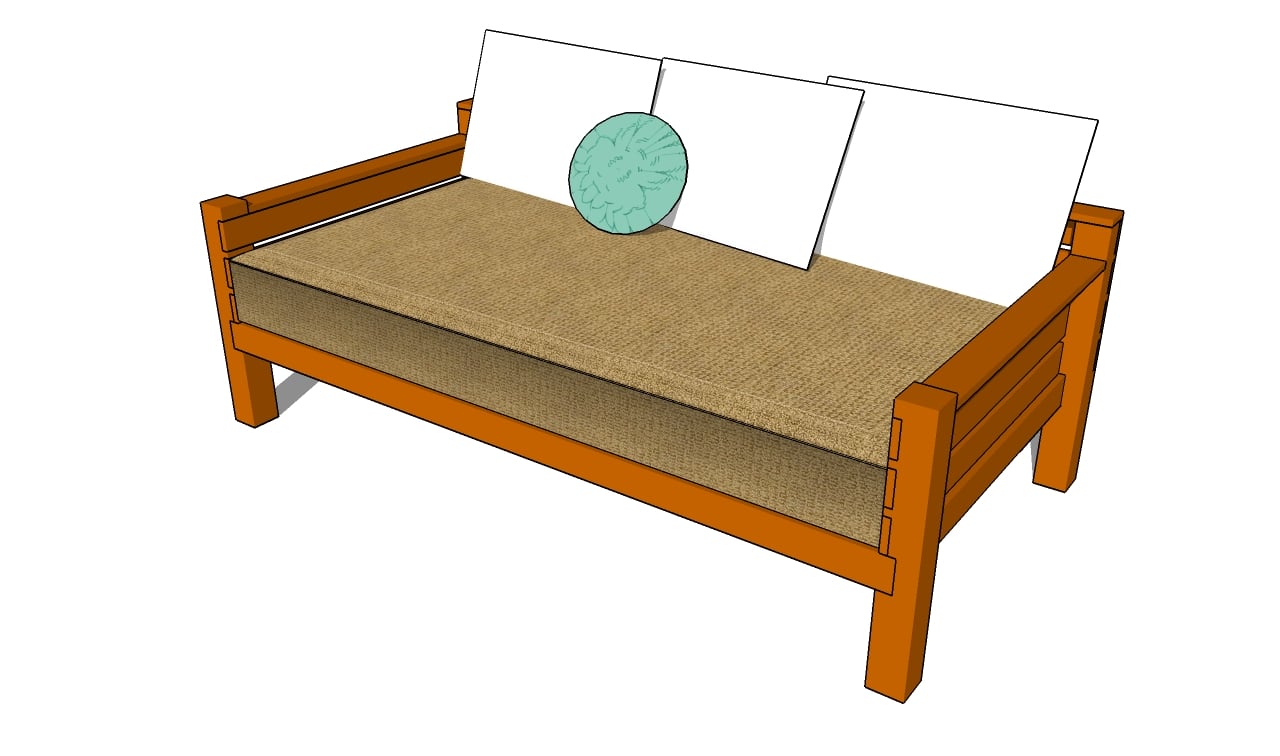
How to build a daybed
Last but not least, we recommend you to take care of the finishing touches. Fill the holes with wood filler and let it to dry out for several hours. Afterwards, smooth the wooden surface with fine-grit sandpaper.
Thank you for reading our project about how to build a daybed and we recommend you to check out the rest of the projects. Don’t forget to share our projects with your friends, by using the social media widgets.

1 comment
Do you know what measurements I’d need to change for a full size daybed?