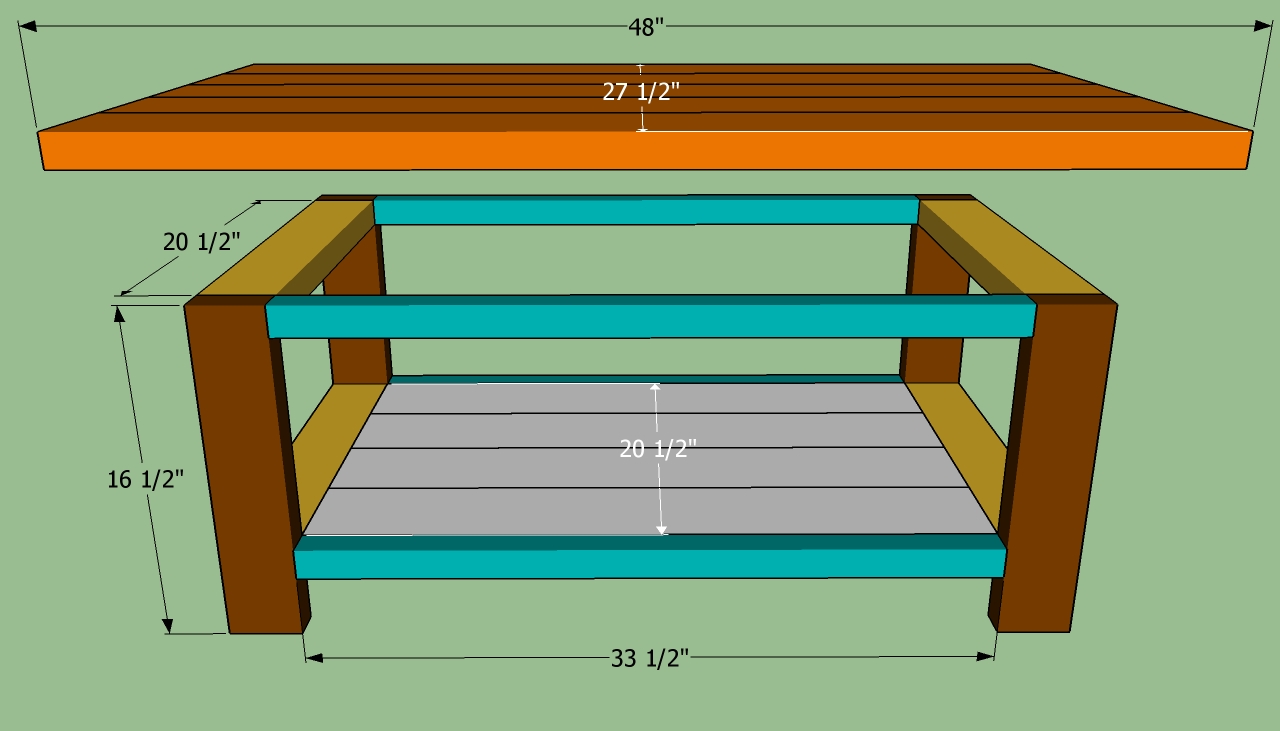
This step by step diy project is about how to build a coffee table. If you want to enhance the look of your living-room and get the job done by yourself, then building a coffee table will fit your needs. There are many designs and shapes you could choose from, therefore we recommend you to thoroughly study the alternatives and choose the plans that fit your needs and match the design of the rest of the furniture.
In order to obtain a professional result, you have to pay attention to several aspects. Therefore, measure the components several times before making the cuts, otherwise they might not fit together easily. Use a pocket hole jig to drill the pilot holes, in order to prevent the wood from splitting. Work with good judgement and great care, if you want to build your own table like a pro. See all my Premium Plans in the Shop.
Made from this plan
In order to build a coffee table, you needs the following:
Materials
- 4 pieces of 2×4 lumber – 16 1/2″ LEGS
- 4 pieces of 2×4 lumber – 20 1/2″, 4 pieces of 2×2 lumber – 33 1/2″ APRONS
- 4 pieces of 2×6 lumber – 33 1/2″ SHELF
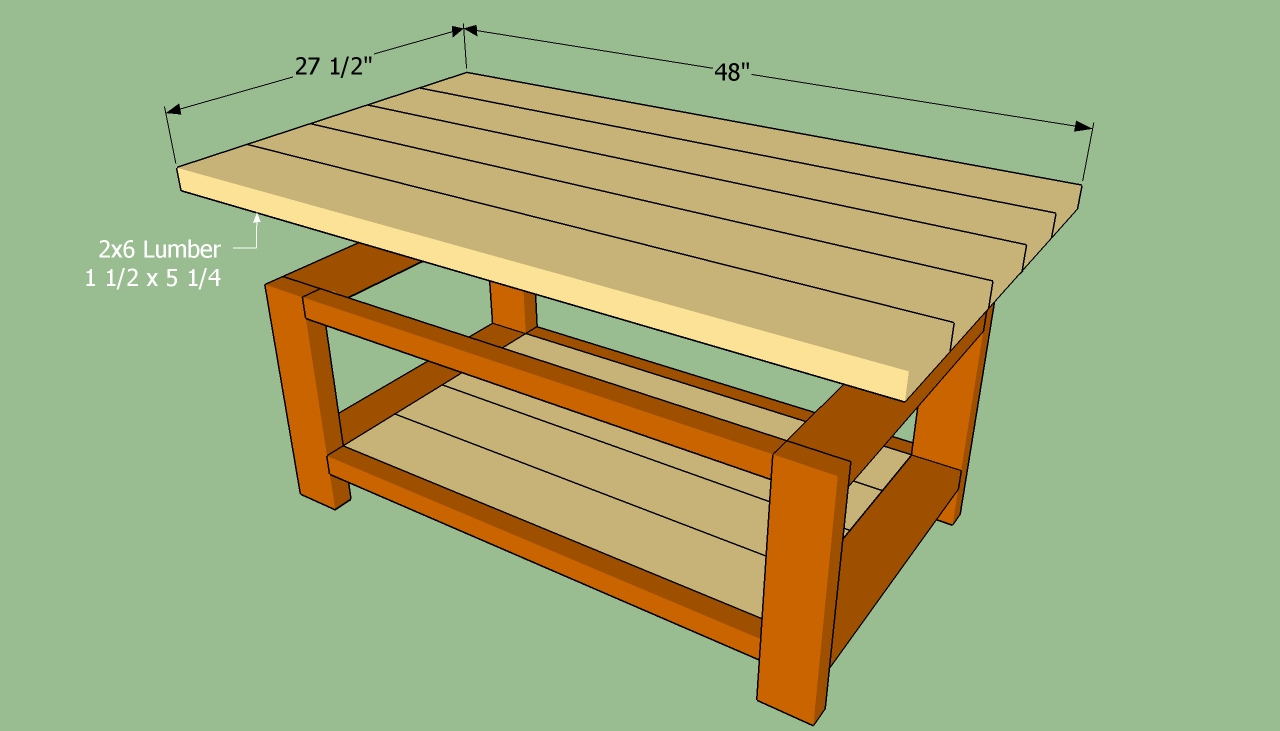
- 5 pieces of 2×6 lumber – 48″ TABLETOP
- 1 1/4” and 2 1/2” wood screws – SCREWS
- Wood glue
- 2 pieces of 2×4 lumber – 8 ft
- 1 piece of 2×2 lumber – 12 ft
- 3 pieces of 2×6 lumber – 8 ft
- 1 piece of 2×6 lumber – 10 ft
- 2 1/2″ screws
- 1 1/4″ screws
- glue, stain
- wood filler
Tools
- Safety gloves, glasses
- Miter saw saw, jigsaw
- Chalk line, tape measure, spirit level, carpentry pencil
- Drill machinery and drill bits
- Pocket hole jig
Tips
- Pre-drill holes in the wooden components, before driving in the screws
- Smooth the exterior edges of the components, by using a router with a 1/4” bit
Time
- One weekend
Related
Building a coffee table
Building a simple coffee table is a great project if you are an amateur builder or you just want to enhance the look of your living-room without investing a significant amount of money. In order to obtain a professional result, you should first build the frame and afterwards install the tabletop and the bottom shelf.
How to build a coffee table
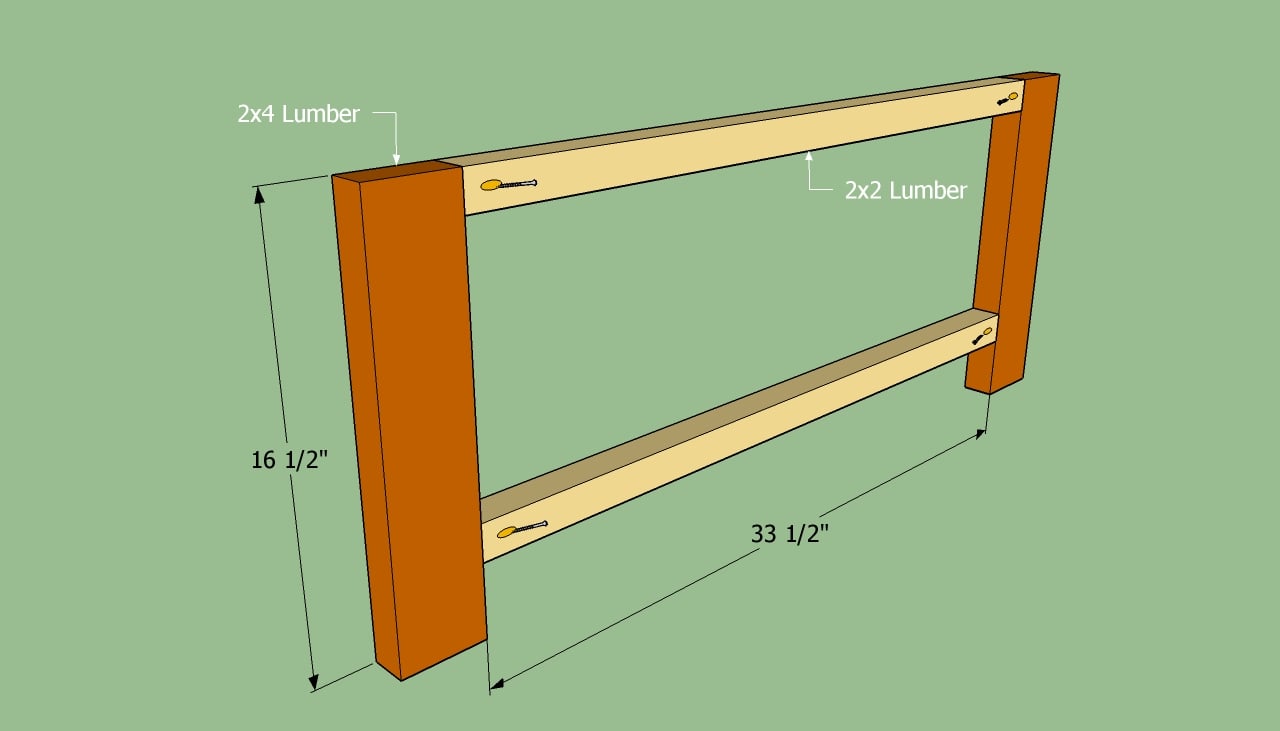
Assembling the sides of the table
First of all you have to build the sides of the coffee table. Therefore, build the posts from 2×4 lumber and and the aprons from 2×2 lumber. In order to join the components together, you should use a pocket hole system. Place the components on a level surface to obtain a professional result.
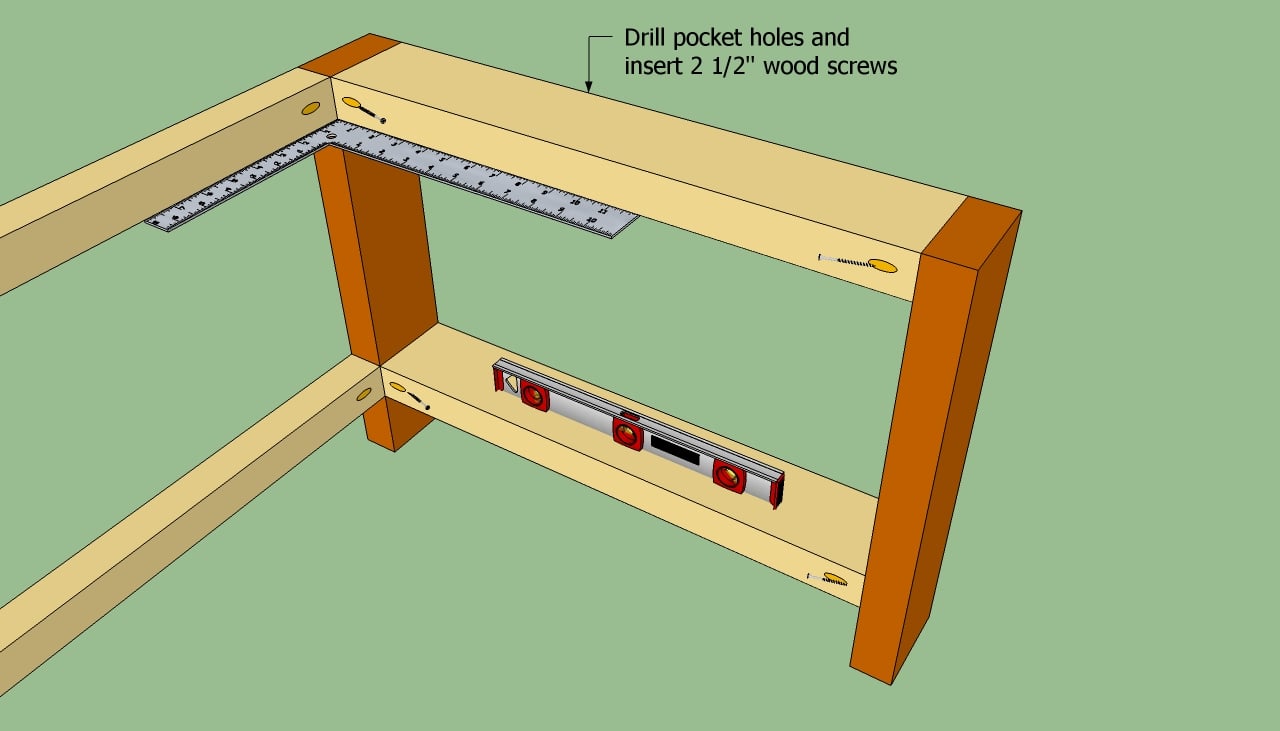
Installing the front aprons
Afterwards, you have to install the from and the back aprons, made of 2×4 lumber. In order to lock the aprons to the legs, drill pocket holes and insert 2 1/2” screws. Use a carpentry square to make sure the corners are right-angled.
In addition, level the aprons with a hand level. Moreover, plumb the sides of the table, before inserting the wood screws, in order to obtain a professional result.
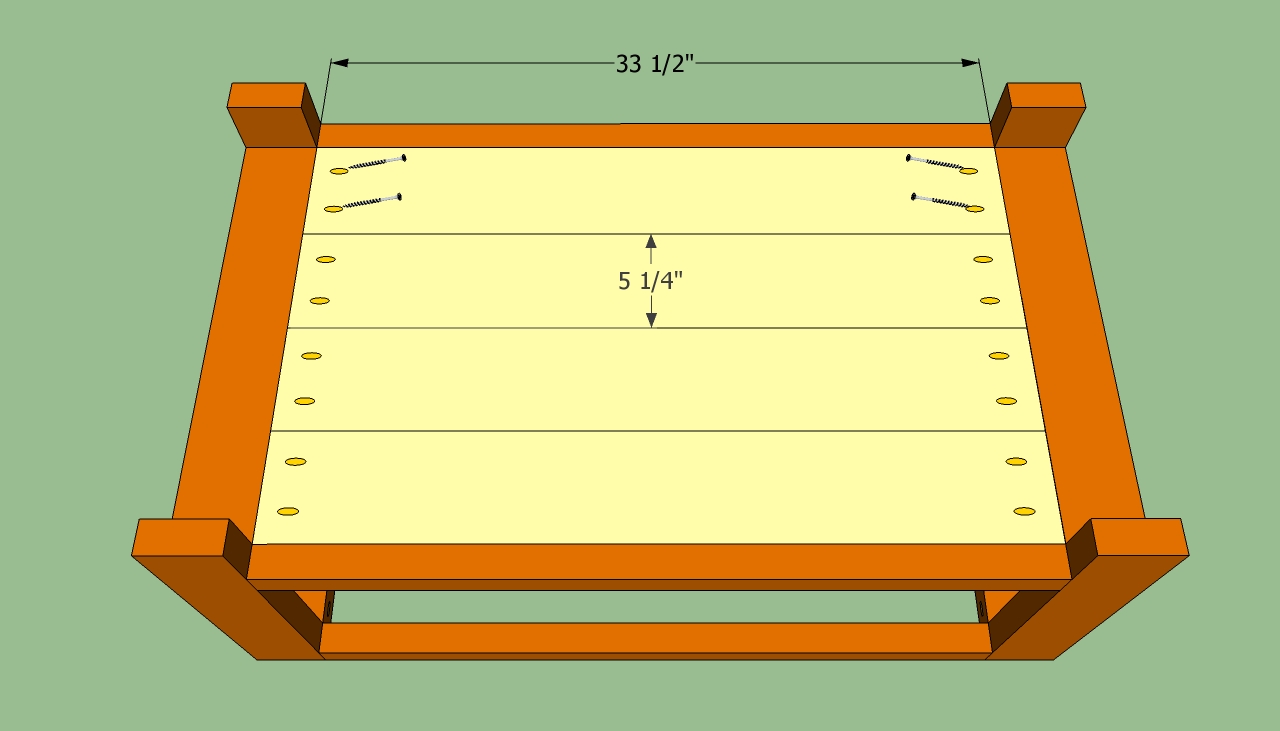
Building the bottom shelf
The next step of the project is to install the bottom shelf of the coffee table. Cut the 2×6 slats to the right size (make sure the slats are 5 1/4” wide) and fit them into place. Drill pilot holes and insert the 2 1/2” screws in the lumber. Add wood glue to the edges of the slats before fitting them into place.
Make sure the slats are perfectly horizontal, using the spirit level. Clean the excess glue with a cloth, before it dries out.
Attaching the top of the caffee table
Installing the tabletop is a straight forward procedure, if you use the right plans and techniques. Join the slats together with 2 1/2” wood screws and add glue to enhance the bond. Afterwards, center the tabletop on the frame and secure it with screws, trough the aprons.
If you don’t want to drill trough the top aprons, you should drill pilot holes trough the tabletop and insert 2 1/2” wood screws. Countersink the head of the screws, to obtain a neat appearance.
How to build a coffee table
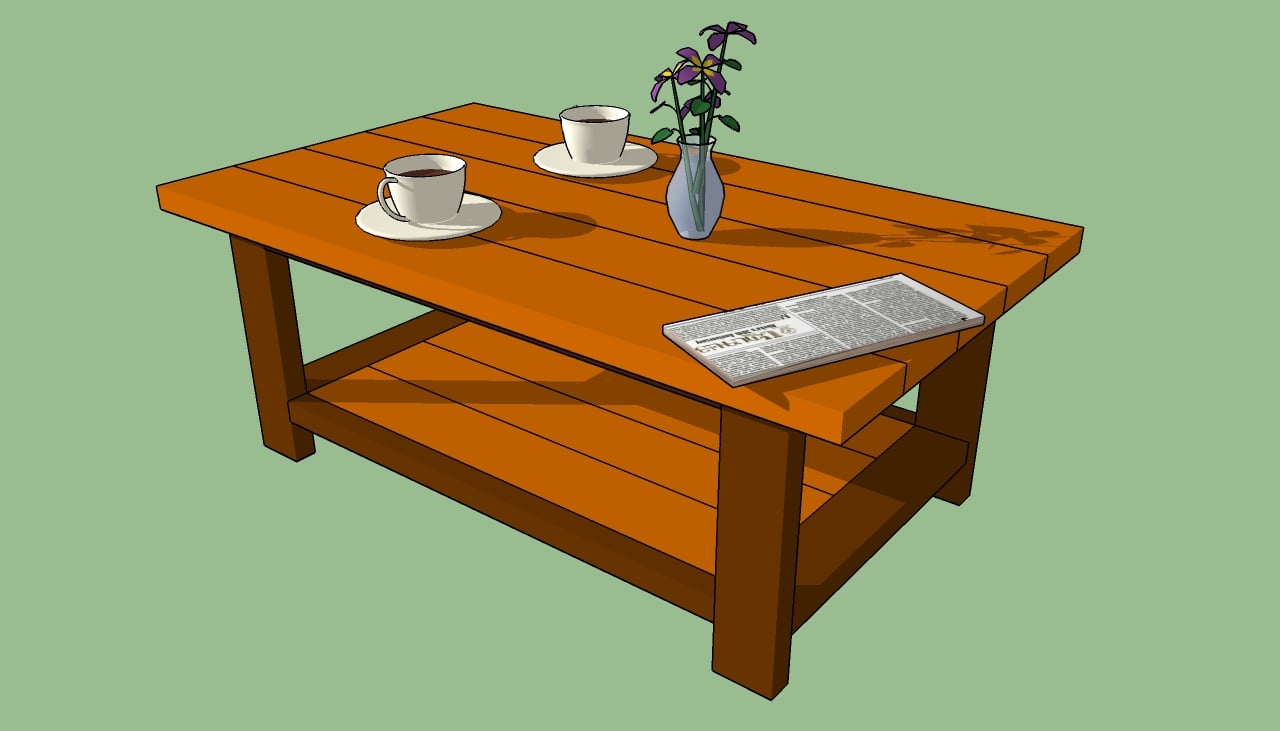
Last but not least you should take care of the finishing touches. Therefore, you need to fill the holes with a good wood filler and let the compound dry out properly for several hours. Afterwards, sand the surface with120-grit sandpaper and clean the dust with a dry cloth.
Thank you for reading our article about how to build a coffee table and we recommend you to check out the rest of our projects. Don’t forget to share our projects with your friends, by using the social media widgets.

