This article is about how to build walkways around the house with pavers. For this project we used concrete edging and double T pavers. We went for 32″ wide walkways that were built around the house for an easy access to the backyard and to protect the foundation from excessive moisture. In addition, the modern walkways add an unique charm to the house and it last for decades in a row.
We built the walkways on a sturdy concrete support layer that we poured before laying the pavers. In this tutorial I share quick and simple tips and tricks so you can build the walkways in a few days and have them for decades in a proper shape. Remember that you can select from lots of designs, shapes and materials when choosing the paving blocks, so the only limit is your budget and your imagination. See all my Premium Plans HERE.
Made from this plan
Materials
- pavers
- edging
- gravel, sand
- cement
Tools
- shovel
- rubber mallet
- angle grinder
- diamond blade
- concrete mixer
- spirit level
Time
- 1 weekend
How to Build Walkways around the House with Pavers
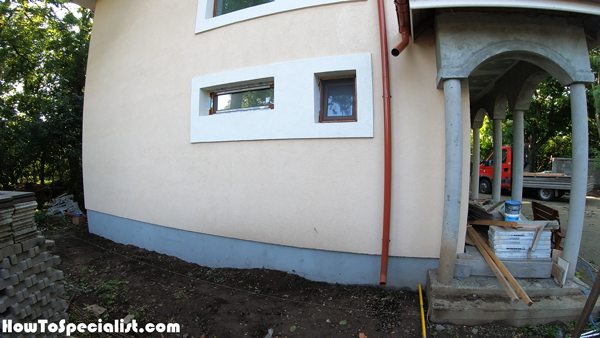
The first step of the project is to determine the width of the around the house walkways. We decided to go with 4 pavers which means 32″. We used batter boards and string to layout the walkways. Make sure the surface is level, otherwise you will need to make steps.
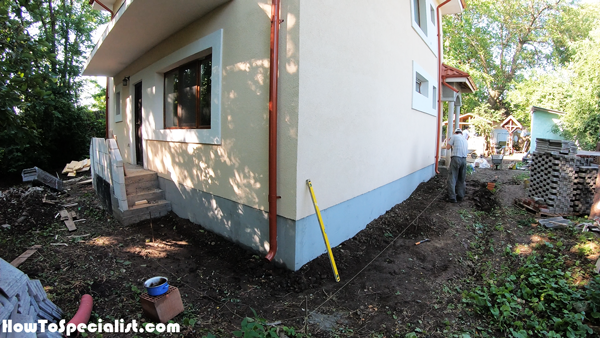
Before laying the actual pavers, you need to set the concrete edging. Dig about 6″ in the ground so you can set the edging in concrete. Follow the string so you can set the edging perfectly straight.

Next, mix concrete so you can set the edging into place. Don’t add too much water in the concrete, otherwise you won’t be able to work with it. You can mix the concrete in a wheelbarrow, so you can use a mixer. If you plan to do lots of concrete projects, I recommend you to buy one, because it saves you a lot of time and it is not that expensive.
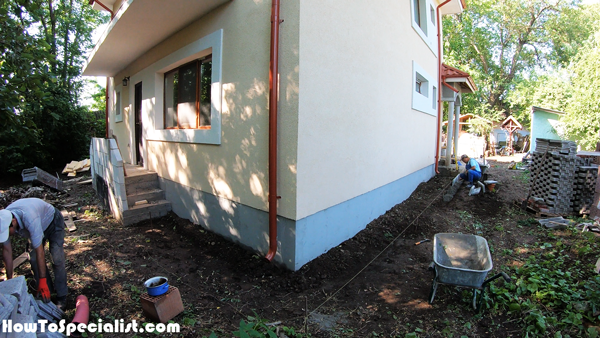
We installed the borders along the string, one by one. Leave no gaps between the edging pieces and use a spirit level to check if they are perfectly horizontal. Set the pieces in concrete and use a mallet to lock them into place tightly.
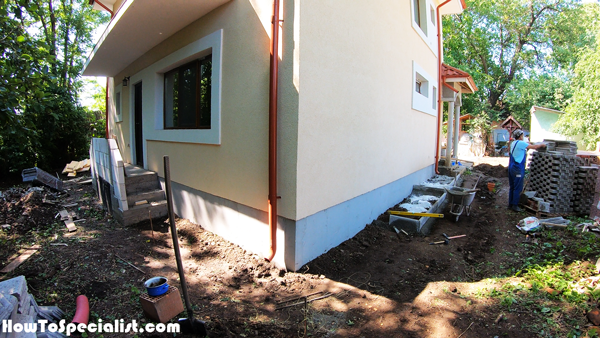
As you can see in the image, the ground around the house is not level, so we had to make a few steps in the walkways. Make sure the paver edging is horizontal.
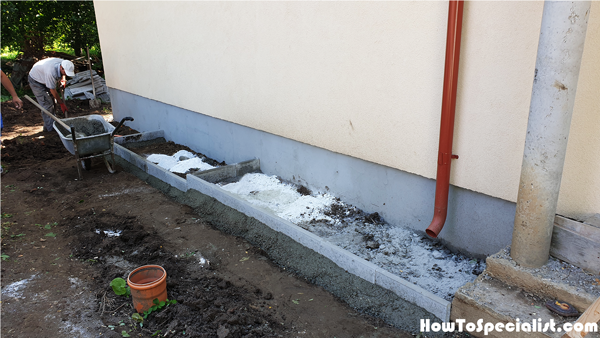
This is the perfect opportunity to get rid of some construction waste you have in the backyard. We had some hardened cement we put inside the edging.
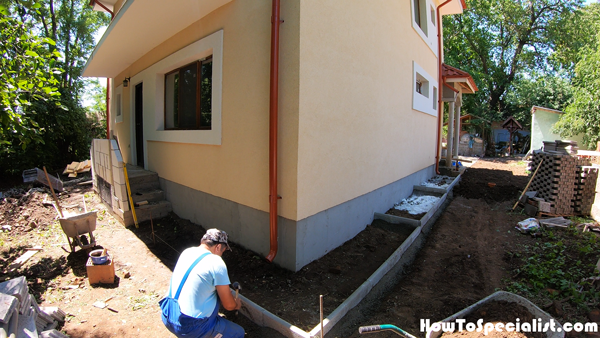
We continued installing the edging to the back of the house. Make sure you set the string so you have a guide when installing the concrete borders.
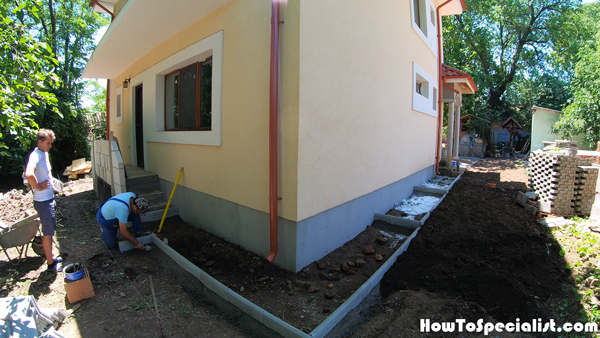
Use a trowel to set the concrete to the exterior of the concrete edging.
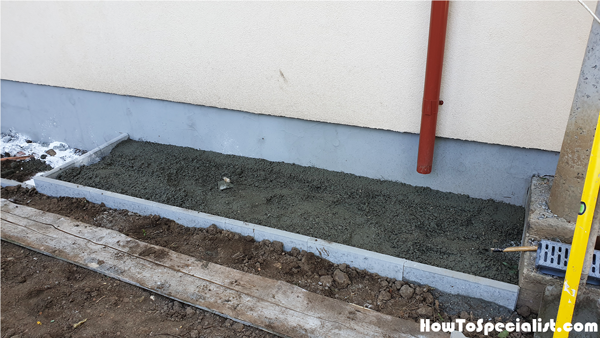
Next, you need to pour concrete to the walkways. However, you need to make sure you leave enough room to fit the pavers. We are going to use 2″ thick pavers so make sure you don’t fill them all the way up.
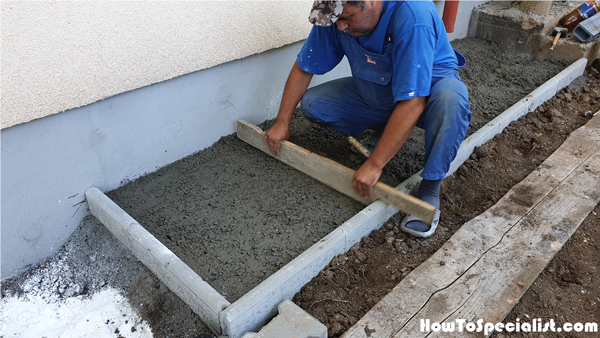
We made a quick jig using an old wooden board, so the support layer is exactly 2″ under the top of the concrete edging.
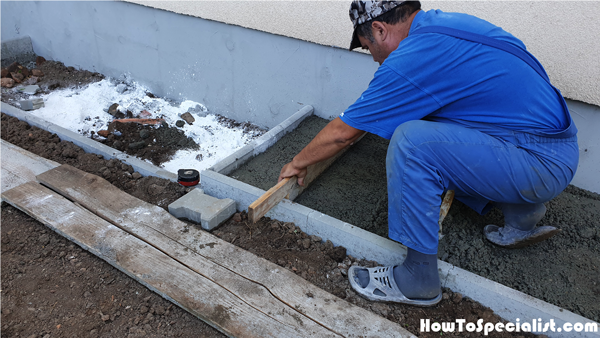
You can use the excess material to fill the rest of the walkways.
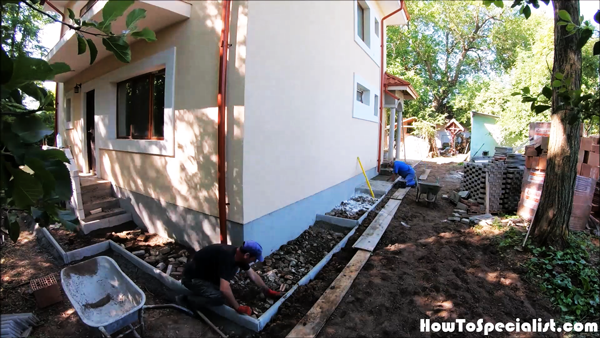
Lay the pavers to the support layer and use a mallet to make sure the surface is perfectly level. Leave no gaps between the pavers.
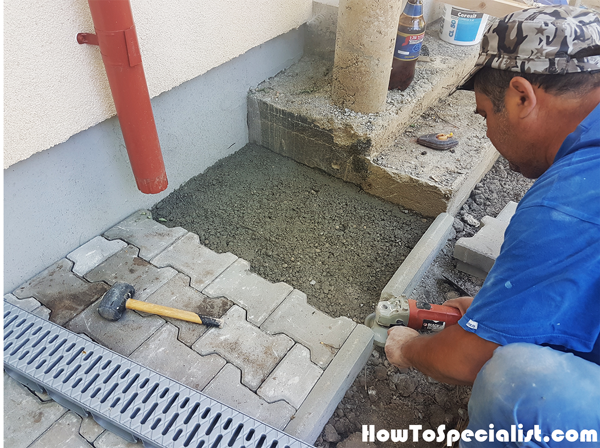
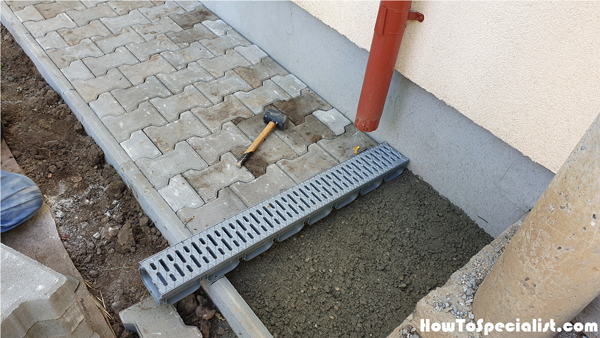
If necessary, you can easily install channel drains. Just use a angle grinder with a diamond blade so you can make a notch inside the edging so you can install the drains. You can select from many types of pavers (material, color, design) according to your tastes and budget. For this project we used double T concrete pavers.
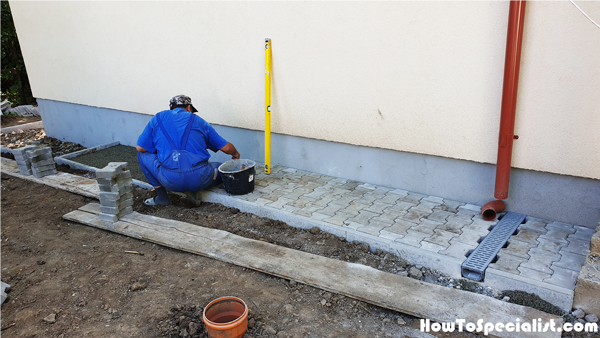
Fill the gaps between the channel drain and the pavers, if necessary.
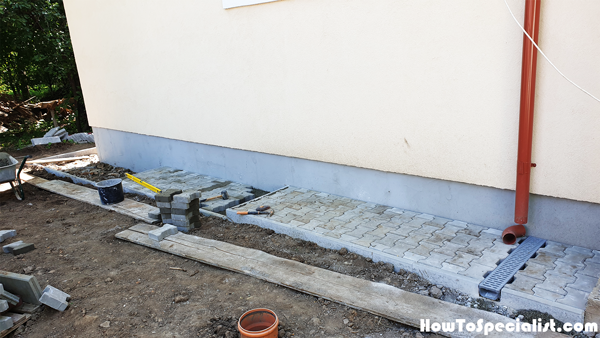
Continue the installation of the rest of the pavers to the other sections of the walkway.
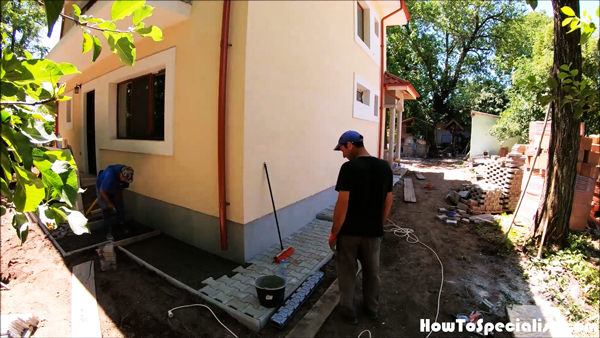
Once you set the support level, installing the paving blocks is a quick and straight forward job. Just make sure that everything is properly aligned.
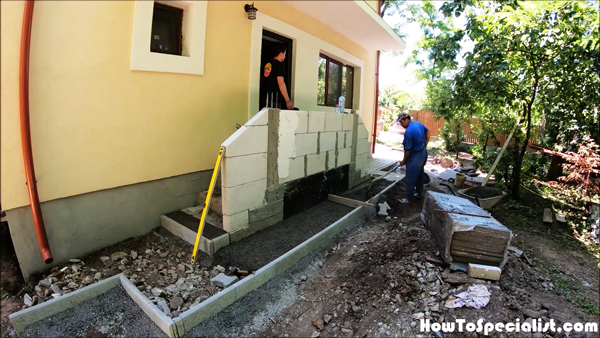
Install concrete edging to the other side of the house. Use the same techniques described above. Use the spirit level so you can check if the edging is horizontal. Add steps when necessary.
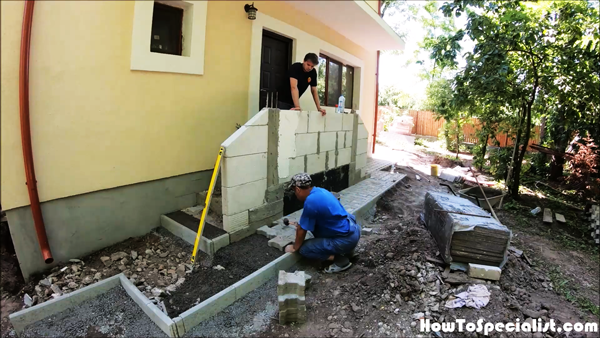
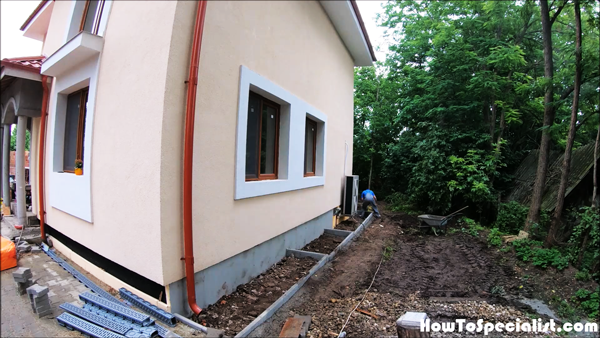
We built the walkways around the house on all sides. We went for a similar structure on both sides with 3 steps, considering the slope of the ground the house is built on. In addition, the walkway has the same width
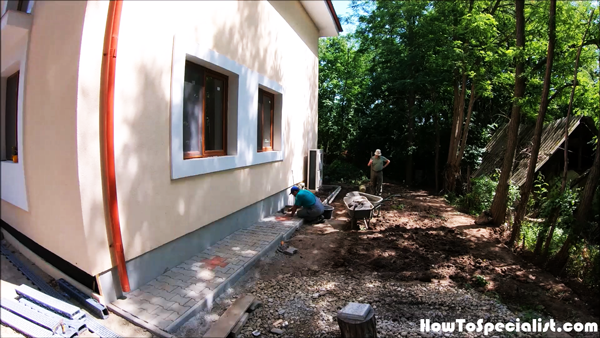
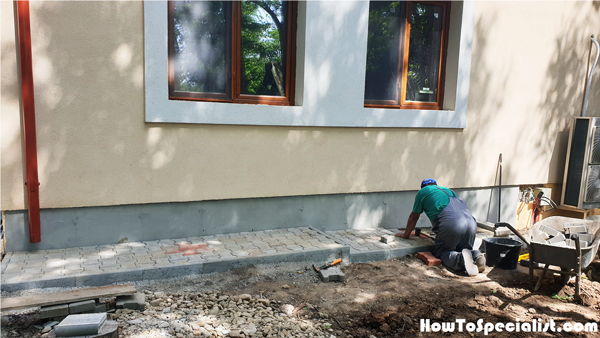
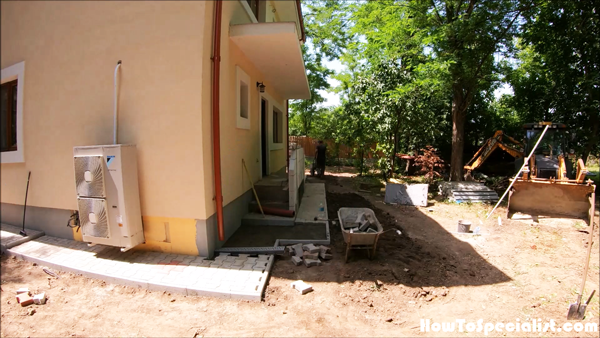
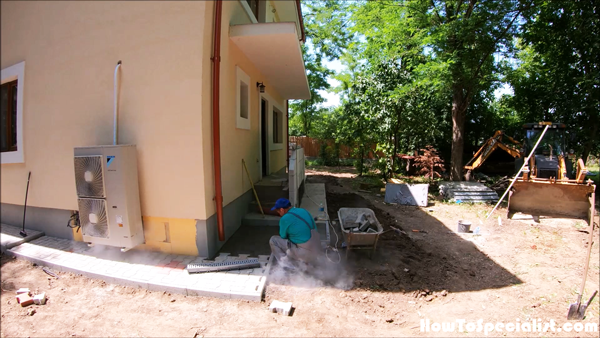
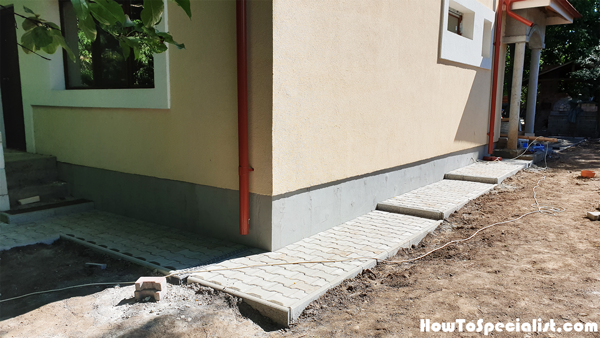
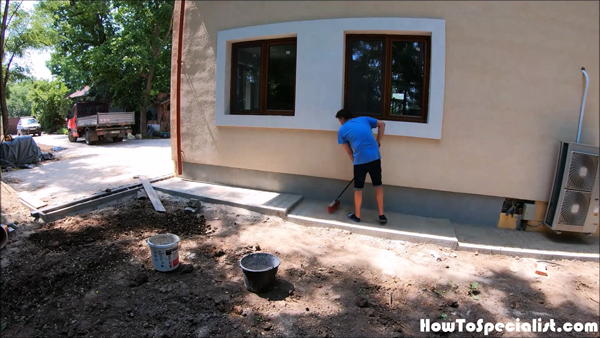
Last but not least, you need to fill the gaps between the paver blocks with fine sand. I used a harsh brush to fill the gaps. Be prepared to redo this step a few times over a few weeks until all gaps are filled completely.
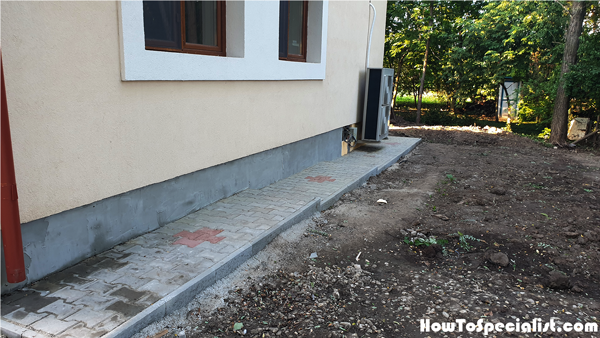
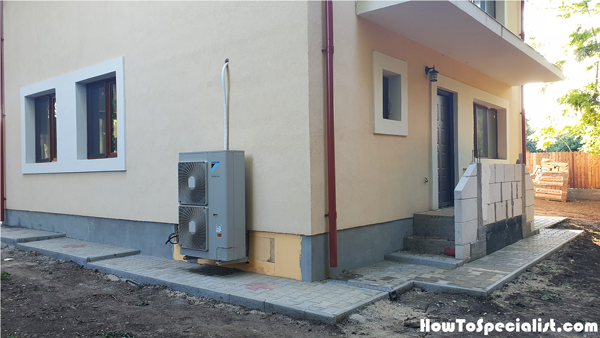
I am very pleased with how this project turned out and it add value to the house. You can easily go around the house without having to get your shoes dirty and the house foundation is also protected from moisture. In addition, the best part is that you can replace the pavers if you want to freshen up the look of the house, or if you consider a new color scheme. See all my home improvement projects HERE. See a full tutorial on how to build a concrete pump house on the blog, as well.
My best tips on making paver walkways around the house:
A paver walkway not only adds charm and curb appeal to your home but also creates a functional pathway that helps protect your lawn and garden from foot traffic. Whether you’re enhancing your front yard or creating a serene garden path, building a paver walkway is a great DIY project. Here are my best tips to help you create a durable and beautiful paver walkway around your house.
1. Plan and Design the Walkway
- Determine the Purpose and Layout: Decide where the walkway will go and what its purpose will be. Will it lead to your front door, wrap around the garden, or provide access to a backyard patio? Use stakes and string, or a garden hose, to outline the walkway’s shape and length.
- Choose a Pattern: Pavers come in a variety of patterns such as herringbone, basket weave, running bond, and more. Choose a pattern that fits your aesthetic and skill level.
- Consider Walkway Width: A standard walkway should be 2-3 feet wide, allowing enough space for comfortable walking. Wider paths may be necessary for larger areas or if the walkway will be used frequently.
2. Gather Materials and Tools
- Pavers: Choose durable pavers made from concrete, brick, or natural stone that suit the style of your home. Be sure to purchase about 10% extra to account for cuts and mistakes.
- Gravel and Sand: You’ll need gravel (crushed stone) as a base layer and sharp sand for leveling beneath the pavers.
- Edging Material: Use plastic, metal, or brick edging to keep the pavers in place and prevent shifting over time.
- Tools: Gather tools like a shovel, rake, level, tamper or plate compactor, rubber mallet, measuring tape, and broom for the installation.
3. Excavate the Walkway Area
- Mark the Path: Use stakes and string or spray paint to mark the outline of the walkway.
- Dig the Pathway: Excavate the area to a depth of about 6-8 inches. This includes space for the gravel base, sand, and pavers. Make sure to remove all grass, roots, and debris from the area.
- Slope for Drainage: Ensure the path has a slight slope (about 1 inch per 4 feet) away from your home to allow water to drain properly and prevent puddling.
4. Lay the Gravel Base
- Spread the Gravel: Add a 3-4 inch layer of crushed gravel (MOT Type 1 or similar) across the entire path. This base provides stability and prevents the pavers from shifting.
- Compact the Gravel: Use a hand tamper or a plate compactor to press the gravel firmly into place. This step is crucial for creating a solid foundation for your pavers.
- Check for Level: Ensure the base is level, but maintain the slight slope for drainage.
5. Add a Layer of Sand
- Spread Sharp Sand: Add a 1-2 inch layer of sharp sand on top of the gravel. This sand acts as a bedding layer for the pavers.
- Screed the Sand: Use a screed board or a straight piece of wood to level the sand evenly. This ensures a flat surface for the pavers to rest on.
- Avoid Compacting the Sand: The sand should remain loose and leveled, but not compacted, as the pavers will settle into the sand during installation.
6. Lay the Pavers
- Start from One End: Begin laying the pavers from one end of the path, ensuring they are placed tightly together. You can use spacers to maintain consistent gaps if desired.
- Tap Pavers into Place: Use a rubber mallet to tap the pavers into the sand and ensure they are level with each other.
- Check Alignment Frequently: Continuously check for level and alignment as you lay the pavers. If any pavers are uneven, adjust the sand underneath as needed.
7. Cut Pavers for Curves or Edges
- Use a Paver Cutter or Saw: If your walkway has curves or unique shapes, you’ll need to cut some of the pavers to fit. Use a paver cutter or a wet saw with a diamond blade to make clean cuts.
- Fit the Cut Pavers: After cutting, place the pavers in their spots and check for a snug fit. Tap them into place using the rubber mallet.
8. Install Edging for Stability
- Add Edging Along the Walkway: Once all the pavers are laid, install edging along the sides of the walkway. This prevents the pavers from shifting over time and helps maintain the walkway’s shape.
- Secure the Edging: Anchor the edging with spikes or stakes, driving them into the ground every few feet to ensure stability.
9. Fill Gaps with Sand
- Spread Jointing Sand: After the pavers are in place, spread fine sand or polymeric sand over the surface of the walkway.
- Sweep Sand into Gaps: Use a broom to sweep the sand into the joints between the pavers, filling all gaps.
- Compact and Repeat: Use a plate compactor to settle the pavers and the sand. After compacting, spread more sand and sweep it into the joints until they are completely filled.
10. Compact the Walkway and Clean Up
- Compact the Pavers Again: Once the gaps are filled with sand, compact the pavers again with a plate compactor. This will ensure the pavers are fully settled into the sand bed.
- Sweep the Surface: After compacting, sweep away any excess sand from the surface of the pavers. Your walkway is now ready for use!
11. Maintain Your Paver Walkway
- Reapply Sand as Needed: Over time, the sand between the pavers may settle or wash away. Check the joints periodically and add more sand to keep the pavers stable.
- Clean the Pavers: Regularly sweep the walkway to keep it clean. Use a pressure washer for deeper cleaning, but be careful not to dislodge the sand between the pavers.
- Weed Control: Keep an eye out for weeds growing between the pavers. Use a natural weed killer or apply polymeric sand, which hardens and prevents weed growth.
Building a paver walkway is a rewarding DIY project that can enhance the look and functionality of your outdoor space. By following these steps and using high-quality materials, you’ll create a beautiful and durable pathway that will last for years. Whether you’re adding curb appeal to the front yard or creating a peaceful garden path, a well-built paver walkway is the perfect finishing touch for your home.
Thank you for reading our article on how to make walkways around the house with concrete pavers and we recommend you to check out the rest of our projects. Please share our articles with your friends by using the social media widgets.


