This diy article is about how to build a deck step by step. Building a deck is a great addition to any house, as it creates an extra-space that can be used as a place to take your dinner or to read a good book. As you probably imagine, there are many designs, shapes and models to choose from, therefore you should decide the plans you are going to use, according to your needs, tastes and budget. If you want to build a deck attached to your house, you could either install a ledger along a wall, or build it on 4×4 wooden posts on all sides.
Before starting the actual project, we recommend you to read carefully the building codes, as to fulfill the legal regulations. In most of the cases, there are several requirements regarding the depth of the holes that support the posts, or the wooden beams you have to use. In addition, you should pay attention to the location of your deck, as to have both a functional and aesthetic role.
There are many techniques you have to know before building a deck, but in this step by step article we show you the main methods needed to obtain a professional result. It is essential to lay out the deck properly, therefore we recommend you to use batter boards and string. In addition, all the elements have to be placed at certain distances one from another, therefore you should use a tape measure regularly. Last but not least, you should buy quality materials, designed for outdoor use, such as pressure-treated lumber or cedar. See all my Premium Plans in the Shop.
Made from this plan
In order to build a deck step by step, you need the following:
Materials
- Tube forms
- Cement, sand, gravel
- 4” and 6” long nails / screws
- Adjustable post anchors
- 2×6 joists, 2×4 decking
- 2×2 balusters
Tools
- Safety gloves, glasses, Circular saw, chalk line
- Hammer, spirit level, carpentry pencil
- Posthole digger. Power mixer
Tips
- Lay out the deck in a professional manner, using batter boards and string
- Plan the deck according to your needs and tastes
Time
- Two weekends
Laying out the deck

Installing ledger
Building a deck next to your house can be done in several ways. On one hand, you could build a floating deck, meaning that although it might look as attached to the house, it is actually supported by 4×4 posts along the edges. On the other hand, you could install a 2×6 ledger to the structure of your house, by driving in lag bolts.
Attach the ledger to the siding of the house and install a vinyl flashing, to drain the water properly.
Laying out the deck
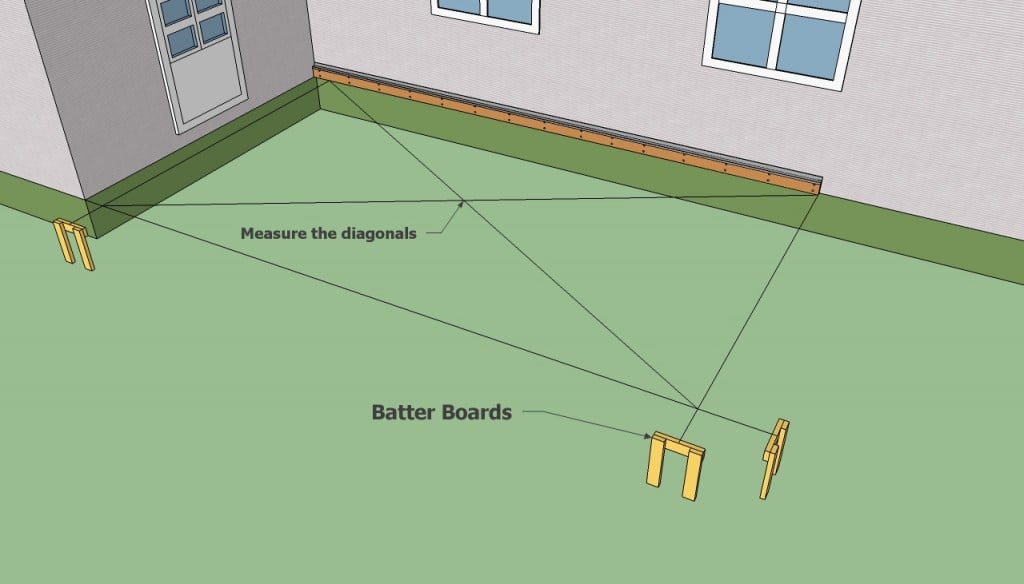
After you have attached the ledger to the house (use a spirit level to make sure it is horizontal), you should lay out the deck accurately. Therefore, you have to build batter boards from 2x4s and use string to set out the deck, as in the image.

Installing deck posts
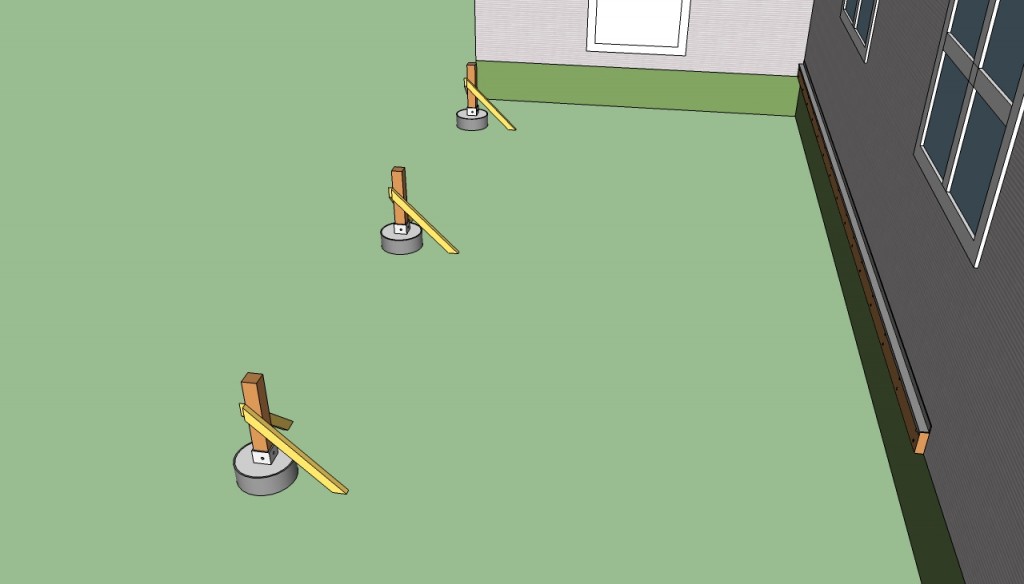
Dig holes every 10-14′ at least 3′ deep ( 10” under the frost line) using a shovel or posthole diggers. Pour a 4” layer of gravel and set the tube forms in the holes. Mix a small quantity of concrete, fill the forms, and install the post anchors.
Let the concrete dry out at least 72 hours before attaching the posts. Plumb the 4×4 posts, brace them with 2x4s and drive in screws to lock them into position.
Deck posts
The posts should be perfectly aligned, otherwise you won’t be able to install the girder and build the rest of the deck. When cutting the posts, you should make sure their highest point is level with the bottom of the ledger.
How to build a deck step by step

Installing the girder
Building the girder can be done in several ways: positioning a beam made of two 2×6 on top of the posts, using a 4×4 post or placing two 2×6 lumber to opposite sides of the posts. We recommend you to level the beams and lock them into place with props and clamps.
Drill two pilot holes about 1” from the edges, through the girders and posts, and install carriage bolts. Use washers under the bolts and nuts.
Installing deck joists
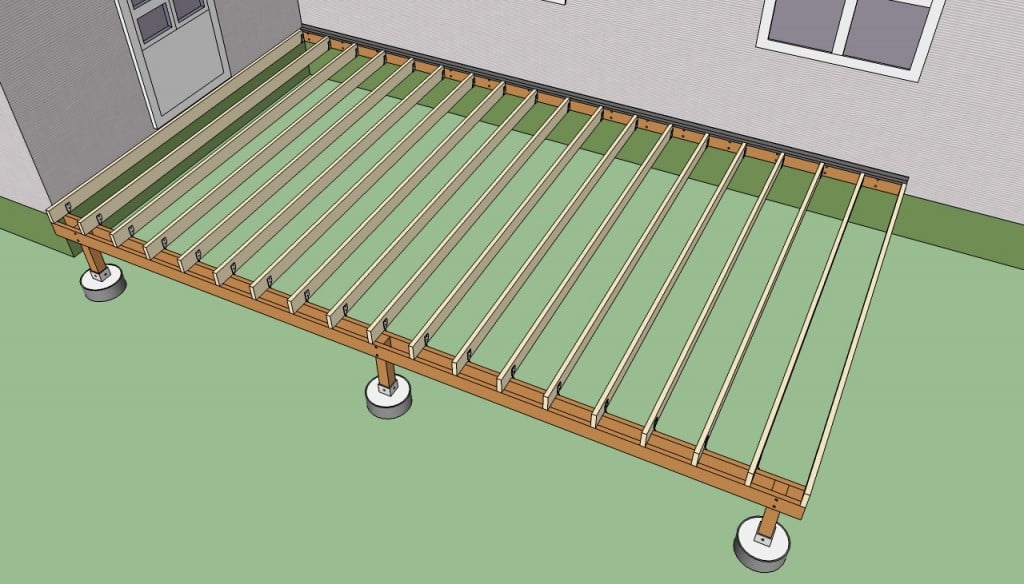
Next, you have to install the 2×6 wooden joists, every 16” on center. In most of the cases, you should start the process by installing the joist along the wall. Taking into account you don’t have access to both sides of the joists, you should lock it into position using a corner bracket.

Securing joists with hangers
Securing the rest of the joists is easy, as you should install the joist hangers into place and then drive in the nails in the 2×6 beams, using a hammer. Work with great care, making sure you place the joists equally spaced and check their alignment with a spirit level.
Secure the outer joist with a corner bracket, on the interior face. In this manner, the deck will have a neat look and it will be easier to install the rail.
Fastening joists to ginder
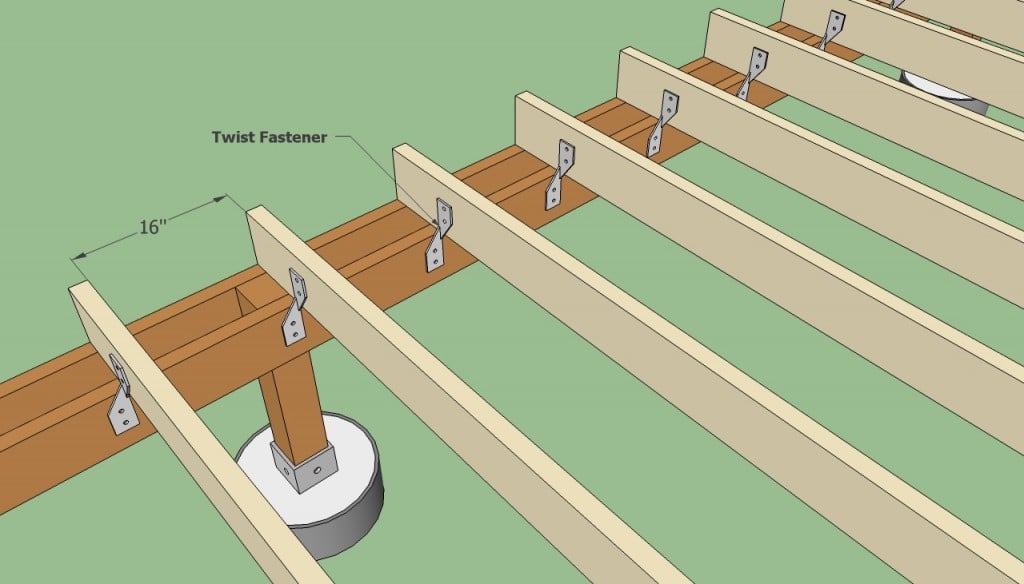
In order to obtain a rigid structure, we recommend you to place a twist fastener at the intersection between the girders with the joists. Work with great care and with good judgement, otherwise the structure of the deck won’t be perfectly level.
Installing bridging
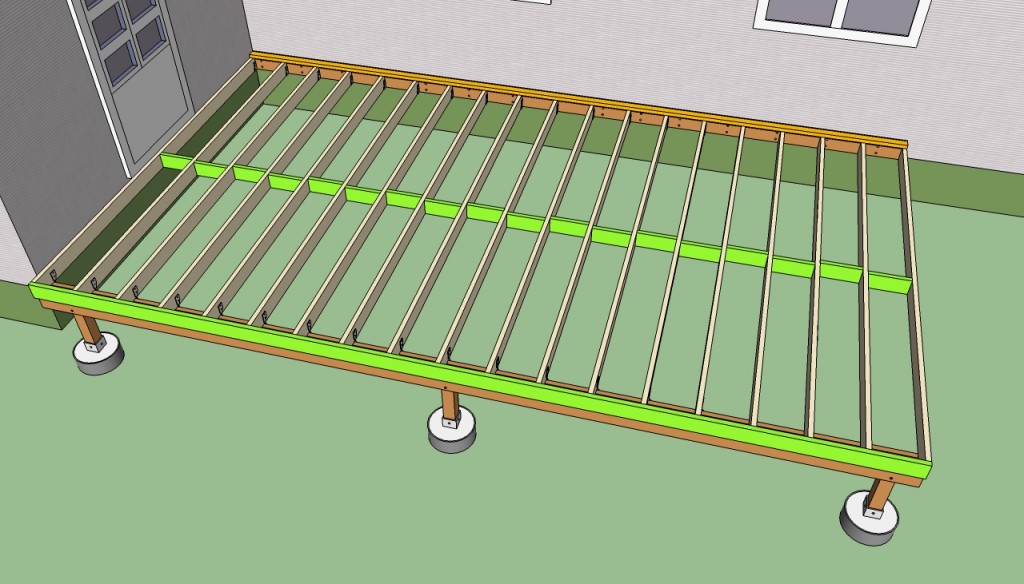
Installing the header joists is the last step before attaching the bridging. Remember that it should have the same size as the ledger, therefore you could build it from the very beginning. Set it into place by driving nails through the header into the joists and install metal hangers.
Cut the bridging from regular joists and drive in two nails into each of its edges. Plumb the bridging with a level, before inserting the nails.
Installing decking
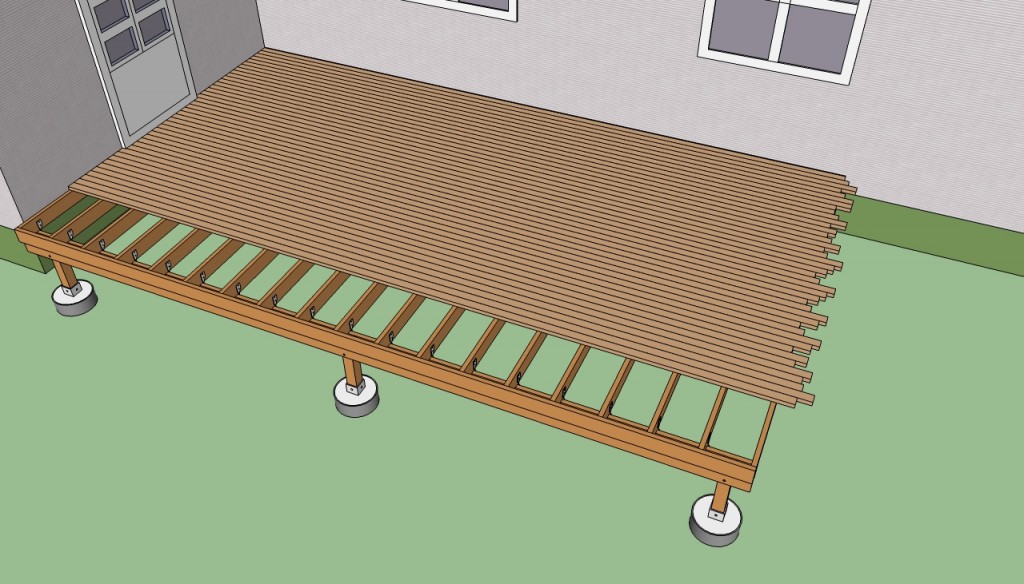
You should leave a 1/2” gap between the first decking board and the house. Drive the nails an inch from each edge, to avoid wood splitting. The butt joints should be placed over the middle of the joists.

Cutting decking boards
After you have installed the decking boards over the whole surface of your deck, you should adjust their dimension, by using a circular saw. Therefore, we recommend you to snap a chalk line from one end to the other and cut along the mark with a circular saw.
If you want to obtain a professional result, you should install a breadboard edging along the edges of the deck.
Installing railing posts
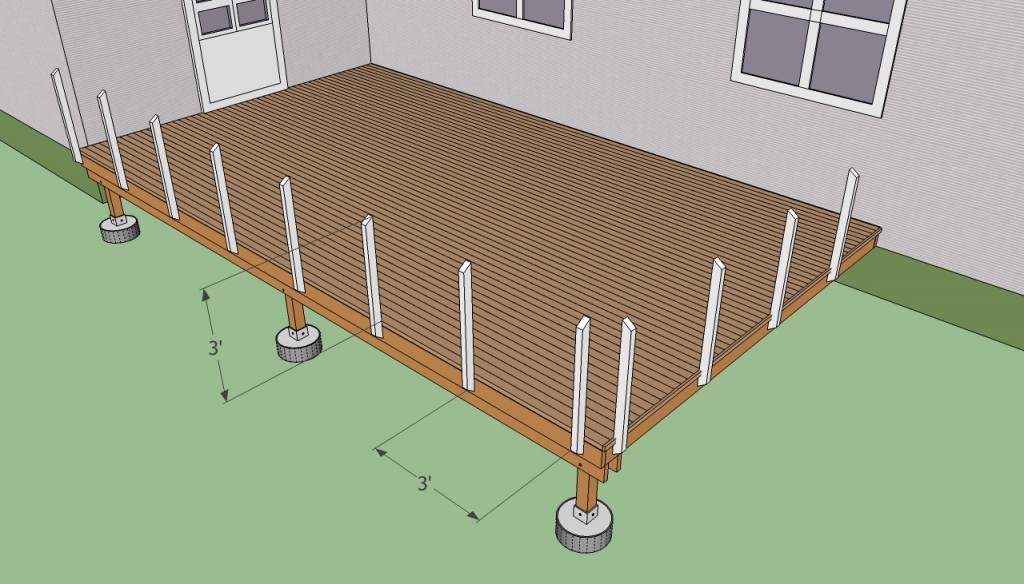
Next, you have to secure the deck posts, every 3′, starting with the points along the walls. In order to build the wooden posts, you can use 2x4s or 4x4s, according to your needs and tastes.
Work with great care and attention as to get the job done in a professional manner. If you want to obtain a professional result, you should notch the posts in the places where you will install the bottom and the top rails.
Installing deck railings
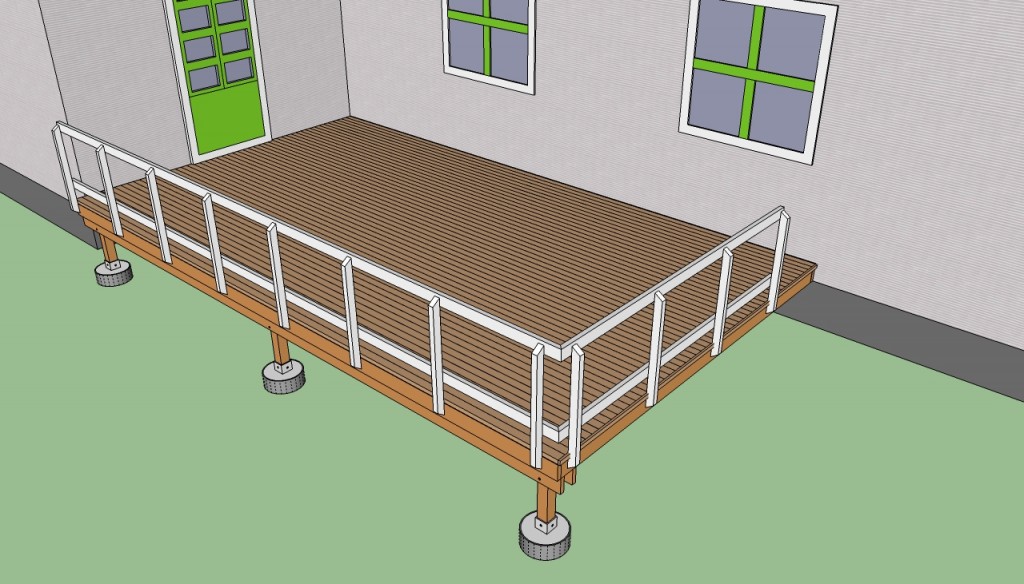
Installing the bottom and the top rails is easy, if you use the right tools, techniques and plans. As you can probably imagine, there are many designs and models to choose from, so you should make you decision according to your needs, tastes and budget.
Use a spirit level when placing the railings into place and countersink the screw holes before securing them into place.
Installing deck balusters
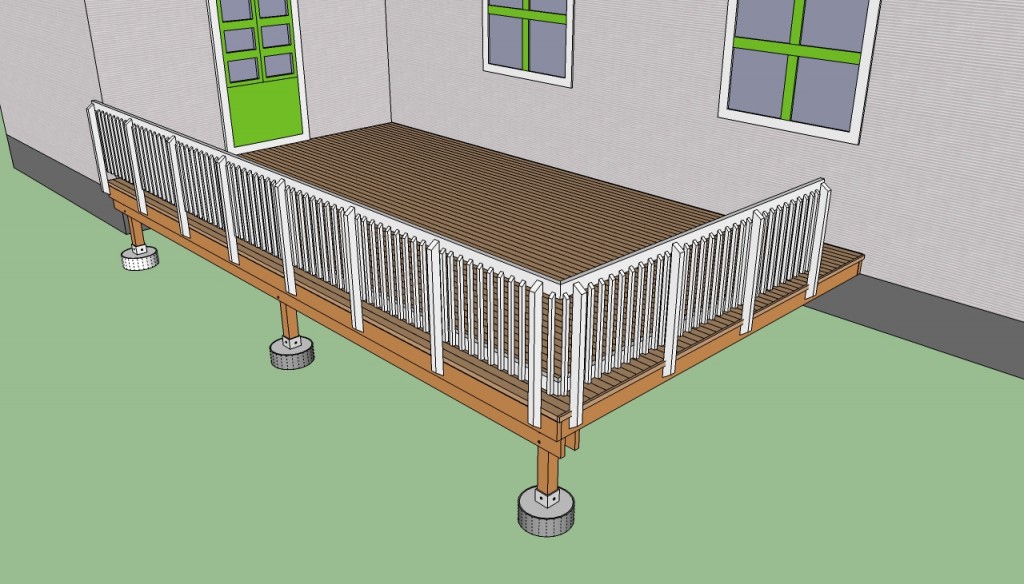
After you have attached the posts and the wooden railings, you should get the job done by installing the 2×2 balusters. If you want to make your deck stand out, you should cut the ends of the balusters, as in the image.
Use a block of wood as spacer when installing the balusters, as to obtain consistent gaps. Drill pilot holes through the balusters to avoid the splitting the wood and drive in 3” screws.
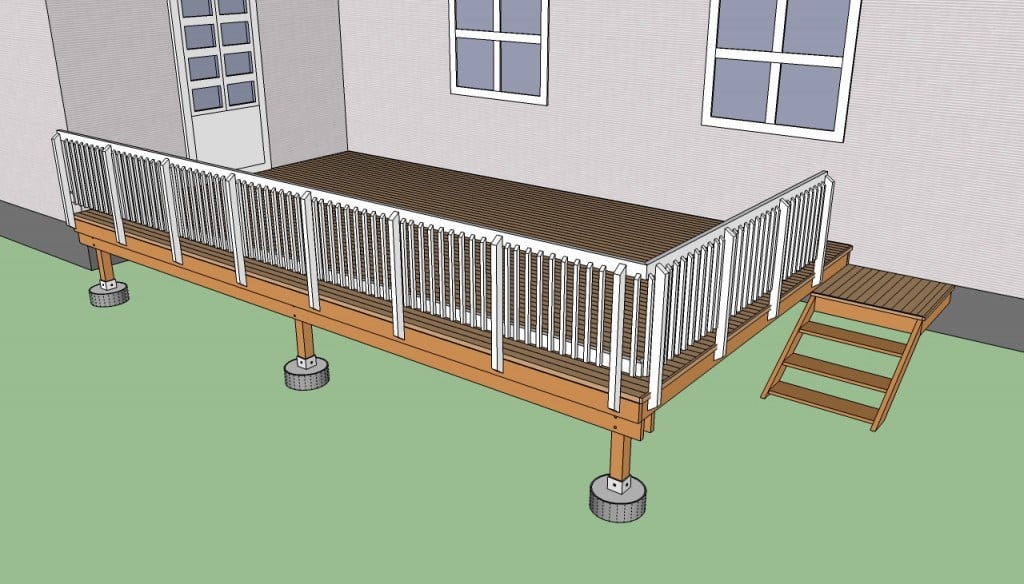
How to build a deck step by step
Last but not least, you should build the stairs of the deck and finish the wooden surface. Therefore, we recommend you to seal the gaps with wood putty and let it dry for several days.
Thank you for reading our article about how to build a deck step by step and we recommend you to check out the rest of our projects. Don’t forget to SHARE and LIKE our articles with your friends, by using the social media widgets. SUBSCRIBE to be the first that gets our latest projects.
<< Previous | Next >>
EXPLORE MORE IDEAS:



1 comment
So easy to follow instructions thanks