This step by step woodworking project is about free cold frame lid plans. This is PART 2 of the cold frame project where I show you how to build the lids for the cold frame. In addition, I also show you how you can build a super easy 2×4 frame to the back of the cold frame so you can keep the lids open and cool down the interior.
Make sure you select the right location for the cold frame. The location of the cold frame requires a lot of natural light for the vegetables to grow healthy. It would be a great idea to research more about the plants you are going to grow in the cold frame so choose the most appropriate location for them. Generally speaking, the cold frame should have a south orientation. See all my Premium Plans in the Shop.
Made from this plan
Cold Frame Lid Plans
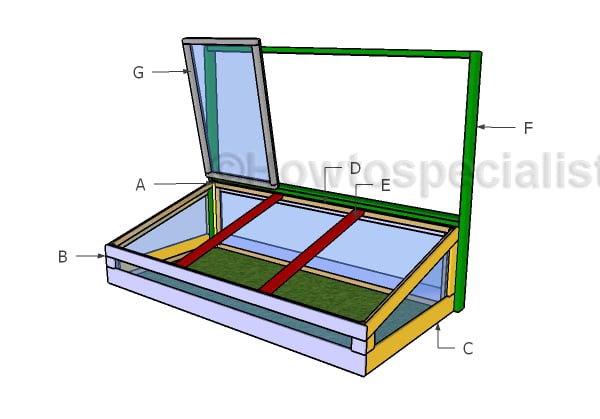
Building a cold frame
Materials
- F – 2 pieces of 2×4 lumber – 72″ long, 2 pieces – 96″ long, 1 piece of 1×4 lumber – 96″ FRAME
- G – 2 pieces of 2×2 lumber – 32″ long, 2 pieces – 45 1/2″ long, 2 pieces of 1×2 lumber – 32″ long, 2 pieces – 45 1/2″ long 3xLID
- 2 1/2″ screws, 1 5/8″ screws, 1 1/4″ screws
- hinges
- greenhouse plastic
- 4 pieces of 2×4 lumber – 8′
- 6 pieces of 2×2 lumber – 8′
- 6 pieces of 1×2 lumber – 8′
Tools
- Safety gloves, glasses
- Miter saw, jigsaw
- Chalk line, tape measure, spirit level, carpentry pencil
- Drill machinery and drill bits
Time
- One Week
How to build cold frame lids
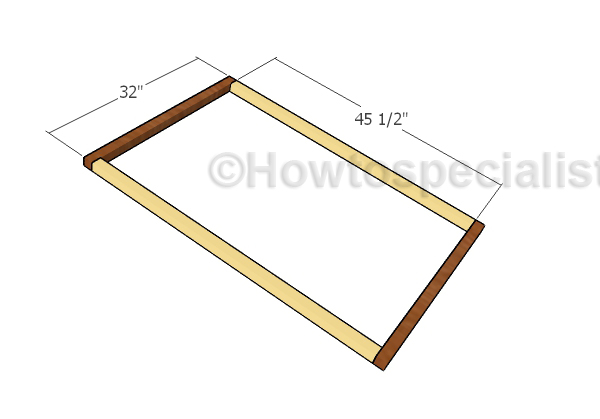
Building the lid frames
Build the frame of the lid from 2×2 lumber. Cut the components at the right dimensions and the drill pocket holes at both ends of the yellow ones. Make sure the corners are square and insert the screws so you lock everything tightly.
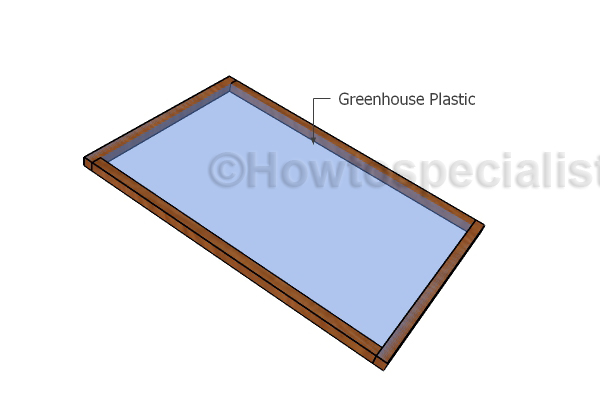
Lid Plastic
Fit the greenhouse plastic to the top of the lid.
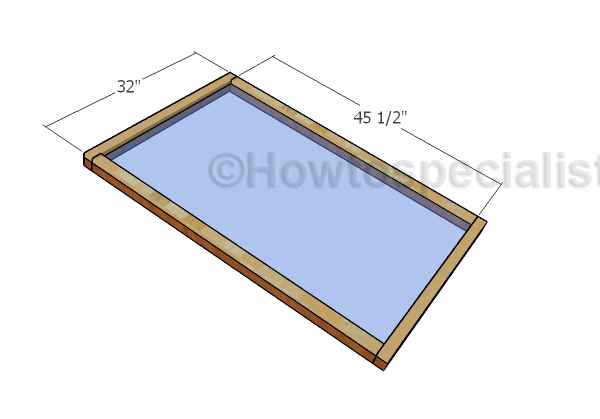
Lid Trims
Fit 1×2 trims to the lid, so you lock the plastic film into place tightly. Use 1 1/4″ screws to secure the trims to the lid tightly.
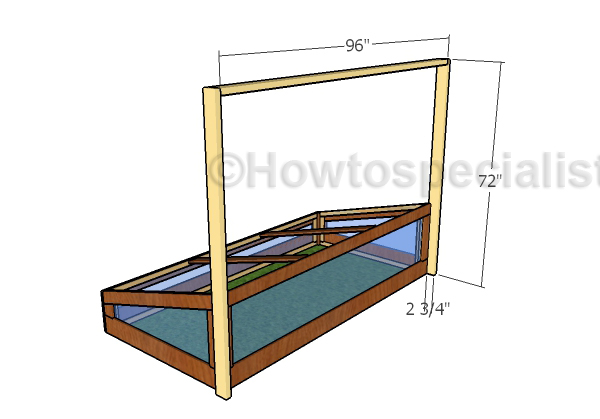
Fitting the tall frame
Fit 2×4 slats to the sides of the cold frame, as shown in the plans. Use a spirit level to plumb the supports and secure them into place with 2 1/2″ screws.
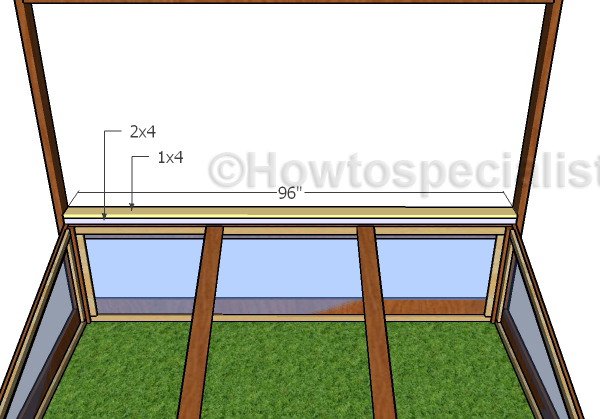
Back trims
Fit the horizontal 2×4 to the back of the cold frame, then install a 1×4 pieces. Drill pilot holes and insert the components into place tightly using 2 1/2″ screws.
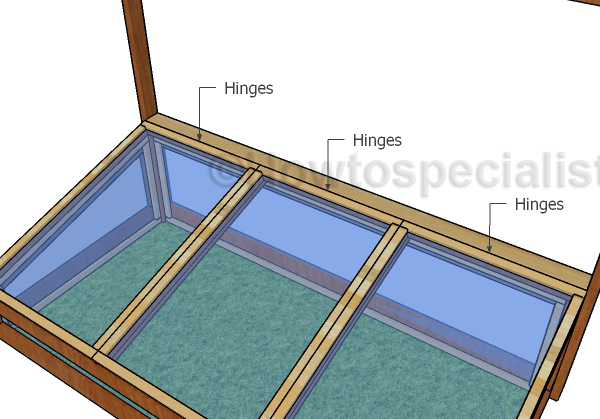
Fitting the lids
Fit the lids to the top of the cold frame and lock them to the back trim with hinges. Attach a handle to the lids, so you can open them easily.
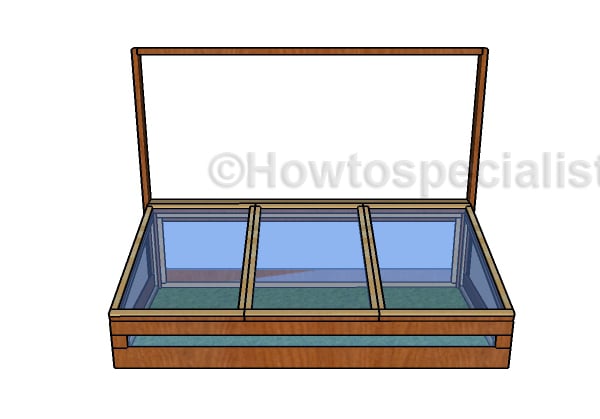
How to build a cold frame
This cold frame will not only help you grow vegetables, but it will also add an unique appeal to your property.
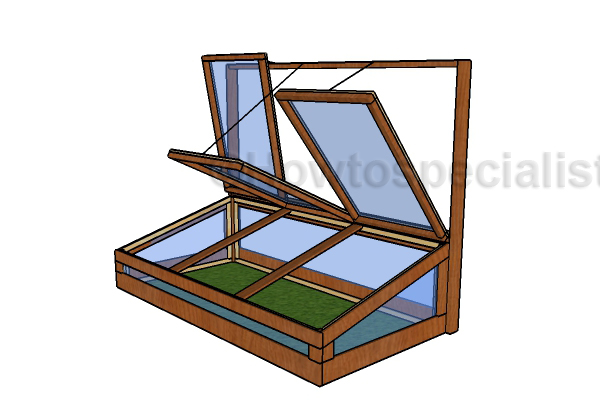
Building a large cold frame
When you need to cool the small greenhouse, you should just use a piece of string and lock them to the back support. In this manner you can cool down the cold frame during the hot summer days.
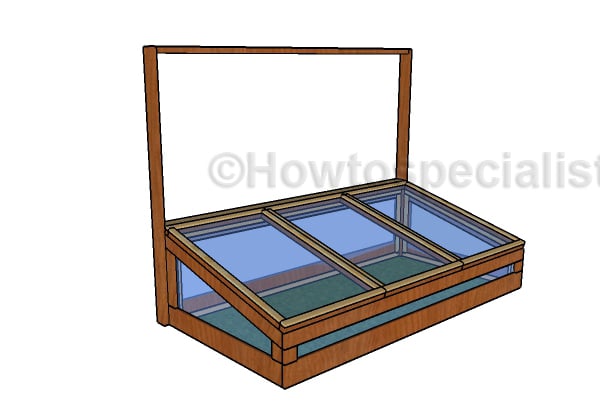
Free cold frame plans
Last but not least, we recommend you to take care of the finishing touches. In order to get a professional result, fill the holes and the gaps with wood filler and let it dry out for a few hours. Check if there are protruding screws and fix the issue if necessary.
Check out PART 1 of the project, so you learn how to build base of the cold frame.
Thank you for reading our project about free cold frame roof plans and we recommend you to check out the rest of the projects. Don’t forget to LIKE and SHARE our projects with your friends, by using the social media widgets.
<< Previous | Next >>
