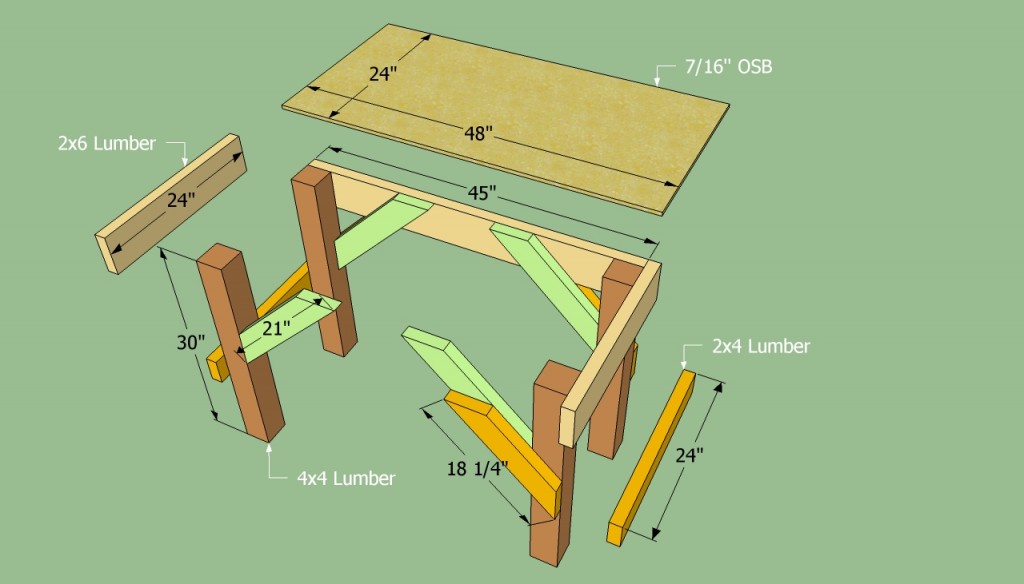
This step by step diy article is about how to build a heavy-duty workbench. If you are an amateur handyman that likes to play with power tools and do various remodeling projects, a properly build workbench is very useful. In most of the cases, you could buy them from specialized stores at a very high price, but you could also build them by yourself, as the procedure is straightforward and the carpentry techniques required are common. The frame of the bench is built from 4×4 and 2×6 beams, while the top is made of thick plywood or OSB.
Buy proper materials for the workbench, if you want to obtain a professional result. Therefore, we recommend you to buy 4×4 lumber for the posts and 2×6 lumber for the stretchers, making sure the beams are in perfect condition. Pay attention to possible flaws, such as: twists, decay, cracks or chips. Determine the amount of materials required, from the very beginning, otherwise you would waste money and time.
Measure the lumber several times before performing the cuts, otherwise they might not fit together when assembling the frame. Use a spirit level to plumb the sides of the bench, in order to make sure you obtain a bench with a symmetrical look. Work with good judgement, as you have to install the angle braces to the frame. In this manner, the joints would be sturdy and the bench would support a significant weight. See all my Premium Plans in the Shop.
Made from this plan
In order to build a heavy-duty work bench, you need the following:
Materials
- 4 pieces of 4×4 lumber – 30″ LEGS
- 2 pieces of 2×6 lumber – 24″, 2 pieces – 45″ STRETCHER
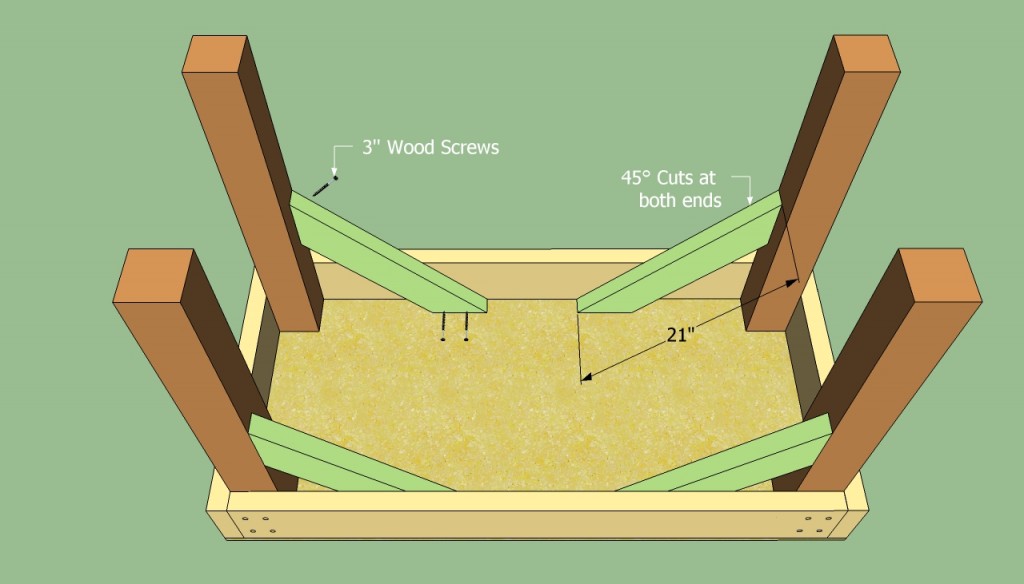
- 4 pieces of 2×4 lumber – 21″ BRACES
- 4 pieces of 2×4 lumber – 18 14″ CROSS BRACE
- 1 piece of 3/4” OSB or plywood – 2’x4′ TOP
- 3” screws – DECKING SCREWS
- 1 piece of 4×4 lumber – 10 ft
- 2 pieces of 2×6 lumber – 8 ft
- 2 pieces of 2×4 lumber – 8 ft
- 1 piece of 3/4” OSB or plywood – 2’x4′
- 2 1/2″ screws
- 1 1/4″ screws
- glue, stain
- wood filler
Tools
- Safety gloves, glasses, Miter saw, jig saw
- Chalk line, tape measure, spirit level, carpentry pencil
- Drill machinery and drill bits
- Router and 1/4 bit
Tips
- Pre-drill holes in the wooden components, before driving in the screws
- Countersink the head of the screws
- Don’t use lumber that is likely to crack or shrink
- Don’t over-tighten the screws to prevent the wood from splitting
Time
- One weekend
Related
Building a garage workbench
Building your own workbench is a fun weekend project, as you have the opportunity to learn new carpentry skills and to create something useful with your hands. Generally speaking, there are many shapes and sizes you could choose from, therefore you have to decide from the very beginning what it suits your needs and tastes.
Smart Tip: You could adjust the size of the workbench according to your needs. In addition, you should add several features to the project, such as electrical outlets or a tool box.
How to build a heavy duty work bench
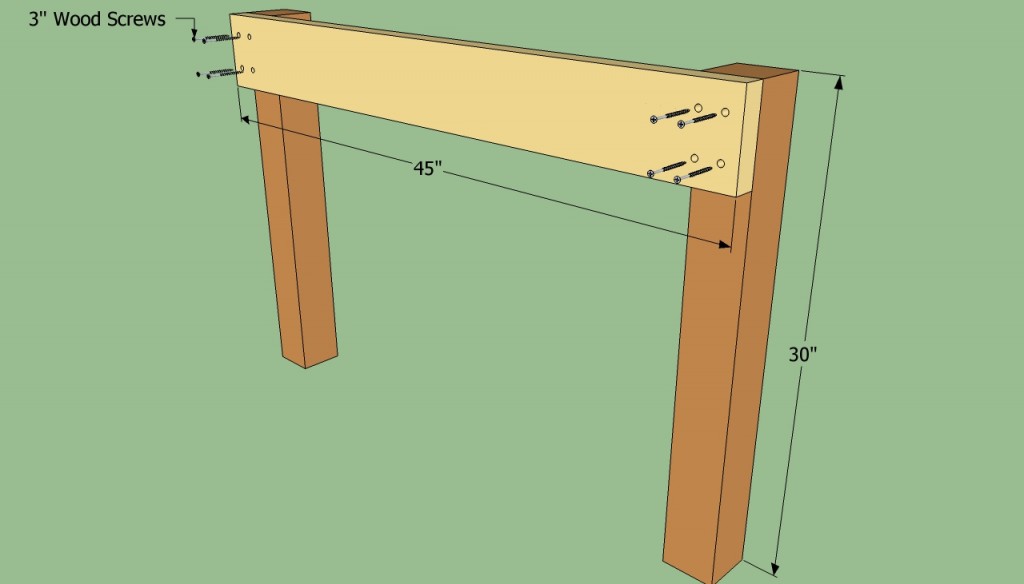
Building the sides of the workbench
First of all, you need to build the sides of the workbench. Therefore, you should choose a perfectly level surface and assemble the sides. Use a tape measure to check if the diagonals are equal, otherwise the end project won’t have a neat look.
Position the stretcher on top of the 4×4 posts and drill several pilot holes, before inserting the 3” screws. Moreover, leave at least 1/2 from the edges, in order to avoid the wood from splitting.
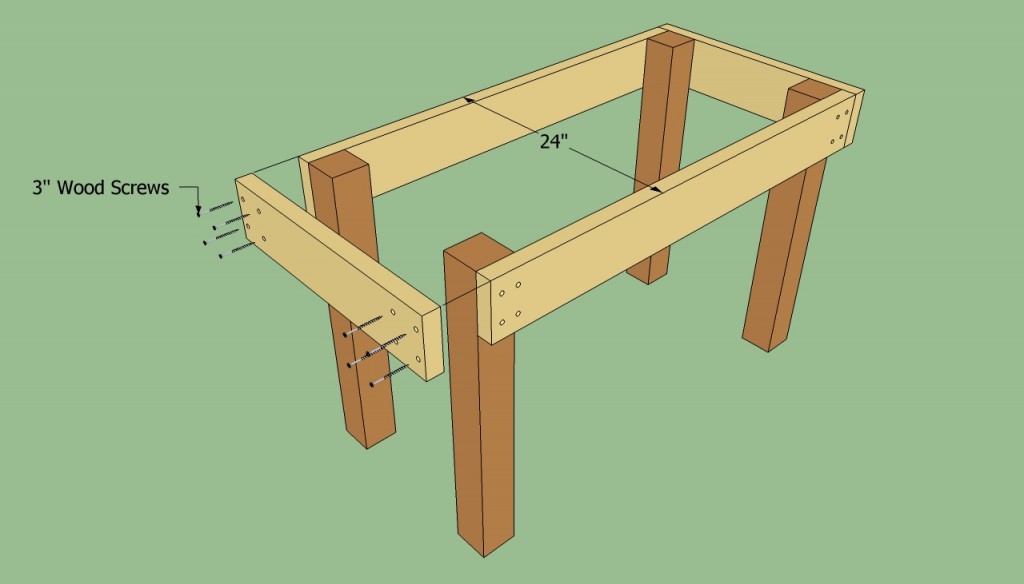
Installing the front stretcher
Afterwards, you have to attach the front and the back stretchers, in order to assemble the sides of the workbench together. As you can see in the image, we recommend you to use 2×6 lumber, as 2×4 beams are not appropriate from a heavy duty project.
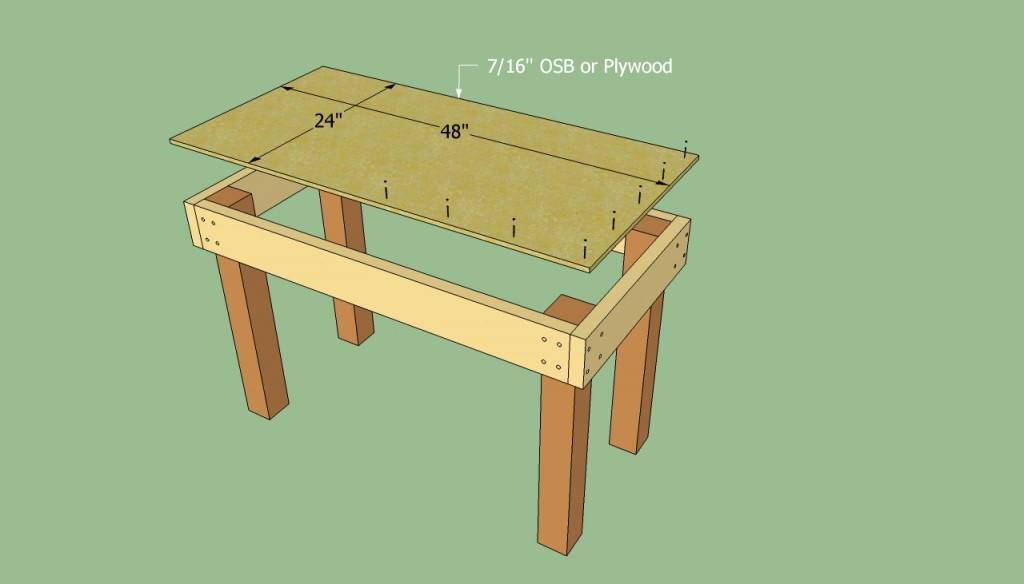
Installing the top of the bench
Afterwards, attach the top of the bench made of 7/16” plywood or OSB. While you could also use 1/4” sheets, there are not recommended for heavy duty workbenches, as they cannot support a significant weight. Drive in 1 1/2” screws every 6-8”, at least 1/2” from the edges.
Snap a chalk along the cut lines, before making the cuts with a circular saw. Choose a sharp blade with downward-oriented teeth, to avoid tearing the sheet.
Installing the braces
The next step of the project is to install the interior angle braces, as in the image. All the four braces have to be equal, having their both ends cut at 45º. Sand the cut edges with a sand block, before fitting them into place.
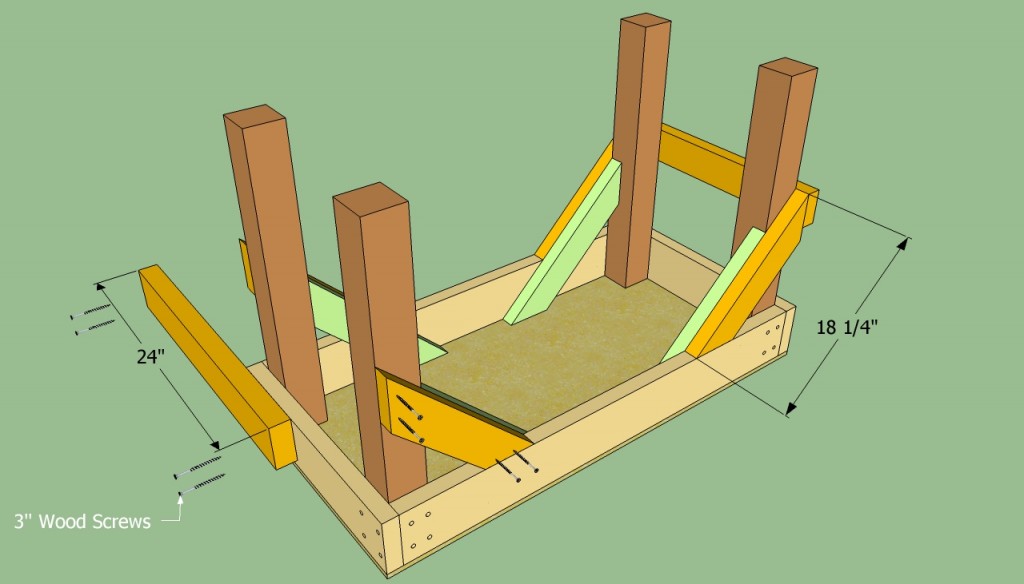
Building the exterior braces
If you want to obtain sturdy joints, we recommend you to install an extra pair of angle braces, on the exterior of the workbench. Fasten the exterior braces to the interior ones, in order to add rigidity to the frame of the bench.
If you really want to bring things to the next level, you could add a couple of metal connectors. You could also drill pocket holes trough the angle braces to connect them to the stretchers.
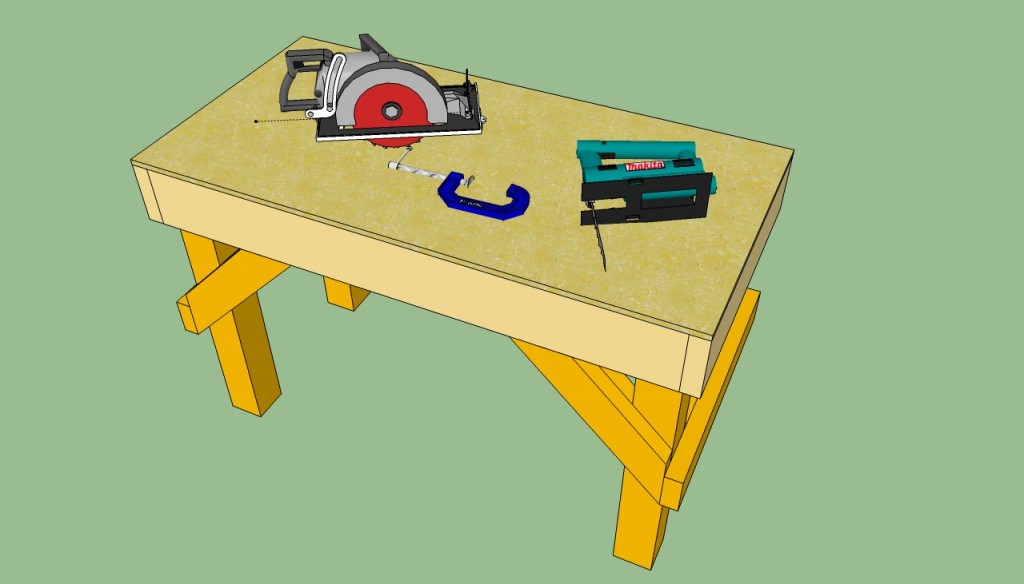
How to build a heavy duty workbench
Last but not least, you should take care of the finishing touches. Fill the holes with wood putty, before sanding the whole surface with average-grit sandpaper. Make sure the top is level and the legs are perfectly plumb.
Thank you for reading our article about how to build a heavy duty bench for your garage and we recommend you to check out the rest of our projects. Don’t forget to share our article with your friends, by using the social media widgets.

