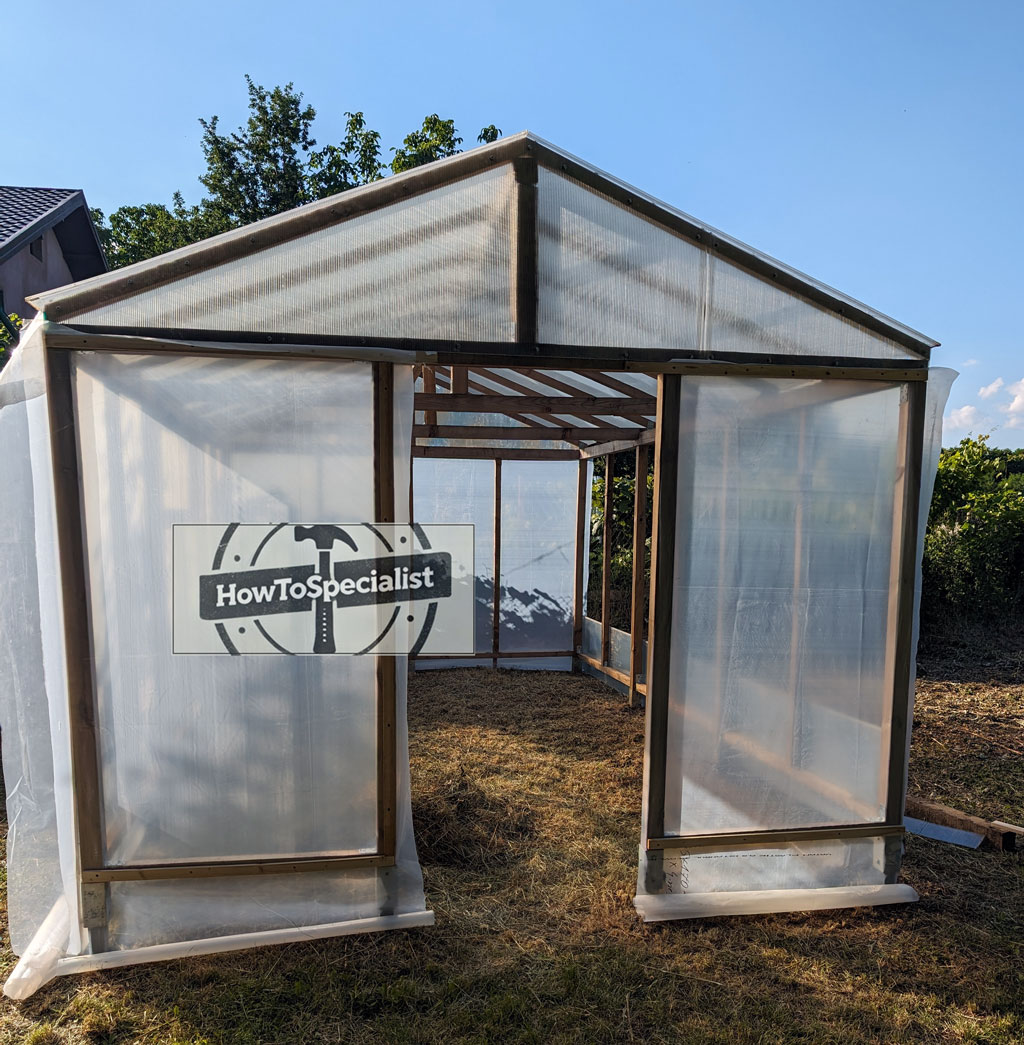
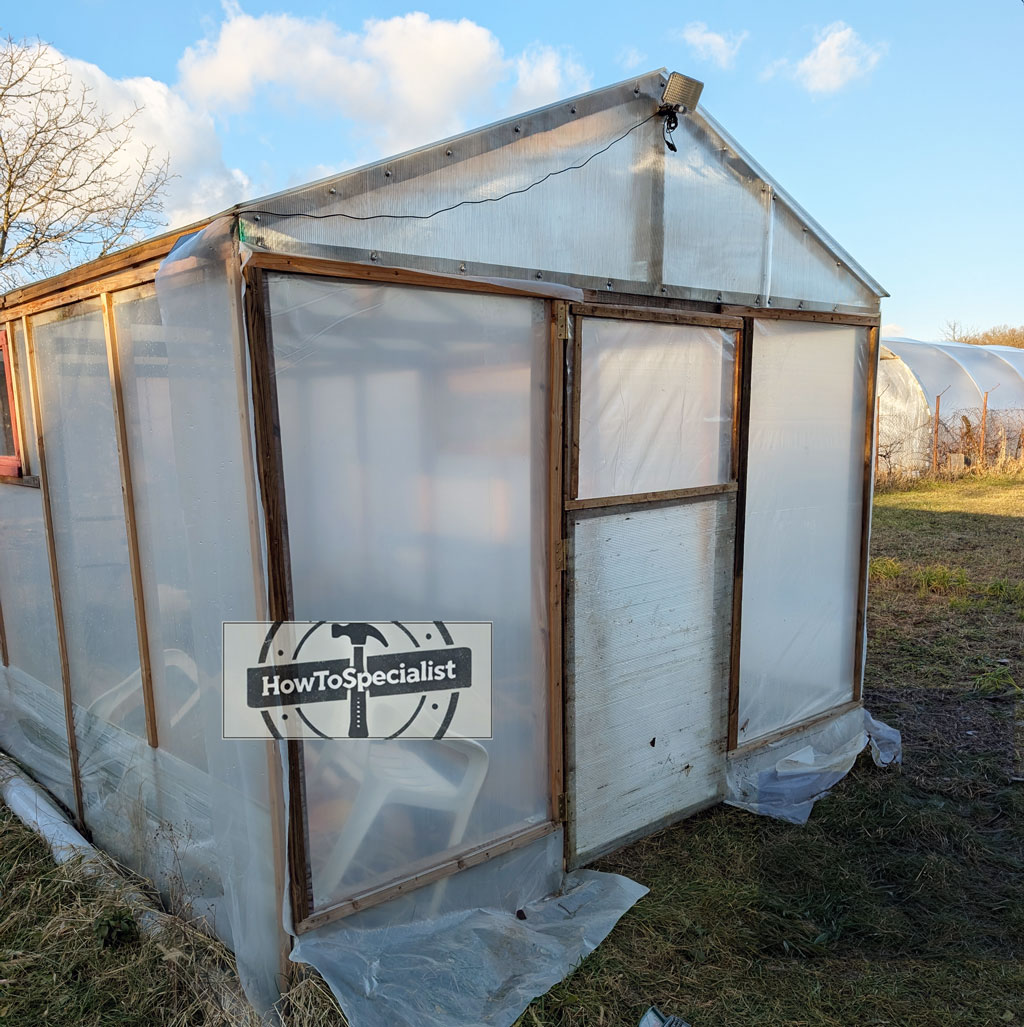
This 12×16 gable greenhouse is designed as a solid, no-nonsense structure that balances durability with light, plant-friendly materials. The how to build starts with a wooden post frame set on anchors and locked in with concrete, giving the greenhouse a stable foundation that resists movement and seasonal shifting. The gable roof shape adds headroom, improves airflow, and makes the structure feel spacious without complicating the framing.
For the enclosure, the materials are chosen with purpose. Polycarbonate sheets on the roof handle sun exposure, shed snow and rain efficiently, and diffuse light evenly across the growing area. The walls are covered with greenhouse plastic, keeping costs down while still providing excellent light transmission and flexibility. Side window vents are integrated into the design to help regulate temperature naturally, a key detail for keeping plants healthy during warmer days.
This project is laid out step by step, focusing on clean framing, proper anchoring, and practical building techniques that work in real conditions. The goal is a greenhouse that’s strong, efficient, and easy to build with standard tools, while still offering the performance you expect from a dedicated growing space. Whether you’re extending the season or growing year-round, this greenhouse is built to work as hard as you do.
Step 1: Laying out the greenhouse
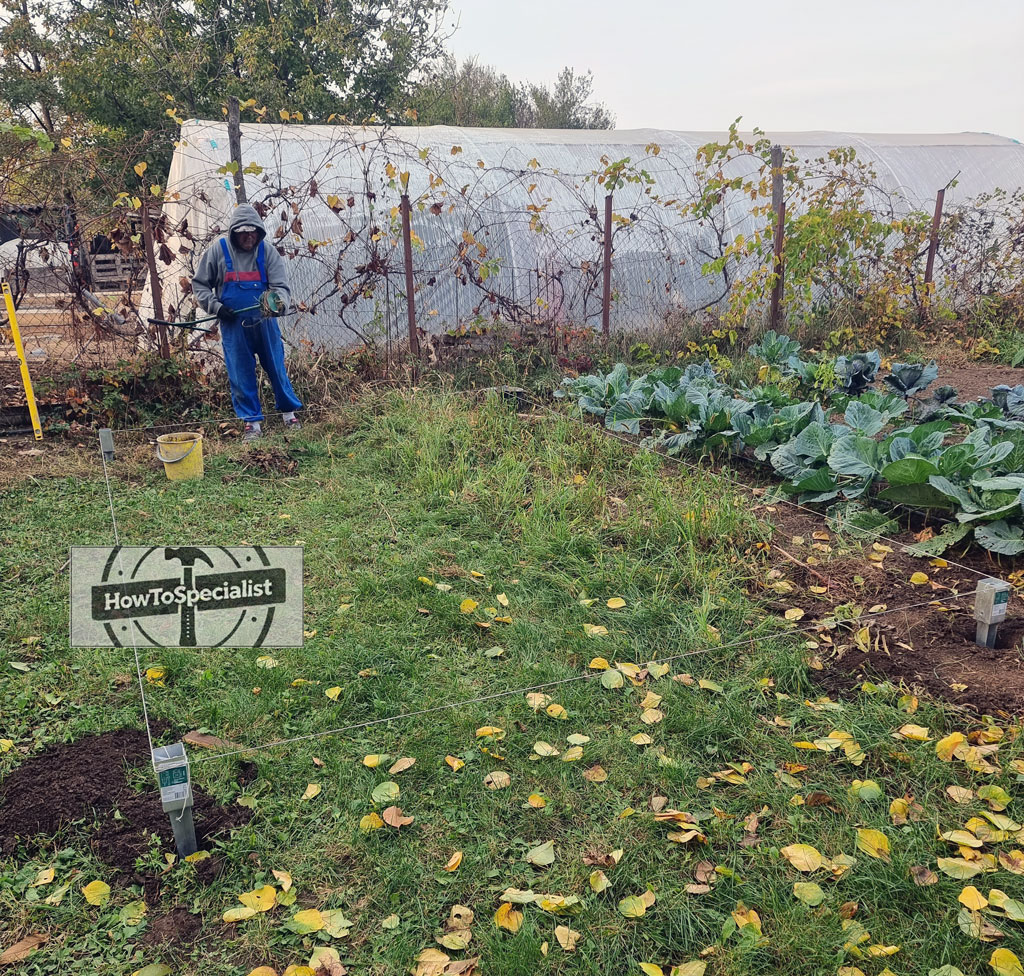

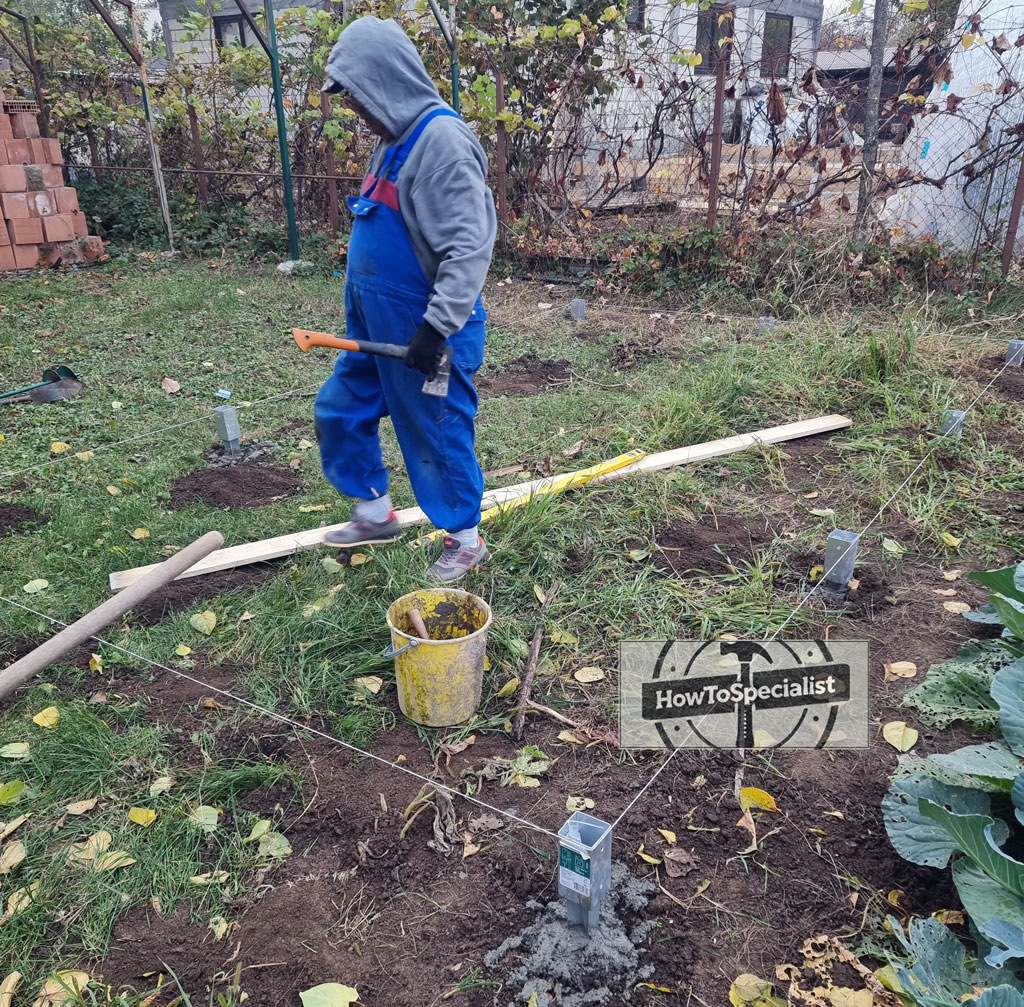
Laying out the posts starts with accuracy, not guesswork. Set batter boards at the corners and run string lines to mark the exact footprint of the 12×16 greenhouse. Measure diagonally from corner to corner and adjust the strings until both diagonals match, locking the layout perfectly square. Once the strings are tight and level, mark the center of each post location directly on the ground so every hole lines up cleanly with the frame above.
Drill the holes using an auger, keeping them straight and to a consistent depth for uniform support. Drop the post anchors into the holes, double-check their alignment with the string lines, and brace them so they stay plumb. Pour concrete around the anchors, working it in to eliminate air pockets, then recheck alignment before the mix sets. Taking the time to get this step right makes the rest of the build smoother, stronger, and far more accurate.
Step 2: Building the frame
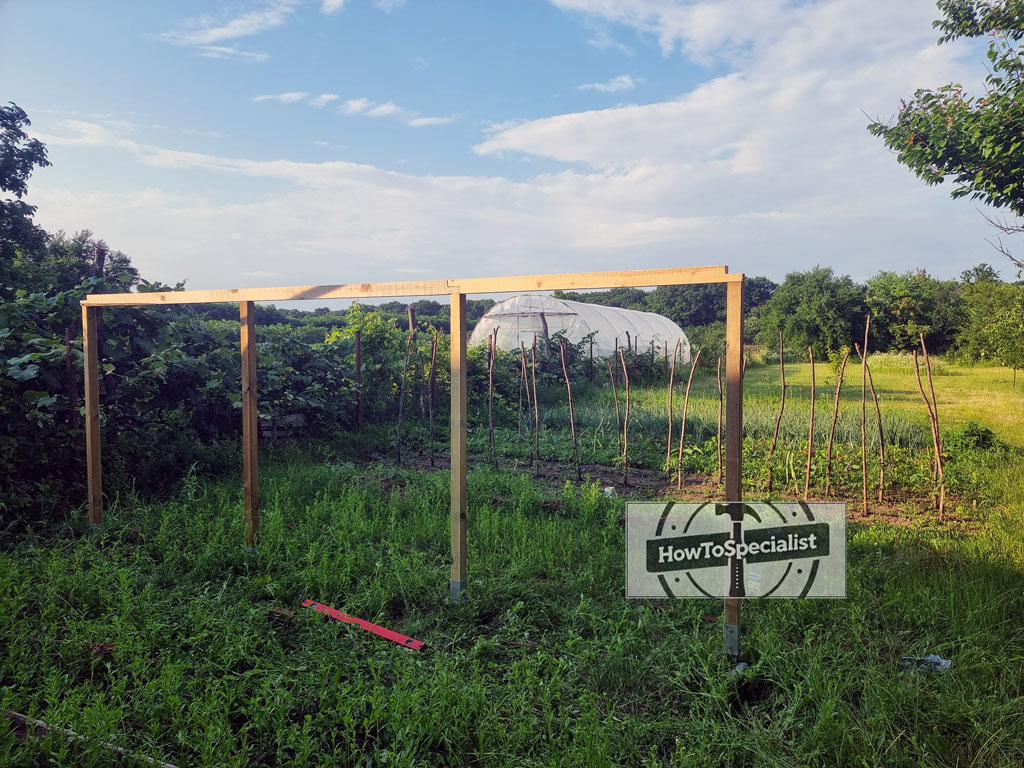
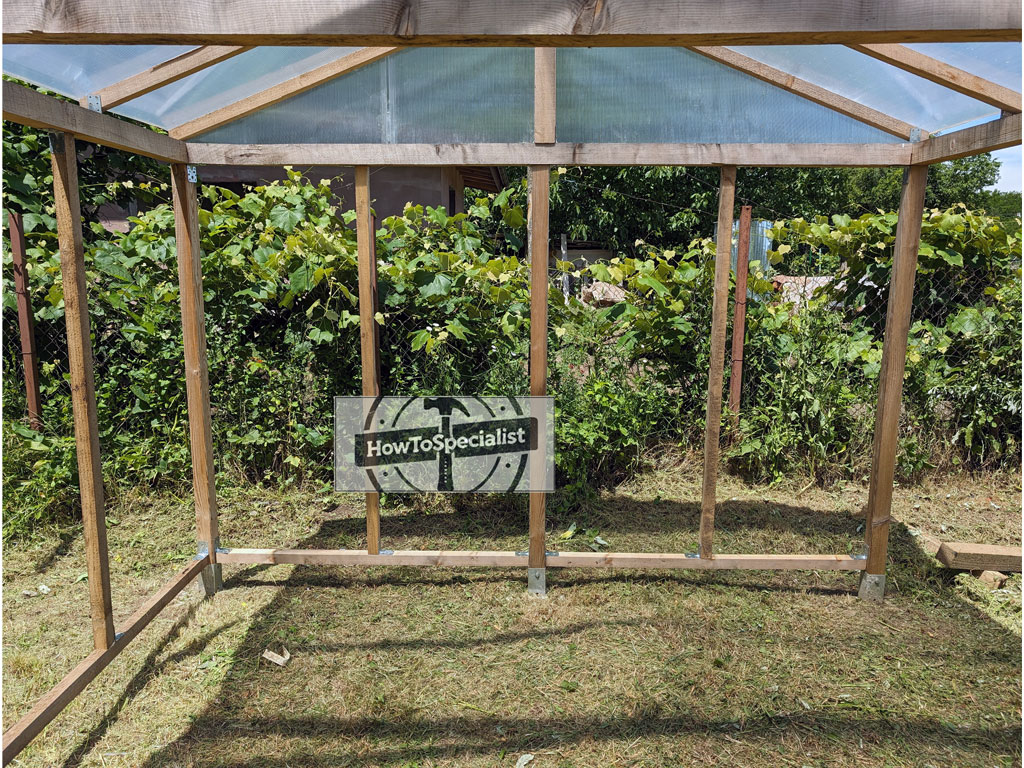
With the anchors fully set, the wooden posts can be installed and brought to final position. Set each post into its anchor, check it for plumb on two sides, and temporarily brace it to hold everything steady. Work your way around the layout, taking the time to align each post with the string lines so the structure stays straight and true. Small adjustments at this stage make a big difference once the framing starts to tie together.
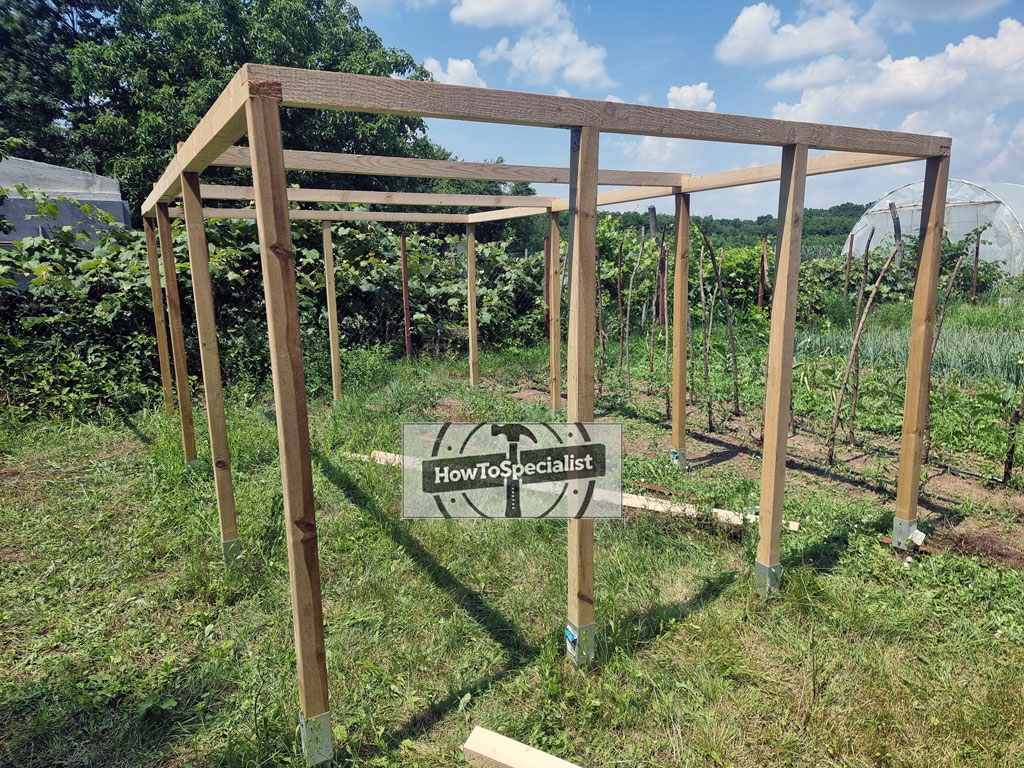
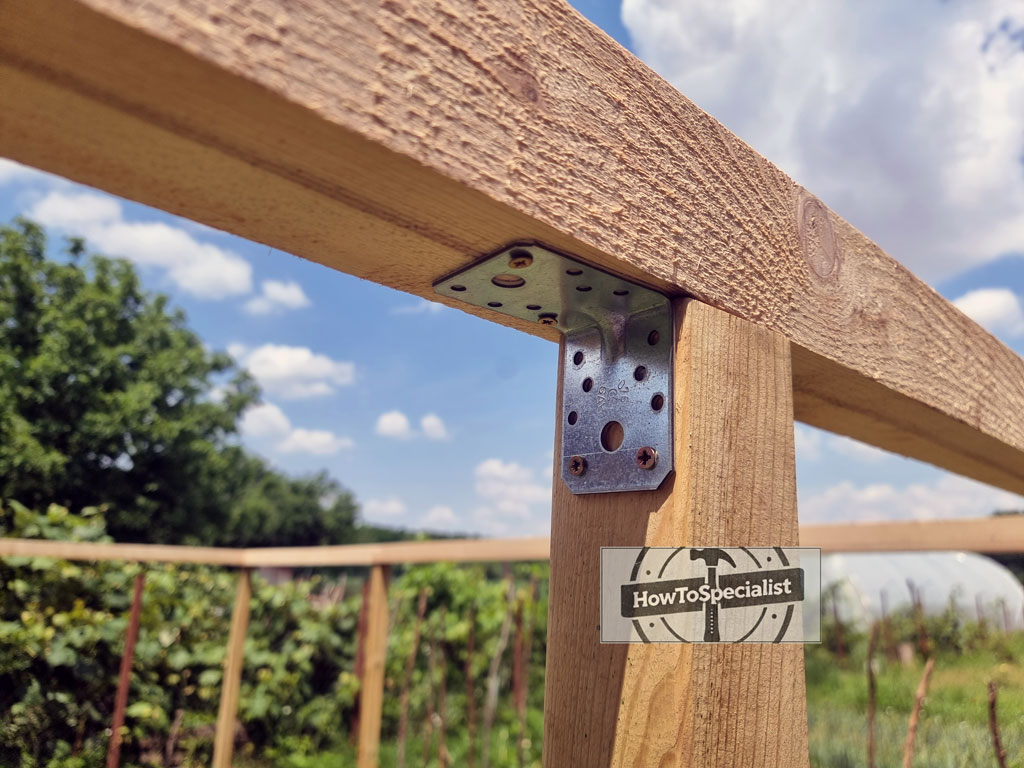
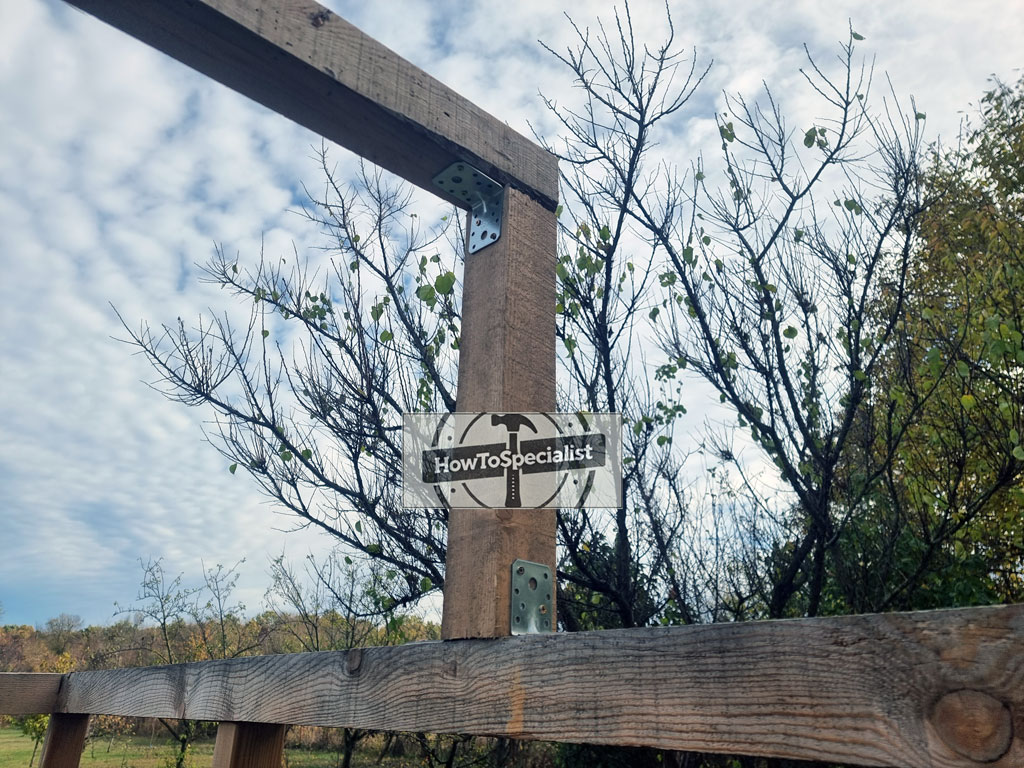
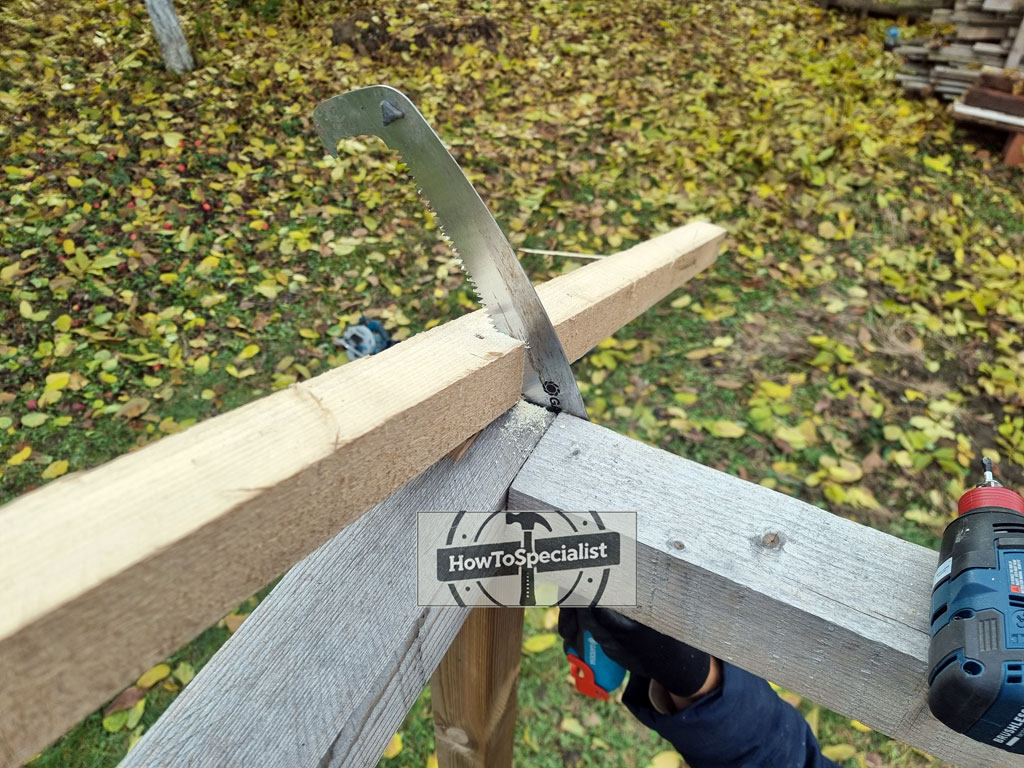
Next, fit the top plates and beams that lock the posts into a single rigid frame. The beams are joined together at the corners using half-lap joints, creating strong, flush connections that resist twisting and spread loads evenly across the structure. Cut the joints carefully, test-fit each beam, and secure them once everything sits tight and square. This detail not only adds strength but also keeps the greenhouse clean and professional in appearance. Reinforce the corners with metal connectors.
With the top frame complete, the four walls can be assembled and brought together as a unit. Frame each wall flat, stand it up between the posts, and fasten it securely to the posts and top plates. As the walls come together, recheck plumb and square, making minor corrections before everything is locked in place. Once all four walls are connected, the greenhouse starts to feel solid, defined, and ready for the roof framing to go on next.
Step 3: Building the gable roof

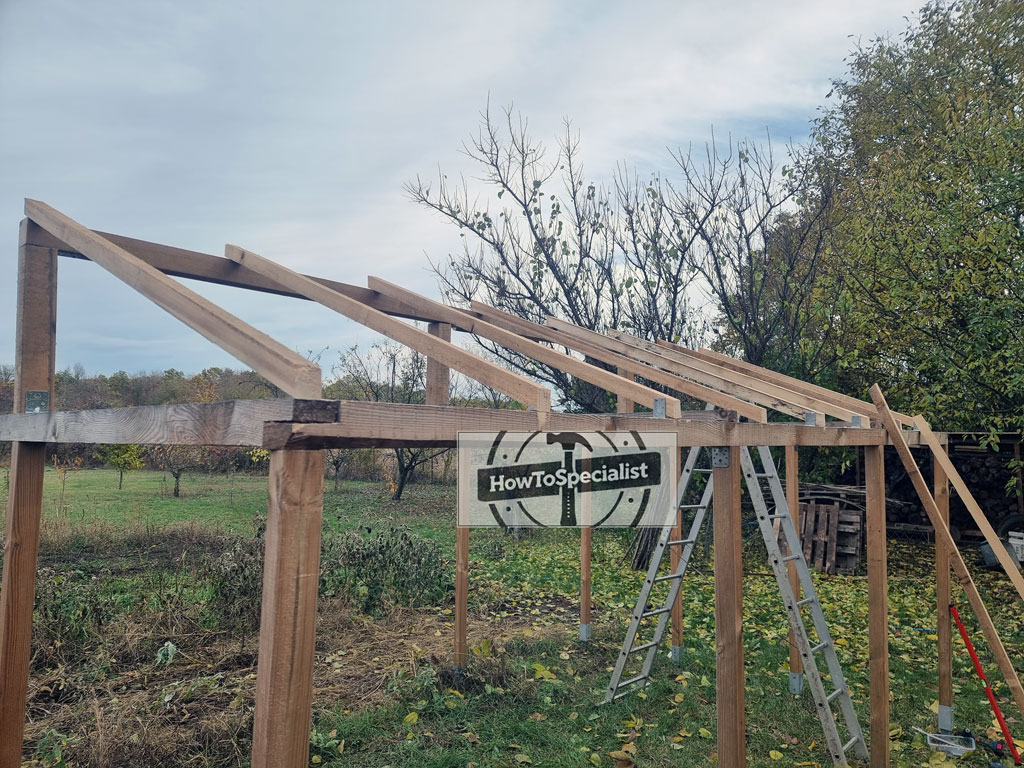
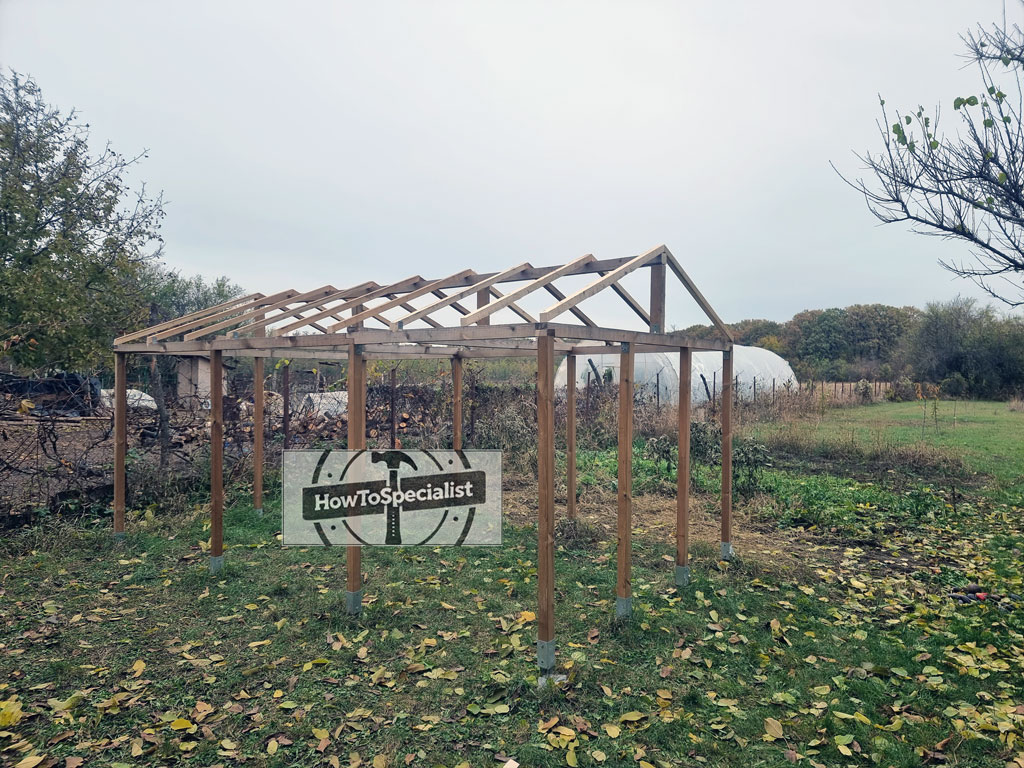
The gable roof starts by setting the ridge beam in place, supported by vertical supports at each end. The roof pitch can be adjusted by changing the height of these supports, allowing the angle to be fine-tuned to match the greenhouse design and local conditions. Once the ridge beam is positioned, check it for level and straightness, then secure it firmly so it becomes the backbone of the roof structure.
To stiffen the frame, the corners and key connection points are reinforced with metal connectors. These add rigidity where loads transfer from the rafters down into the walls and help prevent racking over time. With the ridge locked in and the structure reinforced, the roof framing becomes much more stable and ready to accept the rafters.
The rafters are then installed every 24 inches on center, working from one end to the other to keep spacing consistent. Each rafter is seated cleanly against the ridge beam and top plates, then secured with screws for a tight, reliable connection. As the rafters go in, regularly check alignment to keep the roof straight and even, setting up a clean surface for the polycarbonate sheets that come next.
Step 4: Building the gable roof

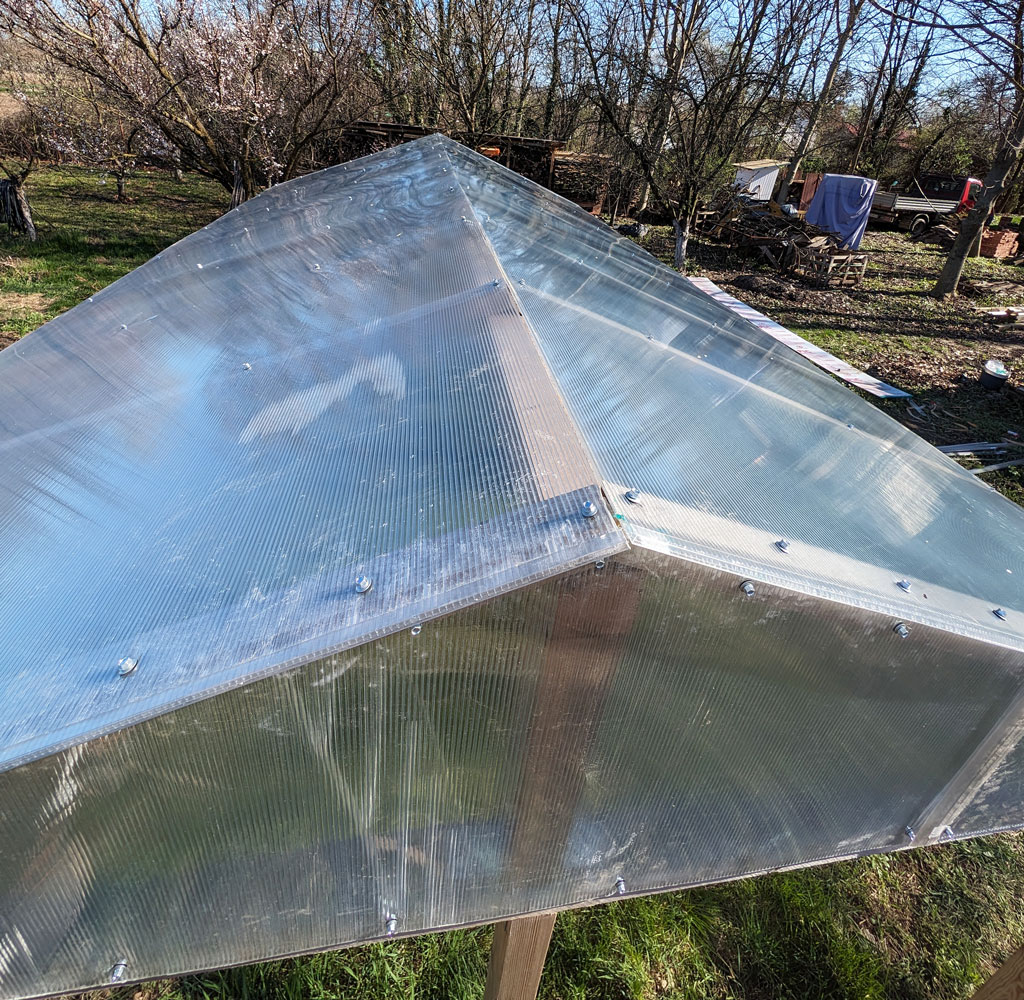
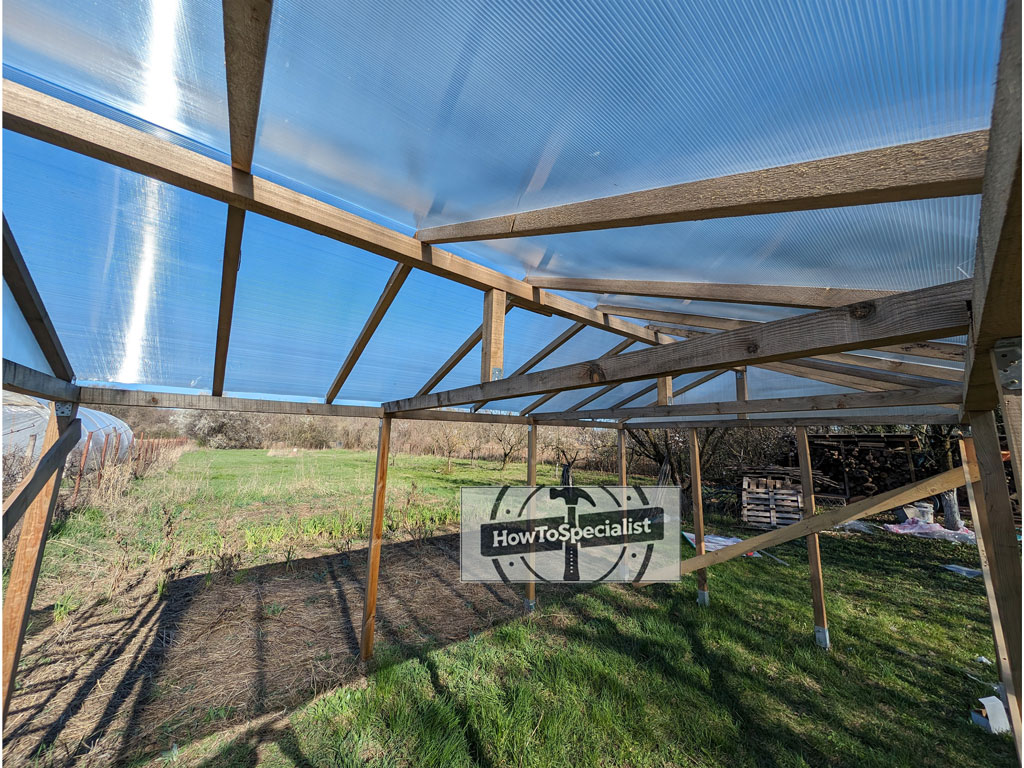

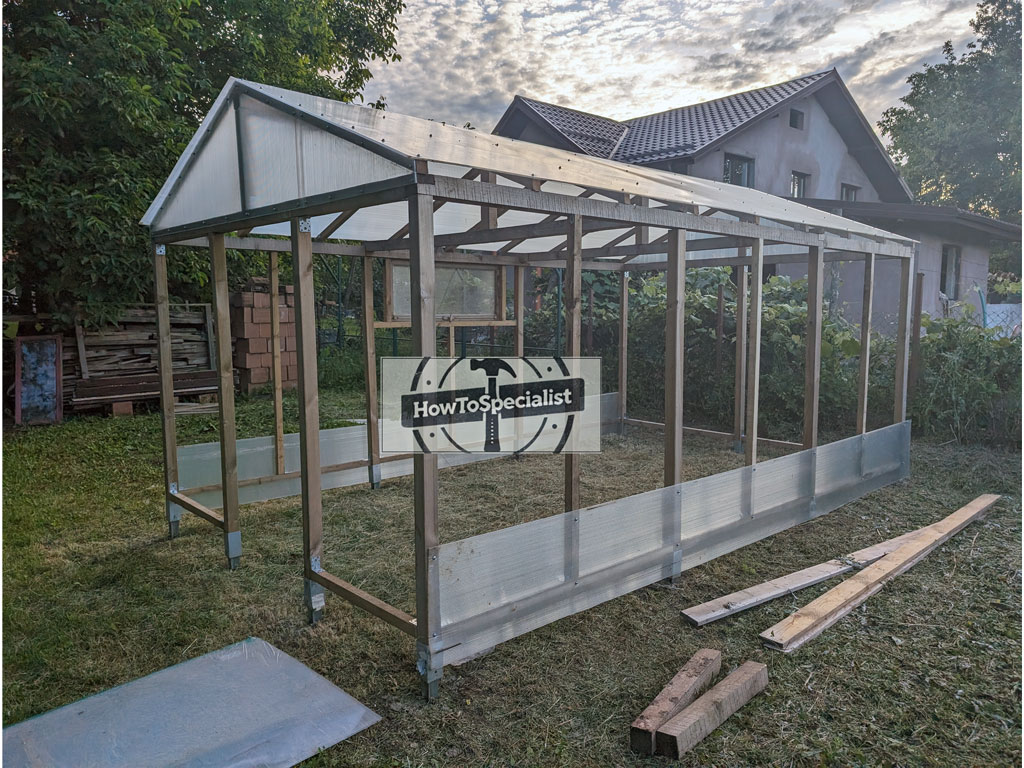
Installing the twin-wall polycarbonate sheets starts with careful measuring and clean cuts. Mark each panel to size and cut it using a grinder fitted with a thin cutting disc, keeping steady pressure to avoid melting the material. Work slowly and support the panels well so the cuts stay straight, especially along the roof slope and at the gable ends where accuracy really shows in the final look.
Once cut, set the panels in place starting from the lower edge of the roof and working upward, overlapping as required to guide water away from the structure. The same approach applies to the gable ends, fitting each sheet tight to the framing while maintaining consistent spacing. Make sure the internal channels of the twin-wall panels are oriented correctly to allow condensation to drain.
Secure the polycarbonate sheets to the frame using appropriate screws fitted with rubber washers. The washers seal the fastener holes while allowing slight movement as the panels expand and contract with temperature changes. Drive the screws snug but not tight, letting the panels sit flat without stress, and you’ll end up with a roof and gable ends that are weather-tight, durable, and built to last.
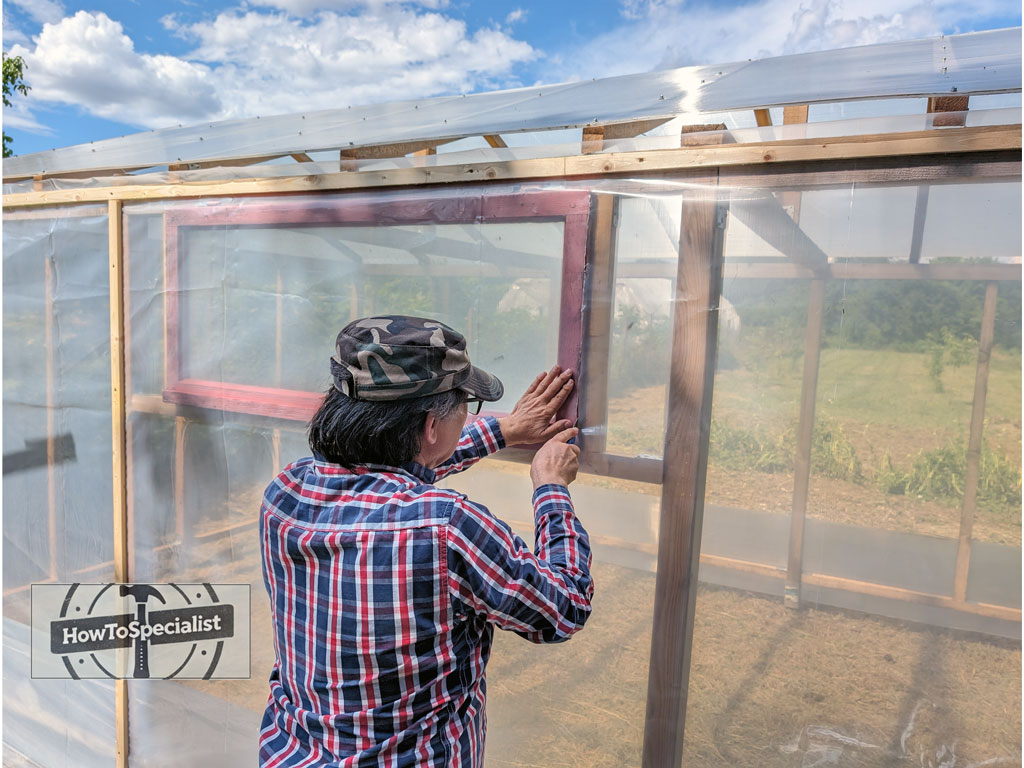
Step 5: Fitting the vents

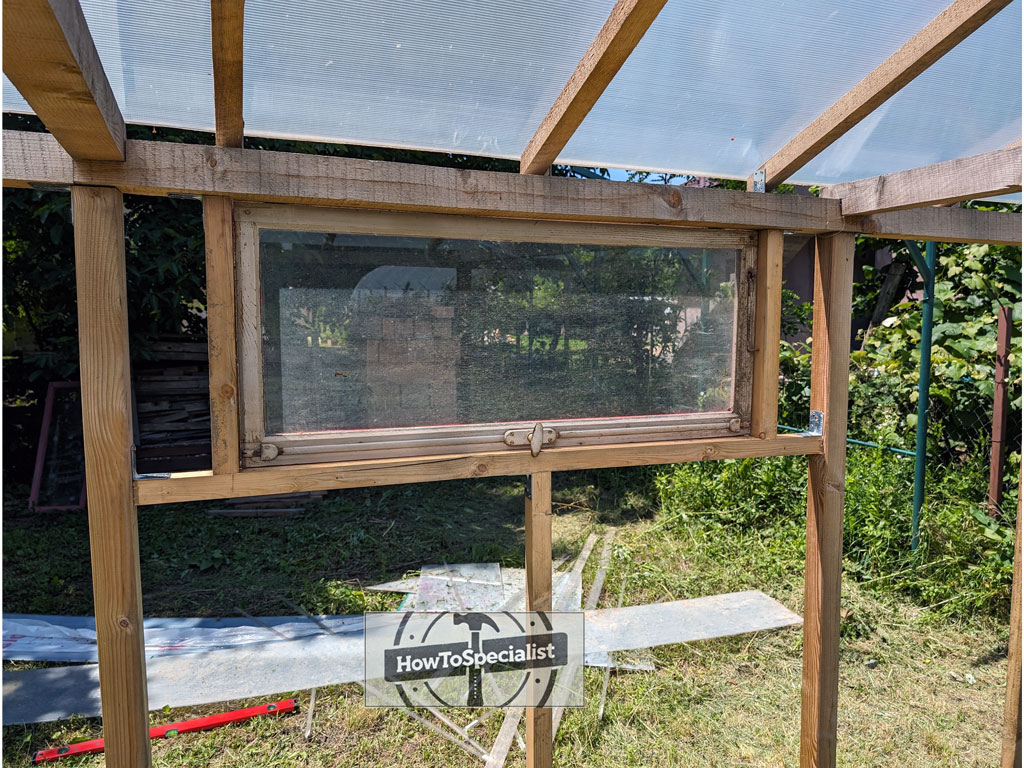
Vent windows are added to the side walls to improve airflow and temperature control inside the greenhouse. Old windows can be repurposed for this step, giving them new life while keeping costs down. Each window is framed directly into the side wall, with a dedicated opening built around it so it fits square and operates smoothly. Taking the time to align the frame properly ensures the window seals well and opens without binding.
Once the windows are in place, the side wall framing is completed by adding vertical supports between the main posts. These members stiffen the walls and provide continuous backing for the greenhouse plastic. Spacing them evenly helps keep the walls straight and prevents the plastic film from sagging or fluttering in the wind.
With the extra framing installed, the walls become much more rigid and ready for the final covering. The added supports also make fastening the plastic cleaner and more secure, resulting in a tight, professional finish that holds up well through changing weather and daily use.
Step 6: Fitting the greenhouse plastic
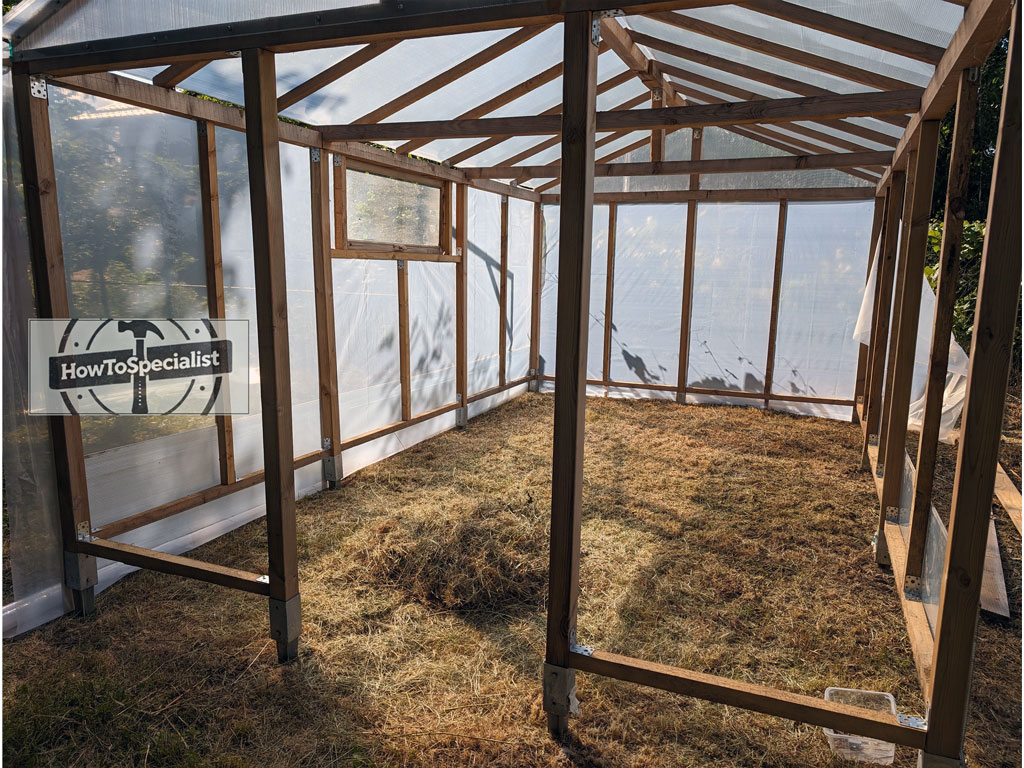

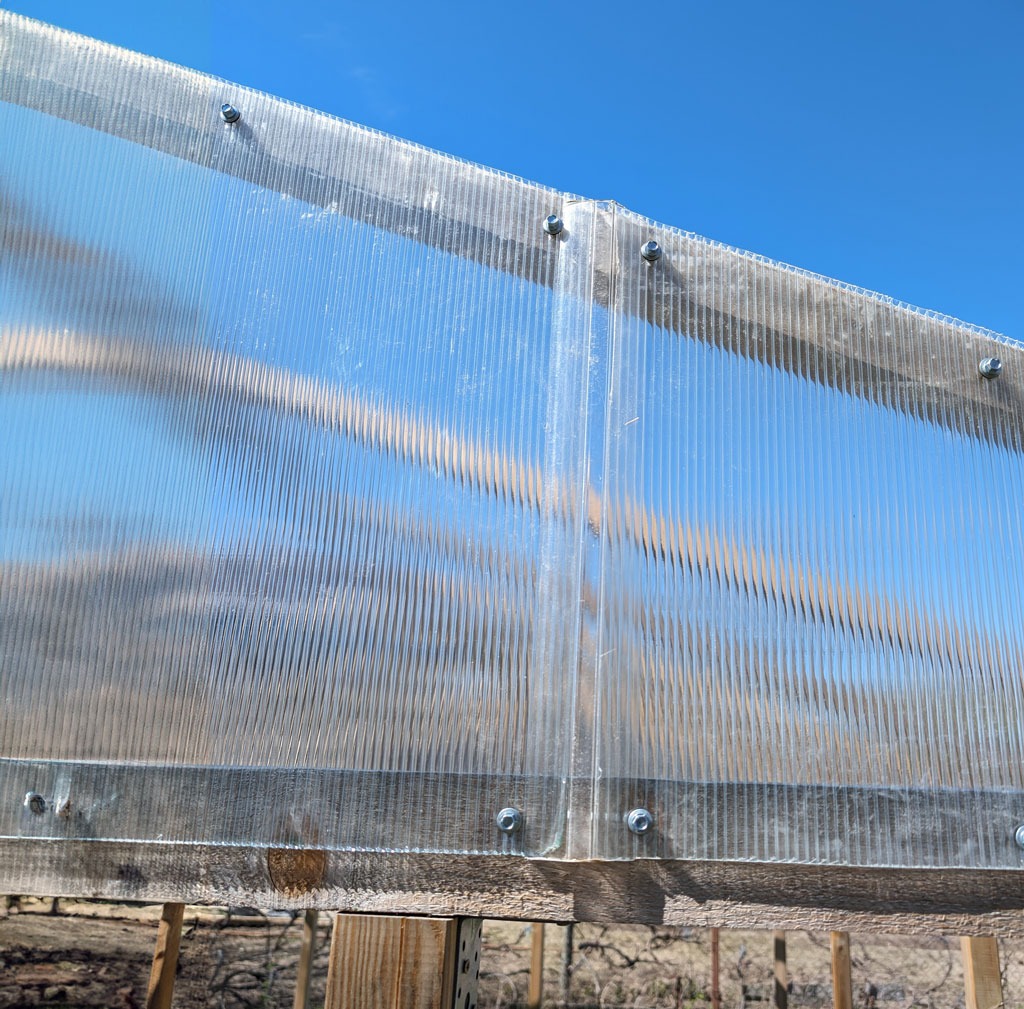
Attaching the greenhouse plastic is one of the final steps, and it’s where the structure really starts to look complete. Roll the plastic out over the walls and pull it tight, working one side at a time to keep wrinkles to a minimum. Rough-cut the material with a utility knife, leaving a little extra at the edges so it can be tensioned properly before being locked in place.
To secure the plastic, 1×2 slats are screwed over it directly into the greenhouse frame. This sandwiching method holds the plastic firmly, spreads the load along the framing, and prevents tearing in windy conditions. Start at the top and work downward, keeping steady tension as you go so the plastic stays smooth and evenly stretched.
Cutouts around the vent windows are made after the plastic is secured. Carefully slice the openings with a utility knife, staying tight to the window frames for a clean fit. Once trimmed, the plastic sits snug against the framing, the vents operate freely, and the greenhouse walls are sealed, tight, and ready for growing.
Step 7: Building the greenhouse door
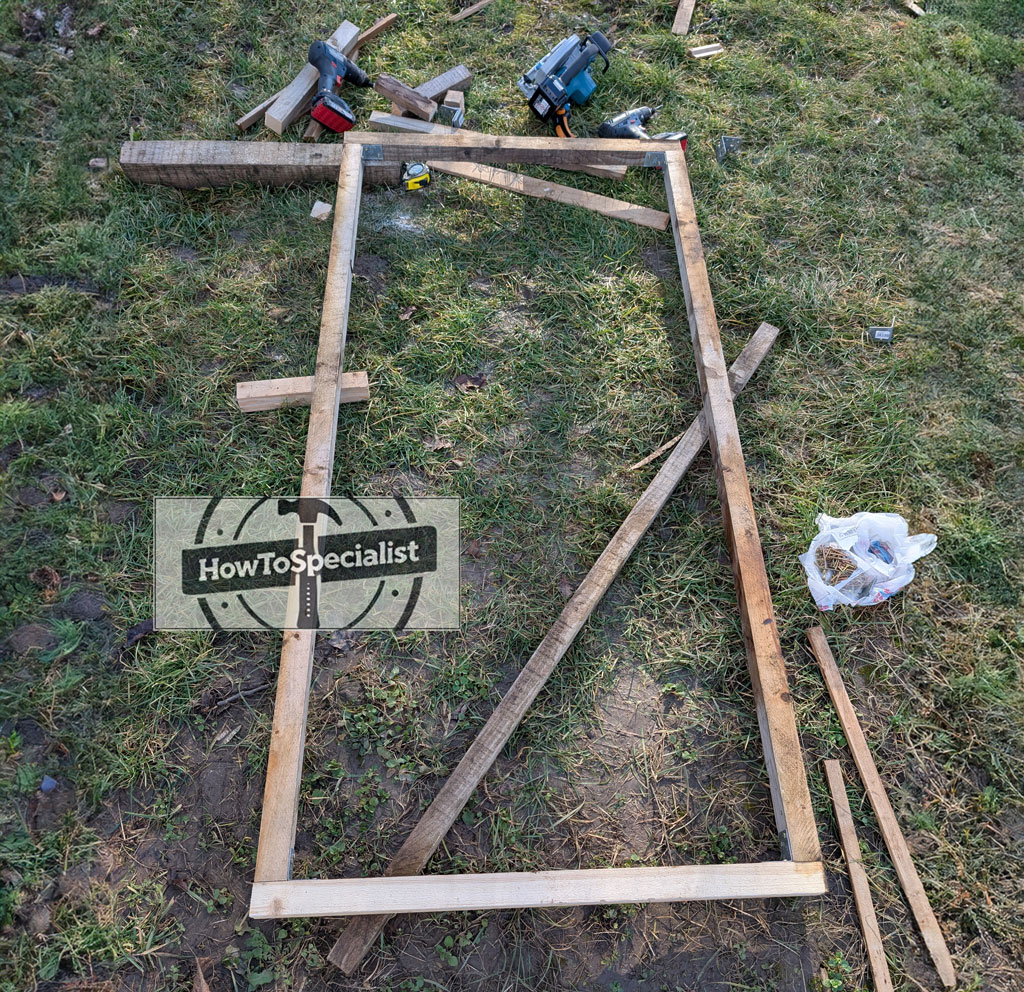
The door frame is built from lumber cut to size and assembled flat on a level surface. Each piece is aligned carefully and locked together with screws, creating a rigid rectangular frame that won’t twist over time. Taking a moment to check for square before driving the final fasteners makes the door fit cleanly once it’s installed.
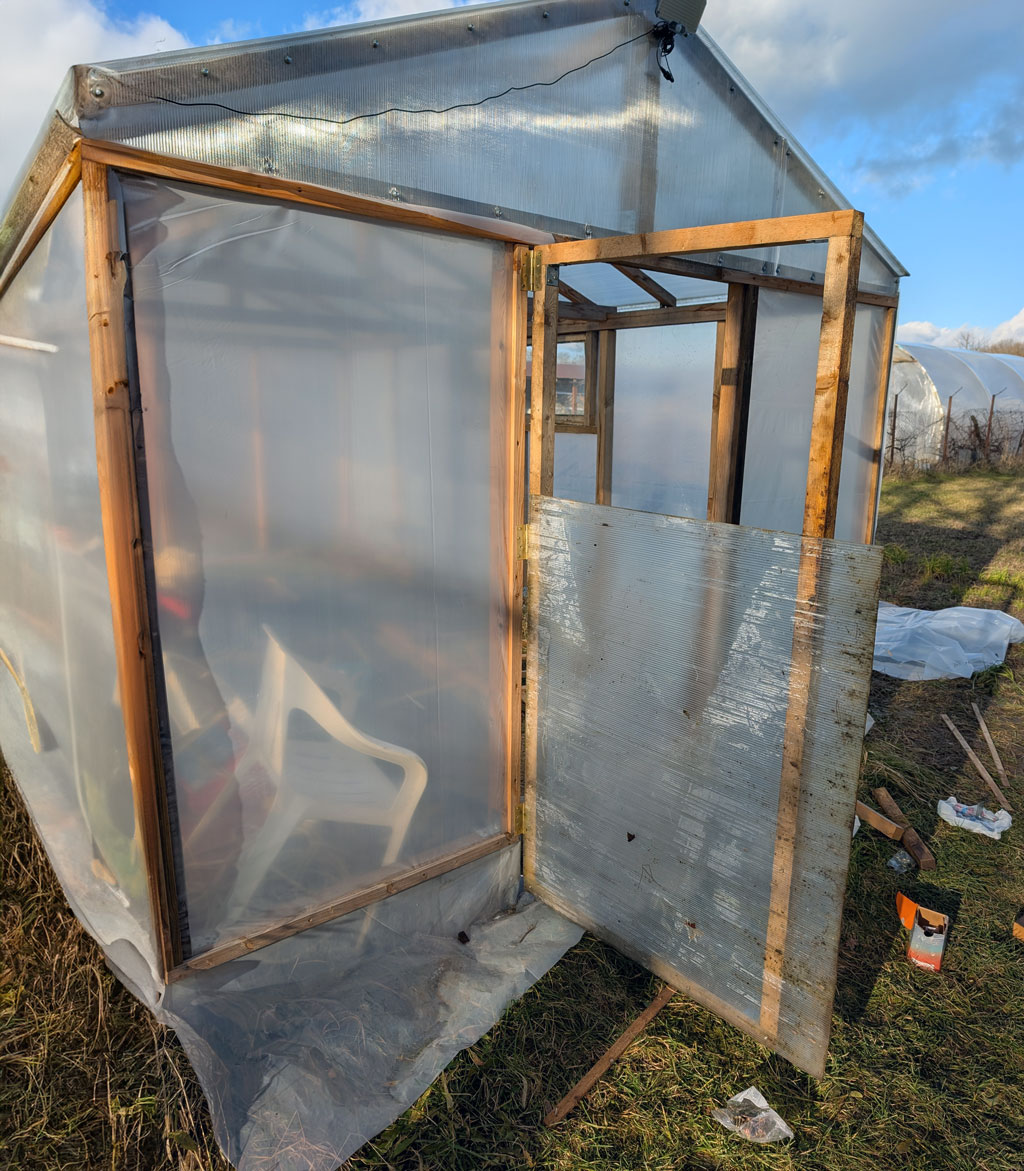
To add strength where it matters most, the corners of the door frame are reinforced with L-brackets. These keep the joints tight through repeated opening and closing and add long-term durability. With the frame complete, the leftover polycarbonate and greenhouse plastic are attached to the door, making good use of materials already on hand while keeping the door light and bright.
The finished door is then set into the opening and secured with hinges, checking clearances so it swings freely without rubbing. A latch is added to keep the door closed and sealed when needed. Once installed, the door feels solid, operates smoothly, and ties in perfectly with the rest of the greenhouse build.
Step 8: Finishing touches


The finishing touches are what turn the greenhouse from a framed structure into a functional growing space. Final checks are made to ensure all fasteners are tight, the plastic is evenly tensioned, and the polycarbonate panels are properly sealed. Any sharp edges are trimmed, exposed screw heads are checked, and moving parts like the door and vent windows are adjusted so they open and close smoothly.
With the structure complete, attention shifts to usability and performance. Airflow is tested by opening the side vents, confirming that heat can escape naturally on warm days. The interior is cleared and leveled, making room for raised beds, shelving, or planting tables. Light distribution, headroom, and access paths are all evaluated, ensuring the greenhouse works efficiently from end to end.
At this point, the greenhouse steps beyond construction and into purpose. The solid post-and-beam frame, secure coverings, and built-in ventilation come together as a reliable environment for growing. Whether used for starting seedlings early or extending the season well into fall, the greenhouse is now complete, dialed in, and ready to be put to work.
Interior Layout
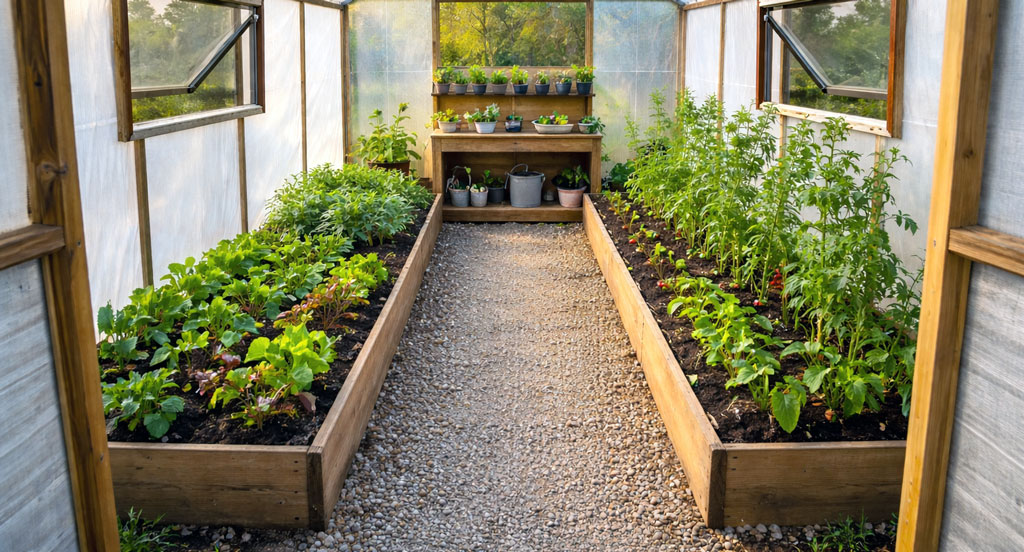
Ground preparation sets the tone for how usable and comfortable the greenhouse will be long term. Start by clearing vegetation and leveling the area inside the frame, then lay down a weed barrier to keep growth under control. From there, you can choose a base that fits your needs, whether that’s compacted gravel for drainage, pavers for a clean walking surface, or exposed soil if you plan to grow directly in the ground. Good drainage at this stage prevents standing water, mud, and excess humidity later on.
Once the base is in place, the interior layout can be planned around how the greenhouse will actually be used. Leave a clear central walkway for easy access, and organize planting areas along the sides where light is most consistent. Raised beds, grow tables, or shelving can be added depending on what you plan to grow, while keeping enough space to move comfortably and work efficiently.
Thinking through the layout early helps avoid constant rearranging down the road. A well-prepared floor and a simple, logical interior setup make daily use easier, keep the greenhouse cleaner, and turn it into a practical space the whole family can enjoy using throughout the season.
Top Tips
Take extra time to square and level the post layout
Everything in this greenhouse depends on the posts being set correctly. Tight string lines, matching diagonals, and plumb anchors make the wall framing, roof, and coverings fall into place without fighting you later. If the base is right, the rest of the build moves faster and cleaner.
Let the structure do the work, not the plastic
The post frame, wall studs, and roof framing should carry all structural loads. The greenhouse plastic and polycarbonate are coverings, not reinforcement. Adding enough vertical supports behind the plastic keeps it tight, quiet in the wind, and much more durable over time.
Allow for movement in roof panels and plastic
Polycarbonate expands and contracts more than wood. Always use screws with rubber washers and avoid over-tightening. On the plastic walls, the 1×2 slats spread pressure evenly and prevent tearing, especially during temperature swings and storms.
Ventilation matters more than insulation
Side vent windows and door airflow are critical in a greenhouse like this. Good ventilation prevents overheating, reduces moisture buildup, and keeps plants healthier than simply trapping warm air inside. If in doubt, more airflow is always better than less.
Build it like an outdoor structure, not a temporary greenhouse
Anchored posts, concrete-set hardware, reinforced corners, and solid joinery are what take this project to the next level. Treating it like a permanent structure pays off in longevity, stability, and day-to-day usability, especially through wind, snow, and seasonal changes.
Conclusion
This greenhouse is about more than framing lumber and plastic panels. It’s a sturdy, well-thought-out structure designed to support real growing, season after season. The solid post-and-beam foundation, reliable ventilation, and light-efficient coverings come together to create a space that works with nature instead of fighting it. Every step in the build is focused on durability, simplicity, and long-term use, not quick fixes or temporary solutions.
Once complete, the greenhouse becomes part of everyday life for you and your family. It’s a place to start seedlings early, grow fresh food longer into the year, and spend time together learning, planting, and harvesting. Beyond the practical benefits, it creates shared moments and a sense of independence, turning this project into something that adds lasting value well beyond the build itself.