Looking to add both greenery and privacy to your outdoor space? These privacy planter box plans are the perfect solution! With a combination of style and function, this project allows you to build a sturdy planter box out of cedar picket fence boards that not only holds your favorite plants but also creates a natural screen for extra privacy. Whether you’re blocking off a neighbor’s view or adding a cozy corner to your patio, this project is simple enough for any DIYer.
The estimated cost for materials is around $75–$150, depending on your choices, and you can have it built in just a weekend. With clear, step-by-step instructions, you’ll be able to create a durable, weather-resistant planter that adds both beauty and function to your space. Let’s dive into these plans and get started on building your own privacy planter box!
We recommend you to invest in the best materials you could afford. Therefore, you should buy weather-resistant lumber, such as pine or cedar. Always take accurate measurements before adjusting the size of the components at the proper size. Drill pilot holes trough the components before inserting the wood screws, to prevent the wood from splitting. My plans come with a full cut / shopping list and they are PDF Download and Print friendly. See all my Premium Plans HERE.
Made from this plan
Privacy Planter Box – Free Plans
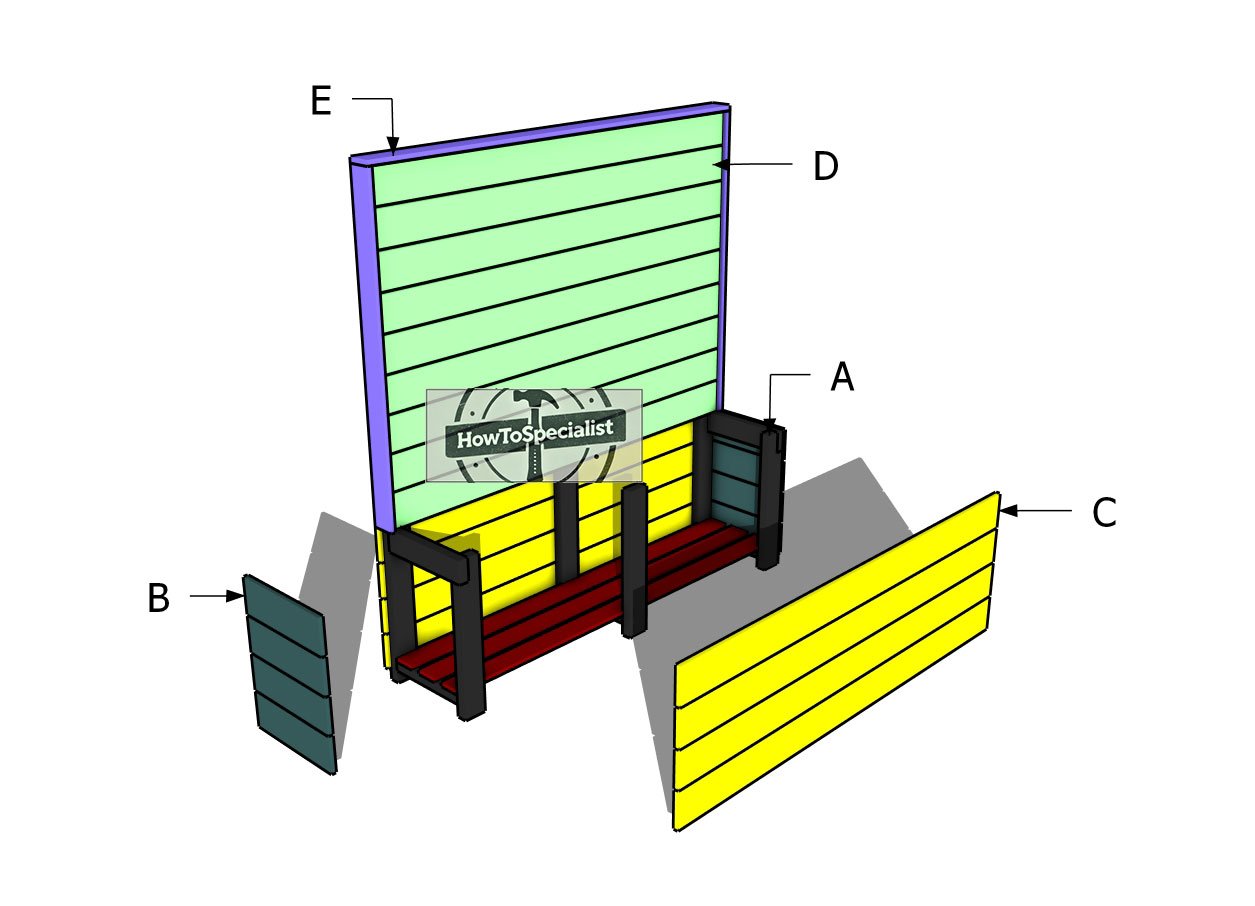
Building-a-privacy-screen-planter
Materials
A – FRAME – 2×4 lumber 76 1/4″ – 3 pieces
A– FRAME – 2×4 lumber 24 3/4″ – 3 pieces
A– FRAME – 2×4 lumber 13 3/4″ – 3 pieces
A– FRAME – 2×4 lumber 15 1/4″ – 2 pieces
B – SIDES – 1×6 cedar picket 16 3/4″ – 8 pieces
C – FACES – 1×6 cedar picket 72″ – 8 pieces
D – PRIVACY SCREEN – 1×6 cedar picket 70 3/4″ – 9 pieces
E – TRIMS – 1×4 lumber 51 1/2″ – 2 pieces
E – TRIMS – 1×4 lumber 72″ – 1 piece
F – BOTTOM – 1×4 lumber 70 3/4″ – 3 pieces
- 19 pieces – 1×6 cedar pickets 6 ft – 5/8″ thick
- 4 pieces – 1×4 cedar picket 6 ft
- 1 piece – 1×4 cedar picket 10 ft
- 3 pieces – 2×4 lumber 8 ft
- 1 piece – 2×4 lumber 10 ft
- 2 1/2″ screws – 100 pieces
- 1 5/8″ screws – 100 pieces
- 2″ finish nails – 50 pieces
- glue, stain
- 80 sq ft of landscape fabric
- staples – 100 pieces
Tools
- Circular saw
- Drill machinery, drill bits
- Safety gloves, glasses
- Chalk line, tape measure, spirit level, carpentry pencil
Time
- One weekend
Related
Pin for later!

Building the frame
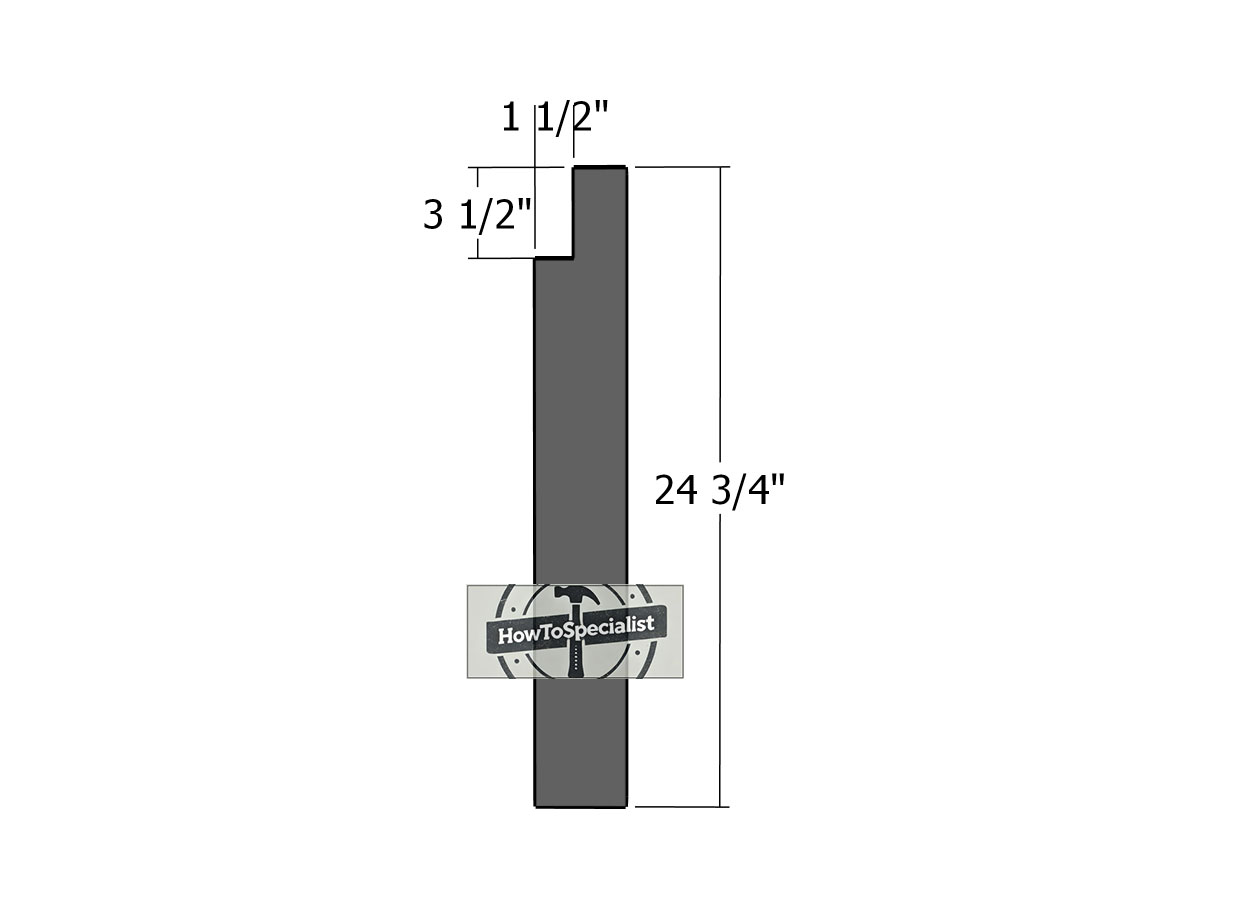
Frame-component
The first step in this project is to build the frame components. You’ll need to cut two pieces from 2×4 lumber according to the measurements in the diagram. Grab your circular saw, mark your cut lines, and carefully make your cuts.
Once you’ve got the pieces cut, go ahead and smooth the edges with some sandpaper for a clean finish—this will help everything fit together nicely and prevent any splinters.
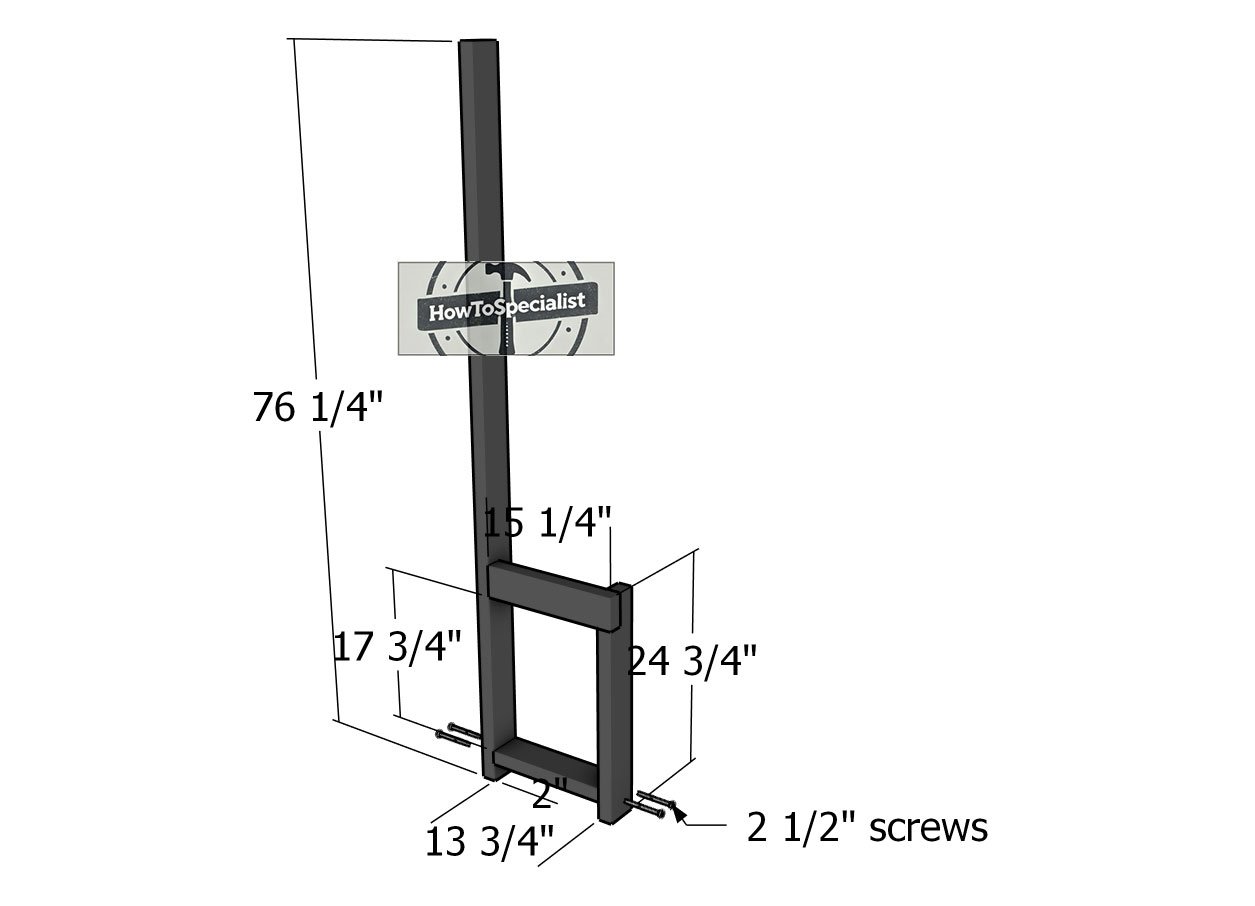
Building-the-side-frames
Now it’s time to assemble the side frames. Cut the remaining pieces from 2×4 lumber as shown in the plans, then start assembling everything with 2 1/2″ screws.
Make sure to align the edges so they’re flush, and double-check that your corners are square before driving in the screws. This will ensure a sturdy, well-aligned frame that sets the foundation for the rest of the project.
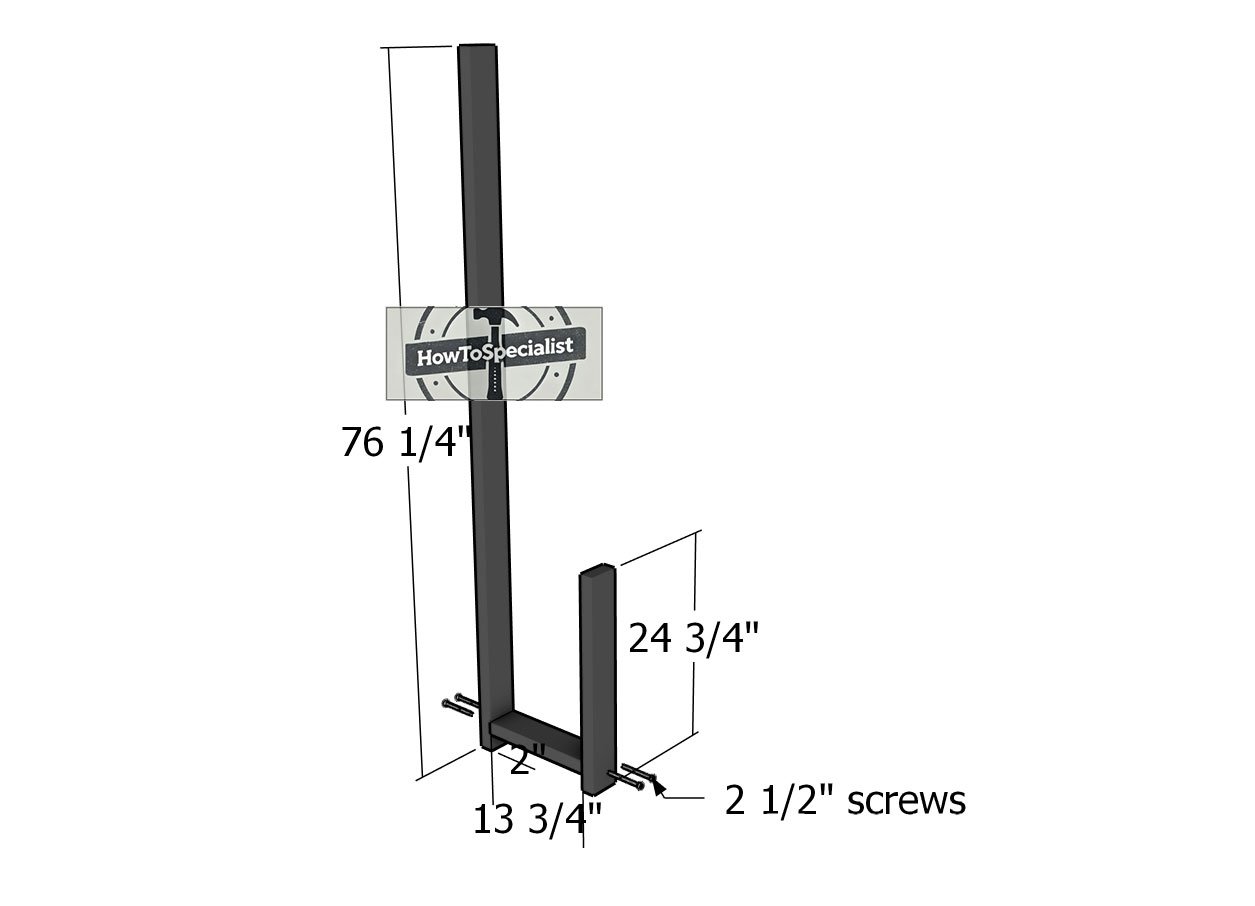
Middle-frame
Next up, we’ll assemble the middle frame using the same techniques as before. Cut your pieces to size, then align everything properly and secure them with 2 1/2″ screws.
Don’t forget to drill pilot holes before driving in the screws—this step is important to keep the wood from splitting and will help ensure a solid, long-lasting build. Follow the same process and you’ll have the middle frame ready to go in no time!

Fitting-the-side-boards
Next, it’s time to attach the 1×6 cedar boards to the sides of the privacy planter. We’ll be using cedar picket fence boards, but make sure to choose ones without the dog ears for a clean look. Place 1/4″ spacers between the boards to create consistent gaps, giving the planter a more polished and breathable design.
Before attaching the rest of the boards, be sure to center the middle frame between the two sides. Drill pilot holes to prevent splitting, then use 1 5/8″ screws to secure each board in place—two screws per joint for a solid hold.
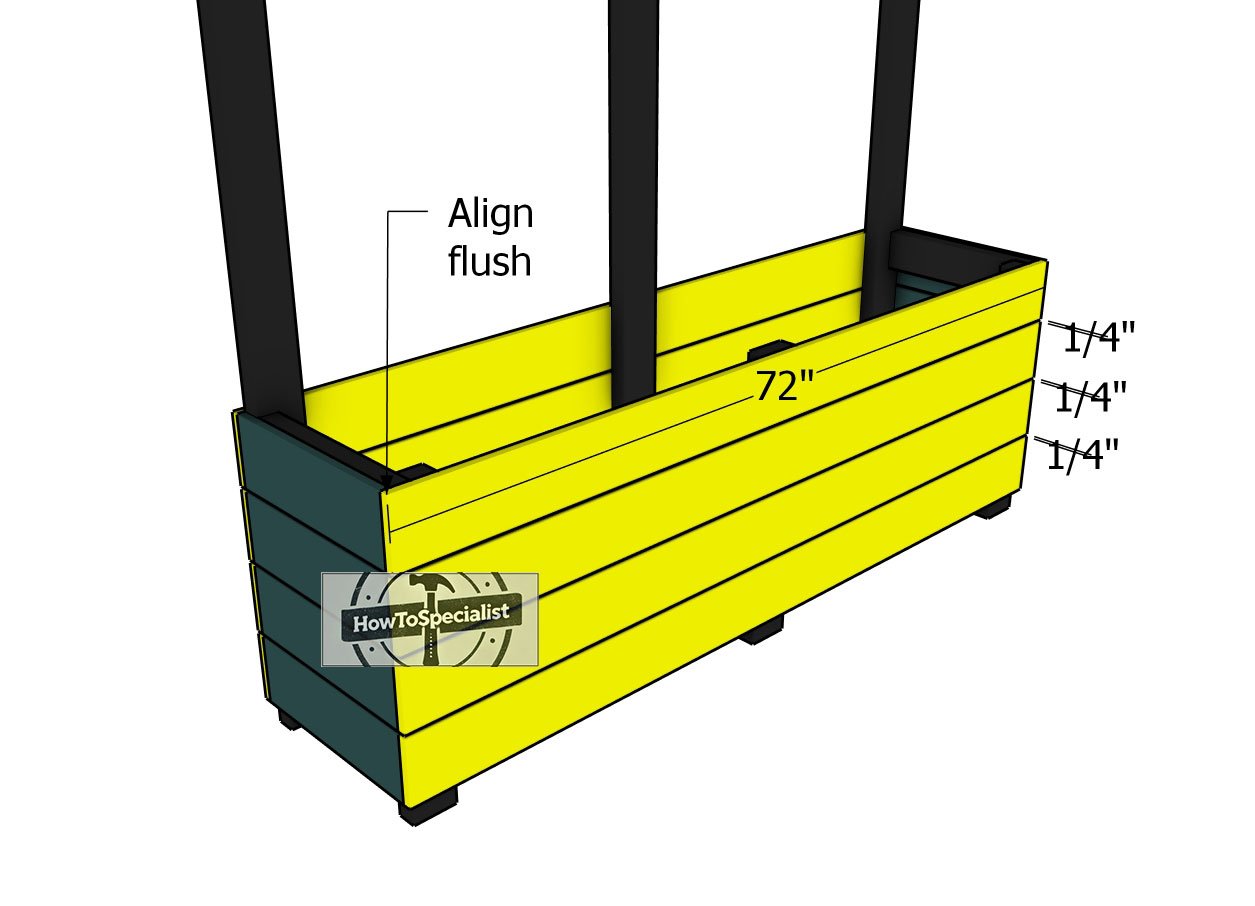
Front-and-back-slats
Now, let’s fit the 1×6 picket fence boards to the front and back of the planter box. Make sure to align the edges so they’re flush with the frame for a clean, professional look.
Once everything is in place, secure the boards to the frames using 1 5/8″ screws, with two screws for each joint to ensure a sturdy connection. Take your time on this step to make sure everything stays aligned and secure.
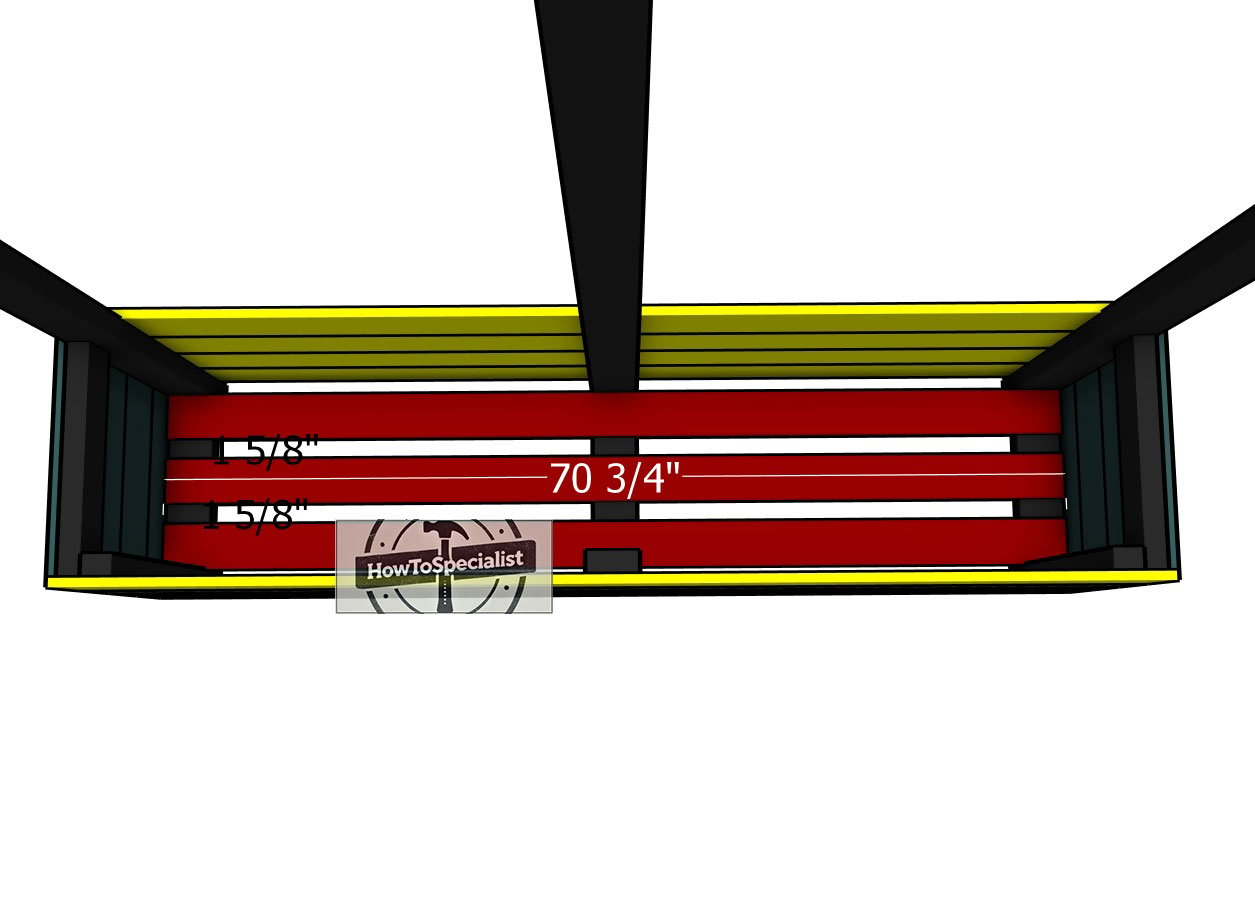
Fitting-the-bottom-slats
Now that the planter box is fully assembled, it’s time to attach the 1×4 boards to the bottom. Lay the slats out evenly spaced to allow for proper drainage, then secure them in place with 1 5/8″ screws.
Make sure everything is lined up, and drive in the screws to lock the slats down securely. This step will give your planter a solid base while keeping it functional for your plants.
Building the privacy screen
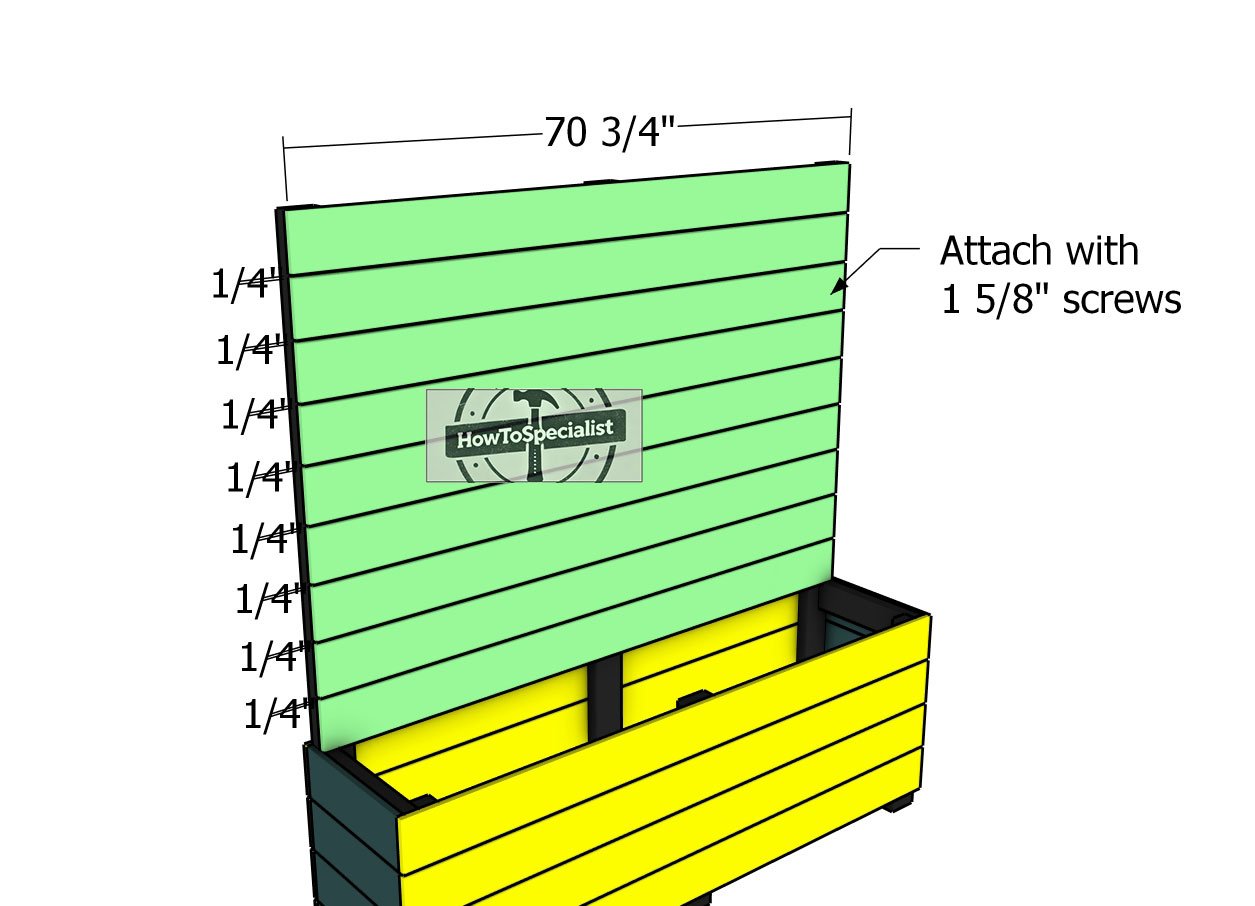
Fitting-the-back-screen-slats
Now, let’s attach the 1×6 picket fence boards to the privacy screen. Start from the bottom and work your way up, aligning the edges so they’re flush for a clean finish. Use 1/4″ spacers between the boards to maintain even gaps as you go.
Be sure to drill pilot holes first to prevent splitting, then secure each board with 1 5/8″ screws to lock everything tightly into place. This will give your screen a solid, polished look that will stand up to the elements.
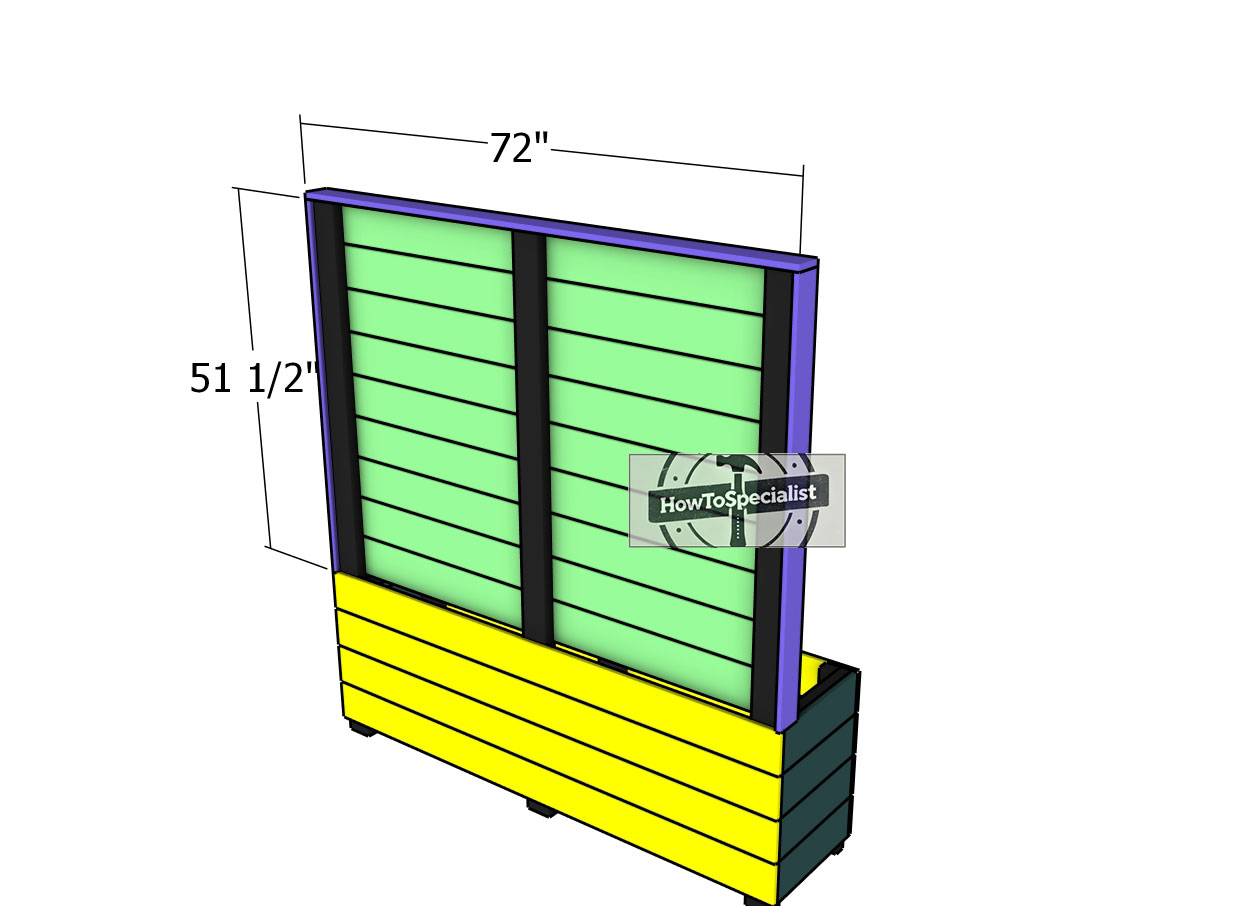
Attaching-the-trims
To add an extra layer of beauty to your project, it’s time to attach the 1×4 boards as trim to the exterior of the privacy screen. Secure the trim boards in place with 2″ nails and a bit of wood glue for added strength.
Make sure the boards are snug with no gaps between them, creating a seamless, polished finish that enhances both the look and durability of your privacy screen.
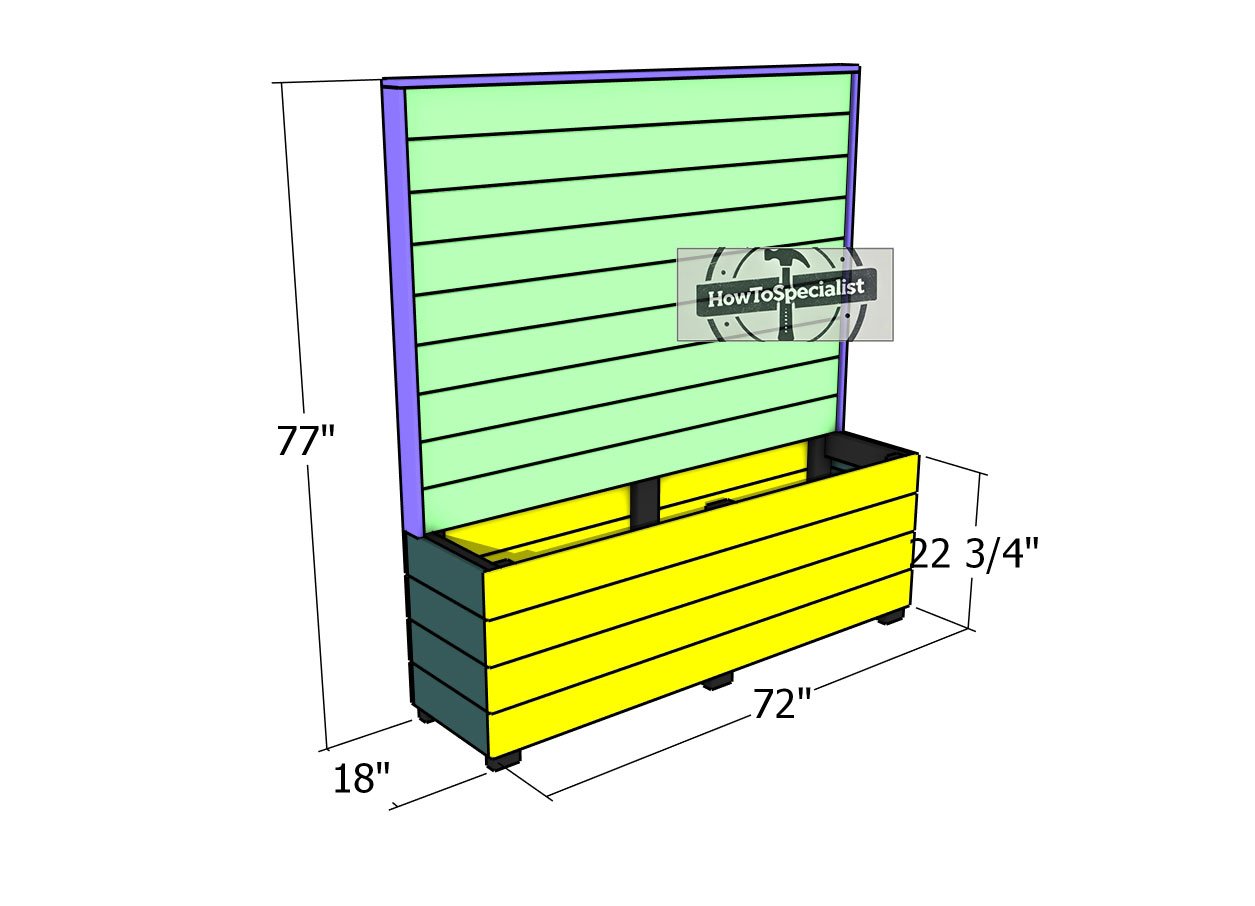
Privacy-planter—dimensions
To fit landscape fabric inside your privacy planter box, start by cutting a piece of fabric slightly larger than the interior dimensions of the box.
Line the inside with the fabric, pressing it firmly into the corners and sides, making sure it’s snug. Secure the fabric with staples along the top edge, leaving enough slack for water to drain properly while keeping the soil contained.
Finishing touches
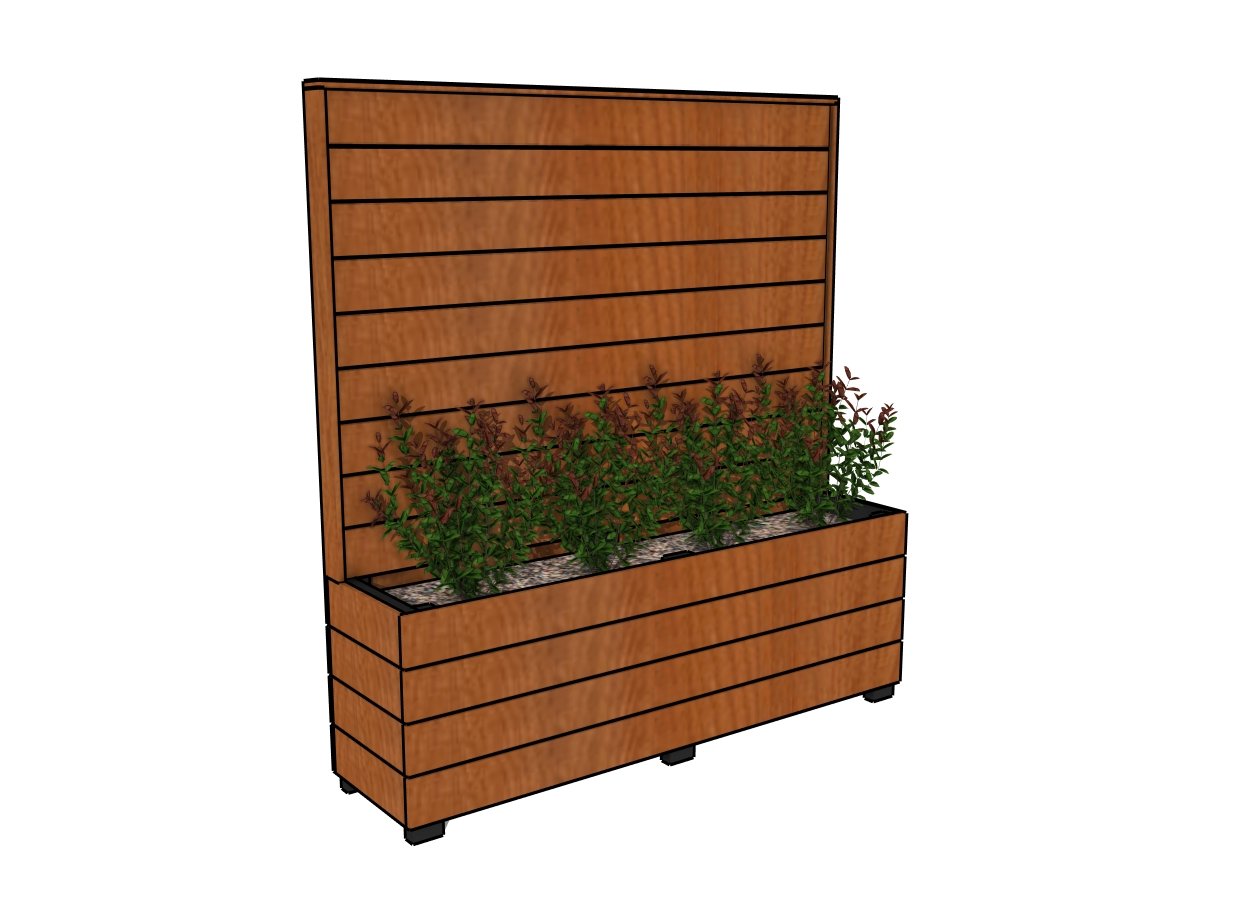
DIY Privacy planter box plans
For the finishing touches on your cedar privacy planter box, start by giving the edges a good sanding to smooth everything out. Cedar holds up well to the elements, so you can leave it natural if you like that weathered look, or go ahead and apply a clear sealant for extra protection.
If you’re feeling creative, a coat of outdoor stain or paint will really make it pop. Just make sure all your joints and screws are nice and secure, and you’ll have a planter that’s both functional and great-looking for years to come
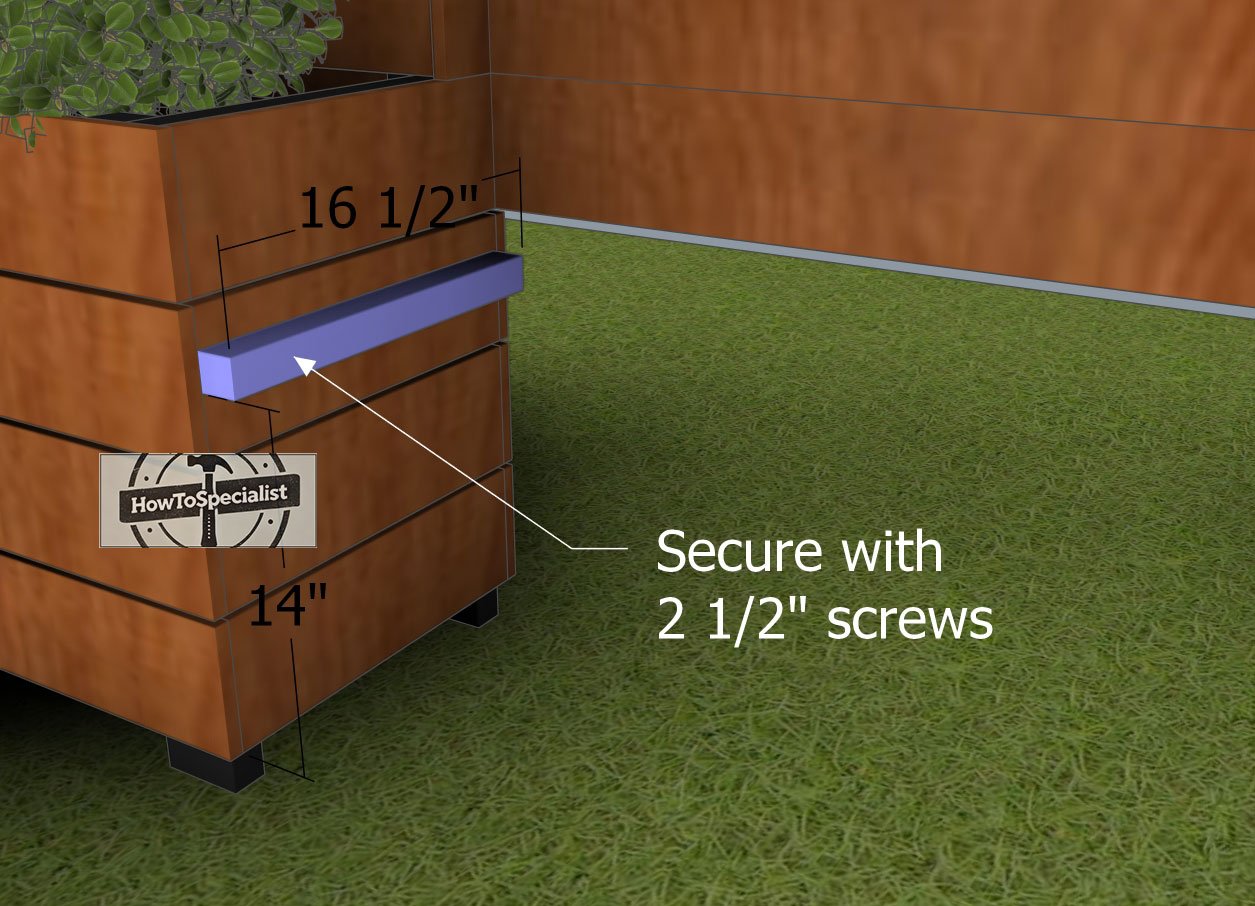
Attaching-the-cleats
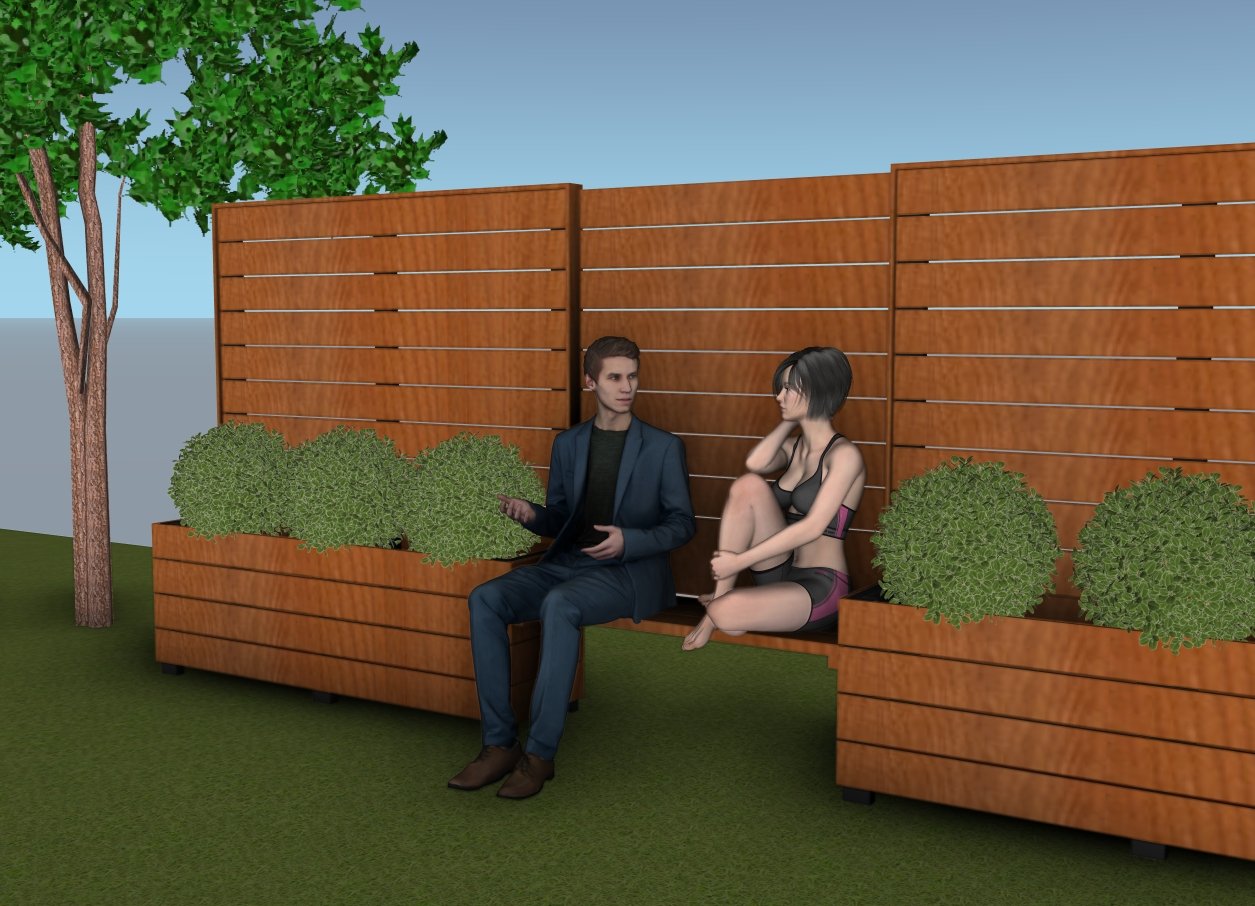
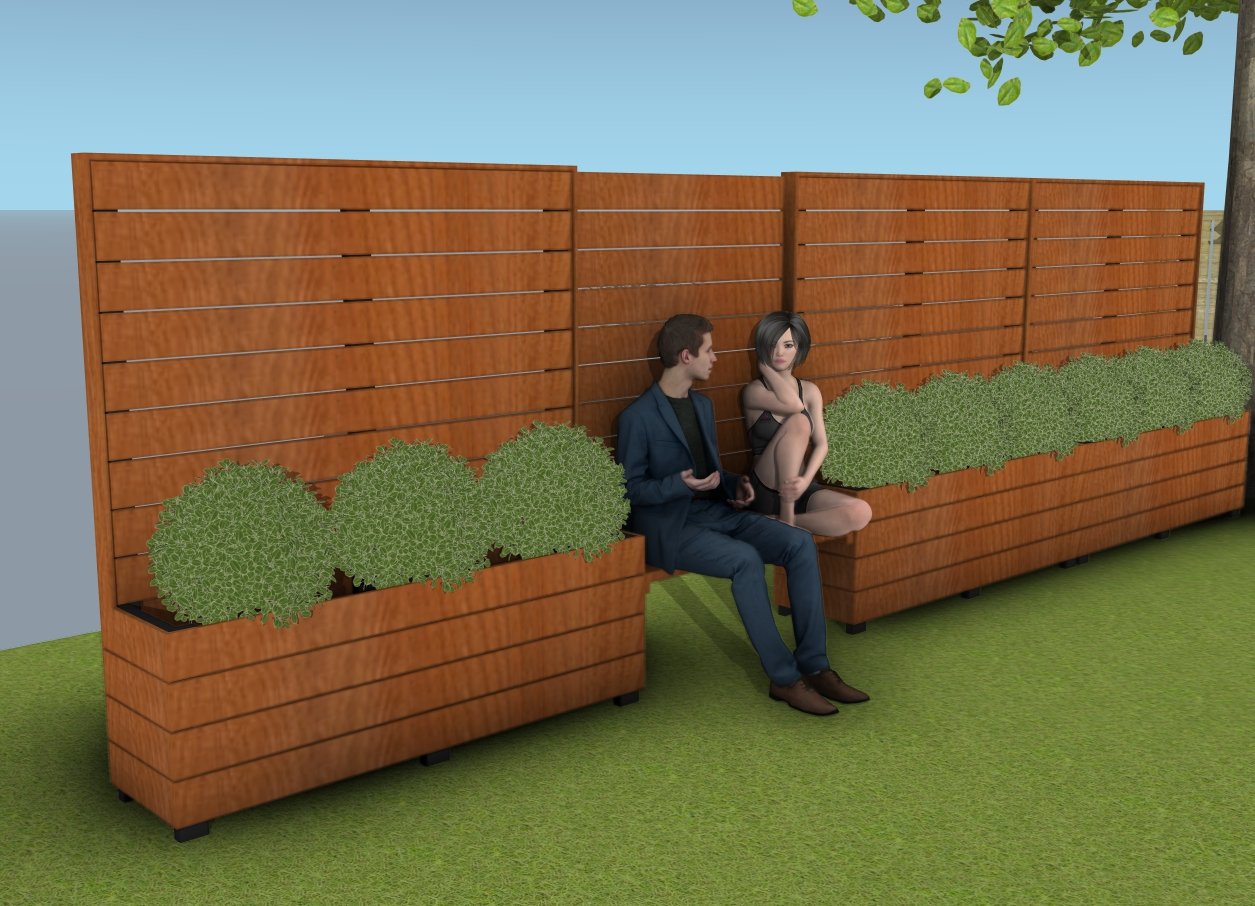
You can even create a cute bench seat with two units. Just add 2×2 cleats to the planter boxes (adjust the height to suit your needs) with 2 1/2″ screws and then fit three 2×6 boards on top of them.
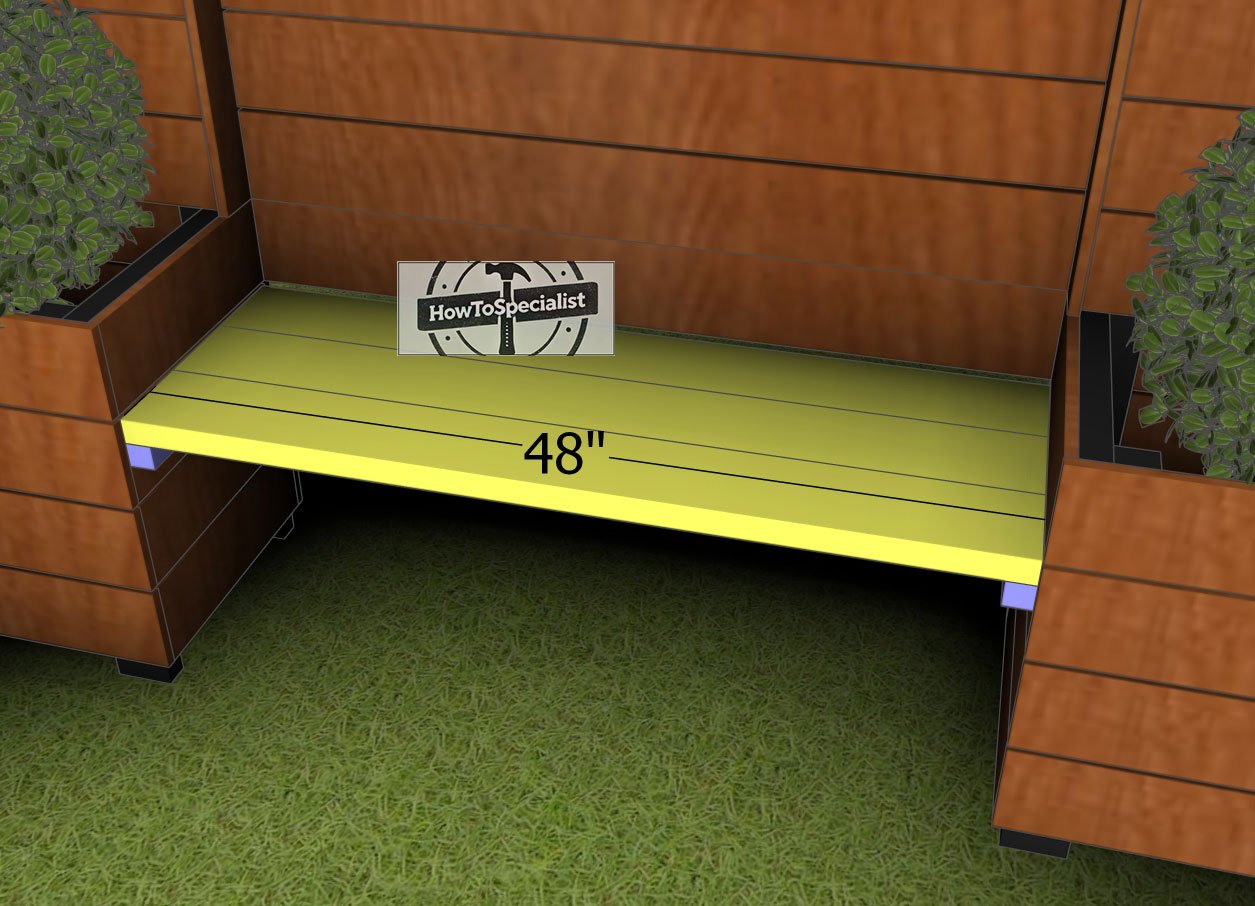
Seat-slats
Now you have created a cozy space for relaxation or for enjoying some time in your garden while being safe from unwanted stares.
How to build a privacy planter
With your new privacy planter box in place, you’ve added both style and function to your outdoor space. Whether it’s for a bit of privacy or just a beautiful way to showcase your favorite plants, this project is sure to make your patio or garden even more enjoyable.
Plus, knowing you built it yourself makes it all the more satisfying! Now, grab a drink, sit back, and admire your handiwork—you’ve earned it! And who knows? This might just be the first of many DIY projects you tackle. Ready for the next one? Check out all my outdoor plans and maybe it sparks an idea.
Privacy planter box plans
Smart Tip: I can’t wait to see how you make it your own – don’t forget to share your finished projects with me! In addition, take a look over the rest of my shed plans HERE. Free plans for the corresponding Montessori chair HERE.
Thanks for checking out my privacy planter box – free plans! Be sure to explore my other projects for more fantastic ideas. Don’t forget to hit the LIKE button and SHARE with your friends using the social media links below.