This article is about how to install concrete anchor. In this step by step project we show you how drill a hole in concrete, by using a drill machinery with hammering function and how to install the right anchors as to get the job done in a professional manner. Either you want to fasten something to a concrete floor or you just want to hang an objects on a concrete wall, you have to learn the basic techniques on how to install a concrete anchor. This task is not hard nor complex, provided you work with patience and choose the right tools and materials.
First of all you need a good drill machinery with hammering function, as to be able do drill holes in concrete. In addition, you also need masonry drill bits as to be able to go through the cement walls or floors. There are many unexperienced diy-ers who underestimate the importance of using the right tools, but they end up with damaging the tools or the materials.
On the market there are many types of cements anchors, each having its own modality of installation. In addition, the concrete anchors size starts with 3/16” up to bigger ones 1-1/4” in diameter, and have lengths from 3/4” up to 10”. In order to secure them into position, you also need to drive in a bolt / screw, which expands them in the wall, or a wrench key.
The first type of concrete anchors is represented by the wedge anchors, which are designed to be installed exclusively in concrete walls and floors. In order to lock them into position, you need to use a wrench key. They come in many sizes, so you should find easily one to fit your needs.
Next, you could install concrete sleeve anchor, which is probably the most common type of cement anchors. In order to install them, you have to drill a hole (the same diameter as the anchor ), tap the sleeve anchor in the wall and use a wrench to fasten the bolt. Remember that you don’t have to apply too much force while you are fastening the bolt, as you might damage it.
Last but not least, you could install drop-in anchors, which are of two-types made of plastic or of metal. The metal drop-in anchors are designed for concrete, while the plastic ones can also be installed in bricks. In order to secure an object, you also have to buy the corresponding bolt / screw, as to drive it in the anchor (the anchor will expand and lock in the hole).
Made from this plan
In order to install concrete anchors, you need the following:
Materials
- concrete anchors
- bolts or screws
Tools
- safety gloves, glasses, ear protections
- drill machinery with masonry drill bits
- wrench key
- vacuum cleaner
- rubber hammer
Tips
- stick duct tape on the drill bit as not to go to deep in the concrete (measure the depth of the needed hole on the drill bit and stick there the duct tape)
Time
- 30 minutes
My best tips on installing a concrete anchor:
Concrete anchors are essential for securely fastening heavy objects like shelving units, machinery, or structural components to concrete surfaces. While installing them may seem intimidating, with the right tools and technique, you can easily achieve a solid hold. Here are my best tips for installing a concrete anchor.
1. Choose the Right Type of Anchor
There are several types of concrete anchors, and choosing the right one depends on the load and the specific project:
- Sleeve anchors: Versatile and great for medium to heavy loads.
- Wedge anchors: Ideal for heavy loads in solid concrete.
- Tapcon screws: Excellent for light to medium loads, often used in concrete block or masonry.
- Drop-in anchors: Best for securing threaded rods or bolts for heavy loads.
Make sure you pick the right anchor for the job based on the weight and application.
2. Gather the Right Tools
You’ll need the following tools for installing concrete anchors:
- Hammer drill (or rotary hammer for tougher jobs)
- Masonry drill bits (to match the diameter of your anchor)
- Vacuum or compressed air (for cleaning out dust)
- Hammer (if needed for the anchor type)
- Wrench or socket set
- Tape measure
- Pencil or marker (for marking the hole location)
3. Mark the Drilling Location
Start by marking where the anchor will be installed. Use a tape measure to find the exact location and mark it with a pencil or marker. Ensure the marks are accurate, as drilling off-center can compromise the strength of the anchor.
4. Drill the Hole
Using a hammer drill with a masonry bit (the size recommended for the specific anchor), drill a hole at the marked location. Hold the drill steady and apply consistent pressure to avoid damaging the concrete. Be sure to drill deep enough to accommodate the entire length of the anchor. Many anchors require a hole that’s slightly deeper than the anchor itself to allow for expansion.
Tip: Use a piece of tape on the drill bit as a depth marker to avoid over-drilling.
5. Clean the Hole Thoroughly
After drilling, it’s essential to clean out the dust and debris from the hole. Use a vacuum, compressed air, or even a small brush to clear out the dust. A clean hole ensures the anchor sits properly and achieves maximum holding strength.
6. Insert the Anchor
Depending on the type of anchor you’re using, this step may vary:
- For sleeve anchors or wedge anchors, insert the anchor into the hole and tap it gently with a hammer until it’s flush with the surface.
- For drop-in anchors, insert the anchor and use the setting tool to expand it inside the hole.
- For Tapcon screws, insert the screw directly into the drilled hole.
Make sure the anchor is fully seated in the hole and sitting flush against the surface.
7. Tighten the Anchor
Once the anchor is in place, tighten it using the appropriate tool:
- For sleeve anchors and wedge anchors, tighten the nut on the threaded end with a wrench or socket until snug.
- For Tapcon screws, use a screwdriver or drill to drive the screw into the concrete.
- For drop-in anchors, thread your bolt or rod into the anchor.
Make sure the anchor is securely tightened, but avoid overtightening, as this can strip the threads or crack the concrete.
8. Test for Stability
After installation, gently tug on the anchor or whatever you’re fastening to ensure the anchor is securely in place. If it feels loose, double-check that the hole was drilled deep enough and that the anchor was properly expanded or tightened.
Bonus Tip: Use the Right Drill Bit for the Job Always use a masonry drill bit and a hammer drill for drilling into concrete. Standard drill bits won’t penetrate concrete effectively, and using the wrong tool can result in uneven holes and poor anchor performance.
How to install concrete anchor
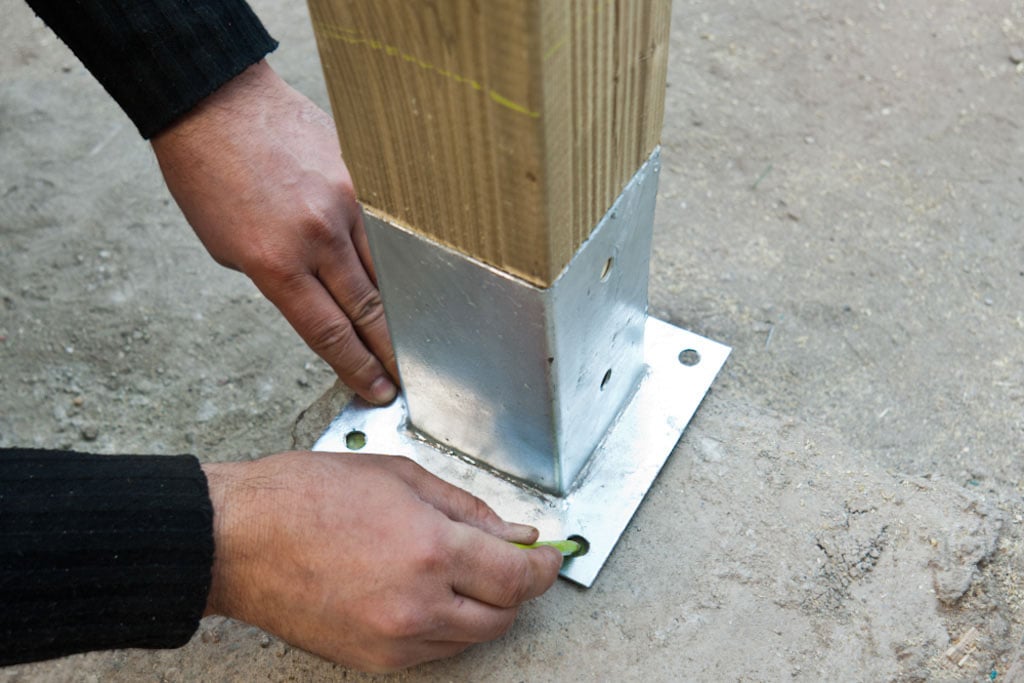
First of all, you have to make a mark on the concrete wall or floor where you want to fasten an object. In our case, we have to install a post hardware, so after we have aligned it with rest of the post, we have used a good carpentry pencil to make the marks.
You should remember that the marks should be highly visible, otherwise they might erase before you drill the needed holes. If needed, you could use a spirit level or a laser level
Next, you have to drill the holes in the marked locations. Consequently, you have to use a drill machinery with torque control and masonry drill bits. Before you start drilling the holes, you have to turn on the hammering function, otherwise you won’t be able to go in concrete.
Maybe one of the most important aspects when installing the concrete anchors is the choice of the right drill bits. Therefore, you should read carefully on the anchor label, as to use the proper drill bit size on making the hole. If you drill a larger or smaller hole than necessary, you won’t be able to insert the anchors.
While you drill in concrete, you have to hold the drill machinery firmly. Consequently, with one hand you push the trigger, while with the second one you control the drill machinery. In addition, you have to use low speeds until you drill about 1/2” and higher speeds after that.
Installing concrete anchors
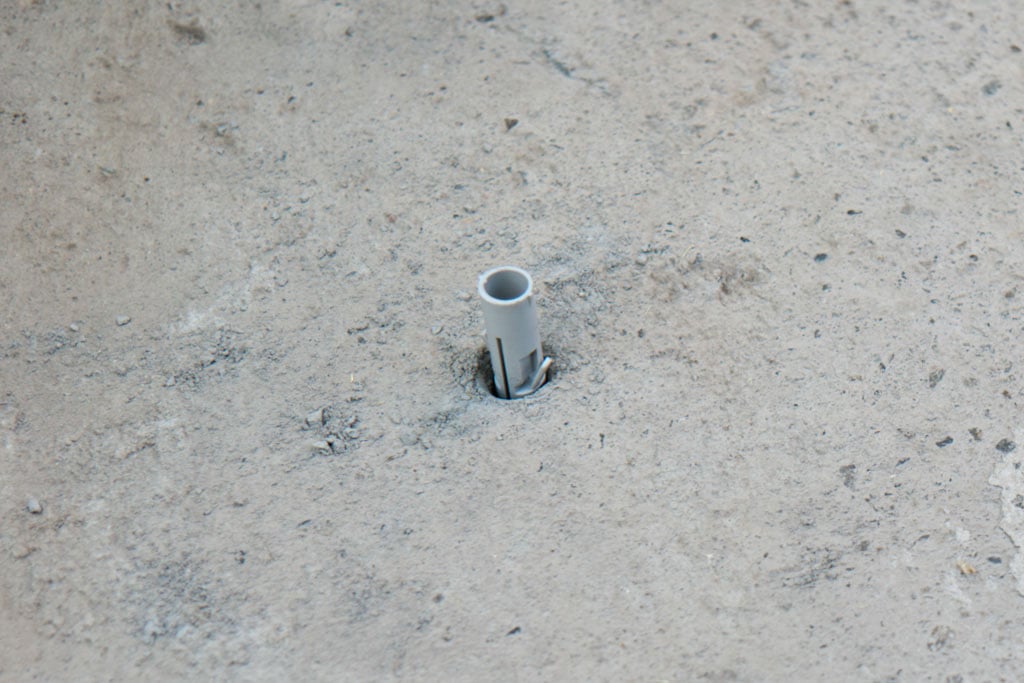
After you have drilled the holes, you have to insert the anchors in concrete. Consequently, you have to drop- in the plastic or metal anchors by using your hands. The hole must be drilled plumb, otherwise you will face serious issues when inserting the anchors.
Smart tip: before installing the concrete anchors, you have to clean thoroughly the hole, by using a vacuum cleaner. This aspect is essential, otherwise you won’t be able to insert the anchor properly.
Next, you have to tap the concrete anchors gently, by using a hammer. You should not use too much force, otherwise you risk damaging the anchors or the floor.
The top of the anchors must be aligned properly with the surface of the concrete wall / floor, or you won’t be able to secure the hardware appropriately. This steps are essential for your project, so try to stay focus while you are working.
Last but not least, the final step is to use a wrench key to drive in the bolts. This operation is straightforward, even for the beginners: you only have to move the wrench key clockwise, until you have secures the hardware.
You should remember that you don’t have to tighten the bolts too much, otherwise you risk damaging the concrete anchors. As you drive in the bolt, the anchor expands and locks in the concrete, so you have to work with care.
By following these steps, you can install concrete anchors securely and confidently, ensuring whatever you’re fastening stays in place. Whether you’re mounting heavy equipment or securing fixtures, the right technique and tools will make the job easy.
Thank you for reading our article on how to tile stairs, and we recommend you to check out the rest of our projects. Please share our projects with your friends, by using the social media widgets.
Related projects:


