

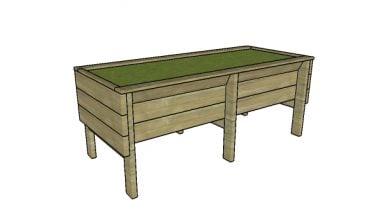
This step by step diy project is about how to build a planter box. Building a planter box is a straight forward project for any patio or garden, even for beginners. Therefore, if you don’t have much experience in working with lumber, this project is ideal to learn the basic techniques and in the same time to create something wonderful with your own hands. Pay attention to the tips, if you want to get a professional result.
The first step of the woodworking project is to select the right plans for your needs. Therefore, make sure the size and the design of the planter box will match the design of your property. It is essential to invest in high quality lumber, such as pine, redwood or cedar, as the parts will be exposed to water damage. In addition, we recommend you to make sure the slats are in a good visual condition.
In order to get both a nice appearance and a rigid structure, we recommend you to drill pocket holes through the components and to insert galvanized screws. Check if the corners are right-angled and plumb the legs with a spirit level before driving the screws into place. Work with attention and plan everything from the very beginning, if you want to get a professional result, while don’t having to invest a fortune. See all my Premium Plans in the Shop.
Made from this plan
Building a planter box

Building a planter box
Materials
- A – 4 pieces of 3×3 lumber – 20” long LEGS
- B – 4 pieces of 3×3 lumber – 11 1/4” long, 4 pieces – 40 1/2″ FRAME
- C – 18 pieces of 1×6 lumber – 13 1/2″ long SLATS
- D – 1 piece of 3/4″ plywood – 13 3/4″ x 40 1/2″ FLOOR
- 4 pieces of 3×3 lumber – 8 ft
- 3 pieces of 1×6 lumber – 8 ft
- 1 piece of 3/4″ plywood – 2’x4′
- 2 1/2″ screws
- 1 1/4″ screws
- glue, stain
- wood filler
Tools
- Safety gloves, glasses
- Miter saw, jigsaw
- Chalk line, tape measure, spirit level, carpentry pencil
- Drill machinery and drill bits
Tips
- Apply several coats of wood stain to the wooden components
- Fill the holes with wood filler and smooth the surface
- Plumb the sides of the bench with a spirit level
Time
- One Day
Related
How to build a planter box

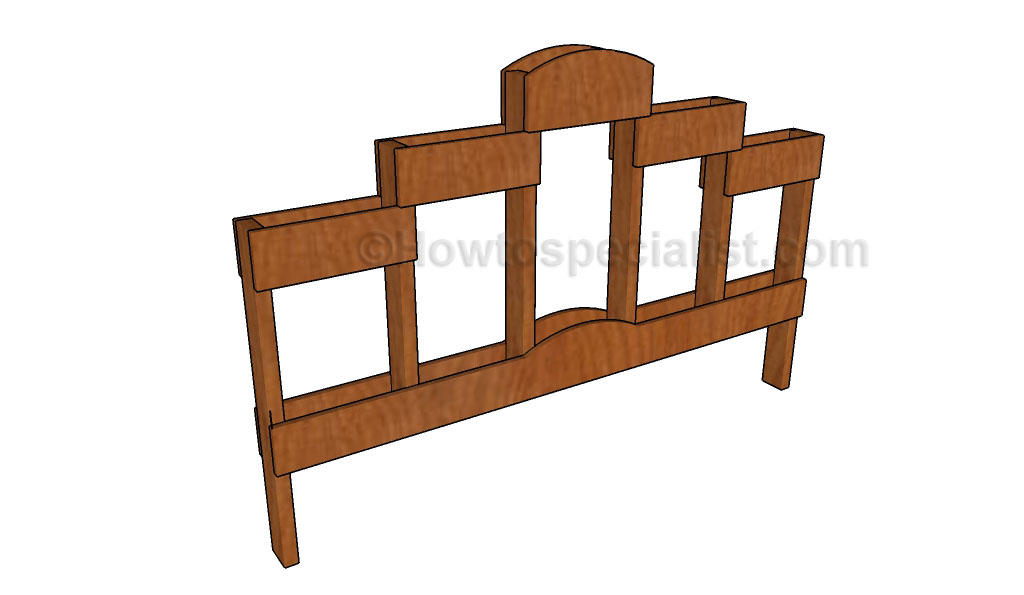
Building the frame of the planter box
The first step of the project is to build the frame of the planter box. As you can see in the image, we recommend you to use 3×3 lumber when building the frame of the rectangular planter box. If you want to get a nice appearance, we recommend you to drill pocket holes at both ends of the horizontal components and insert galvanized screws.

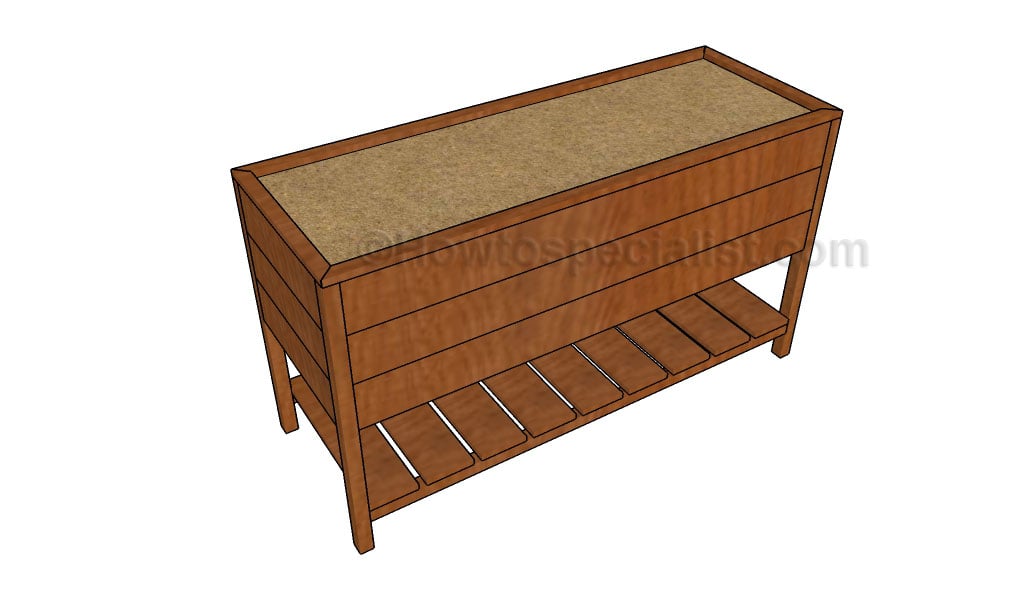
Attaching the floor
Continue the project by attaching a piece of 3/4″ plywood to the bottom of the planer box. Mark the cut lines on the plywood sheet and make the cuts with a circular saw. Next, lay the piece of plywood into place and lock it to the supports with 1 1/4″ screws.

Installing the slats
Building the sides of the planter box is a straight forward process, as you need to use 1×6 slats. After cutting the slats at the right size, you need to drill pocket holes at both ends, align them properly and insert screws into the supports. It is essential to place the slats equally spaced, leaving about 1/4″ between the slats.

How to build a planter box
Last but not least, you should take care of the finishing touches. Therefore, smooth the edges with sandpaper and remove the residues with a damp cloth. Fill the irregularities with wood putty, if necessary.

Thank you for reading our project about how to build a planter box and we recommend you to check out the rest of the projects. Don’t forget to LIKE and SHARE our projects with your friends, by using the social media widgets. SUBSCRIBE to be the first that gets our latest projects.

I like this plan. Thanks for sharing it! I’m going to build it but add trim to the top like you have on your deck planter plan.
Also a small correction; for your material list, I believe it should be 18 1x6s, instead of 16.