
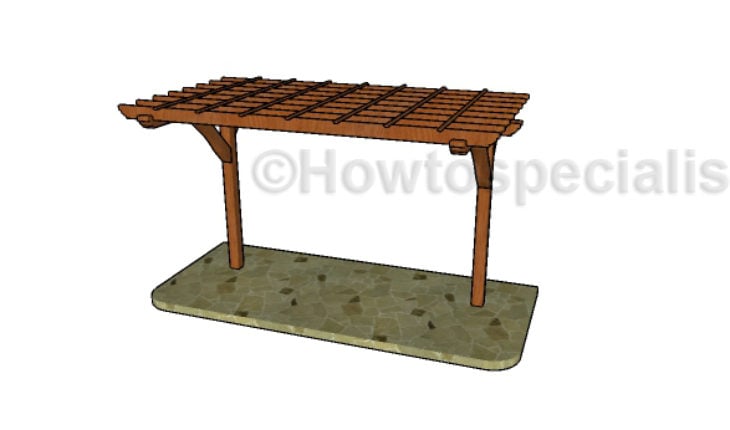
This step by step woodworking project is about two post pergola plans. This is a nice project that anyone can add to their backyard, especially that I’ve got you covered with step by step instructions and diagrams. This 2 legged pergola is ideal if you want to cover your bbq area or create a nice shaded area for your garden bench or hammock. You can adjust the size of the bench to suit your needs. See my other DIY projects HERE. PDF downloadable plans with premium features in the Store.
We recommend you to invest in the best materials you could afford. Therefore, you should buy weather-resistant lumber, such as pine or cedar. Always take accurate measurements before adjusting the size of the components at the proper size. Drill pilot holes trough the components before inserting the wood screws, to prevent the wood from splitting. See all my Premium Plans in the Shop.
Made from this plan
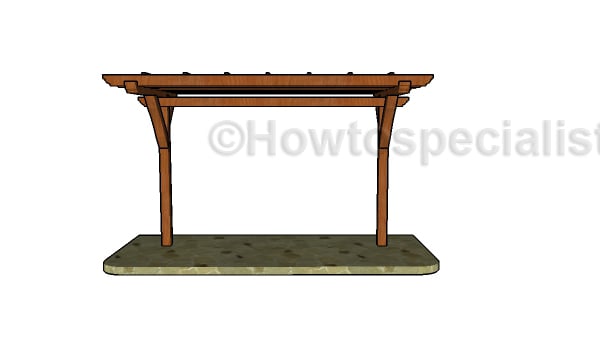
Two Post Pergola Plans
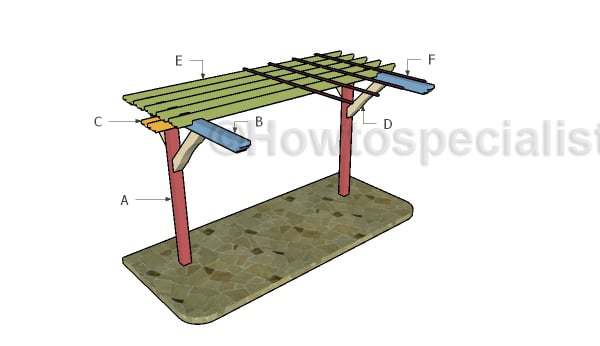
Building a 2 post pergola
Materials
- A – 2 pieces of 6×6 lumber – 132″ long POSTS
- B – 2 pieces of 6×6 lumber – 96″ long PLATES
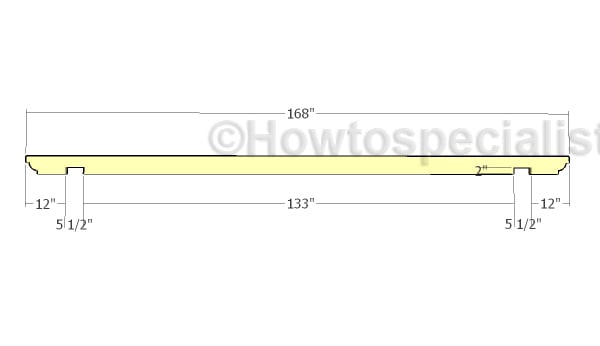
- C – 2 pieces of 2×6 lumber – 168″ long BEAMS
- D – 2 pieces of 6×6 lumber – 25 1/2″ long, 2 pieces – 45″ long BRACES
- E – 8 pieces of 2×6 lumber – 168″ long SHADE ELEMENTS
- F – 7 pieces of 1×2 lumber – 96″ long SLATS
- 2 pieces of 6×6 lumber – 12′
- 4 pieces of 6×6 lumber – 8′
- 10 pieces of 2×6 lumber – 14′
- 7 pieces of 1×2 lumber – 8′
- tube forms, concrete, rafter ties
- 2 1/2″ screws, 7″ screws, 3 1/2″ screws, 9″ carriage bolts
- paint, glue
- post to beam connectors
Tools
- Safety gloves, glasses
- Miter saw, jigsaw
- Chalk line, tape measure, spirit level, carpentry pencil
- Drill machinery and drill bits
Time
- One Day
Building a two post pergola
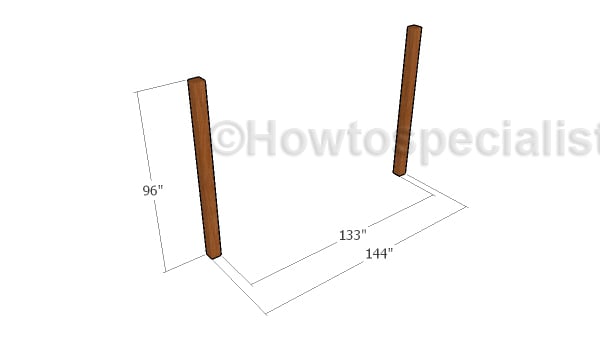
Setting the posts
The first step of the project s to lay out the posts for the pergola. Make sure you align everything with attention, for a professional result.
Fitting the posts
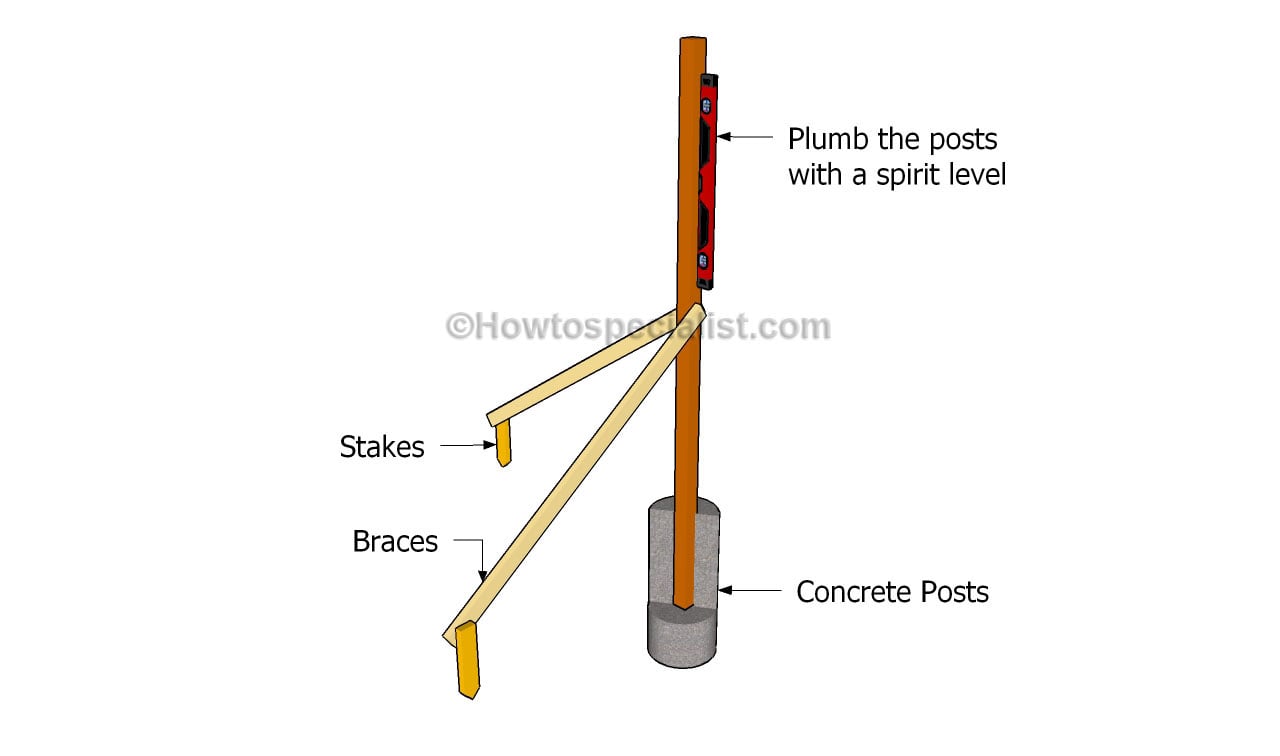
Mark the location for the holes and dig about 2-3′. Fit concrete tubes and then set the 6×6 posts into place. Use a spirit level to plumb the posts and then secure them temporarily into place with 2×4 braces, as shown in the image. Fill the tubes with concrete and leave it to dry out for a couple of days.
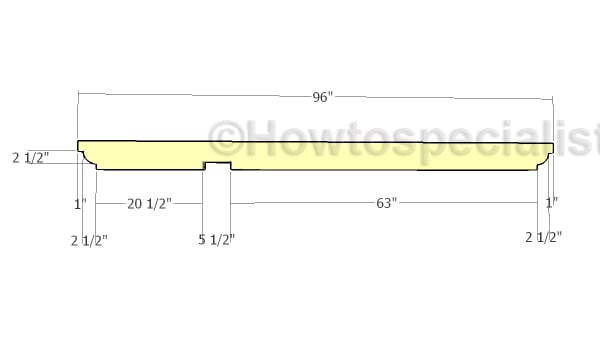
Top beams
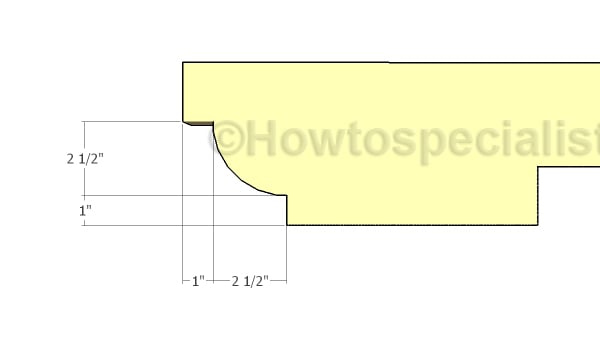
Build the top plates from 6×6 lumber, as well. Cut the ends in a decorative manner using a jigsaw. Smooth the edges with sandpaper. In addition, make the recess so you can fit the plates to the top of the posts. Make some parallel cuts and then remove the excess with a chisel.
Making the decorative elements
Cut the ends of the beams in a decorative manner. Mark the cut lines on the beams and then get the job done with a circular saw. Smooth the edges with sandpaper for a neat result.
Fitting the top beams
Fit the plates to the top of the posts. Align the edges flush and make sure the corners are square. Drill pilot holes and insert 7″ screws.
Base beams
Build the base beams from 2×6 lumber. Cut both ends in a decorative manner and smooth the cut edges with sandpaper.
Fitting the base beams
Fit the base beams to the top of the posts, as shown in the diagram. Dill pilot holes through the beams and through the posts and insert 9″ carriage bolts.

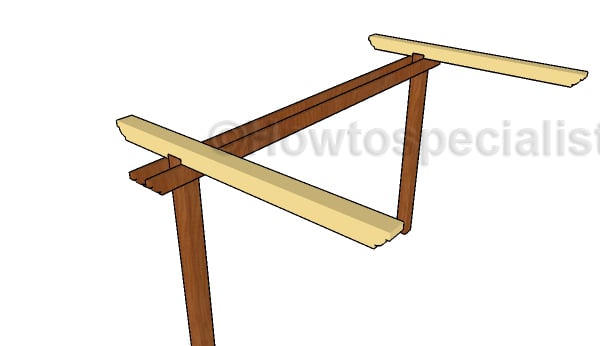
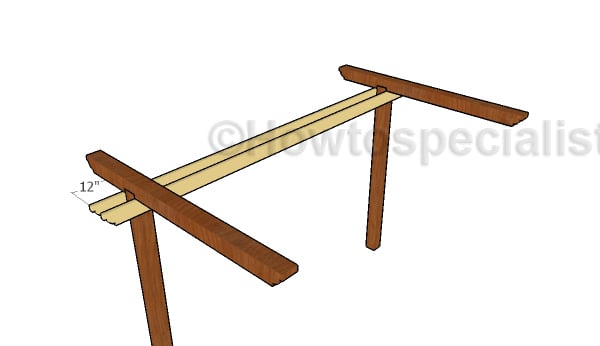
Fitting the braces
Build the braces from 6×6 lumber and cut both ends at 45 degrees. Fit the braces to the 2 legged pergola, as shown in the plans. Make sure the corners are square, align the edges flush and secure them into place with 3 1/2″ screws.
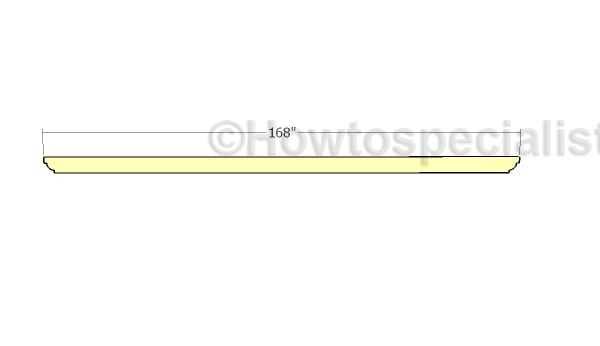
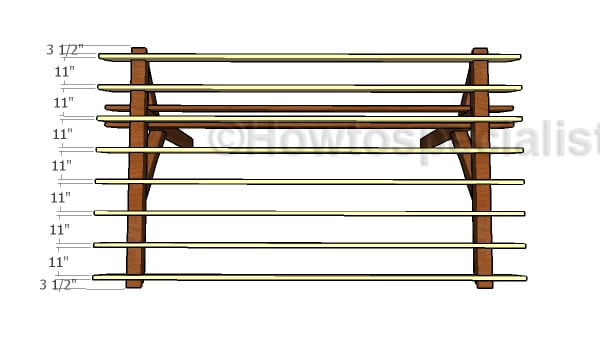
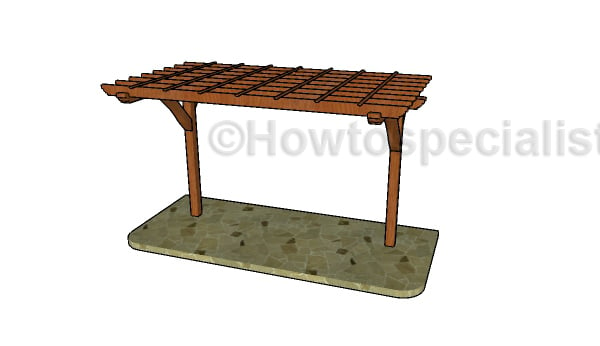
Building the shade elements
Build the shed elements using the information from the diagram. Make the cuts with a saw and smooth the edges with sandpaper.
Fitting the shade elements
Fit the shade elements to the top of the pergola, making sure you space them evenly. Use metal hardware or screws to secure the rafters to the top plates.
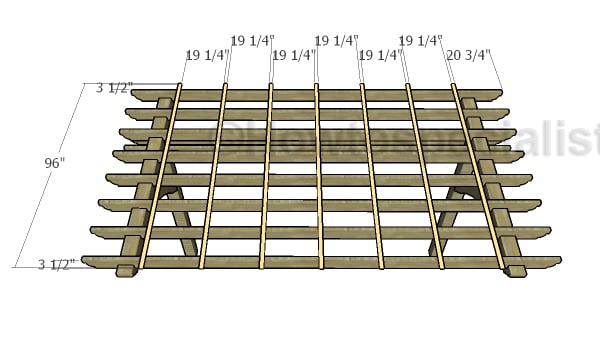
Fitting the top slats
Fit 1×2 slats over the shade elements to keep them evenly spaced on the long run. Fit the slats to the top of the pergola and then secure them into place with 1 1/4″ screws. Drill pilot holes before inserting the screws to prevent the wood from splitting.
2 Post Pergola Plans
Fill the holes with wood putty and then smooth the surface with 120-220 grit sandpaper. Apply a few coats of paint or stain to enhance the look of the pergola and to protect the components from the elements.
Two Post Pergola Plans
This is a nice two post pergola. This project has a nice appearance and it is ideal for sheltering a bbq or a outdoor stove. You can adjust the size of the project easily so it suits your needs and tastes. If you like my project, don’t forget to SHARE it on Facebook and Pinterest.
If you want to download the plans. just click on the GET PDF PLANS button bellow.

Thank you for reading our project about two post pergola plans and I recommend you to check out the rest of the projects. Don’t forget to LIKE and SHARE our projects with your friends, by using the social media widgets. SUBSCRIBE to be the first that gets our latest projects.


Is 96″ the max width for a 2-post pergola (with 6×6 posts)? Or could it handle bigger?
You can go up to 10′ with proper diagonal braces.
If you use 10’ what is the length of the diagonal braces ?
At least 5 ft
do you have plans for two post gazebo with a pitched roof?
I am having a problem getting the free plans for a 2 post pergola. Do I have to have a wind zip file. I really need some help. I don’t mind paying for the plan but where do I go to buy?
You don’t have to install anything. To get the PDF file for this plan, you have a big BUY PLANS at the end of the article.
Odlično prikazano in razloženo. Hvala
Can I attach the posts to a simpson bracket which is set in concrete, so I can replace the posts when they rot out, without having to dig out the concrete? Or do the posts need to be set in concrete? Thanks