
This step by step diy woodworking project is about lean to shed door plans. This is PART 3 of the bike shed, where I show you how to build the small front door and the side double doors. Remember that you need to read the local building codes before starting the construction, so you comply with the legal requirements. See my other shed plans HERE.
We recommend you to invest in the best materials you could afford. Therefore, you should buy weather-resistant lumber, such as pine or cedar. Always take accurate measurements before adjusting the size of the components at the proper size. Drill pilot holes trough the components before inserting the wood screws, to prevent the wood from splitting. See all my Premium Plans HERE.
Made from this plan
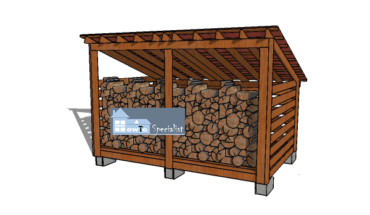
6×12 Lean to Shed Door – Free DIY Plans
Building a 6×12 lean to shed
Materials
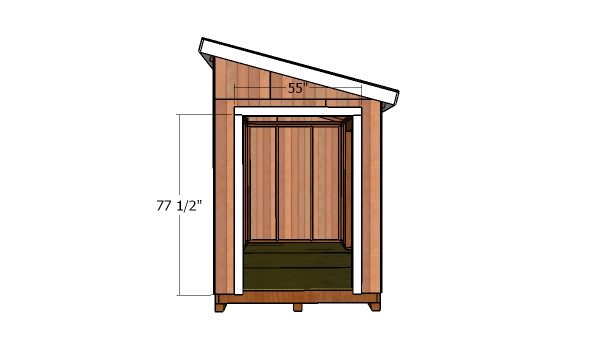
- N – 2 pieces of 2×4 lumber – 77 1/2″ long, 1 piece – 55″ long JAMBS
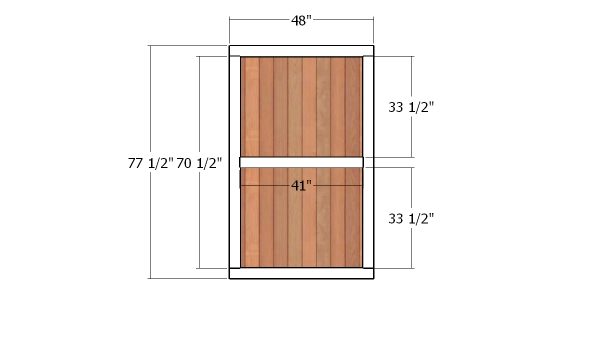
- O – 2 pieces of 2×4 lumber – 70 1/2″ long, 2 pieces – 48″ long, 1 piece – 41″ long, 1 piece of T1-11 siding – 48″x77 1/2″ long DOOR
- P – 2 pieces of 2×4 lumber – 77 1/2″ long, 1 piece – 79″ long JAMBS
- R – 2 pieces of 2×4 lumber – 70 1/2″ long, 2 pieces – 36″ long, 1 piece – 29″ long, 1 piece of T1-11 siding – 36″x77 1/2″ long 2xDOOR
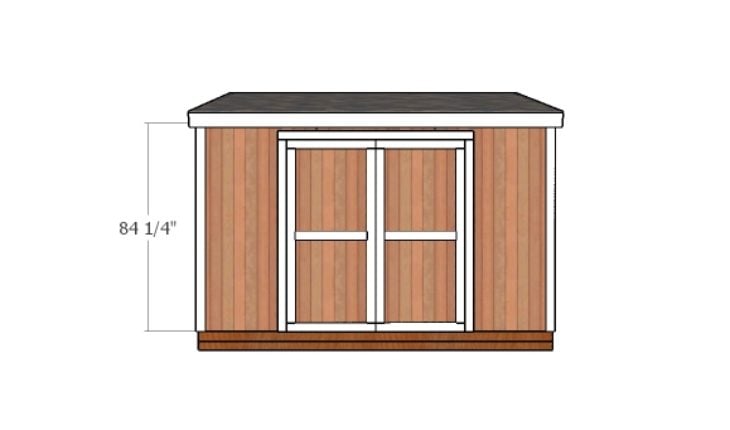
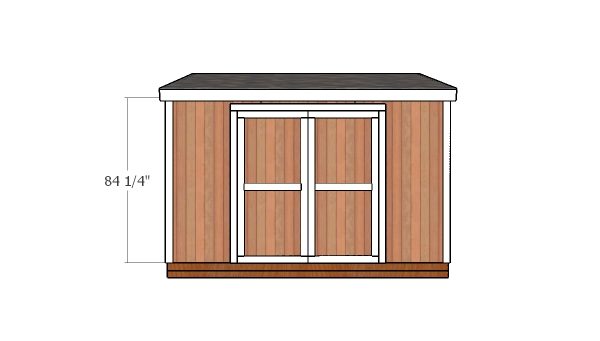
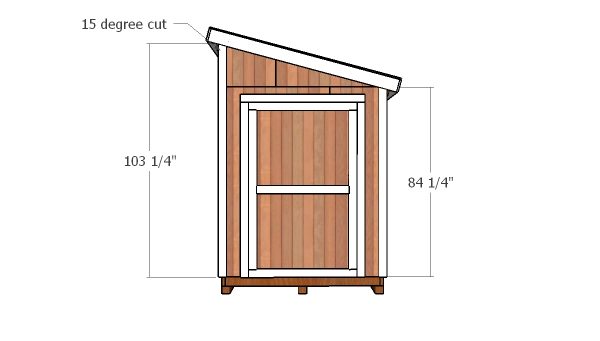
- Q – 2 pieces of 1×4 lumber – 104 1/4″ long, 4 pieces – 84 1/4″ long, 2 pieces – 103 1/4″ long TRIMS
- 3 pieces of T1-11 siding – 4’x8′
- 16 pieces of 2×4 lumber – 8′
- 4 pieces of 1×4 lumber – 10′
- 4 pieces of 1×4 lumber – 8′
- 2 1/2″ screws, 3 1/2″ screws, 1 5/8″ screws
- 4d nails, 16d nails, 6d nails
- shed hinges and latch
- wood filler , wood glue, stain/paint
Tools
- Safety gloves, glasses
- Miter saw, jigsaw
- Chalk line, tape measure, spirit level, carpentry pencil
- Drill machinery and drill bits
Time
- One Week
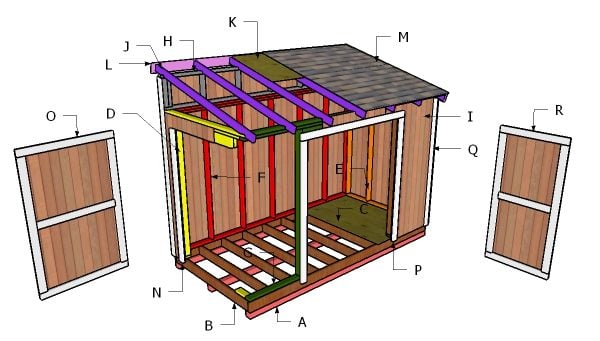
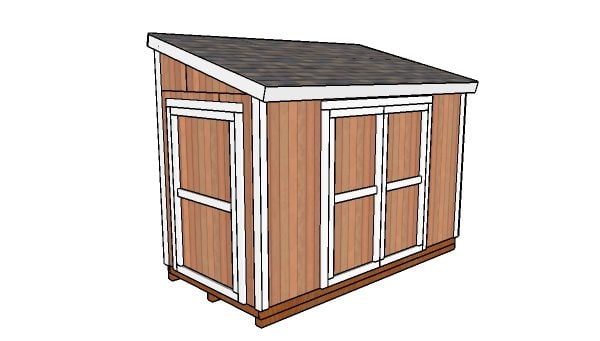
How to build a 6×12 bike shed door
Front door jambs
Fit the 2×4 slats around the door opening. Align the edges with attention and insert 3 1/2″ screws to lock the jambs into place tightly.
Front door jambs
Continue the project by assembling the front wall. Use a piece of T1-11 siding as panel and 2×4 lumber for the frame of the door. Add glue to the joints and make sure the edges are flush. Insert 2″ nails through the trims into the door panel.
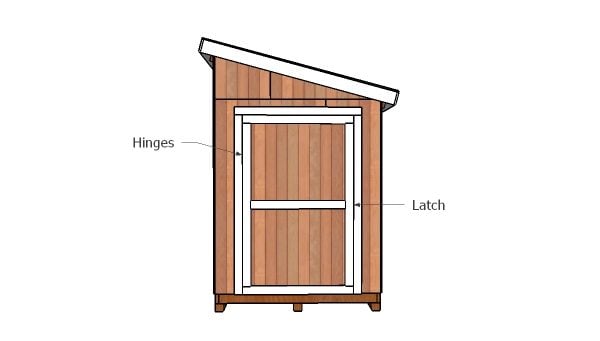
Fitting the front door
Fit the door to the opening and then make sure the edges are aligned. Use hinges to lock the door to the jambs and then attach the latch. Make adjustments, if necessarily.
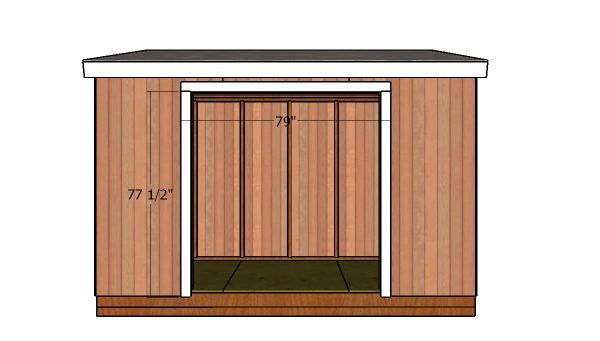
Double doors jambs
Fit the 2×4 lumber for the double door jambs. Align the edges with attention and insert 3 1/2″ screws to lock them to the framing.
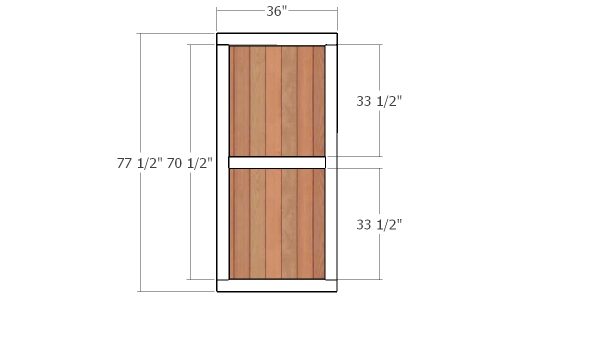
Double doors
Use the same techniques described above to assemble the double doors.
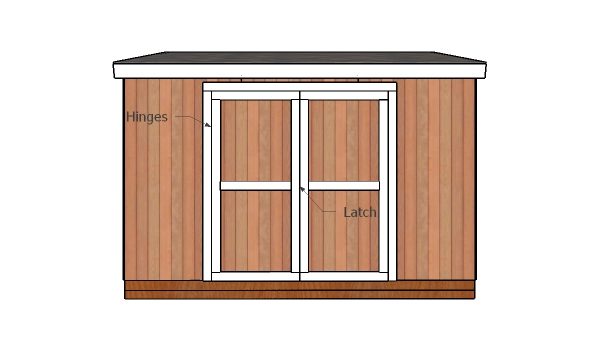
Fitting the double doors
Fit the double doors to the opening and then secure it to the jambs with hinges. Make sure the doors open and close easily and then attach a latch to keep them locked.
Short side wall trims
Fit 1×4 trims to the side wall of the shed. Align the edges with attention and insert 2″ nails to lock them into place tightly.

Side wall trims
Attach the 1×4 trims to the opposite side of the storage shed. Align the edges with attention and use 2″ nails to lock the trims into place tightly.
Front and back trims
Fit the trims to the front and back of the shed, as well. Make cuts to the trims so you can fit them into place. Afterwards, use 2″ nails to lock the trims into place tightly.
12×6 Lean to Shed Plans
Last but not least, you need to take care of the finishing touches. Fill the holes with wood putty and then smooth the surface with sandpaper. Apply a few coats of paint or stain over the components, to protect them from decay and to enhance the look of the shed.
This is a very narrow shed, making it ideal for a small backyard. Don’t forget to take a look over PART 1 and PART 2 of the project so you learn how to build the roof and the front door for the storage shed. If you like my project, don’t forget to SHARE it on Facebook and Pinterest.
Thank you for reading our project about free lean to shed door plans and I recommend you to check out the rest of the projects. Don’t forget to LIKE and SHARE our projects with your friends, by using the social media widgets. SUBSCRIBE to be the first that gets our latest projects.
<< Previous | Next >>