
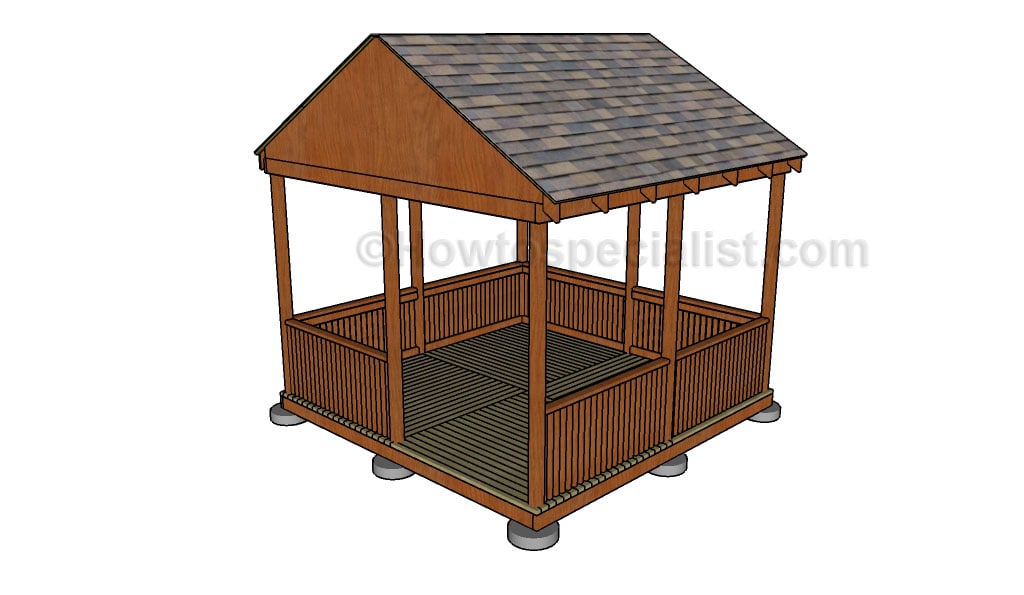
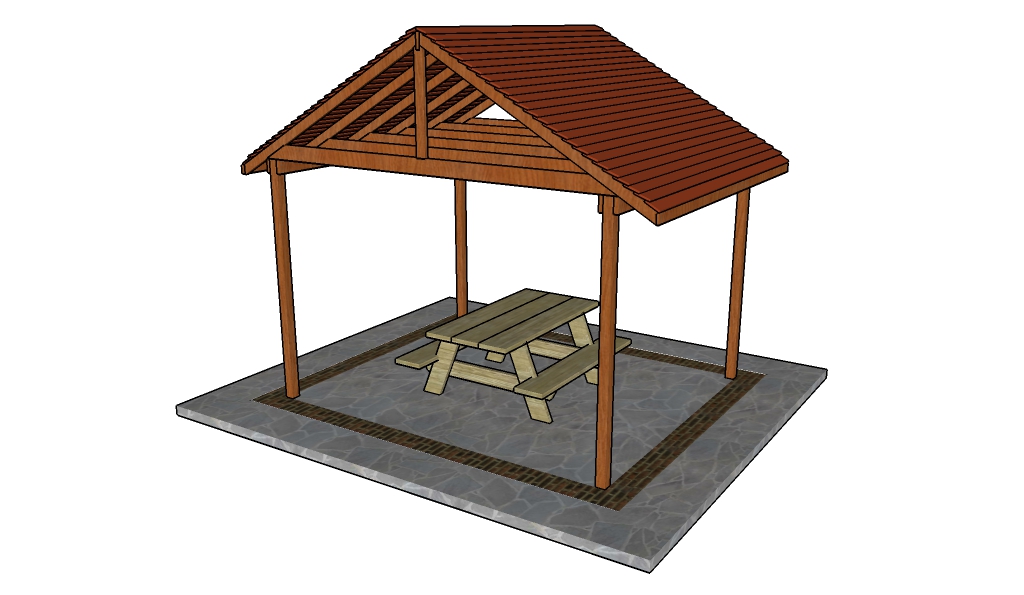
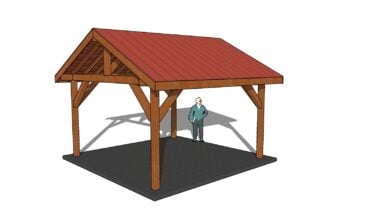
This step by step diy woodworking project is about square gazebo plans. This article features detailed plans for a square gazebo with a gable roof. The 12×12 gazebo is a straight-forward project, if you know the basic woodworking techniques. There are many backyard projects featured on our site, so don’t be afraid to browse through the rest of the woodworking plans.
Before starting the actual construction project, we recommend you to plan everything, as to save money and to keep the costs under control. Adjust the size and the design of the gazebo to suit your needs. In most of the cases a building permit is required, so make sure you go to the town hall to see the building requirements. Select the location for the gazebo with great care, if you want to get a professional result.
It is essential to invest in high quality materials, that are also water-resistant, such as pressure-treated lumber. Cut the components at the right size by using a circular saw and smooth the cut edges with a sand block. Don’t forget to ask a skilled friend to assist you during the project, especially if you don’t have a large expertise in the field. You need someone to hold the components into place, while you drive the screws in. See all my Premium Plans in the Shop.
Made from this plan
Building a square 12×12 gazebo

Building a square gazebo
Materials
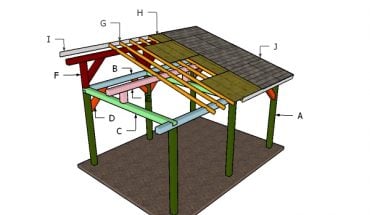
- A – 6 pieces of 4×4 lumber – 139″ long, 2 pieces – 180 1/2″ long POSTS
- B – 2 piece of 2×6 lumber – 141″ long, 2 pieces – 144″ long RIM JOISTS
- C – 4 pieces of 2×6 lumber – 69 3/4″ long, 1 piece – 134″ long MIDDLE JOISTS
- D – 2 pieces of 2×6 – 65 1/2″ long JOISTS
- E – 80 pieces of 2×4 lumber – 72″ long DECKING
- F – 2 piece of 2×6 lumber – 141″ long, 2 pieces – 144″ long TOP PLATES
- G – 1 piece of 4×4 lumber – 141″ long TOP RIDGE
- 7 pieces of 4×4 lumber – 12 ft
- 2 pieces of 4×4 lumber – 16 ft
- 9 pieces of 2×6 lumber – 12 ft
- 6 pieces of 2×6 lumber – 8 ft
- 40 pieces of 2×4 lumber – 12 ft
- 2 1/2″ screws
- 3 1/2″ screws
- rafter ties
- 1 1/2″ structural screws
- 1 5/8″ screws
Tools
- Safety gloves, glasses
- Miter saw, jigsaw
- Chalk line, tape measure, spirit level, carpentry pencil
- Drill machinery and drill bits
Tips
- Use a good miter saw to make the angle cuts
- Drill pilot holes before inserting the screws
Time
- One Week
Related
- PART 1: Square Gazebo Plans
- PART 2: Gazebo Roof Plans
- PART 3: Gazebo Railings Plans
Check out this VIDEO TUTORIAL! It’s that simple to build your own barn shed!
[youtube id=”Enter video ID (ICBYpHlXNp8)” width=”600″ height=”350″]
Square gazebo plans
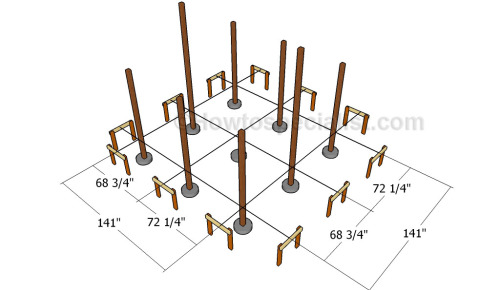
Laying out the gazebo
First of all, lay out the square gazebo in a professional manner. Select the location with attention, making sure the ground is perfectly level. Remove the grass layer and compact a layer of gravel. Use batter boards and string to make sure the posts will be properly placed. Apply the 3-4-5 rule to each corner of the layout in order to check if they are perfectly square. In addition, make sure the diagonals are perfectly equal before setting the posts into place.
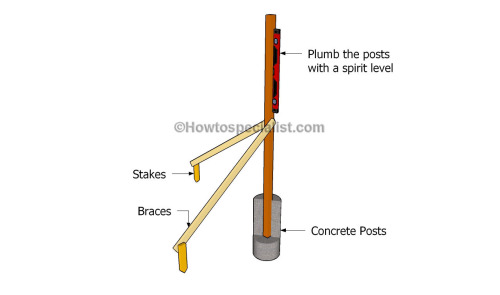
Fitting the posts
Setting the posts in concrete is essential for the rigidity of the square wooden gazebo. As you can easily notice in the diagram, we recommend you to dig 3′ deep holes and to pour 2″ gravel on the bottom. Install the tube forms to the holes. Secure the posts with braces before filling the forms with concrete.
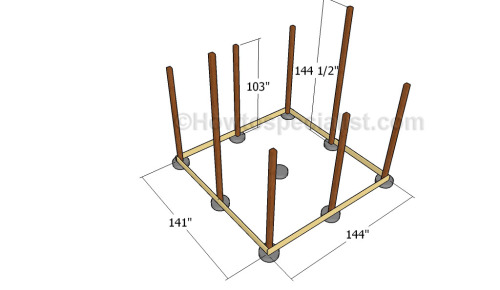
Fitting the rim joists
After setting the 4×4 posts into place, we recommend you to attach the 2×6 perimeter joists to the bottom of the structure. Cut the components at the right size and drill pilot holes before setting them into place with 3 1/2″ screws. Leave no gaps between the components and make sure the joists are horizontal. Place a spirit level on top of the joists to make sure they are horizontal and the post perfectly plumb.

Fitting the middle joists
Build the middle joists out of 2×6 lumber and fit them to the posts, as described in the diagram. Make sure the corners are square and perfectly horizontal. Leave no gaps between the components and use metal hardware to reinforce the rigidity of the structure.
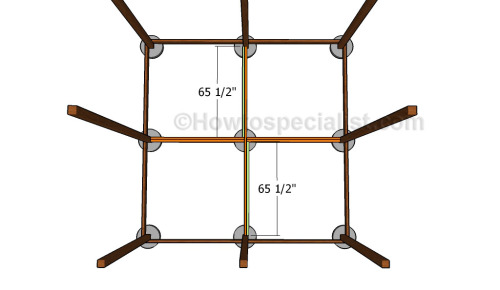
Middle joists
Afterwards, fit the rest of the 2×6 joists to the middle of the gazebo. Cut the joists at the right size and secure them into place using galvanized screws. Leave no gaps between the components and make sure the edges are perfectly flush.
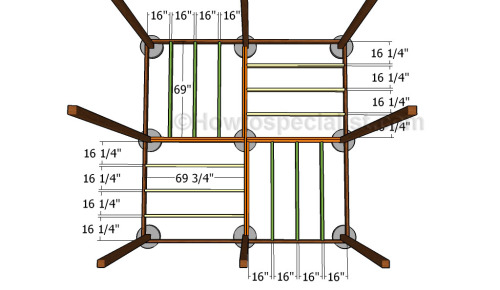
Fitting the regular joists
The next step of the project is to install the intermediary joists to the floor frame. As you can easily notice in the diagram, we recommend you to build the joists out of 2×6 lumber. Fit the joists to the structure by inserting 2 1/2″ screws or by using joist hangers. Place the joists equally-spaced, making sure the surface is perfectly level.
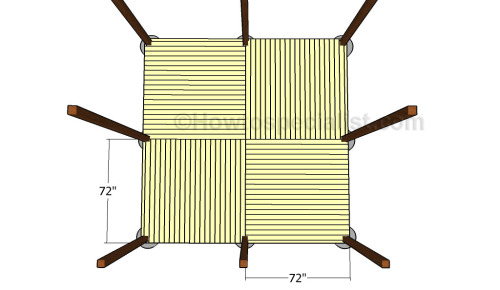
Fitting the decking boards
Fit the 2×4 decking slats to the floor frame of the gazebo, as described in the diagram. Place a nail between the boards if you want to make sure the water will dry out easily. Smooth the edges with great care and drill pilot holes through the slats before securing them into place with 2 1/2″ screws. Make sure you countersink the head of the screws to get a professional result.
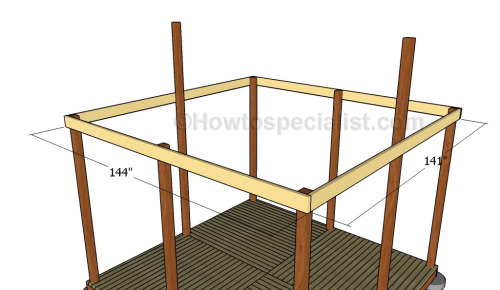
Fiting the top plates
Fit the 2×6 top plates to the structure, as described in the diagram. Drill pilot holes through the beams and secure them into place using 2 1/2″ screws. Make sure the beams are perfectly horizontal before inserting the screws.
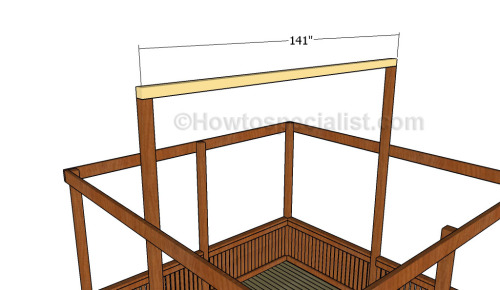
Fitting the top ridge
Build the top ridge out of 4×4 lumber. Cut the components at the right size and secure it to the posts by using 5 1/2″ screws. Drill pilot holes before inserting the screws, to prevent the wood from splitting. In addition, you could install corner brackets to enhance the rigidity of the structure.

Square gazebo plans
Last but not least, we recommend you to take care of the finishing touches. Fill the holes with wood filler and let it to dry out for several hours. Check out the rest of the square gazebo project to learn how to build the gable roof.
If you want to download the plans. just click on the GET PDF PLANS button bellow.

Thank you for reading our project about square gazebo plans and we recommend you to check out the rest of the projects. Don’t forget to share our projects with your friends and LIKE us, by using the social media widgets. SUBSCRIBE if you want to be the first that gets our latest articles.
<< Previous | Next >>