

This step by step diy project is about adirondack table plans. This backyard project features detailed instructions regarding the construction of a small end table for your adirondack chairs. Adjust the design of the table to suit your needs and to match the design of your backyard furniture. Check out the rest of the outdoor projects that are featured on our site.
You should always plan everything from the very beginning, in order to prevent costly mistakes and to save time. In most of the cases, you need a friend to give you a hand when assembling the outdoor end table. Invest in high quality lumber and plywood, as the components will be exposed to bad weather. Protect the components with appropriate paint or stain.
There are a few tips that you should take into account, if you want to get a professional result. Therefore, take accurate measurements and use professional tools when making the cuts or when drilling pilot holes. Align the components at both ends and add waterproof glue to the joints, if you want to create a rigid structure.
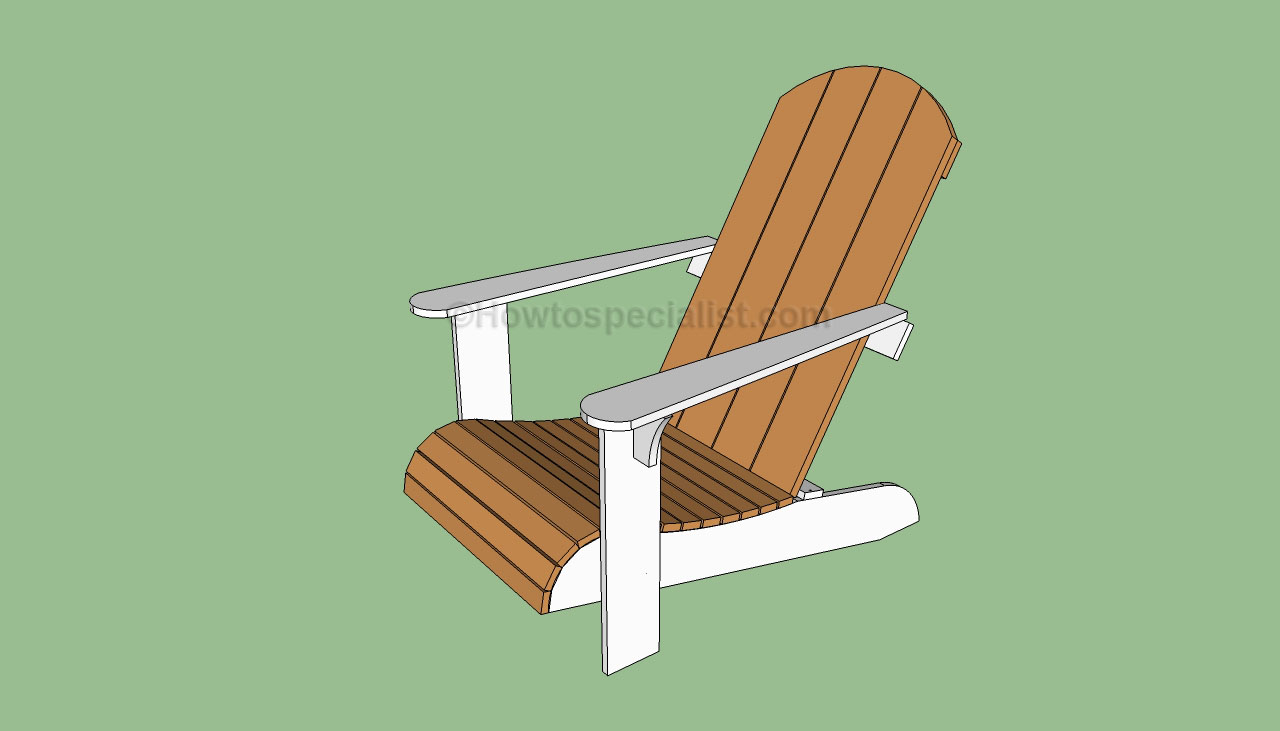
Made from this plan
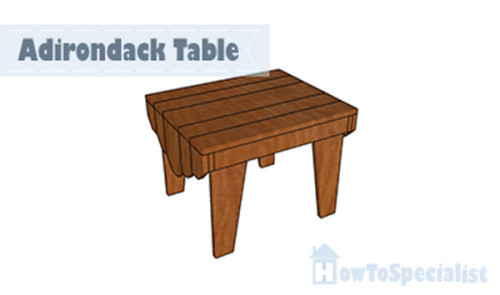
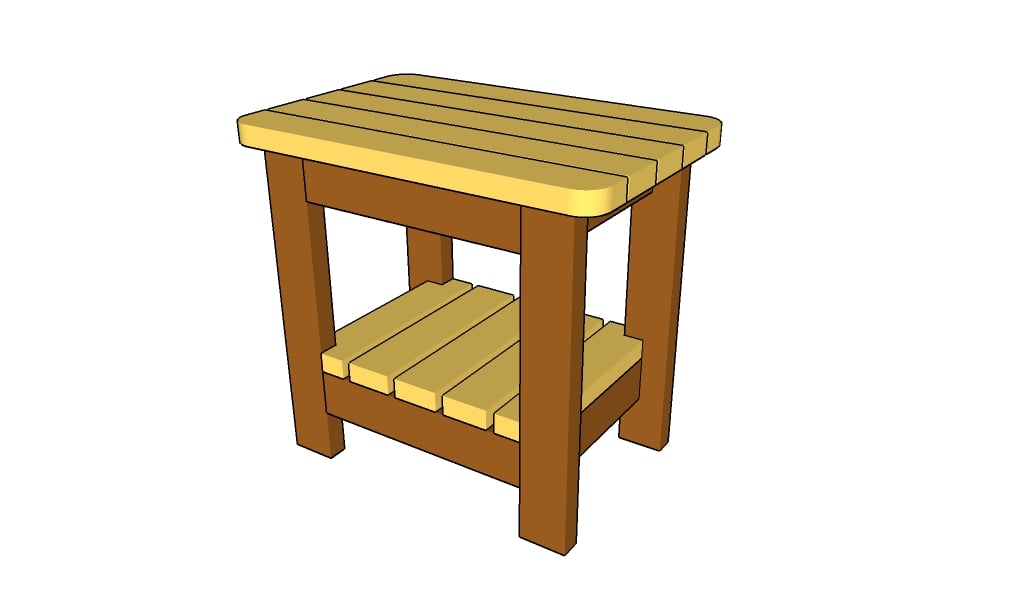
Adirondack table plans
Building an adirondack table
Materials
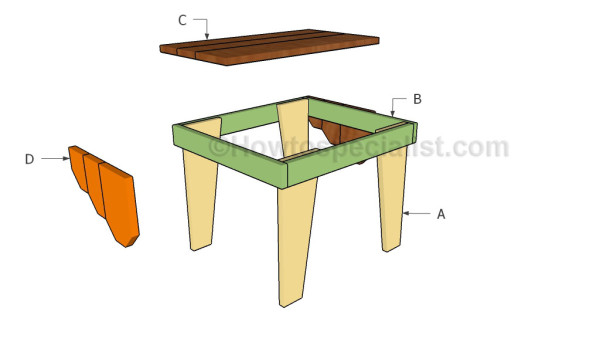
- A – 4 pieces of 1×6 lumber – 17″ long LEGS
- B – 2 pieces of 1×3 lumber – 21″ long, 2 pieces – 20″ long FRAME
- C – 4 pieces of 1×4 lumber – 24″ long, 1 piece of 1×6 lumber – 24″ long TABLETOP
- D – 2 pieces of 1×4 lumber – 4 1/4″ long, 2 pieces – 6″ long, 1 piece of 1×6 lumber – 7 3/4″ long 2xTRIMS
Tools
- Safety gloves, glasses
- Miter saw, jigsaw
- Chalk line, tape measure, spirit level, carpentry pencil
- Drill machinery and drill bits
Time
- Use a good miter saw to make the angle cuts
- Drill pilot holes before inserting the screws
Time
- One Weekend
Related
How to build an adirondack table
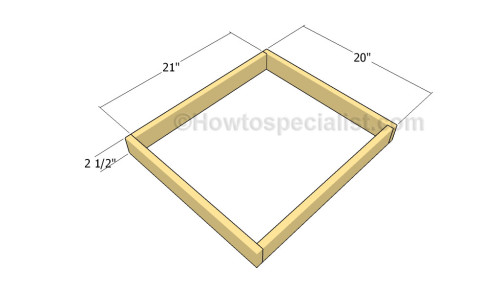
Building the frame
The first step of project is to build the frame of the adirondack table. Cut the components at the right dimensions and drill pocket holes at both ends of the 21″ long slats. Align the edges with attention and secure them together tightly using 1 1/4″ screws. Leave no gaps between the components and make sure the corners are right-angled.

Building the legs
Build the legs out of 1×6 lumber. Use a circular saw to make the cuts and smooth the edges with fine-grit sandpaper.
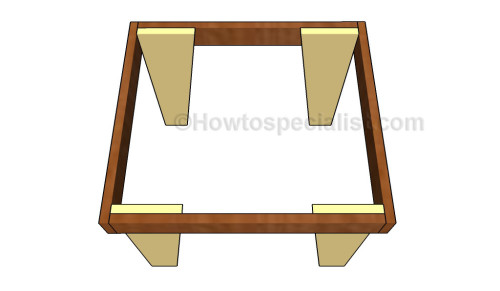
Fitting the legs
Attach the legs to the frame of the tabletop. Drill pilot holes through the legs and insert 1 1/4″ screws into the legs, as described in the diagram. Add glue to the joints and align the edges with attention.
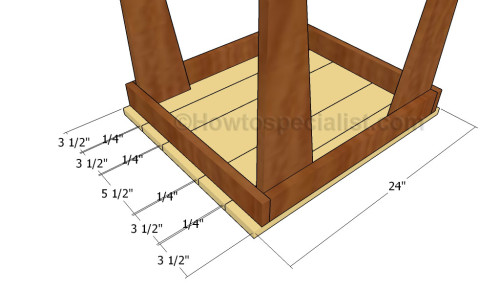
Attaching the tabletop
Lay the tabletop slats on a level surface, making sure you place them equally-spaced. Center the frame of the table to the slats and insert 1 1/4″ screws into the slats. Drill pocket holes through the frame before inserting the screws. Add glue to the joints.
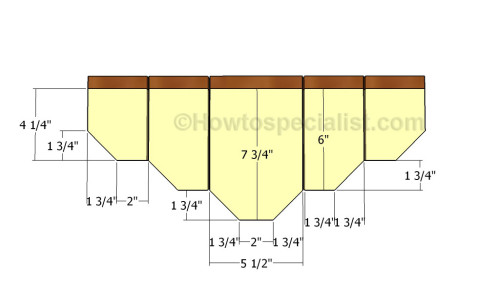
Building the side trims
Build the side trims and attach them with finishing nails to the frame of the table. Add glue to the joints and leave no gaps between the components. Use a circular saw to make the cuts to the slats.
Adirondack-table-plans
Last but not least, we recommend you to take care of the finishing touches. In order to get a professional result, fill the holes and the gaps with wood filler and let it dry out for a few hours. Check if there are protruding screws and fix this issue, if necessary.
How to build an outdoor side table
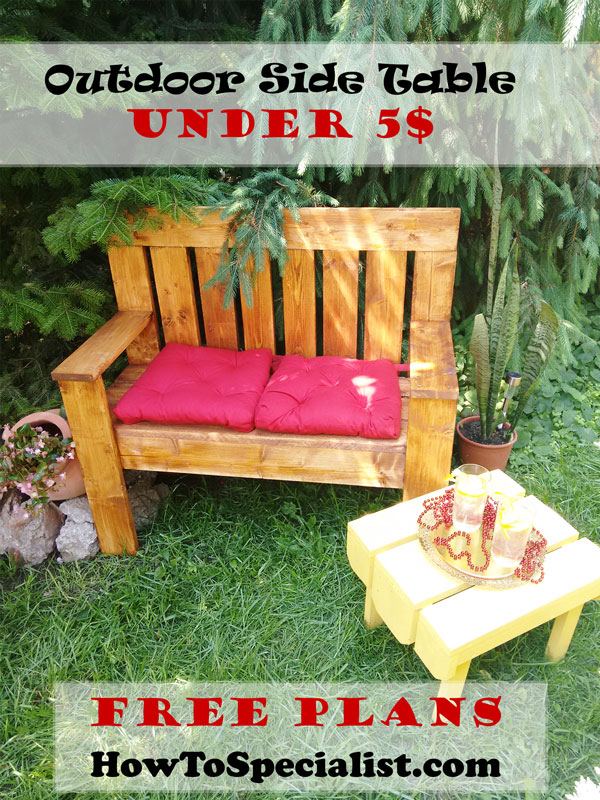
How to build an outdoor side table
Anyone can build this inexpensive outdoor side table in just a few hours. Make sure you pay attention to the instructions and make accurate cuts.

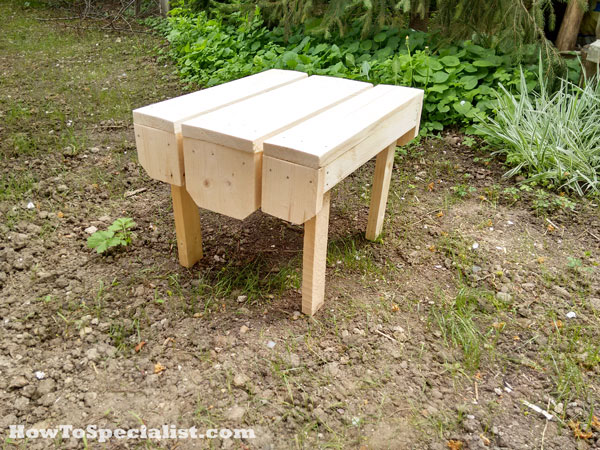
Building an adirondack side table
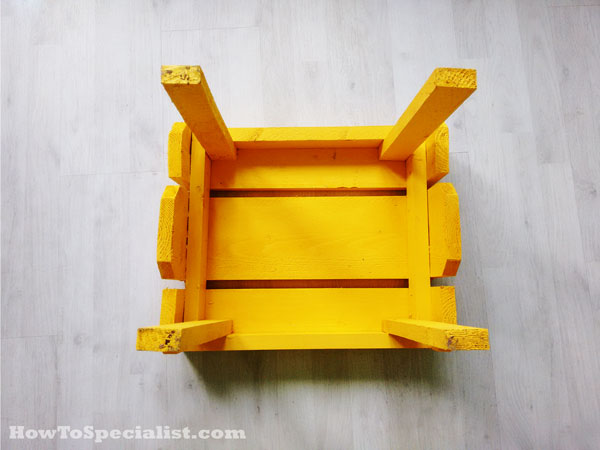
I have modified a little the plans and used three 1×6 slats for the top, but the overall dimensions are approximately the same. I used 1×3 slats to make the frame for the outdoor side table. When fitting the top slats to the frame, make sure they overhang for about 3/4″ on both sides. Use 1 1/4″ galvanized screws to secure the slats to the frame, after drilling pilot holes.
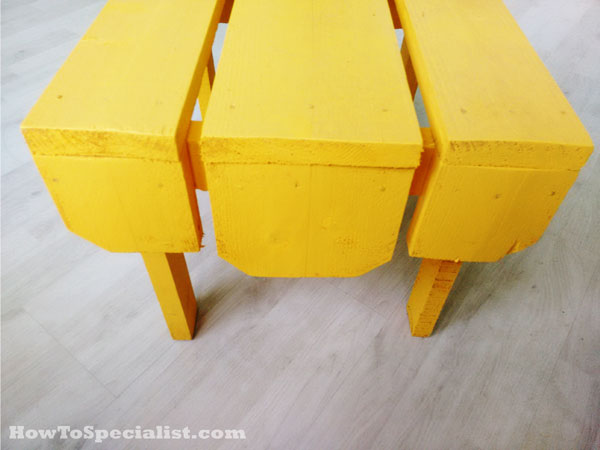
Attaching the end slats
Next, I attached the end slats to the table using 1 1/4′ screws and glue.
Adirondack outdoor side table
Attach the legs to the frame of the side table using 1 1/4″ screws and waterproof glue. I used 1x3s for the legs.
Wiooden side table
All the imperfections add character to the side table. If you aim for a neat look, you should sand the surface thoroughly with 120-150 grit sandpaper. Fill the gaps with wood putty before sanding the table.
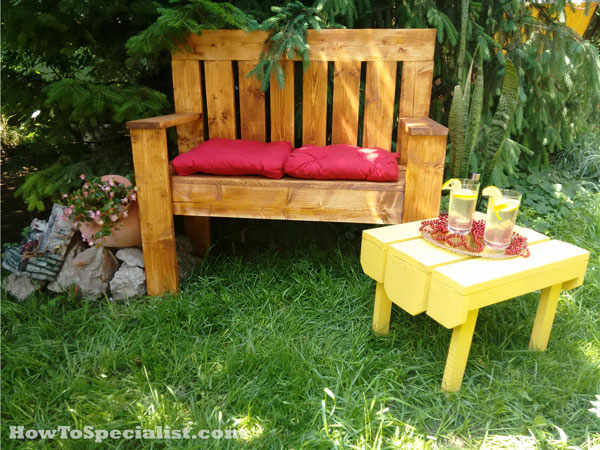
Wood Side Table Plans
I really love my adirondack outdoor side table and so do my friends. It is a super easy and quick project that can be tackled by anyone. You really don’t need expertise in working with wood to make this small table. Just make sure you follow the safety rules and assembling the components together. I would love to see your pins, likes and share. Take a look over the rest of my projects for more wood ideas.
Thank you for reading our project about adirondack table plans and we recommend you to check out the rest of the projects. Don’t forget to SHARE and LIKE our projects with your friends, by using the social media widgets, if you want to help us keep adding free woodworking plans.