
This step by step project is about outdoor glider bench plans. This is PART 2 of the glider swing project, where I show you how to build the wood bench. In order to get the job done, you just have to follow my instructions. Moreover, I truly recommend you to check out the rest of the outdoor plans on my site, for even more building ideas. PDF downloadable plans with premium features in the Store.
There are many designs and plans you could choose from, so you should take a look on more projects before starting the actual project. Nevertheless, if you are looking for a simple but sturdy design, this project might be the solution to your needs. Moreover, you could build all the components from 2×4 lumber, as to save both time and money. Make sure you check all the dimensions before making the cuts, otherwise the components might not fit together easily. See all my Premium Plans in the Shop.
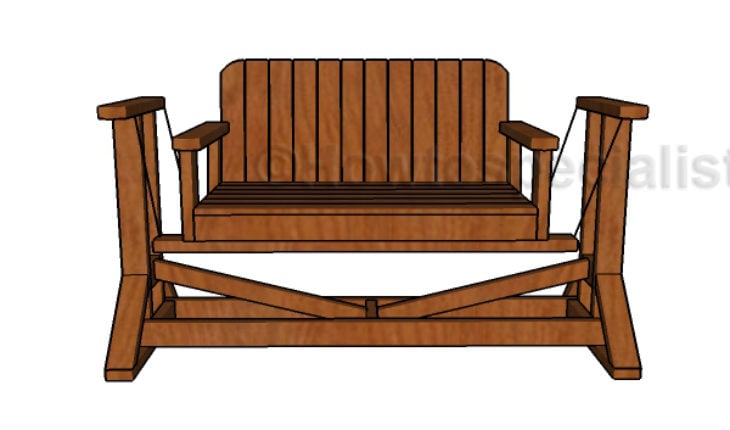
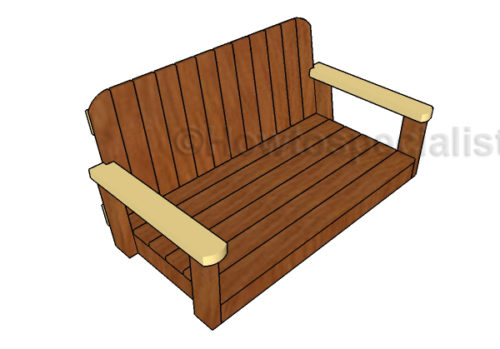
Made from this plan
How to build a glider bench
Building a glider bench
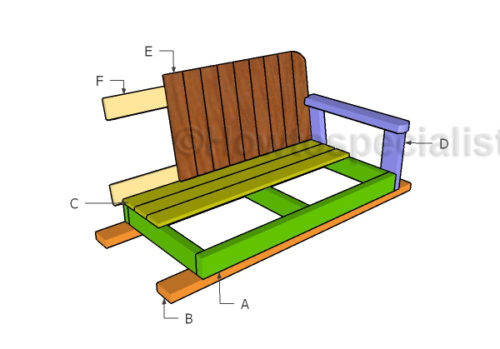
Materials
- A – 2 pieces of 2×4 lumber – 45″ long, 3 pieces – 19 1/2″ long SEAT FRAME
- B – 2 pieces of 2×4 lumber – 56″ long SUPPORTS
- C – 6 pieces of 1×4 lumber – 45″ long SEAT
- D – 2 pieces of 2×4 lumber – 22 1/4″ long ARMRESTS
- E – 12 pieces of 1×4 lumber – 24 3/4″ long, 2 pieces – 12″ long, 2 pieces – 12 3/4″ long BACKREST
- F – 1 piece of 1×4 lumber – 45″ long, 1 piece – 48″ long SUPPORTS
- 5 pieces of 2×4 lumber – 8′
- 8 pieces of 1×4 lumber – 8′
- 2 1/2″ screws, 1 5/8″ screws, 1 1/4″ screws
- wood filler , wood glue, stain/paint
Tools
- Safety gloves, glasses
- Miter saw, jigsaw
- Chalk line, tape measure, spirit level, carpentry pencil
- Drill machinery and drill bits
Tips
- Pre-drill holes in the wooden components, before driving in the screws
- Use a good miter saw to make the angle cuts
Glider Bench Plans
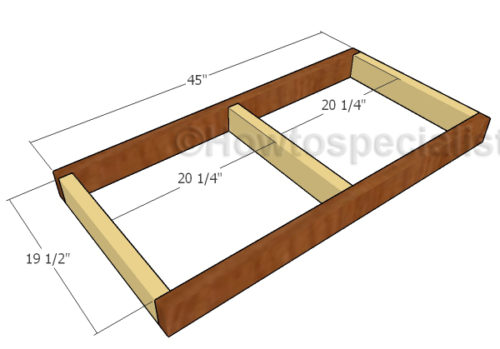
Building the seat frame
The first step of the project is to build the frame for the glider bench. Cut the components at the proper dimensions using 2×4 lumber. Drill pilot holes through the 45″ long components into the perpendicular supports. Align the edges flush, make sure the corners are square and insert the 2 1/2″ screws.
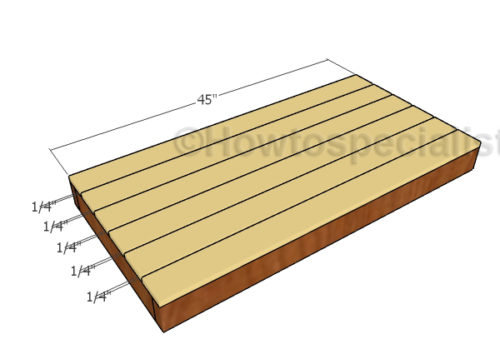
Fitting the seat slats
Fit the 1×4 slats to the seat frame. Place a piece of 1/4″ plywood between the slats so you create even gaps. Drill pilot holes through the slats and insert 1 5/8″ screws into the seat frame.
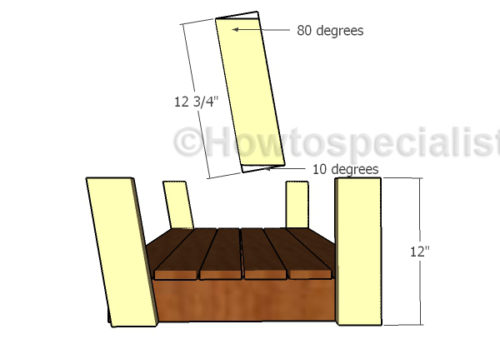
Armrests supports
Build the armrests supports for the bench from 2×4 lumber. Attach the supports to the sides, drill pilot holes and insert 2 1/2″ screws to lock them into place tightly.
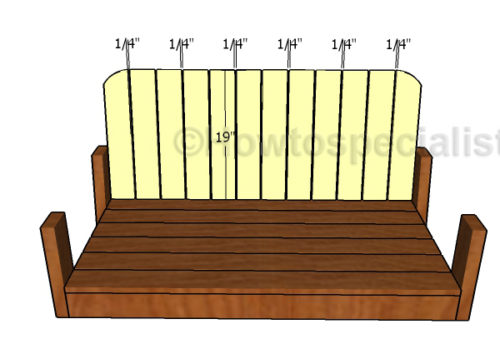
Fitting the backrest slats
Use 1×4 slats for the backrest. As you can easily notice in the plans, you need to use a good jigsaw to round the exposed corners of the bench. Smooth the edges with 120-220 grit sandpaper.
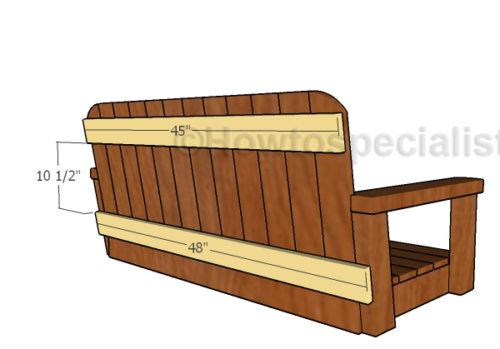
Backrest supports
Fit the 1×4 cleats to the back of the bench. Drill pilot holes and insert 1 1/4″ screws to secure the cleats to the backrest slats.
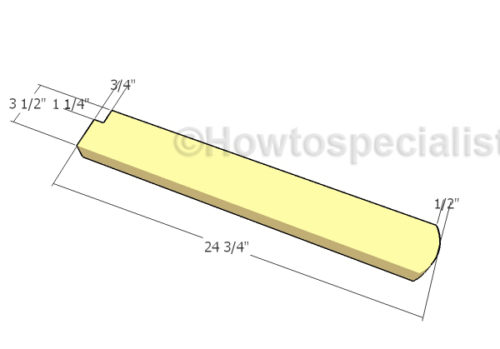
Building the armrests
Build the armrests from 2×4 lumber. As you can see in the plans, you need to make a small notch to one end of the armrests and to round the opposite end. Smooth everything with sandpaper.
 Fitting the armrests
Fit the armrests to the bench. Drill pilot holes through the armrests and insert 2 1/2″ screws into the supports. Smooth the edges with sandpaper for a neat result.
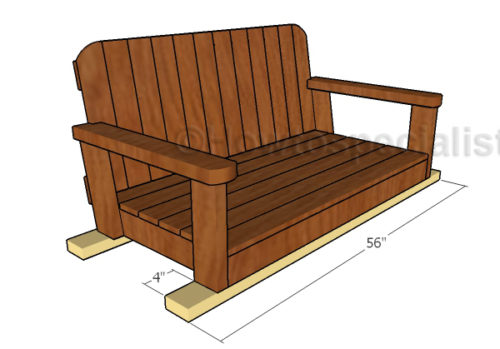
Fitting the base supports
Fit the 2×4 supports to the bottom of the glider bench, so you can hang it to the stand. Center the supports to the front and to the back of the bench swing. Drill pilot holes through the supports and insert 3 1/2″ screws into the bench seat frame.
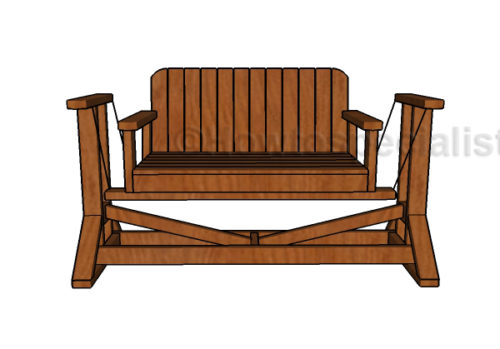
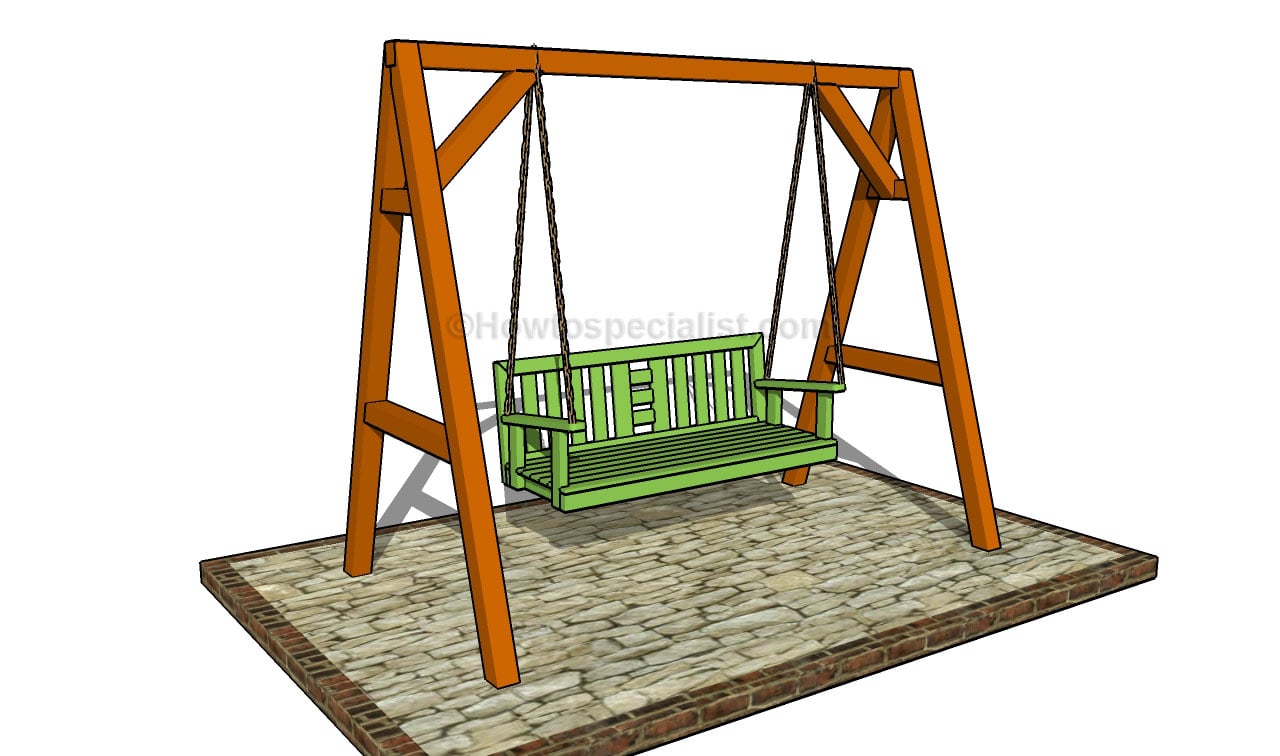
Glider swing building plans
Make sure you check out PART 2 of the glider swing project, so you learn how to build the bench. Even if you are a rookie when it comes to DIY, you will be surprised how easy it is to make this glider swing with some common household tools and materials.
If you want to download the plans. just click on the GET PDF PLANS button bellow.

Thank you for reading our project about outdoor glider bench plans and we recommend you to check out the rest of the articles. Don’t forget to share our projects with your friends, by using the social media widgets.
<< Previous | Next >>
