
This step by step woodworking project is about wall wine rack plans. If you like collecting wine bottles and you want to build a really simple display rack, make sure you check out my free plans. My plans come with step by step instructions and you can easily adjust all the dimensions to suit your needs. See my other DIY projects HERE.
We recommend you to invest in the best materials you could afford. Therefore, you should buy weather-resistant lumber, such as pine or cedar. Always take accurate measurements before adjusting the size of the components at the proper size. Drill pilot holes trough the components before inserting the wood screws, to prevent the wood from splitting. See all my Premium Plans in the Shop.
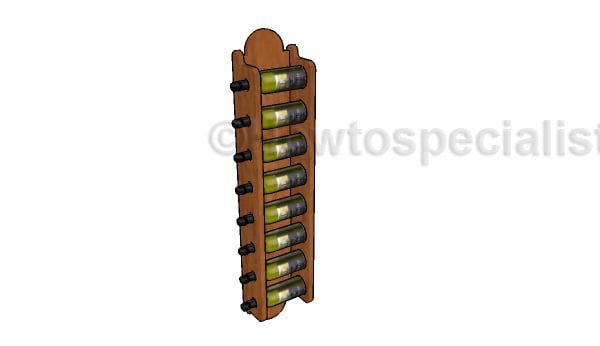
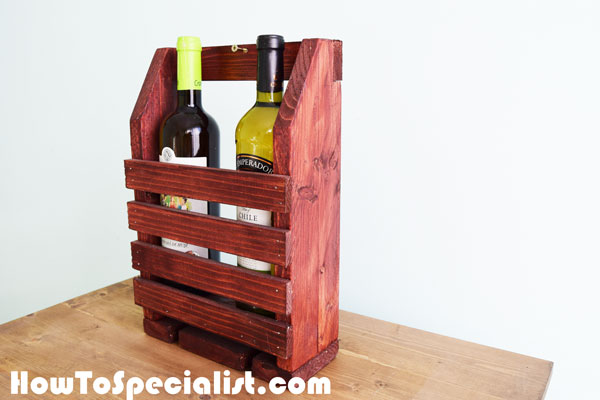
Made from this plan
Wall Wine Rack Plans
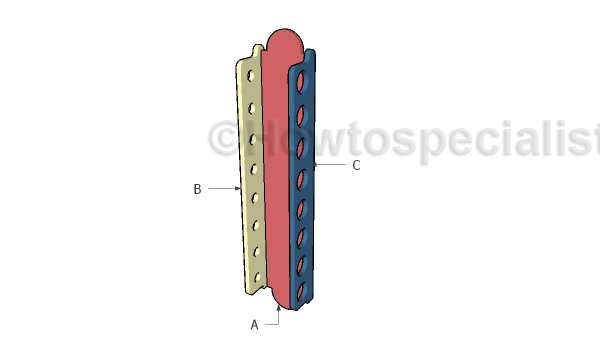
Assembling the wall wine wood rack
Materials
- A – 1 piece of 1×8 lumber – 43 1/2″ long BACK
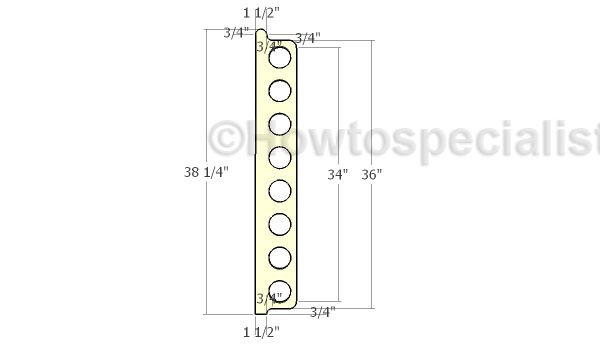
- B – 1 pieces of 1×6 lumber – 38 1/4″ long SIDE
- C – 1 pieces of 1×6 lumber – 38 1/4″ long SIDE
- 1 piece of 1×6 lumber – 8′
- 1 pieces of 1×8 lumber – 6′
- 1 1/2″ hole saw, 3″ hole saw
- 1 1/4″ pocket screws
- hanger
- stain, glue, putty
Tools
- Safety gloves, glasses
- Miter saw, jigsaw
- Chalk line, tape measure, spirit level, carpentry pencil
- Drill machinery and drill bits
Time
- One Day
Building a wall wine rack
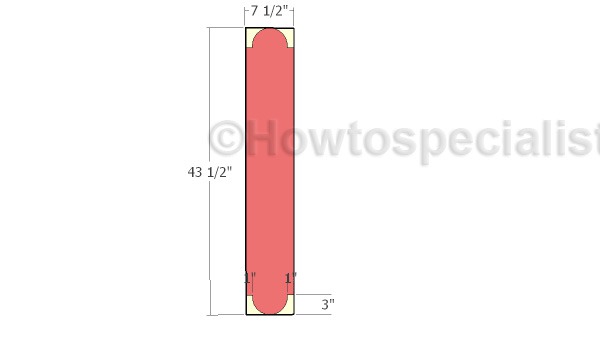
Building the back slat
The first step of the project is to build the back of the wine rack. Mark the cut lines on the slat and then get the job done with a jigsaw. Smooth the edges with snadpaper.
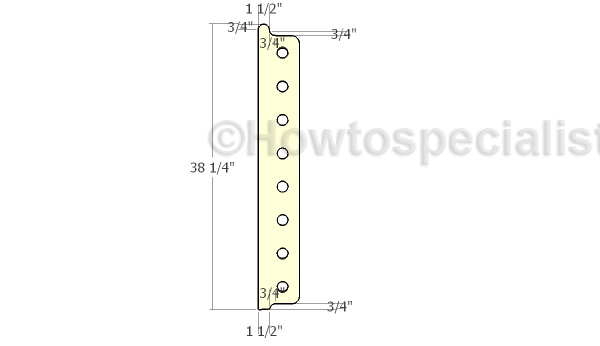
Side
Next, you need to build the sides for the wine rack. Cut the side that will support the bottom of the bottles from 1×6 lumber. Cut the top and the bottom with a jigsaw. Mark the cut lines on the slats and get the job done with a jigsaw.
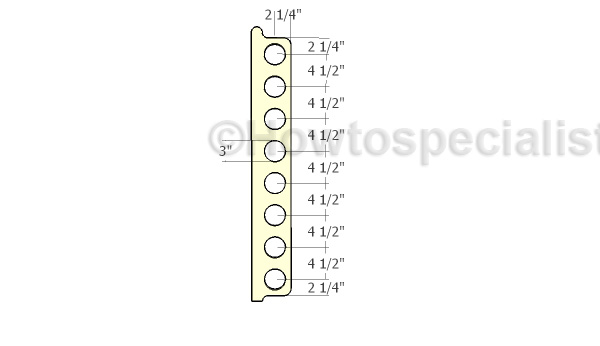
Cutting out the holes for the bottle
Cut out 3″ holes in the slat with a hole saw drill bit.
Building one side
Build the other side that will support the bottle necks.
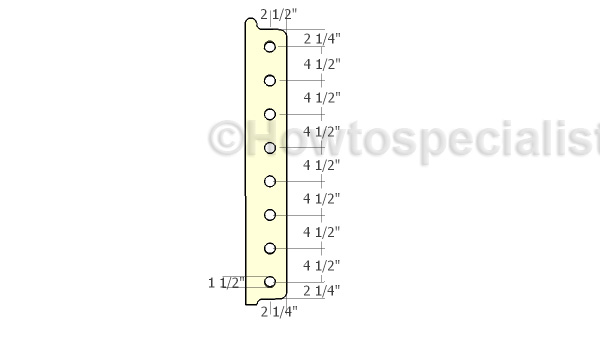
Cutting the holes for the bottle necks
Drill 1 1/2″ holes in the slats using a hole saw drill bit.
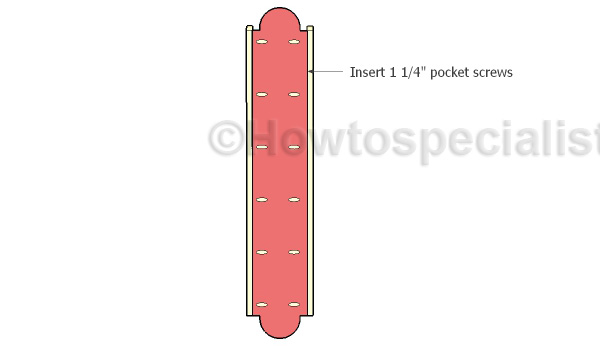
Assembling the wine rack
Drill pocket holes along the sides of the back slat and insert 1 1/4″ pocket screws into the sides. Add waterproof glue to the joints and leave no gaps between the components.
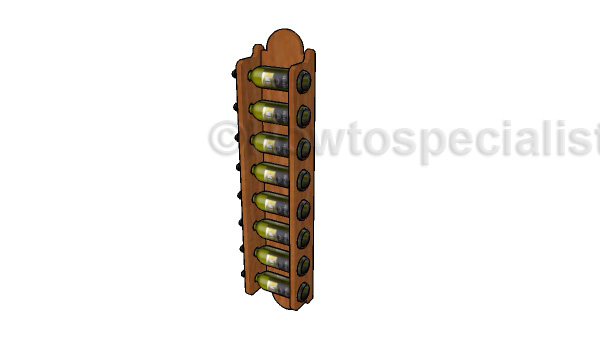
Wood wall rack plans
Fill the holes and the dents with wood putty and smooth the surface with 120-220 grit sandpaper. Apply a few coats of stain or paint to enhance the look of the project. Attach wall hangers to the back of the wine rack, so you can secure it to the wall.

Wall Wine Rack Plans
This wall wine rack has a nice design and it will really add value to your home. You can easily adjust the size of the rack so it can secure more or less bottles. If you like my project, don’t forget to SHARE it on Facebook and Pinterest.
Thank you for reading our project about wall wine rack plans and I recommend you to check out the rest of the projects. Don’t forget to LIKE and SHARE our projects with your friends, by using the social media widgets. SUBSCRIBE to be the first that gets our latest projects.
