

This step by step woodworking project is about how to build a magnetic bottle opener plans. I designed this wooden bottle opener with magnetic cap catcher, as I like to experiment with different materials and techniques! This project was also the perfect excuse to buy a new set of forstener bits, as well! This diy project took me 2-3 hours to make, considering that you have to wait about an hour for the epoxy glue to dry out. See my other DIY projects HERE.
We recommend you to invest in the best materials you could afford. Therefore, you should buy weather-resistant lumber, such as pine or cedar. Always take accurate measurements before adjusting the size of the components at the proper size. Drill pilot holes trough the components before inserting the wood screws, to prevent the wood from splitting. See all my Premium Plans in the Shop.
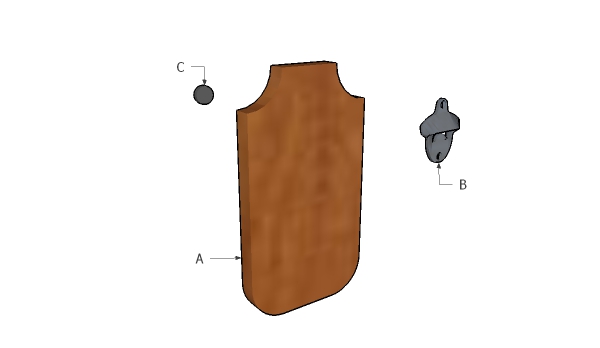
Made from this plan
Materials
- A – 1 piece of 1×6 lumber – 10″ long SUPPORT
- B – 1 piece of bottle opener OPENER
- C – 10 pieces of 3/4″ magnets MAGNETS
- 1 piece of 1×6 lumber – 3′
- bottle opener
- magnets
- stain, glue
Tools
- Safety gloves, glasses
- Miter saw, jigsaw
- Chalk line, tape measure, spirit level, carpentry pencil
- Drill machinery and drill bits
Time
- One Day
Bottle opener with magnetic cap catcher plans
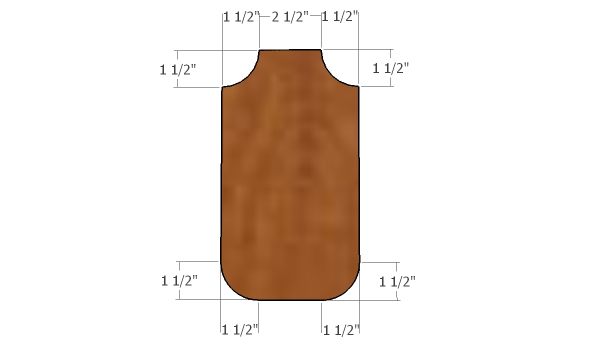
First, of all you need to build the wooden support for the bottle opener.
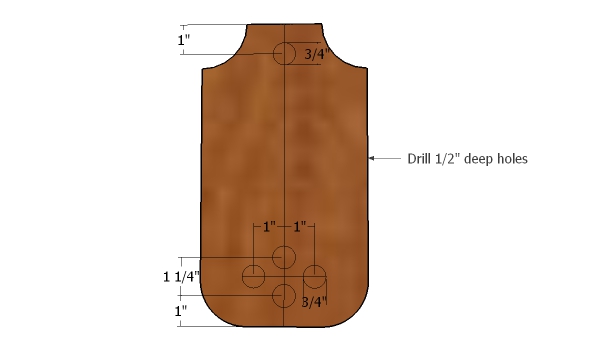
Then, you have to drill the 3/4″ holes to the back of the support. Use a forstner bit and drill about 1/2″ into the 1×6 board.
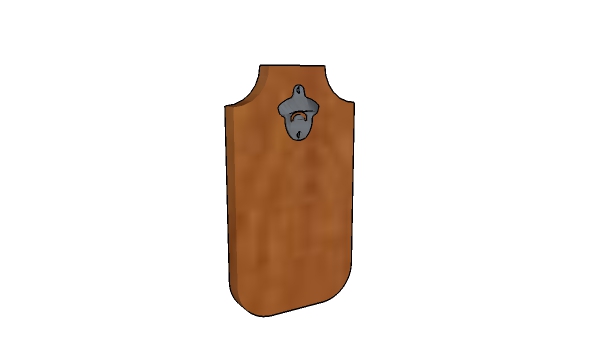
After smoothing the edges, you need to fit the bottle opener to the front face. In addition, secure the magnets to the back of the support using epoxy glue.
How to build a magnetic bottle opener
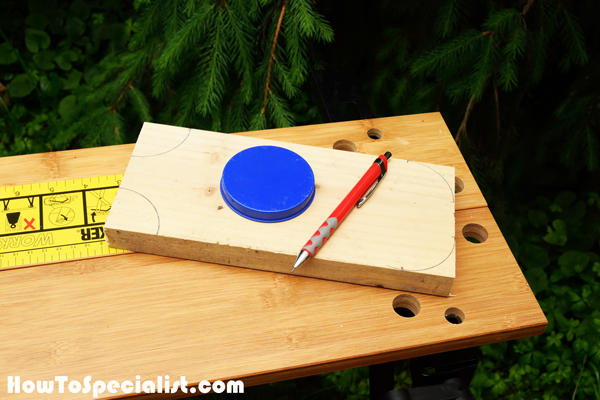
First of all, I have marked the cut lines on the piece of lumber. I used a large round cap to mark the cut lines with a pencil, as you can see in the image.
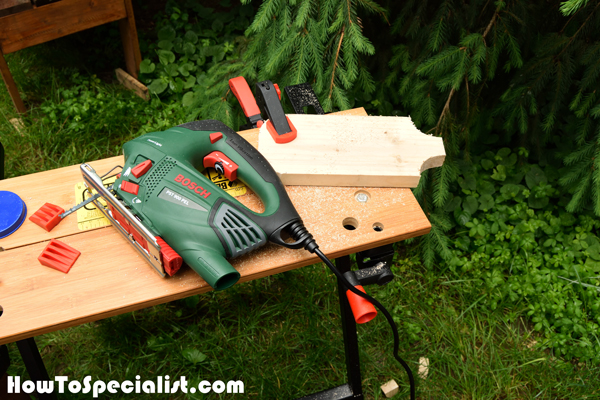
Then, I clamped the piece of lumber to the top of the workbench and I made the cuts with a jigsaw. I made sure the blade of the saw goes on the exterior of the cut lines, so I can smooth later the edge with sandpaper.
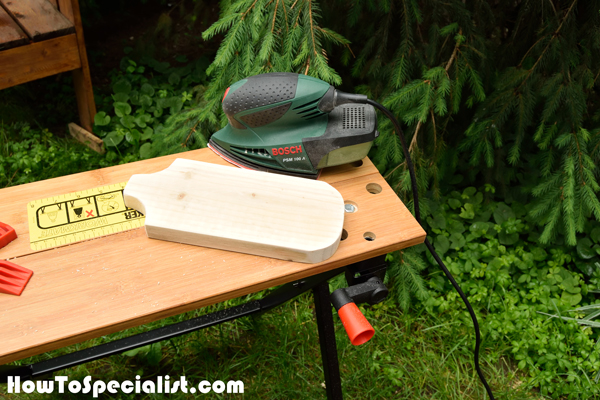
I used my detail sander to smooth the edges. If you happen to have a spindle sander in the workshop, you will get the job done a lot easier, especially for the inside curved edges. Make sure you wear a respiratory mask while you sand the edges.
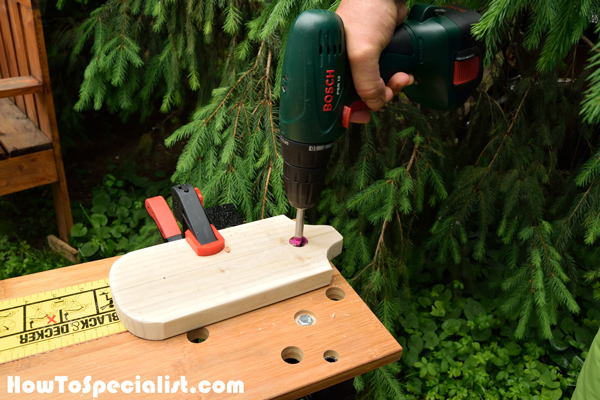
Next, I marked the middle of the slat and drilled the recessed holes with a 3/4″ forstner bit. I drilled about 1/2″ into the wood, making sure I didn’t go all the way through.
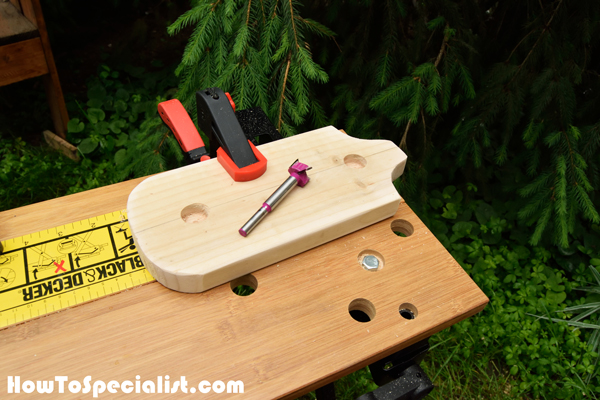
I made more holes into the back of the bottle opener, following the plans.
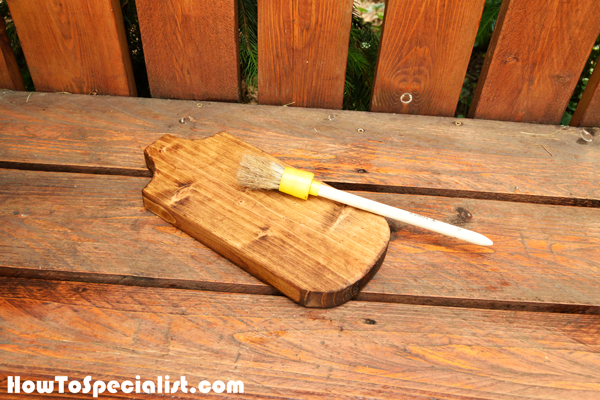
Next, I applied a few coats of stain to the piece of lumber. I used a small brush making sure I wiped off the excess. I used wall nut color for this project, so it matches the rest of my furniture in the kitchen.
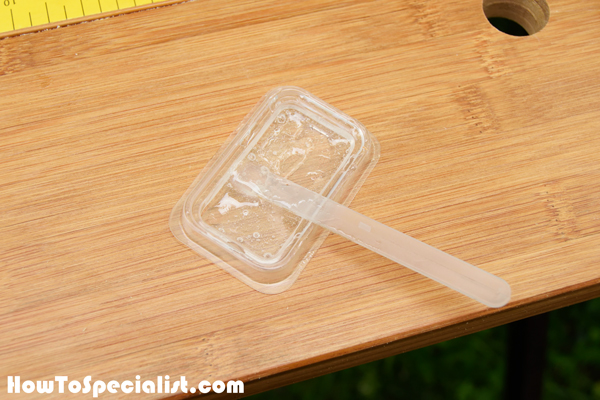
Next, I mixed a small quantity of epoxy glue. It is essential to read the instructions labeled on the box before applying the glue to the holes, so you get a really tight bond.
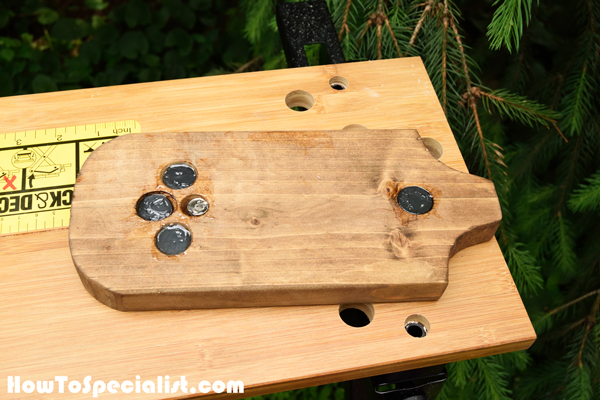
I inserted two 3/4″ magnets in each hole and then I covered them with more epoxy glue, so they would be locked into place. I used a cloth to clean the excess glue, as after it dries out it gets hard and it sticks to the wooden surface. The magnets tend to attract each other, so this might be a little tricky at first, but nothing difficult.
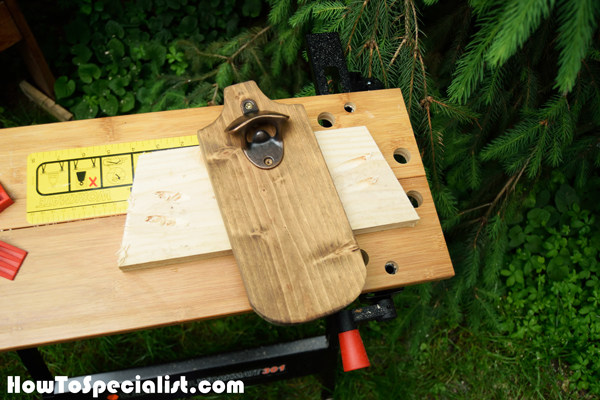
After an hour, I attached the brass bottle opener to the front face of the wooden plank. I centered the opener into place and marked the location for the screws. I drilled the pilot holes and then secure the opener into place with screws. I chose matching screws, for a neat result.

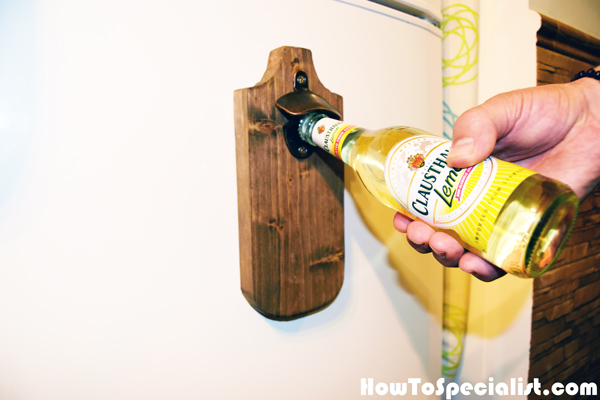
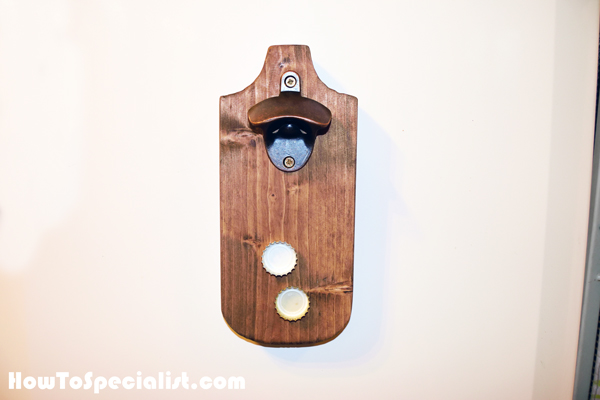
Then, it was a question of choosing the right spot for the magnetic bottle opener. I finally decided to place it on the front of the fridge, so I can show it off to my friends. The opener sticks really well to the fridge door, as I used enough magnets. In addition, I ran a few tests until I found the right number of magnets to hold the caps into place after opening the bottles.

I can testify that it is super fun to open the soda or beer bottles and watch the caps being hold into place by the undercover magnets.
It is a very quick project that really creates a nice result. If you are looking for a cheap and crafty gift idea for a friend, this might be what you are looking for. It only cost me about 10 $ to make, considering I already had the glue and the stain.
If you want to raise the bar, you can invest in a more expensive wood, such as walnut, oak or even redwood. Moreover, you can use a router along the edges, for even more character.
This project came out really nice and I can easily add it to my favorite list of projects. What I like the most about the project is that you can customize the design to suit your tastes, while using the techniques described in the tutorial. If you like my project, don’t forget to SHARE it on Facebook and Pinterest.
Thank you for reading our project about how to build a magnetic bottle opener and I recommend you to check out the rest of the projects. Don’t forget to LIKE and SHARE our projects with your friends, by using the social media widgets. SUBSCRIBE to be the first that gets our latest projects.