
This diy step by step article is about grouting floor tiles. After laying the floor tiles, you have to thoroughly prepare the surface, mix the grout and apply it between the tiles. Generally speaking, grouting a floor is not the most complex project which can be undertaken by a home owner, but you have to know several techniques, as to get the job done as a professional. The grout must have the right consistency and you should remove the excess off the tiles at the right time, otherwise you would spend a lot of many trying to fix these issues. Nevertheless, if you pay attention to our tips, you will be able to grout your floor by yourself and save some money for other projects.
Choose carefully the grout color, as to match the floor tiles. We’ve seen many homeowners who didn’t paid enough attention to this aspect and later on they were dissatisfied with the aspect of their floor tiles. Go to your local store with a piece of tile and try to match the grout with it, according to your tastes. The dry powder of grout has, in 99% of the cases, the same color with the applied grout on the floor tiles.
We recommend you to avoid applying white grout on your kitchen or bathroom floor, as it will get dirty very soon. Instead, you could choose a light color to match with the floor tiles. In addition, if you want to highlight the lines between the floor tiles, you should choose a grout with a contrasting color, otherwise buy one with a color similar to the tiles.
Made from this plan
In order to grout floor tiles, you need the following:
Materials
- Grout
- Paper tape
Tools
- Grout float
- Sponge, trowel
- Bucket, clean cloth
Tips
- Use a damp sponge to remove the excess grout
- Make sure you fill the gaps properly
How to grout floor tiles

How to grout floor tiles
Thoroughly prepare the tile flooring, otherwise you won’t be able to get the job done in a professional manner. Pay special attention to the adhesive residues between the tiles, as they can ruin your work, if you don’t remove them before grouting the floor tiles.
Preparation for grouting floor tiles

Floor tiles
Before grouting floor tiles, you have to clean the surface thoroughly, otherwise it would be difficult to obtain a proper result. Therefore, you should use a semi-dry sponge and remove the adhesive off the floor tiles.

Removing tile spacers
Next, you have to remove the plastic spacers between the tiles. Therefore, you could use a small pair of pliers or the edge of a trowel. Each of these methods is good, just make sure you remove all the spacers and try to work with great care, otherwise you may chip the tile edges.

Tile spacers
After you have removed the plastic spacers between the tiles, you should throw them away, as they cannot be reused. During the years I’ve seen many diy-ers making this mistake, but I recommend you to use new tile spacers for every project.

Removing adhesive between the tiles
Next, use a trowel to remove the adhesive between the tiles. It is essential to clean the spaces between the tiles, otherwise you won’t be able to apply the grout on the whole surface.

Cleaning the floor tiles
After you have cleaned the space between the tiles, you have to vacuum the whole surface of the floor, as to make sure you remove the adhesive particles.

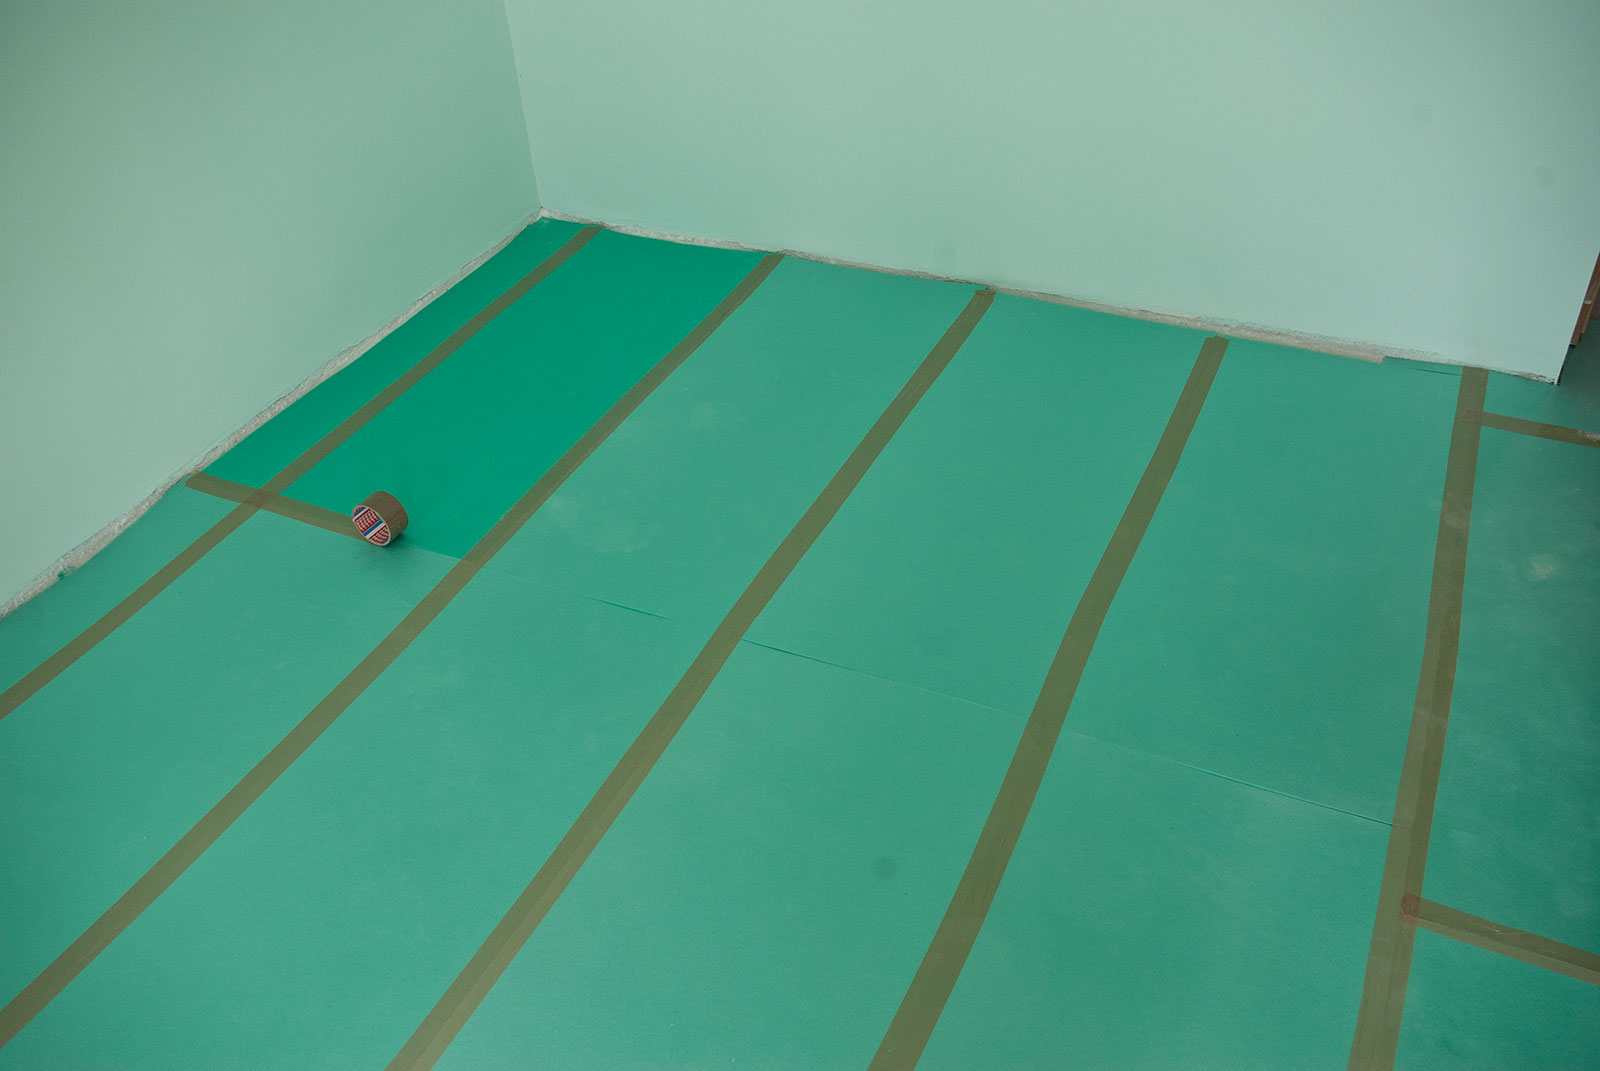
Masking tile transitions
We recommend you to mask the door jambs and the transitions, by using paper tape, otherwise you will have a hard time cleaning the excess grout. After finishing the preparation stage, you should mix the grout.
Grouting floor tiles

Colored grout
For this project, we have used colored grout powder. Generally speaking, we recommend you to choose a quality brand of grout, as it make the difference in time. If you apply a good grout, it will be more durable and flexible over time.

Tools for grouting floor tiles
In order to grout the floor tiles like a pro, you need to use the following tools. On one hand, you need a small bucket and a trowel to mix the grout thoroughly.
On the other hand, you need a grout float to fill the gaps between tiles with compound. These floats come in different shapes and sizes, but there are all good for the job (in the left and in the right of the image).

Preparing grout
Pour water in the plastic bucket and add grout powder progressively, by using a trowel. Use a respiratory mask to avoid inhaling the toxic powder.

Mixing tile grout
Mix the grout thoroughly for a couple of minutes, making sure it doesn’t have any lumps. In the image you can notice the proper consistency of the grout. Remember that the grout shouldn’t slip off the trowel, otherwise you should add more powder and mix it thoroughly. If the grout doesn’t have the proper consistency, it won’t be durable.

Spraying water on floor tiles
Next, before applying the grout, you should spray water on the surface. In order to cover the tile flooring with water, you could also use a semi-dry sponge, as it is equally efficient.

Spreading grout on floor tiles
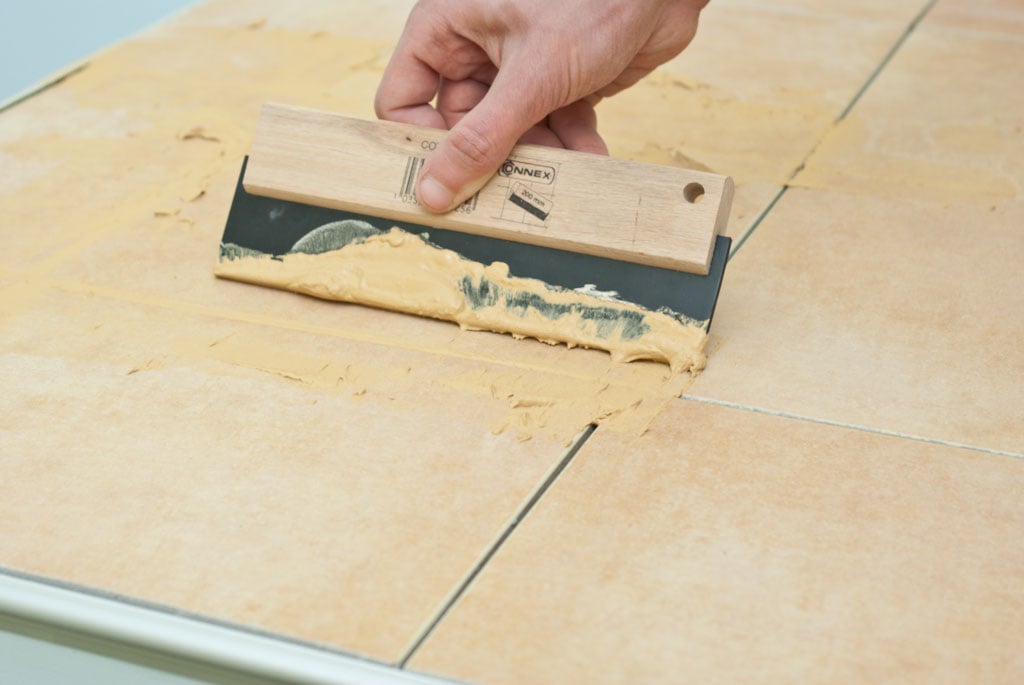
Next, start applying ground on the floor, starting with the farthest corner when entering the room. In this way, you will be able to grout the floor and exit the room without getting dirty with compound.

Grouting floor tiles
Next, use the float to spread the grout in the gaps between the tiles. Hold the float at about 30 – 45º and move it several times until you fill the spaces properly.
Work with patience, as to get the job done as a professional. Fill the gaps with grout progressively, until you cover the whole surface.

How to grout floor tiles
Grouting floor tiles is not difficult if you follow our tips. Make sure remove the excess off the tiles with the float, holding it almost vertically.

Grouting tile
In this image you can see the role of the paper tape: it masks the door jambs and the transition. If you don’t mask certain items and maybe the edges of the walls, you will spread the grout over them.
Cleaning excess grout

Grouting floor tiles
After you have applied the grout on the whole surface, you should wait for about 20 minutes, before cleaning it with a sponge. Meanwhile, you should clean your tools with water. In addition, if you have applied grout on the walls, you should remove it with a semi-dry sponge.

Removing grout excess
After about 5 minutes, you could use a piece of cable to clean the gaps between the tiles. Remember that this step is optional, as you might not like the aspect.

Grouting floor tiles
Use the cable and remove the grout along the gaps between the tiles. Work with great care as to finish the job quickly. Vacuum the small residues, otherwise they might get back in the spaces between tiles.

Floor tiles
If you like the appearance of the grout lines, you should use the cable. On the other hand, if you prefer the regular aspect of grout, you should skip directly to wiping off the excess with a dump sponge.

Cleaning grout of floor tiles
First, you could use a dry cloth to remove the large residues of grout. Next, wipe off the excess with a semi-dry sponge.

Grouting floor tiles
After we have wiped off the whole surface, the tiles looked like you can see in the image. You should still notice a light haze on the tiles, but it is impossible to remove the grout 100%, from the very first time.
If there are spots of hardened grout you cannot remove, you should try to use a large scrapper or a dump abrasive sponge.

Cleaning floor tile
After another 10-20 minutes, you should clean the tile flooring with a semi-dry mop. Wipe the floor tiles gently, as the grout between them hasn’t hardened yet properly. The grout it will be completely dried in 1-2 days, so make sure you don’t scratch it accidentally.

Grouting floor tiles
After we have cleaned thoroughly the tile floor, the haze disappeared completely. Work with great care and follow our tips if you want to obtain a professional result.
Thank you for reading our article about grouting floor tiles and we recommend you to check out the rest of our projects. Don’t forget to SHARE our articles with your friends, by using the social media widgets. LIKE us to be the first that gets our latest updates and to help us add more free tutorials.
