
This article is about how to install transition from tile to laminate. Either you install laminate around ceramic tiles, or tiles around laminate flooring, you have to use a transition as to hide the height difference and to get a nice appearance. When the transition from tile to laminate is under the door, you have to make sure you will install it parallel with the door, as to obtain a nice effect.
On the market there are several types of transitions, starting with the most common ones based on a U-shaped metal track, up to the adjustable transition strips. The former type requires the installation of a metal track by fastening several screws and snapping the transition in it. This option is best when the flooring is already installed on both sides of the transition. The adjustable transition strips are ideal when there is a height difference between the laminate and the ceramic tile flooring.
All you have to do is to install the transition (by using our guidelines) and then to tap it with a mallet, until it fits perfectly. In addition, if you are in the process of installing flooring on any side of the transition, the adjustable trim is the best choice, as you can fit it perfectly. For larger areas with height differences, you could also install the first model, but you have to make a few cuts to fit the location. Don’t forget to check out the rest of the ceramic tile and laminate flooring projects.
Made from this plan
In order to install a transition from tile to laminate, you need the following:
Materials
- Water
- Thinset mortar / premixed mastic
- Transition from tile to laminate
Tools
- Safety gloves, eye protection
- Drill machinery with mixing palette
- Bucket, Rubber hammer
Tips
- Read carefully the manufacturer’s instructions
Time
- 30 minutes
Fitting transition from tile to laminate

Measuring door opening
First of all, you have to measure the door opening by using a tape measurement, as to determine the length at which you have to cut the transition.
There are some cases in which there is enough space as to install the transition between tile to laminate, under the door jamb. Nevertheless, in most of the cases you should install the transition between the door jamb. Irrespective of the situation, you should take accurate measurements, as to avoid making mistakes.

Marking cut line on transition strip
Next, you have to use the tape measurement and a pencil, to mark the cutting line on the transition strip. We kindly recommend you to pay attention to these steps, otherwise you risk cutting it too short. In that cases, you have to buy another transition.

Cutting transition strip
After you have marked the cutting line on the transition between tile and laminate, you should place it in the miter box. Next, you should use a sharp hacksaw to cut the transition.

Installing transition between tile to laminate
After you have cut the transition, you should install it into location, to check if it fits between door jamb. If it is bigger, than you should redo the measurements and cut it again. On the contrary, if it’s too short, you have no option than to buy another transition.
In our case, we had to install ceramic tile toward the bedroom, which had a laminate flooring. Consequently, we installed the transition strip with the base oriented towards the ceramic tile floor, as to weight of the adhesive and of the tiles would secure it tightly into position.
Installing transition from tile to laminate

Measuring ceramic tile
Afterwards, you have to inset the tiles in the channel of the transition strip and make several marks, as to cut them properly. In order to cut ceramic tiles, you can use a wet saw or a tile scorer. You can read more on how to cut ceramic tiles, by checking out our article.
It is important to pay attention to this step, otherwise you risk making serious mistakes. Taking accurate measurements represents on of the essential tasks when installing transition from tile to laminate.

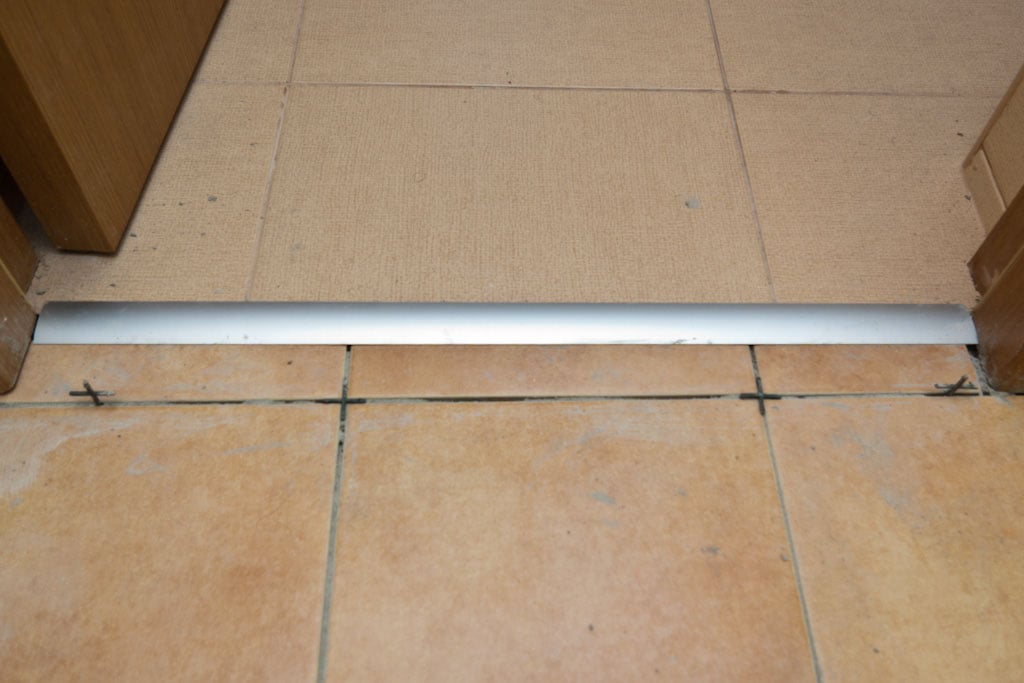
Checking the fit of the transition
After you have cut the ceramic tiles, you have to lay them into position (without using tile adhesive), as to check if the cuts are accurate. If you face any issues, it is better to take again the measurements and cut them properly.

Spreading tile adhesive on floor
After you are sure that the tiles and the transition from them to laminate are cut in a proper manner, you should spread the adhesive on the floor. Mixing ceramic tile adhesive is not a complex task, provided you use the right materials and tool.

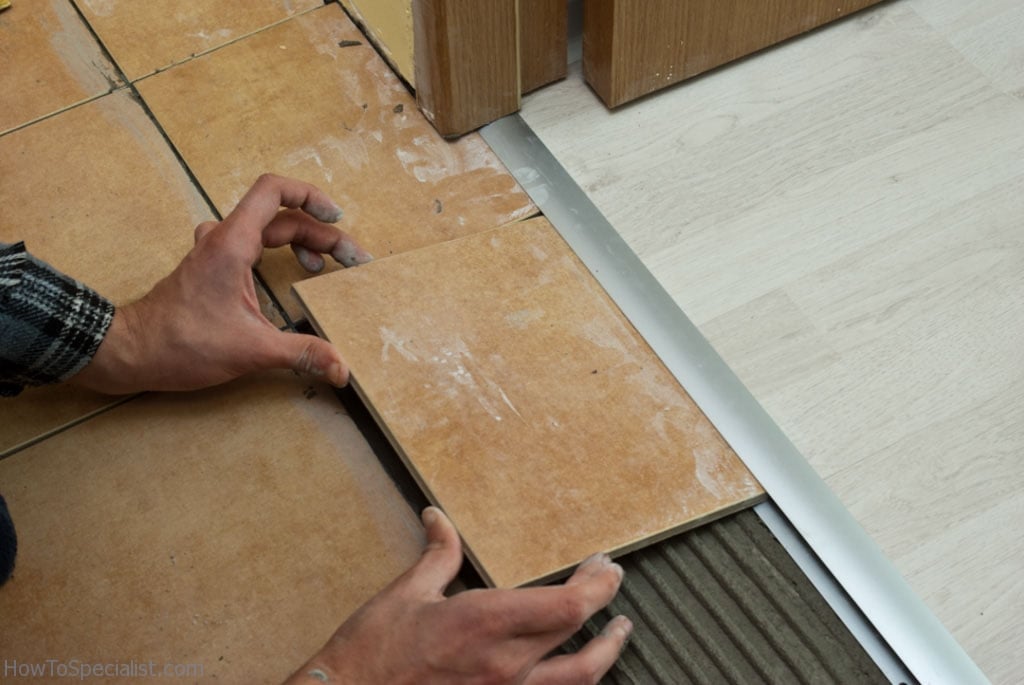
Installing tile to laminate transition
Next, you should install the ceramic tiles in the transition, one by one, starting with one corner. When installing the tiles, you have to make sure the transition is secured properly into position, and parallel with the door, otherwise you will get a poor appearance.

Installing spacers between tiles
As to do the job in a professional manner, you should use spacers between the ceramic tiles. In this way the gaps between the tiles will be even from one end to the other. Place the spacers between the tiles, as in the image.

Tapping tiles to make them level
After you have installed the tiles, you have to tap them gently as to make sure they are level. Last but not least, you should use a sponge and some water, to clean the area off adhesive.
Thank you for reading our article on how to install transition from tile to laminate and we recommend you to check out the rest of our projects. Please share our articles with your friends, by using the social media widgets.
